
Kidde KN-COEG-3
Kidde KN-COEG-3 Carbon Monoxide and Explosive Gas Alarm User Manual
Your essential guide to setup, operation, and maintenance.
Einführung
The Kidde KN-COEG-3 Carbon Monoxide and Explosive Gas Alarm is designed to protect your home and family from the dangers of carbon monoxide (CO), methane, natural gas, propane, and other explosive gases. Utilizing advanced electrochemical sensor technology, this alarm provides continuous monitoring and alerts you with an 85-decibel alarm and a clear digital LED display when gas is detected. It features both plug-in operation and a 9-volt battery backup for continuous protection during power outages.

Abbildung 1: Vorderseite view of the Kidde KN-COEG-3 Carbon Monoxide and Explosive Gas Alarm.
Hauptmerkmale
- Doppelte Erkennung: Detects both carbon monoxide and explosive gases (methane, natural gas, propane).
- Digitale LED-Anzeige: Shows CO levels in parts per million (ppm) or indicates "GAS" when explosive gas is present.
- Plug-In with Battery Backup: Operates on 120V AC power with a 9-volt alkaline battery for continuous protection during power failures.
- 85-Dezibel-Alarm: Provides a loud, clear warning when gas is detected.
- Speicher auf Spitzenniveau: Records the highest CO level detected since the last reset or power cycle.
- Intelligente Stummschalttaste: Schaltet Fehlalarme vorübergehend für etwa 8 Minuten aus.
- Mehrere Montageoptionen: Can be plugged directly into a wall outlet, wall-mounted, or placed on a table/shelf using the included extension cord.

Figure 2: The alarm offers 2-in-1 detection for carbon monoxide and explosive gases.
Setup und Installation
The Kidde KN-COEG-3 alarm offers flexible installation options to suit your home's needs.
1. Einlegen der Batterie
Before initial use, the included 9-volt alkaline battery must be installed. This battery provides backup power in case of an AC power outage.
- Suchen Sie das Batteriefach auf der Rückseite des Geräts.
- Öffnen Sie die Abdeckung des Batteriefachs.
- Connect the 9-volt battery to the battery clip.
- Legen Sie die Batterie in das Batteriefach ein und schließen Sie den Deckel fest.
2. Stromanschluss
The alarm is designed to plug into a standard 120V AC wall outlet.
- Direktes Plug-In: Simply plug the unit directly into any standard 120V AC wall outlet. The plug can be rotated to ensure the unit remains vertical regardless of outlet orientation.
- Platzierung der Tischplatte: For placement on a table or shelf, use the included 6-foot extension cord. Plug the alarm into the extension cord, and then plug the extension cord into a wall outlet.
- Wandhalterung: The unit can also be wall-mounted using the provided screws and anchors. Ensure the unit is plugged into an outlet or the extension cord is used for power.

Abbildung 3: Rückseite view showing the 9V battery compartment and rotatable plug.
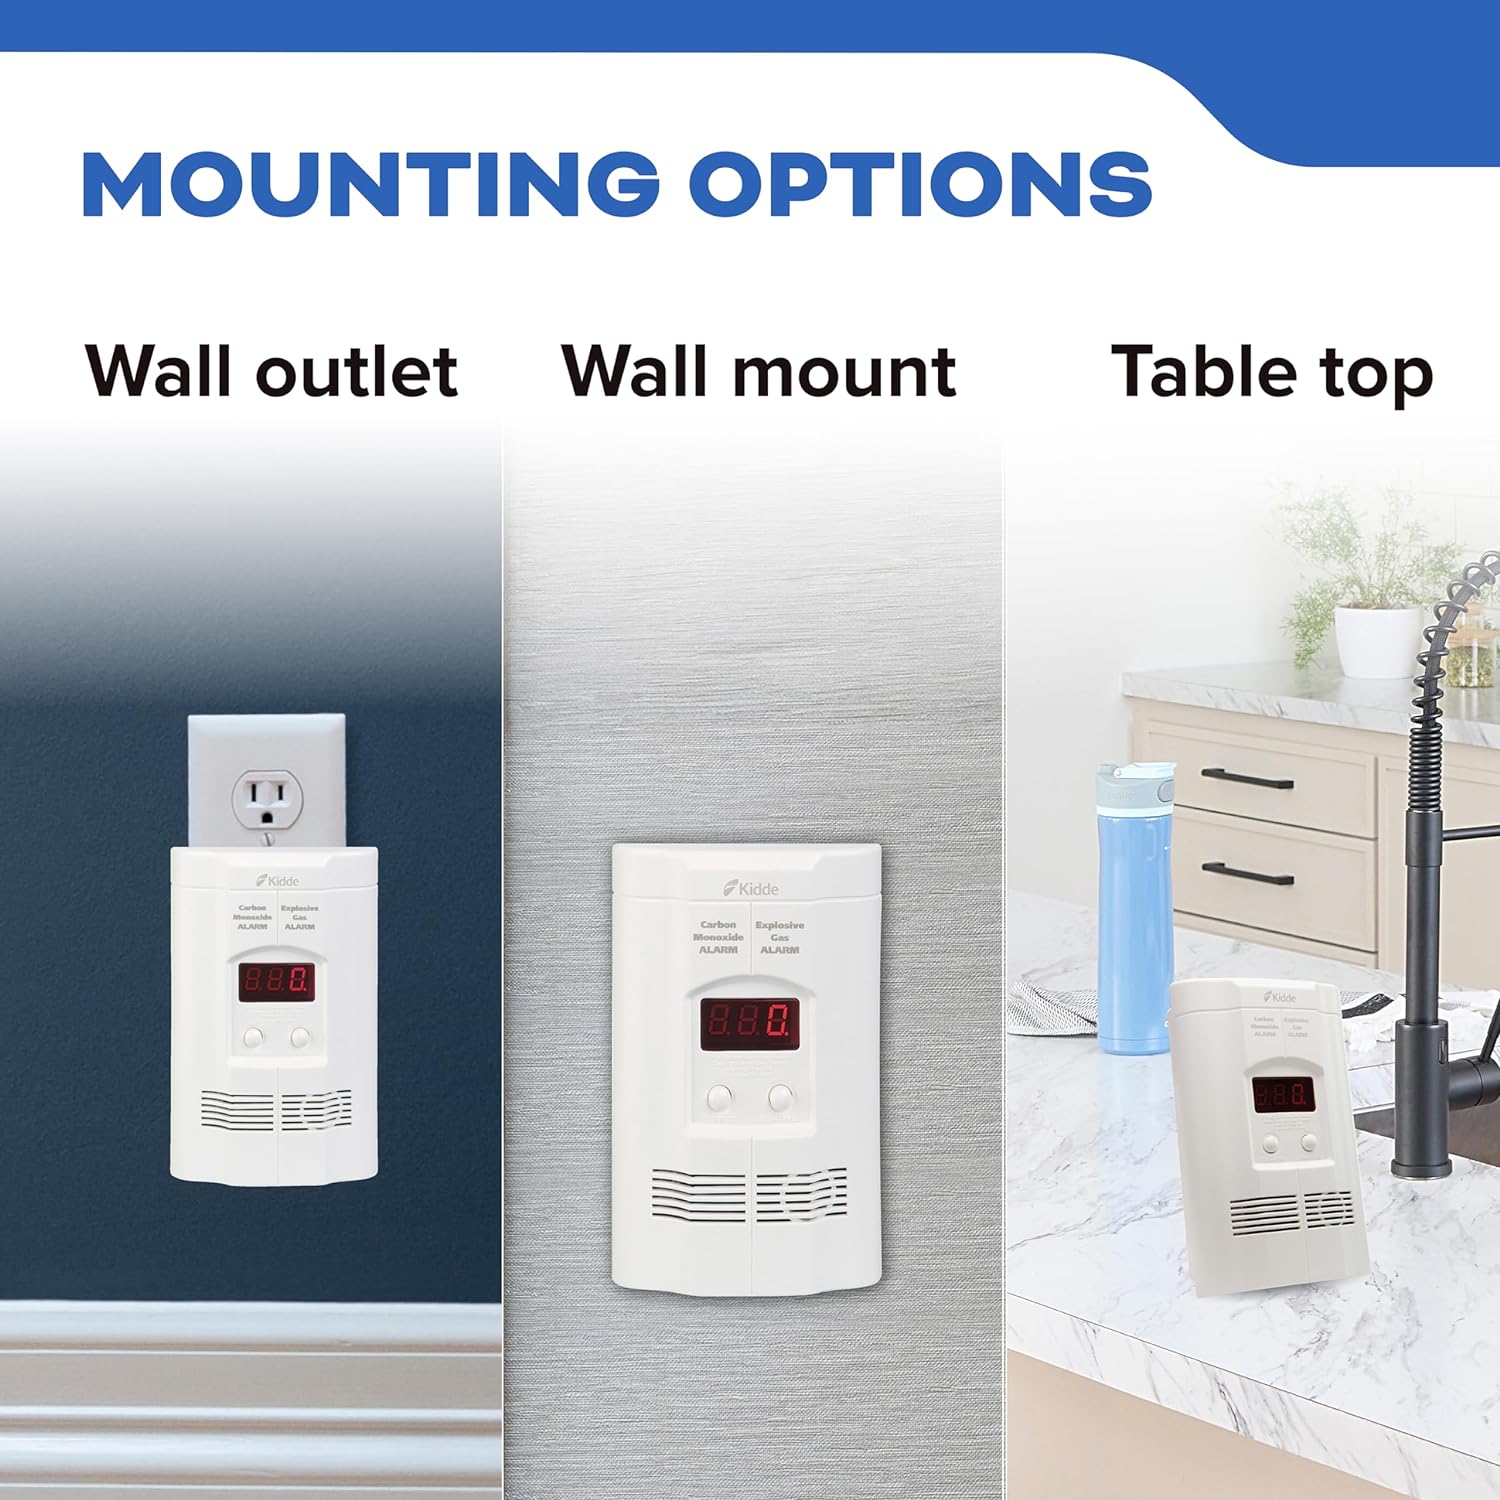
Figure 4: Various mounting and placement options for the alarm.
Bedienungsanleitung
Once powered, the alarm will perform a self-test and begin monitoring. The digital display provides real-time information.
Digital Display and Status Indicator
The digital LED display shows the current CO level in parts per million (ppm) or indicates "GAS" when explosive gas is detected. It updates every 15 seconds. A blinking dot in the lower right-hand corner of the display indicates normal operation.
Test-/Reset-Taste
Press and hold the "TEST/RESET" button to test the alarm's functionality. The alarm will sound, and the display will show a test sequence. Release the button to stop the test. This button also silences the alarm during a nuisance alarm or resets the Peak Level Memory.
Peak-Level-Taste
Press the "PEAK LEVEL" button to view the highest CO concentration recorded by the alarm since it was last reset or unplugged.

Figure 5: Labeled diagram of the alarm's front panel controls and indicators.

Figure 6: Alarm notifications are triggered when CO or explosive gas is detected.
Platzierungsrichtlinien
For optimal protection, install a carbon monoxide and explosive gas alarm on every level of your home, especially near sleeping areas. Avoid placing alarms within 6 feet of cooking or heating appliances to prevent false alarms.

Figure 7: Recommended placement of safety devices throughout a home.
Understanding Alarms and Gases
Carbon monoxide (CO) is an odorless, tasteless, and invisible gas often referred to as the "silent killer." Methane and propane gases, while commonly used, can also pose risks if leaks occur.
Common Sources of Carbon Monoxide
- Kamine
- Kitchen Ranges
- Tragbare Heizgeräte
- Generatoren
- Grills
- Warmwasserbereiter
- Garages (running vehicles)
- Broken Pipes (gas leaks)

Figure 8: Visual representation of common CO sources in and around the home.
Wartung und Prüfung
Regelmäßige Wartung gewährleistet die einwandfreie Funktion Ihrer Alarmanlage.
Regelmäßige Tests
Test your alarm weekly by pressing the Test/Reset button. The alarm should sound, indicating proper operation of the horn and circuitry.
Batteriewechsel
The 9-volt battery should be replaced annually, or immediately if the low battery warning sounds (a chirp or specific indicator). Always use a fresh 9-volt alkaline battery.
Reinigung
Clean the alarm regularly to prevent dust buildup from interfering with sensor operation. Use a soft, damp Mit einem Tuch die Außenseite abwischen. Keine Reinigungssprays oder Lösungsmittel verwenden.
Fehlerbehebung
- Alarm Chirping: A persistent chirping sound typically indicates a low battery. Replace the 9-volt battery immediately. Note that the low battery alert can be very loud and persistent until the battery is replaced.
- Falscher Alarm: If the alarm sounds without apparent gas presence, it might be due to cooking fumes, shower steam, or proximity to combustion appliances. Use the Smart-Hush button to temporarily silence the alarm. Relocate the alarm if false alarms are frequent.
- Difficulty Opening Battery Cover: Some users report the battery cover can be stiff. Use a sturdy, flat tool (like a screwdriver) to gently pry it open if needed, being careful not to damage the unit.
- Kein Display/Stromanschluss: Ensure the unit is securely plugged into a working 120V AC outlet. Check the circuit breaker. If using battery backup, ensure the battery is correctly installed and not depleted.
Technische Daten
| Attribut | Wert |
|---|---|
| Marke | Kidde |
| Modellnummer | KN-COEG-3 |
| Stromquelle | Plug In (120V AC) with 9V Battery Backup |
| Sensortyp | Elektrochemisch |
| Alarm Dezibel | 85 dB |
| Technische Daten | 4"T x 4"B x 2"H |
| Artikelgewicht | 1 Pfund |
| Luftfeuchtigkeit bei Betrieb | 5 % bis 95 % relative Luftfeuchtigkeit, nicht kondensierend |
| Obere Temperaturbewertung | 100 Grad Fahrenheit |
Garantie und Support
The Kidde KN-COEG-3 Carbon Monoxide and Explosive Gas Alarm comes with a 5-year limited manufacturer's warranty. For detailed warranty information or support, please refer to the official User Guide (PDF) available online or contact Kidde customer service.
Benutzerhandbuch (PDF): Benutzerhandbuch herunterladen
Garantie (PDF): Garantieinformationen herunterladen
Ask a question about this manual
Ask about setup, troubleshooting, compatibility, parts, safety, or missing instructions. Manuals+ will review the question and use this page’s manual context to help answer it.