
1. Einleitung
This manual provides essential instructions for the safe and efficient use of your FSP ATX-300PA 300W ATX Power Supply. Please read this manual thoroughly before installation and operation to ensure proper functionality and to prevent damage to the unit or other components. Keep this manual for future reference.
2. Sicherheitshinweise
Beachten Sie die folgenden Sicherheitsvorkehrungen, um Verletzungen oder Schäden zu vermeiden:
- Always disconnect the power cord from the wall outlet before installing, removing, or servicing the power supply.
- Öffnen Sie nicht das Netzteil casing. Hohes Volumentage components are present inside, which can cause electric shock. There are no user-serviceable parts within.
- Ensure proper ventilation around the power supply to prevent overheating. Do not block any ventilation openings.
- Use the power supply only in dry environments. Avoid exposure to moisture, humidity, or liquids.
- This product is designed for internal computer use only. Do not use it for any other purpose.
- Ensure the power supply is compatible with your system's motherboard and components before installation.
3. Einrichtung und Installation
Follow these steps to install the FSP ATX-300PA power supply into your computer system:
- Bereiten Sie Ihr System vor: Turn off your computer and disconnect the power cord from the wall outlet. Open your computer case.
- Altes Netzteil entfernen (falls zutreffend): Disconnect all power cables from the motherboard, graphics card, and other components. Unscrew and remove the old power supply from the case.
- Neues Netzteil einbauen: Carefully place the FSP ATX-300PA into the power supply bay of your computer case. Ensure the fan is oriented correctly for optimal airflow (typically facing downwards or inwards, depending on case design). Secure the power supply with screws provided with your computer case.
- Anschluss der Stromversorgung des Motherboards: Connect the main 20+4 pin ATX power connector to the corresponding socket on your motherboard. Ensure it clicks into place.
- CPU-Stromversorgung anschließen: Connect the 4-pin (or 4+4 pin) CPU power connector to the CPU power socket on your motherboard.
- Peripheriegeräte anschließen: Connect SATA power connectors to your hard drives, SSDs, and optical drives. Connect Molex connectors to any other peripherals that require them.
- Schließen Sie die Stromversorgung der Grafikkarte an (falls zutreffend): If your graphics card requires additional power, connect the appropriate PCIe power connectors from the power supply.
- Kabelmanagement: Route cables neatly to improve airflow and aesthetics within the case.
- Gehäuse schließen und Strom anschließen: Close your computer case. Connect the AC power cord to the power supply's input socket and then to a wall outlet or surge protector.
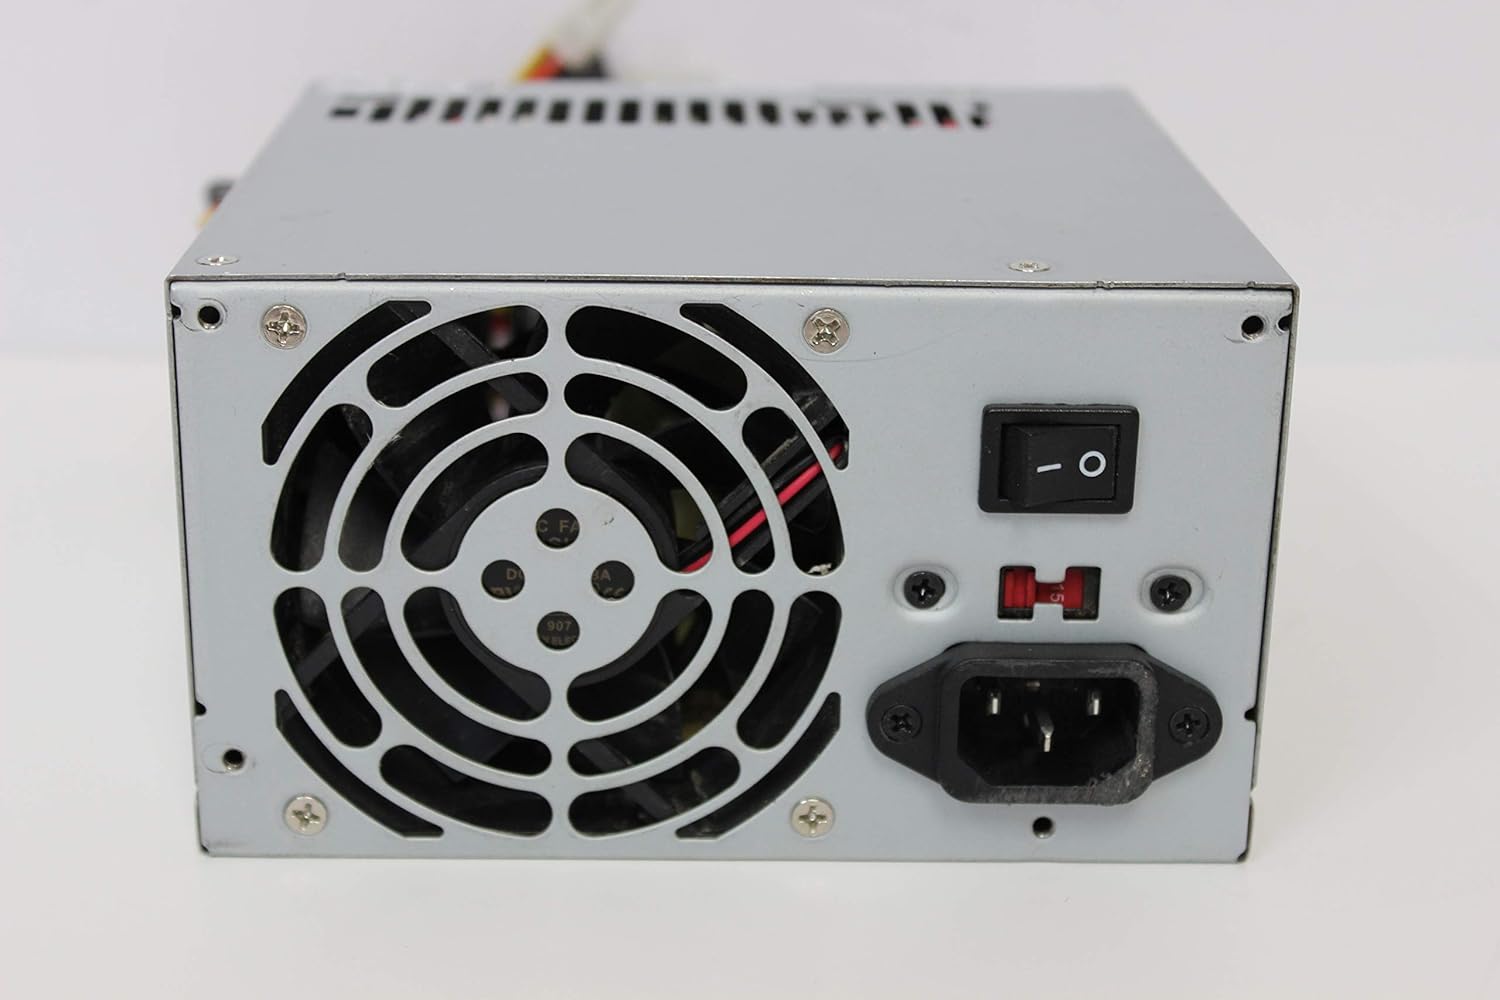
Bild: Rückseite view of the FSP ATX-300PA power supply. This image displays the rear panel of the FSP ATX-300PA power supply. Visible components include the AC power input socket, the main power on/off switch, and the exhaust fan grille. A fuse holder is also present.

Image: Power connectors of the FSP ATX-300PA. This image shows a selection of power cables and connectors extending from the FSP ATX-300PA power supply. The prominent connector is the 20+4 pin ATX motherboard power connector, alongside several peripheral power connectors (e.g., Molex, SATA, 4-pin CPU).
4. Bedienungsanleitung
Once the power supply is correctly installed and all connections are secure:
- Ensure the power switch on the rear of the power supply is in the "ON" (I) position.
- Drücken Sie den Netzschalter an Ihrem Computergehäuse, um das System zu starten.
- The power supply will provide stable power to all connected components.
5. Wartung
Regelmäßige Wartung trägt dazu bei, die Langlebigkeit und optimale Leistung Ihres Netzteils zu gewährleisten:
- Staubreinigung: Periodically (e.g., every 6-12 months), disconnect the power supply from the wall outlet and open your computer case. Use compressed air to gently remove dust buildup from the power supply's fan and vents. Hold the fan blades to prevent them from spinning excessively during cleaning.
- Lüfterinspektion: Check the power supply fan for any obstructions or unusual noises. A clean, unobstructed fan is crucial for effective cooling.
- Kabelprüfung: Ensure all power cables remain securely connected to their respective components.
Warnung: Do not attempt to lubricate or disassemble the power supply fan. Do not open the power supply casing aus irgendeinem Grund.
6. Fehlerbehebung
If you encounter issues with your FSP ATX-300PA power supply, consider the following troubleshooting steps:
- Keine Stromversorgung des Systems:
- Stellen Sie sicher, dass das Netzkabel fest mit dem Netzteil und der Steckdose verbunden ist.
- Verify that the power switch on the rear of the power supply is in the "ON" (I) position.
- Prüfen Sie die Funktionsfähigkeit der Wandsteckdose, indem Sie ein anderes Gerät anschließen.
- Confirm all internal power connectors (20+4 pin ATX, CPU, peripherals) are firmly seated.
- Systeminstabilität oder zufällige Abschaltungen:
- Stellen Sie sicher, dass das Netzteil ausreichend belüftet ist und nicht überhitzt.
- Verify that the total power draw of your components does not exceed the power supply's 300W capacity.
- Check for loose connections to any components.
- Ungewöhnliche Geräusche:
- If you hear grinding or rattling, it may indicate a fan issue. Disconnect power and inspect the fan for obstructions. Do not attempt to repair the fan yourself.
If issues persist after performing these checks, it may indicate a faulty power supply or another component. Consider professional diagnosis.
7. Spezifikationen
| Marke | FSP |
| Modellnummer | ATX-300PA |
| Ausgang Wattage | 300 Watt |
| Formfaktor | ATX |
| Steckertyp | ATX |
| UPC | 754031288653 |
| Hersteller | FSP GROUP INC. |
8. Garantie und Support
For detailed warranty information, technical support, or service inquiries regarding your FSP ATX-300PA power supply, please refer to the official FSP Group INC. webBesuchen Sie die Website oder kontaktieren Sie direkt den Kundendienst. Die Garantiebedingungen können je nach Region und Kaufdatum variieren.