1. Einleitung
Welcome to the user manual for your HP EliteBook 2560p laptop. This document provides essential information for setting up, operating, maintaining, and troubleshooting your device. Please read this manual thoroughly to ensure proper use and to maximize the lifespan of your laptop.
2. Sicherheitshinweise
To prevent injury, damage to the product, or loss of data, observe the following safety precautions:
- Verwenden Sie ausschließlich das mit Ihrem Laptop gelieferte Netzteil.
- Setzen Sie den Laptop keinen extremen Temperaturen, hoher Luftfeuchtigkeit oder direkter Sonneneinstrahlung aus.
- Vermeiden Sie es, schwere Gegenstände auf den Laptop zu stellen.
- Halten Sie Flüssigkeiten vom Gerät fern.
- Versuchen Sie nicht, den Laptop selbst zu zerlegen oder zu reparieren. Wenden Sie sich an qualifiziertes Servicepersonal.
- Sorgen Sie für ausreichende Belüftung, um eine Überhitzung zu vermeiden.
3. Packungsinhalt
Überprüfen Sie, ob alle Artikel in Ihrem Paket vorhanden sind:
- HP EliteBook 2560p Laptop
- Netzteil und Netzkabel
- Akku
- Dokumentation (dieses Handbuch, Garantieinformationen)
4. Produktüberschreitungview
Familiarize yourself with the components of your HP EliteBook 2560p.
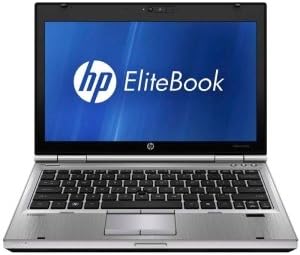
Abbildung 4.1: Front view of the HP EliteBook 2560p laptop. This image shows the laptop open, revealing the 12.5-inch display, keyboard, and touchpad. The screen displays the "HP EliteBook" logo.
4.1. Front and Top Components
- 12.5-inch HD Anti-Glare LED Display: Zur visuellen Ausgabe.
- Tastatur: Standard QWERTY layout for text input.
- Touchpad: Zur Cursorsteuerung und Navigation.
- WebNocken: Integrated for video conferencing and imaging.
- Fingerprint Reader (FPR): For enhanced security.
4.2. Side and Rear Components
- USB 2.0 Ports: Zum Anschluss von Peripheriegeräten.
- DVD+/-RW Optical Drive: Zum Lesen und Schreiben von CDs/DVDs.
- Stecker: Zum Anschließen des Netzteils.
- Ethernet Anschluss: Für kabelgebundene Netzwerkverbindung.
- Display-Anschlüsse: Zum Anschluss externer Monitore.
- Audiobuchsen: Für Kopfhörer und Mikrofon.
5. Einrichtung
5.1. Anschließen des Netzteils
- Schließen Sie das Netzkabel an das Netzteil an.
- Stecken Sie den Netzadapter in eine geerdete Steckdose.
- Connect the DC output plug of the AC adapter to the power connector on your laptop.
- Laden Sie den Akku vor der ersten Benutzung vollständig auf oder benutzen Sie den Laptop, während er an die Stromversorgung angeschlossen ist.
5.2. Initial Boot-Up and Operating System Setup
- Öffnen Sie den Laptopdeckel.
- Press the power button, typically located above the keyboard.
- Follow the on-screen instructions to complete the Windows 7 Professional setup, including language selection, user account creation, and network configuration.
6. Bedienungsanleitung
6.1. Ein- und Ausschalten
- So schalten Sie das Gerät ein: Drücken Sie die Einschalttaste.
- So fahren Sie herunter: Click the Start button, then select "Shut Down."
- Neustarten: Click the Start button, then select "Restart."
- Zum Schlafen: Close the lid or click the Start button and select "Sleep."
6.2. Verwenden des Touchpads
The touchpad allows you to control the cursor on the screen.
- Klopfen: Single tap to click, double tap to double-click.
- Ziehen: Tap and hold, then drag your finger across the touchpad.
- Scrollen: Verwenden Sie zwei Finger zum vertikalen oder horizontalen Scrollen.
6.3. Connecting to a Wireless Network (Wi-Fi)
- Click the network icon in the system tray (bottom-right corner of the screen).
- Wählen Sie das gewünschte WLAN-Netzwerk aus der Liste aus.
- Klicken Sie auf „Verbinden“ und geben Sie gegebenenfalls den Netzwerksicherheitsschlüssel (das Passwort) ein.
6.4. Verwendung des optischen Laufwerks
The integrated DVD+/-RW drive allows you to read and write CDs and DVDs.
- Press the eject button on the drive to open the tray.
- Place a disc gently onto the tray, label side up.
- Push the tray back into the laptop until it clicks shut.
7. Wartung
7.1. Reinigung Ihres Laptops
- Vor der Reinigung den Laptop immer ausschalten und vom Stromnetz trennen.
- Mit einem weichen, fusselfreien Tuch leichtampmit Wasser oder einem speziellen Bildschirmreiniger für das Display abspülen.
- Reinigen Sie Tastatur und Gehäuse mit einem weichen Tuch. Vermeiden Sie aggressive Chemikalien.
- Verwenden Sie Druckluft, um Staub aus Lüftungsschlitzen und Tastaturspalten zu entfernen.
7.2. Batteriepflege
- Vermeiden Sie häufiges vollständiges Entladen des Akkus.
- Bewahren Sie den Laptop an einem kühlen, trockenen Ort auf, wenn er längere Zeit nicht benutzt wird.
- If the battery is removable, ensure it is securely seated.
7.3. Software-Updates
Regularly check for and install operating system updates (Windows Update) and driver updates from the HP support webSite, um optimale Leistung und Sicherheit zu gewährleisten.
8. Fehlerbehebung
| Problem | Mögliche Lösung |
|---|---|
| Der Laptop lässt sich nicht einschalten. | Ensure the AC adapter is securely connected and the power outlet is functional. Check battery charge. |
| Keine WLAN-Verbindung. | Verify Wi-Fi is enabled (check physical switch or function key). Restart router and laptop. Re-enter Wi-Fi password. |
| Bildschirm ist leer. | Connect an external monitor to check if the display is faulty. Adjust brightness settings. Restart the laptop. |
| Das System ist langsam oder reagiert nicht. | Close unnecessary applications. Check for malware. Ensure sufficient free disk space. Restart the laptop. |
Bei komplexeren Problemen wenden Sie sich bitte an den HP Support. webWebsite oder wenden Sie sich an den Kundendienst.
9. Spezifikationen
| Besonderheit | Detail |
|---|---|
| Modell | HP EliteBook 2560p (LJ467UT#ABA) |
| Prozessor | Intel Core i5-2520M |
| Anzeige | 12.5-inch HD Anti-Glare LED (1366 x 768 pixels) |
| RAM | 4 GB DDR3 (1333 MHz) |
| Lagerung | Festplatte mit 320 GB |
| Optisches Laufwerk | DVD+/-RW |
| Grafik | Intel Integrated Graphics |
| Kabellos | 802.11a/b/g/n, Bluetooth |
| Häfen | USB 2.0 (x1), DisplayPort, VGA, Ethernet, Audio Jacks |
| Betriebssystem | Windows 7 Professional 64-Bit |
| WebNocken | Integriert WebNocken |
| Sicherheit | Lesegerät für Fingerabdrücke |
| Akkulaufzeit | Bis zu 8.5 Stunden (durchschnittlich) |
| Abmessungen (LxBxH) | 16.5 x 13.5 x 4.5 Zoll |
| Gewicht | 6.8 Pfund |
10. Garantie und Support
For information regarding your product's warranty, please refer to the warranty document included with your purchase or visit the official HP support webWebsite.
HP provides various support resources, including online documentation, driver downloads, and customer service contact options.
- HP-Kundendienst WebWebsite: www.hp.com/support
- Kontaktieren Sie den Support: Siehe HP website for regional contact numbers and chat options.