
1. Einleitung
This manual provides essential information for the safe and efficient operation of your SANYO PLC-XK2200 XGA Ultra-Portable Multimedia Projector. Please read this manual thoroughly before using the projector and retain it for future reference.
The SANYO PLC-XK2200 is designed to deliver clear and bright images with 2200 lumens and a 2000:1 contrast ratio, suitable for various presentation environments.
2. Sicherheitshinweise
- Energiequelle: Use only the specified power supply. Ensure the power cord is securely connected.
- Belüftung: Blockieren Sie nicht die Lüftungsöffnungen. Sorgen Sie für ausreichend Platz um den Projektor herum, um eine ordnungsgemäße Luftzirkulation zu gewährleisten und eine Überhitzung zu vermeiden.
- Lamp Warnung: Der Projektor lamp Das Gerät arbeitet unter hohen Temperaturen und Drücken. Lassen Sie den Projektor abkühlen, bevor Sie ihn bewegen oder Wartungsarbeiten durchführen. Schauen Sie nicht direkt in die Linse, wenn der Projektor eingeschaltet ist.amp ist eingeschaltet.
- Flüssigkeitsexposition: Do not expose the projector to rain, moisture, or liquids.
- Wartung: Überlassen Sie alle Wartungsarbeiten qualifiziertem Fachpersonal. Versuchen Sie nicht, den Projektor selbst zu öffnen oder zu reparieren.
3. Produktüberschreitungview
3.1 Bedienelemente auf der Oberseite
The top panel provides access to essential controls for power, menu navigation, focus, and zoom adjustments.

Bild: Oben view of the SANYO PLC-XK2200 projector. Visible controls include the focus and zoom rings, the power button, and buttons for menu navigation (Menu, Select, Volume, Auto Setup, Lamp Zurücksetzen).
3.2 Anschlüsse auf der Rückseite
Auf der Rückseite befinden sich verschiedene Eingangs- und Ausgangsanschlüsse zum Verbinden externer Geräte.

Bild: Rückseite view of the SANYO PLC-XK2200 projector. Ports visible include Control Port, Computer In 1 (S-Video In/Component In), Computer In 2 (Monitor Out), Video In, Audio In/Out, and a network port.
3.3 Seite und Boden Views
Die Seite view shows the power input and ventilation, while the bottom view reveals mounting points and product labels.
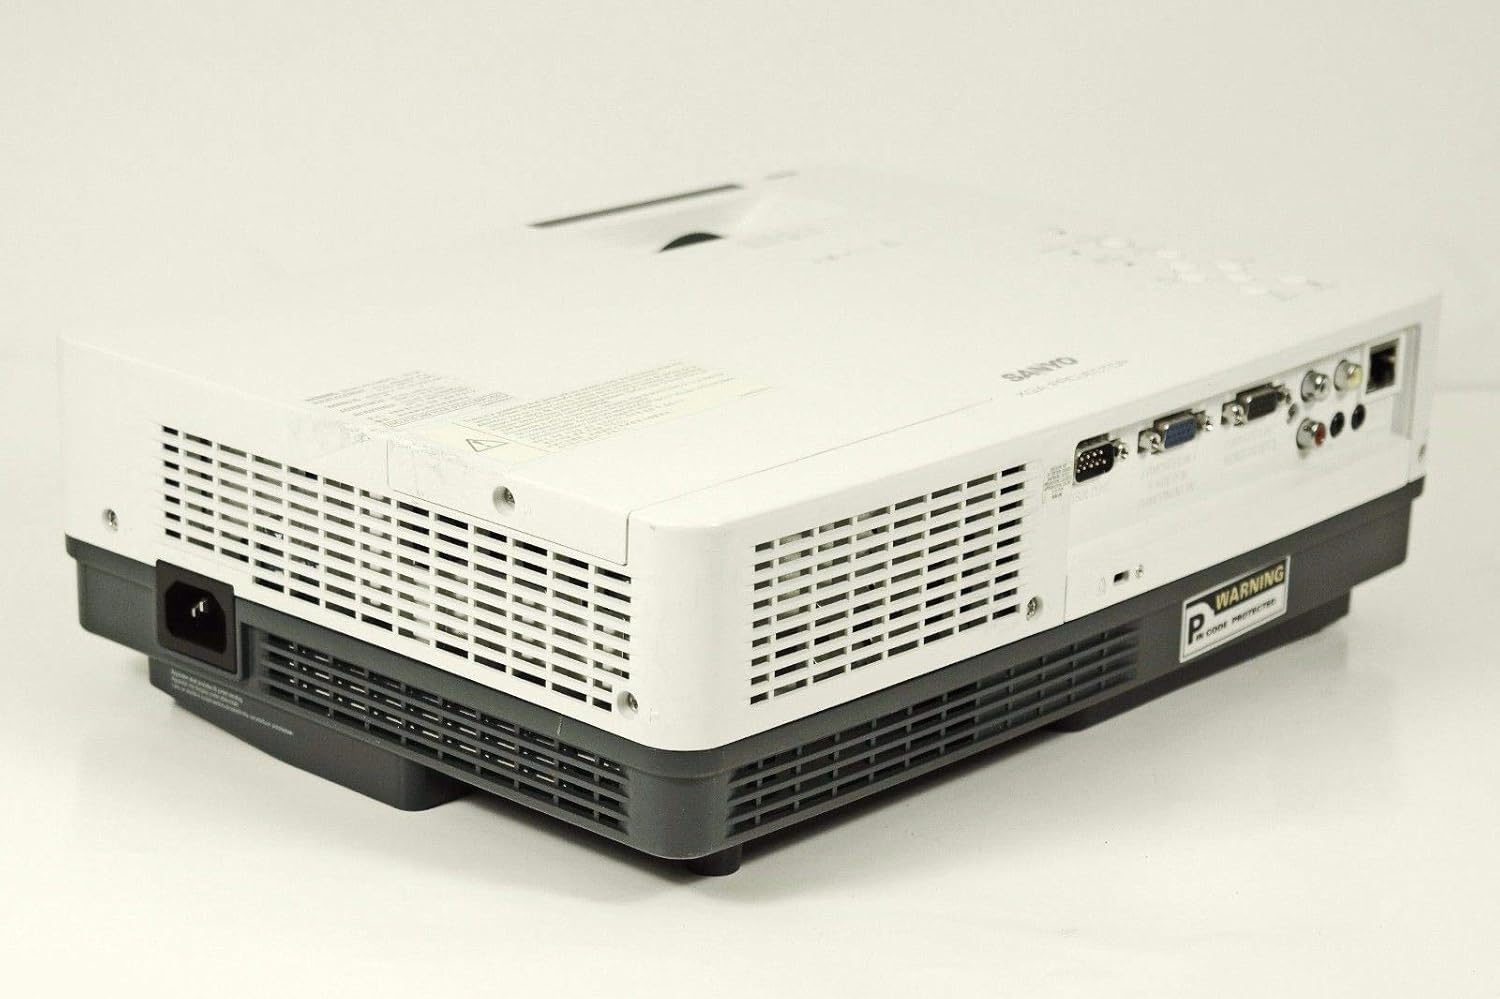
Abbildung: Seite view of the SANYO PLC-XK2200 projector, highlighting the power input socket and exhaust vents.

Abbildung: Unten view of the SANYO PLC-XK2200 projector, displaying screw holes for mounting, ventilation grilles, and the product information label.
4. Einrichtung
4.1 Aufstellung des Projektors
Place the projector on a stable, flat surface or mount it securely. Ensure there is sufficient space around the projector for ventilation. Avoid placing it in direct sunlight or near heat sources.
4.2 Stromversorgung anschließen
- Connect the power cord to the AC inlet on the projector.
- Stecken Sie das andere Ende des Netzkabels in eine geerdete Steckdose.
- The power indicator light will illuminate, typically in amber, indicating standby mode.
4.3 Anschließen von Eingangsquellen
Connect your video source (e.g., computer, DVD player) to the appropriate input port on the projector's rear panel. The PLC-XK2200 supports various inputs including VGA (Computer In 1/2), S-Video, and Composite Video.
- Computer: Use a VGA cable to connect your computer's video output to the COMPUTER IN 1 or COMPUTER IN 2 port.
- Videogeräte: For S-Video, connect to the S-VIDEO IN port. For composite video, connect to the VIDEO IN port using an RCA cable.
- Audio: Connect audio cables from your source device to the AUDIO IN ports if you wish to use the projector's internal speaker or audio output.
5. Bedienungsanleitung
5.1 Ein-/Ausschalten
- So schalten Sie das Gerät ein: Press the POWER button on the projector's top panel or remote control. The power indicator will turn green, and the lamp leuchtet auf.
- So schalten Sie das Gerät aus: Press the POWER button twice. The projector will enter cooling mode, and the power indicator will flash amber. Once cooled, it will return to standby mode (solid amber).
5.2 Anpassen des Bildes
- Fokus: Rotate the FOCUS ring on the lens until the image is sharp and clear.
- Zoom: Rotate the ZOOM ring on the lens to adjust the image size.
- Trapezkorrektur: Use the AUTO SETUP button or navigate through the menu to adjust vertical keystone distortion, which corrects trapezoidal images.
5.3 Eingangsauswahl
Press the INPUT button on the projector or remote control to cycle through available input sources (e.g., Computer 1, Computer 2, Video, S-Video).
5.4 Menünavigation
Press the MENU button to access the on-screen display (OSD) menu. Use the arrow buttons to navigate and the SELECT button to confirm choices. Press MENU again to exit.
6. Wartung
6.1 Reinigung des Projektors
- Exterieur: Verwenden Sie ein weiches, trockenes Tuch, um den Bildschirm des Projektors zu reinigen.asing. For stubborn dirt, dampen the cloth with a mild detergent solution.
- Linse: Gently wipe the lens with a lens cleaning cloth or lens paper. Avoid harsh chemicals or abrasive materials.
- Luftfilter: Regularly clean the air filter to maintain proper ventilation and prevent overheating. Refer to the filter cover for removal instructions.
6.2 Literamp Ersatz
Die lamp hat eine begrenzte Lebensdauer. Wenn die lamp Die Anzeige leuchtet auf oder das Bild wird dunkler, die lamp Möglicherweise muss das Gerät ausgetauscht werden. Lassen Sie den Projektor immer vollständig abkühlen, bevor Sie Reparaturen durchführen.amp replacement. Consult a qualified technician for lamp replacement if you are unsure.
Warnung: High pressure lamp. Risk of explosion if improperly handled. Refer to the service manual for detailed lamp Austauschverfahren.
7. Fehlerbehebung
| Problem | Mögliche Ursache | Lösung |
|---|---|---|
| Kein Bild angezeigt | Incorrect input selected; loose cable connection; projector in standby. | Press INPUT to select correct source; check cable connections; press POWER button to turn on. |
| Bild ist verschwommen | Fokus nicht eingestellt; Projektor zu nah/zu weit von der Leinwand entfernt. | Adjust the FOCUS ring; reposition the projector or use the ZOOM ring. |
| Das Bild ist trapezförmig | Projektor nicht senkrecht zur Leinwand. | Use Auto Vertical Keystone correction or manually adjust. |
| Der Projektor überhitzt und schaltet sich ab. | Verstopfte Belüftung; verschmutzter Luftfilter. | Sorgen Sie für freie Luftzirkulation um die Lüftungsschlitze; reinigen oder ersetzen Sie den Luftfilter. |
8. Spezifikationen

Abbildung: Seite view of the SANYO PLC-XK2200 projector, displaying the model number label (MODEL NO. PLC-XK2200).
- Modellname: PLC-XK2200
- Marke: SANYO
- Anzeigetechnologie: LCD
- Helligkeit: 2200 Lumen
- Kontrastverhältnis: 2000:1
- Native Auflösung: XGA (1024 x 768)
- Seitenverhältnis: 4:3 (Nativ)
- Formfaktor: Tragbar
- Montageart: Tischhalterung
- Eingangsklemmen: VGA (x2), S-Video, Composite Video, Audio In (RCA)
- Ausgangsklemmen: VGA (Monitor Out), Audio Out (RCA)
- Steuerport: RS-232C
- UPC: 086483079498
9. Garantie und Support
For warranty information, please refer to the warranty card included with your product or contact your local SANYO dealer. Technical support may be available through authorized service centers.
No official product videos were provided in the input data for this manual.