1. Einleitung
Vielen Dank für Ihren Einkauf.asing the Gemini PS3-USB 3 Channel 10-Inch Mixer. This manual provides essential information for the proper setup, operation, and maintenance of your mixer. Please read this manual thoroughly before use to ensure optimal performance and to prevent damage.
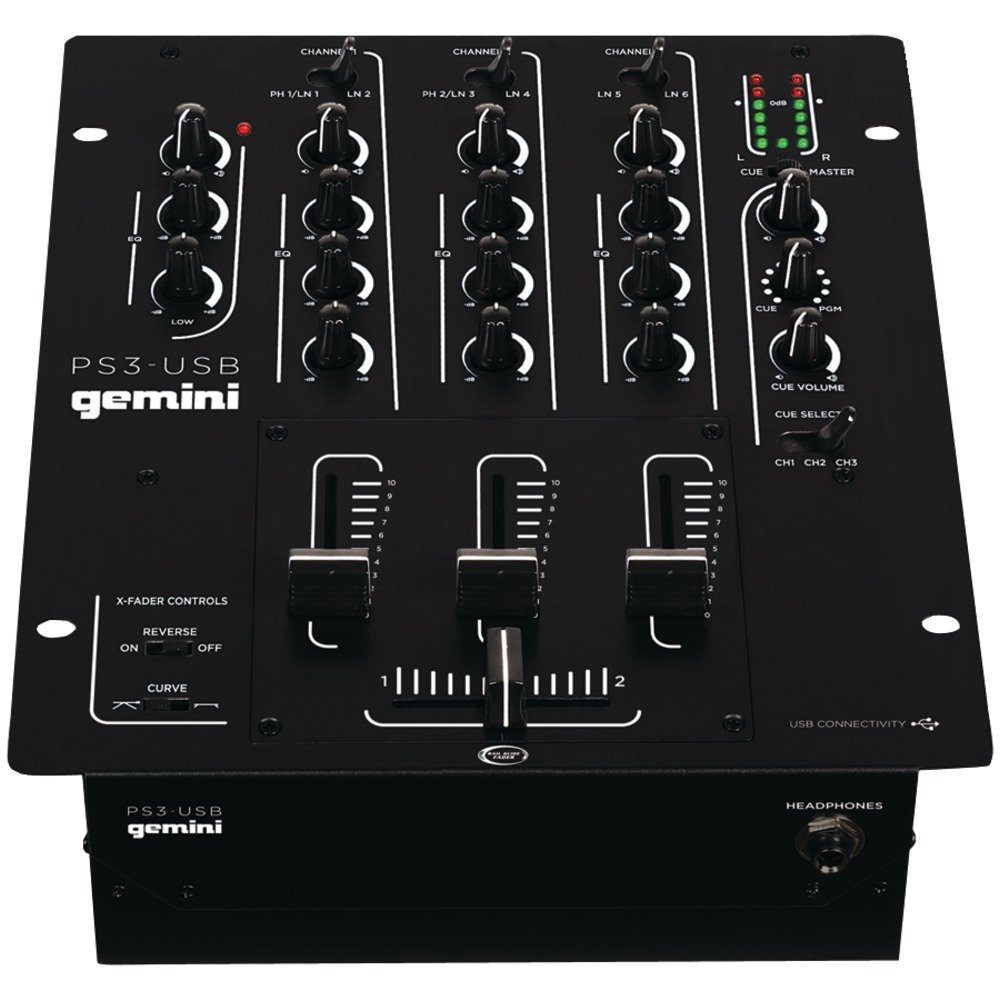
Abbildung 1: Vorderseite view of the Gemini PS3-USB Mixer, showing controls and inputs.
2. Sicherheitshinweise
- Energiequelle: Schließen Sie das Gerät nur an die angegebene Stromversorgung an.
- Belüftung: Sorgen Sie für ausreichende Belüftung. Blockieren Sie keine Belüftungsöffnungen.
- Wasser und Feuchtigkeit: Setzen Sie das Gerät weder Regen noch Feuchtigkeit aus. Stellen Sie keine mit Flüssigkeiten gefüllten Gegenstände auf das Gerät.
- Hitze: Halten Sie das Gerät von Wärmequellen wie Heizkörpern, Heizlüftern, Öfen oder anderen Geräten (einschließlich) fern. ampKonverter (Lüfter), die Wärme erzeugen.
- Reinigung: Nur mit trockenem Tuch reinigen.
- Wartung: Überlassen Sie alle Wartungsarbeiten qualifiziertem Servicepersonal. Versuchen Sie nicht, dieses Produkt selbst zu reparieren.
3. Einrichtung
3.1 Auspacken
Carefully unpack the mixer and check for any signs of damage. Retain the packaging materials for future transport or storage.
3.2 Stromversorgung anschließen
Schließen Sie den mitgelieferten Netzadapter an den Stromeingang des Mischpults und anschließend an eine geeignete Steckdose an.
3.3 Audioverbindungen
The PS3-USB features 5-line, 3-channel inputs with 2 convertible Phono/Line RCA inputs.
- Phono-/Line-Eingänge: Connect turntables or line-level devices (CD players, media players) to the RCA inputs. Use the Phono/Line switch to select the appropriate input type for each channel.
- Master-Ausgang: Connect the Master RCA outputs to your ampVerstärker oder Aktivlautsprecher.
- Aufnahmeausgabe: Connect the Record RCA outputs to a recording device if you wish to record your mix.
- Kopfhörer: Plug your 1/4" (6.3mm) headphones into the front panel headphone connector.
3.4 USB-Anschluss
Connect the mixer to your Mac or PC using a standard USB cable. This allows for simultaneous playback and recording through your computer's media player software.
4. Bedienungsanleitung
4.1 Bedienelemente und Funktionenview
Familiarize yourself with the mixer's layout:
- Channel Gain Control: Passt den Eingangspegel für jeden Kanal an.
- 3-Band Rotary EQ: Provides control over High, Mid, and Low frequencies for each channel.
- Kanalfader: Die Lautstärke jedes einzelnen Kanals kann separat geregelt werden.
- Überblender: A user-replaceable Rail Glide crossfader with curve and reverse controls for blending between channels.
- Master-Lautstärke: Steuert den Gesamtausgangspegel des Mixers.
- VU-Meter: Visual indicators for master or cue levels.
- Cue-Sektion: Includes rotary cue volume, CUE/PGM controls, and a split cue switch for headphone monitoring.
- Mikrofonbereich: Features a rotary microphone volume control and a 2-band EQ for microphone input.
4.2 Grundlegendes Mischen
- Connect your audio sources to the appropriate Phono/Line inputs.
- Set the Phono/Line switch for each channel to match your source.
- Adjust the Gain control for each active channel to achieve a healthy input level without clipping (distortion).
- Use the channel faders to bring up the volume of your desired audio sources.
- Utilize the 3-band EQ to shape the sound of each channel.
- Use the crossfader to smoothly transition between channels.
- Monitor your mix using headphones via the Cue section and adjust the Master Volume for the main output.
4.3 USB-Wiedergabe und -Aufnahme
Once connected via USB, your computer should recognize the PS3-USB as an audio device.
- Wiedergabe: Select the PS3-USB as the output device in your computer's sound settings or media player software to route audio through the mixer.
- Aufnahme: Select the PS3-USB as the input device in your recording software. The mixer's master output will be sent to your computer for recording.
5. Wartung
- Reinigung: Reinigen Sie die Außenseite des Mixers mit einem weichen, trockenen Tuch. Verwenden Sie keine flüssigen Reiniger oder Lösungsmittel.
- Crossfader Replacement: The Rail Glide crossfader is user-replaceable. Refer to the Gemini website or authorized service centers for replacement parts and instructions if needed.
- Lagerung: When not in use for extended periods, store the mixer in a cool, dry place, preferably in its original packaging.
6. Fehlerbehebung
| Problem | Mögliche Ursache | Lösung |
|---|---|---|
| No sound output from master. | Master volume too low; incorrect input selection; ampProbleme mit Verstärker/Lautsprechern. | Increase Master Volume. Check Phono/Line switches. Verify ampAnschlüsse für Verstärker/Lautsprecher und Stromversorgung. |
| Kein Ton von einem bestimmten Kanal. | Channel fader down; Gain too low; incorrect Phono/Line selection; source device off/muted. | Raise channel fader. Adjust Gain. Correct Phono/Line switch. Check source device. |
| Verzerrter Ton. | Input Gain too high; Master Volume too high; faulty cable. | Reduce channel Gain. Reduce Master Volume. Replace cables. |
| USB recording/playback not working. | Incorrect USB connection; computer audio settings incorrect; driver issues. | Ensure USB cable is securely connected. Select PS3-USB as audio device in computer settings. Restart computer. |
7. Spezifikationen
- Modell: PS3USB
- Kanäle: 3
- Eingänge: 5-Line, 2 Convertible Phono/Line RCA, USB
- Ausgaben: Master RCA, Record RCA, 1/4" (6.3mm) Headphone
- EQ: 3-Band Rotary EQ per channel, 2-Band EQ for Microphone
- Überblender: User-replaceable Rail Glide with Curve and Reverse controls
- Konnektivität: USB for Mac/PC Playback & Recording
- Dimensions (Approximate Shipping): 12.00 Zoll x 10.00 Zoll x 3.25 Zoll
- Weight (Approximate Shipping): 6.2 kg
- UPC: 747705208149
8. Garantie und Support
This Gemini product is covered by a 90 Tage Garantie Diese Garantie gilt ab Kaufdatum und deckt Herstellungsfehler und Verarbeitungsmängel bei normalem Gebrauch ab. Sie deckt keine Schäden ab, die durch Missbrauch, Unfälle, Modifikationen oder nicht autorisierte Reparaturen verursacht wurden.
For technical support, service inquiries, or warranty claims, please contact your authorized Gemini dealer or visit the official Gemini webWebsite für Kontaktinformationen.
Bitte bewahren Sie Ihren Kaufbeleg zur Überprüfung der Garantie auf.


