The Electro-Voice ZLX-12P is a 12-inch two-way powered loudspeaker designed for versatile audio applications. It features custom-engineered drivers, a robust Class-D amplifier, and integrated Digital Signal Processing (DSP) for optimal performance. This loudspeaker is suitable for various setups, including pole-mounted applications and use as a floor monitor, delivering clear and powerful sound.
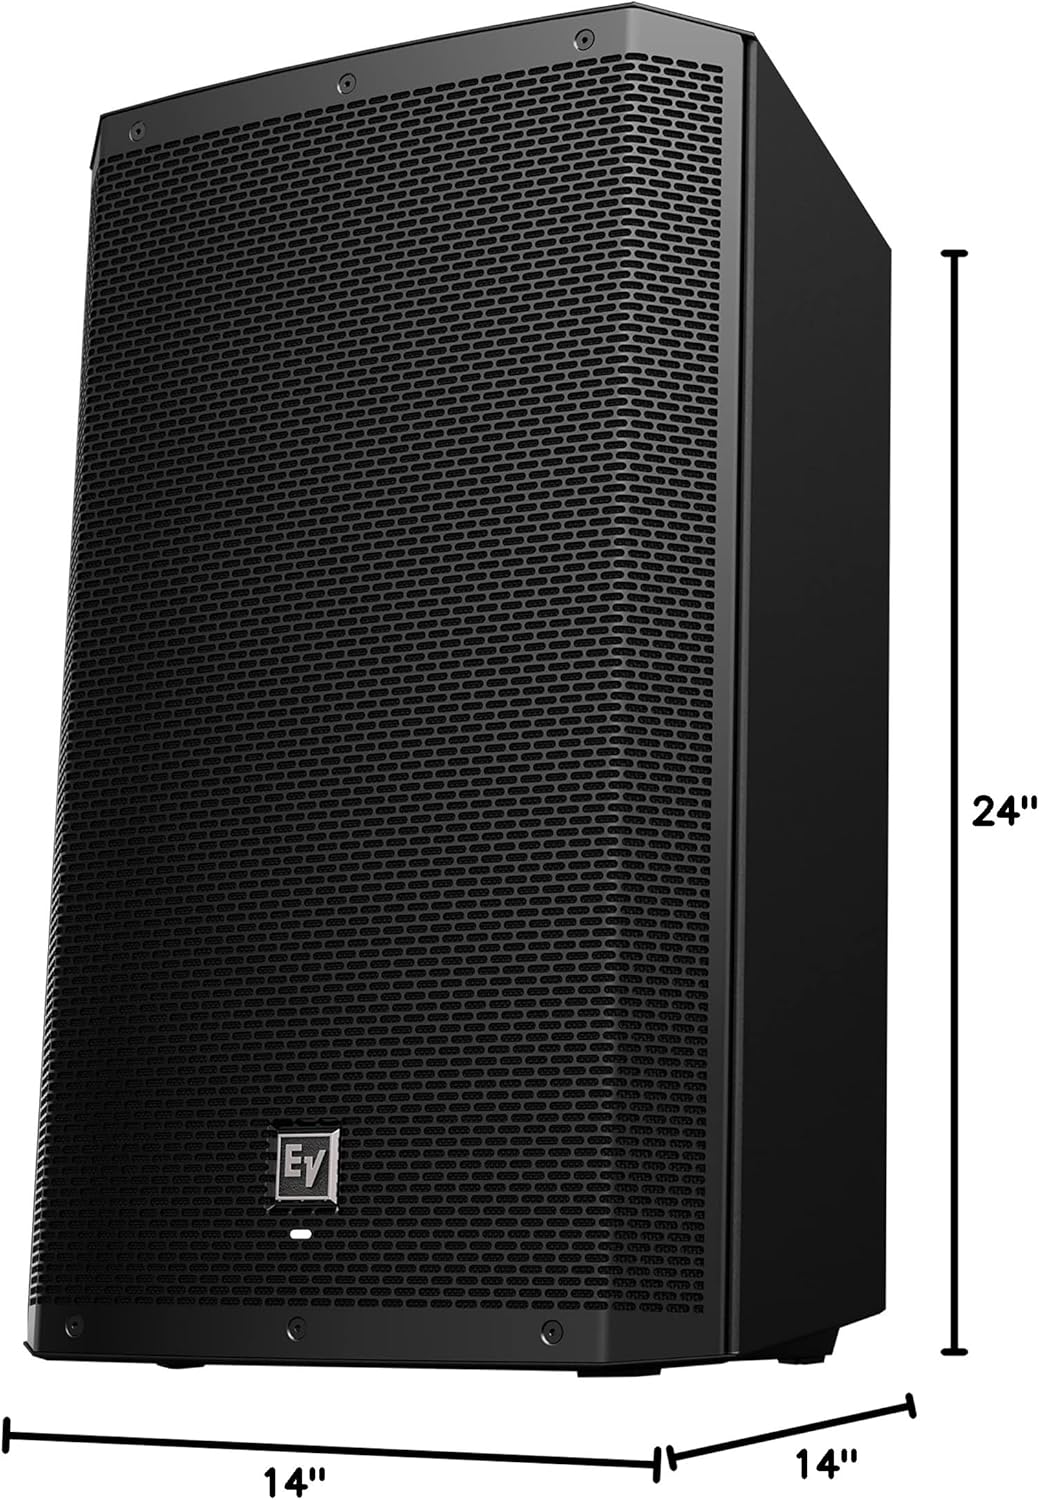
Abbildung 1: Vorderseite view of the Electro-Voice ZLX-12P Powered Loudspeaker, showcasing its protective grille and compact design.
Sicherheitshinweise
Read all instructions before operating the loudspeaker.
Bewahren Sie diese Anleitung zum späteren Nachschlagen auf.
Beachten Sie alle Warnhinweise auf dem Produkt und in der Bedienungsanleitung.
Befolgen Sie alle Anweisungen für einen sicheren Betrieb.
Verwenden Sie dieses Gerät nicht in der Nähe von Wasser.
Nur mit trockenem Tuch reinigen.
Die Lüftungsöffnungen dürfen nicht blockiert werden. Die Installation muss gemäß den Anweisungen des Herstellers erfolgen.
Installieren Sie das Gerät nicht in der Nähe von Wärmequellen wie Heizkörpern, Heizregistern, Öfen oder anderen Geräten (einschließlich ampKonverter (Lüfter), die Wärme erzeugen.
Machen Sie den Sicherheitszweck des polarisierten oder geerdeten Steckers nicht zunichte. Ein polarisierter Stecker hat zwei Stifte, von denen einer breiter als der andere ist. Ein geerdeter Stecker hat zwei Stifte und einen dritten Erdungsstift. Der breite Stift oder der dritte Stift dienen Ihrer Sicherheit. Wenn der mitgelieferte Stecker nicht in Ihre Steckdose passt, wenden Sie sich an einen Elektriker, um die veraltete Steckdose auszutauschen.
Schützen Sie das Netzkabel vor Beschädigungen oder Beschädigungen durch Fußgänger, insbesondere an den Steckern, Steckdosen und an der Stelle, an der es aus dem Gerät austritt.
Verwenden Sie nur vom Hersteller angegebene Zusatzgeräte/Zubehör.
Verwenden Sie das Gerät nur mit dem vom Hersteller angegebenen oder mit dem Gerät verkauften Wagen, Ständer, Stativ, Halter oder Tisch. Wenn Sie einen Wagen verwenden, seien Sie beim Bewegen der Wagen-/Gerät-Kombination vorsichtig, um Verletzungen durch Umkippen zu vermeiden.
Trennen Sie das Gerät bei Gewitter oder längerer Nichtbenutzung vom Stromnetz.
Überlassen Sie alle Wartungsarbeiten qualifiziertem Servicepersonal. Eine Wartung ist erforderlich, wenn das Gerät auf irgendeine Weise beschädigt wurde, z. B. wenn das Netzkabel oder der Stecker beschädigt sind, Flüssigkeit in das Gerät verschüttet wurde oder Gegenstände hineingefallen sind, das Gerät Regen oder Feuchtigkeit ausgesetzt war, nicht normal funktioniert oder fallengelassen wurde.
Einrichtung und Anschlüsse
Proper setup is crucial for optimal performance and safety. Ensure the loudspeaker is placed on a stable surface or mounted securely using appropriate hardware.
Rückseite überview
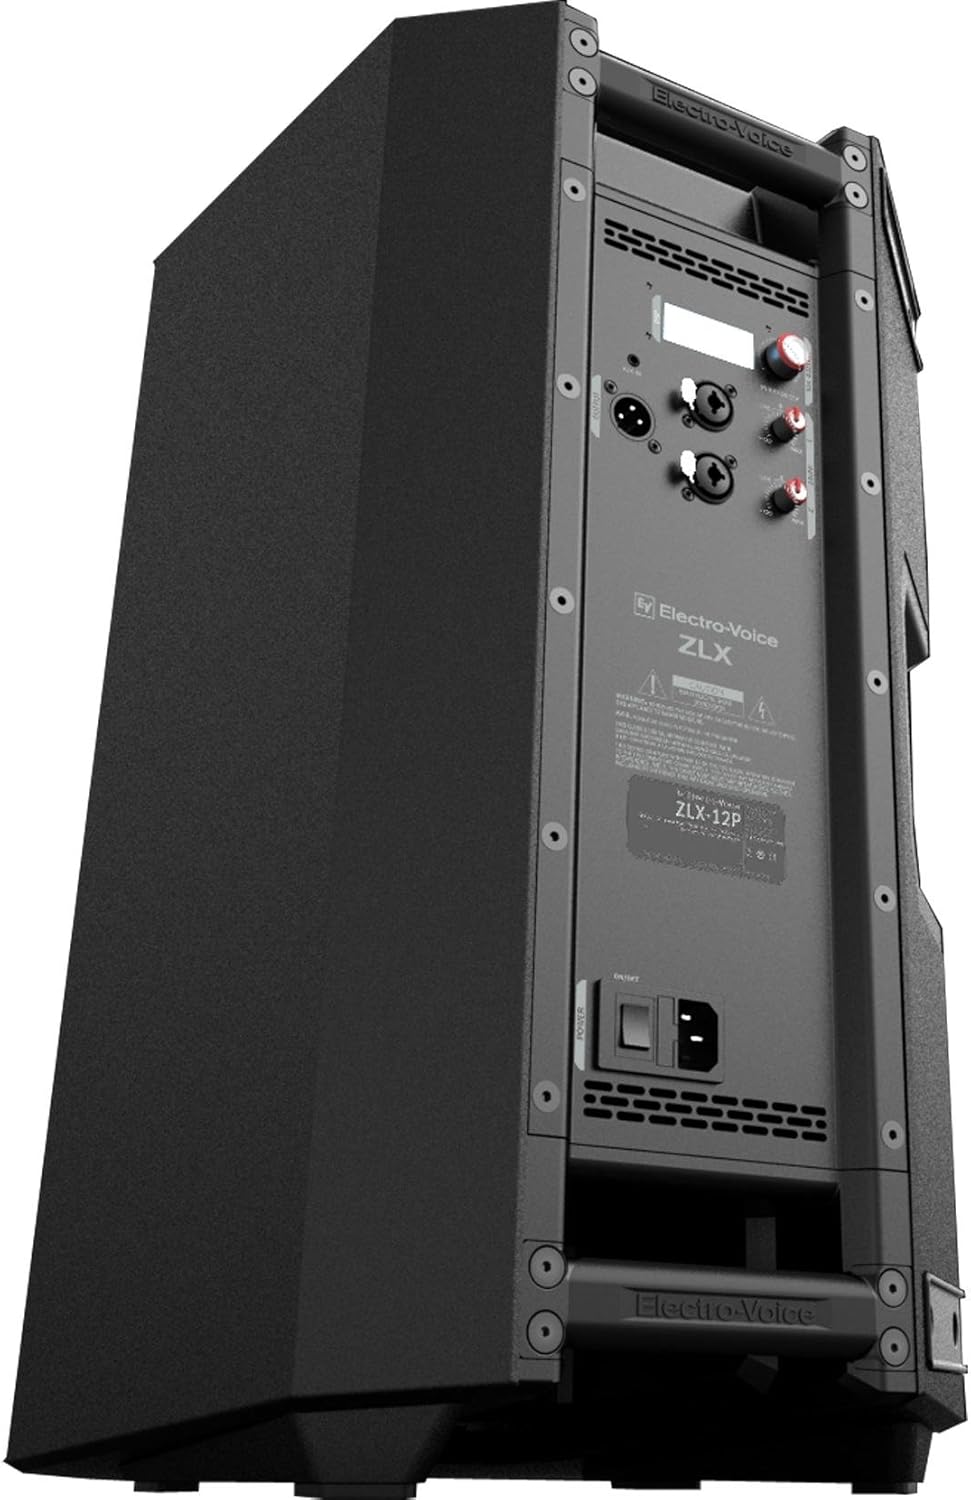
Figure 2: Rear panel of the ZLX-12P, showing input/output connections, DSP control, and power switch.
The rear panel provides all necessary connections and controls for the ZLX-12P. It includes XLR/TRS combo inputs, a 3.5mm input, an XLR link output, and the DSP control knob with an LCD display.
Stromanschluss
Stellen Sie sicher, dass sich der Netzschalter auf der Rückseite in der Position AUS befindet.
Connect the provided power cord to the AC inlet on the rear panel and then to a suitable power outlet.
Turn the power switch to the ON position. The front LED will illuminate, indicating power.
Audioeingangsanschlüsse
The ZLX-12P offers flexible input options:
XLR/TRS Combo Jacks (Input 1 & 2): These inputs accept both XLR and 1/4-inch TRS connectors. They are suitable for microphones, mixers, and other line-level audio sources.
3.5mm Eingang: A stereo 3.5mm input is available for connecting portable media players or other consumer audio devices.
Adjust the individual input level controls (Line/Mic) for each input to achieve optimal gain structure. The LCD display will show input levels.
Audio Output (Link)
The XLR link output allows you to send the mixed audio signal to another ZLX-12P loudspeaker or a different audio device, facilitating system expansion.
Montageoptionen
Mastmontage: The ZLX-12P features a pole mount socket for use with standard speaker poles. Ensure the pole and stand are rated for the loudspeaker's weight (approximately 34.4 lbs).
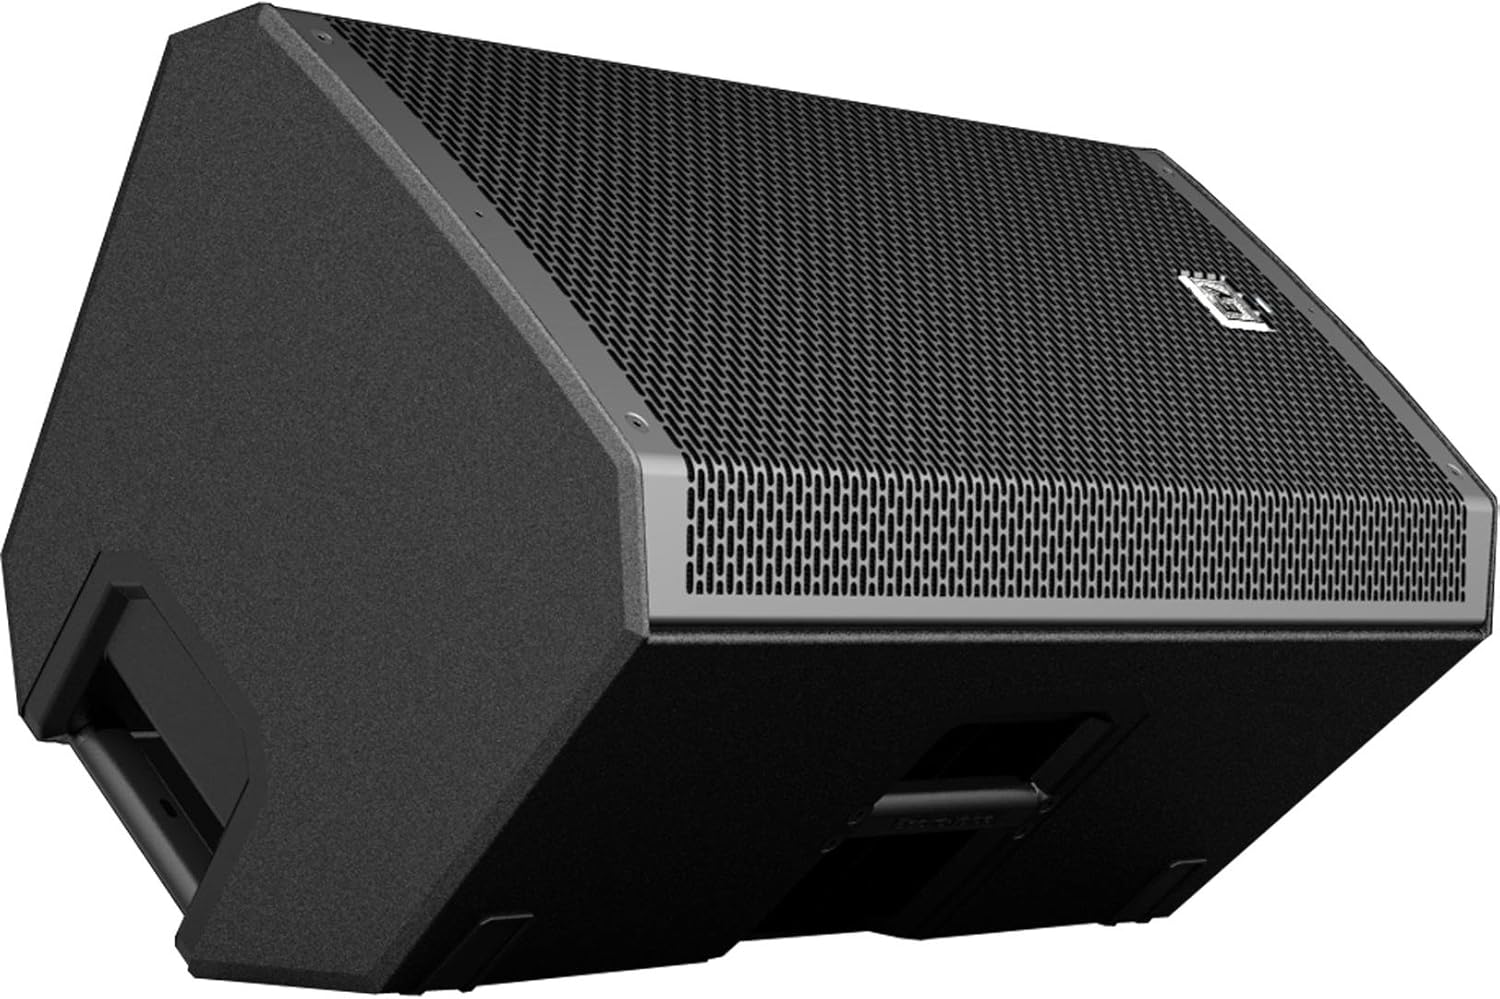
Bodenmonitor: The enclosure design allows the loudspeaker to be placed on its side for use as a floor monitor.
Figure 3: The ZLX-12P positioned as a floor monitor, demonstrating its angled design for stage verwenden.
Handhabung und Transport
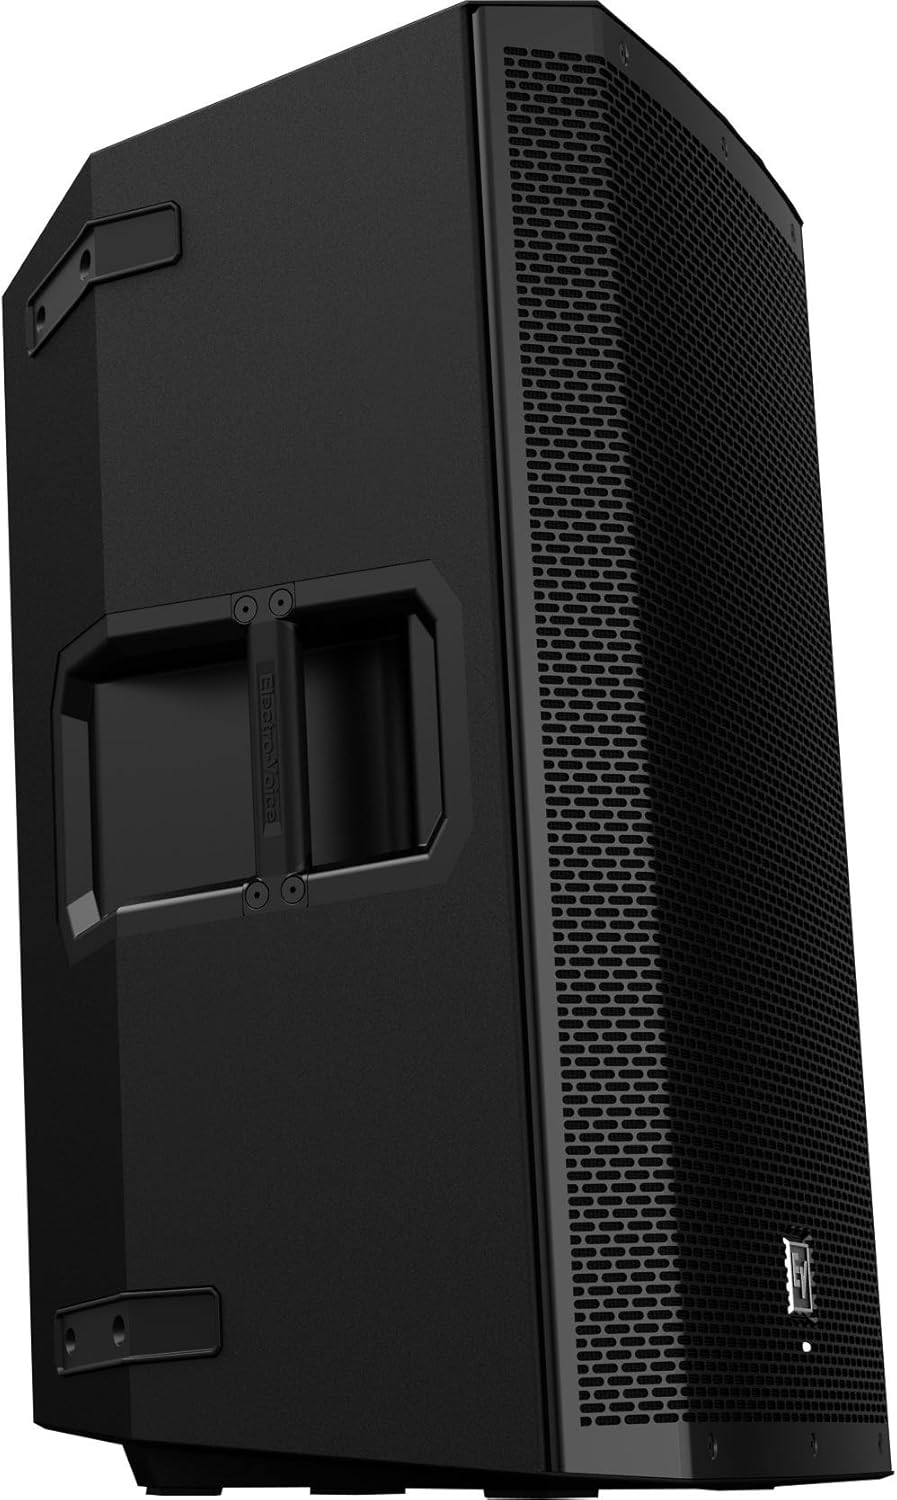
The ZLX-12P is designed with integrated handles for easy lifting and transport. Always use proper lifting techniques and ensure a secure grip when moving the loudspeaker.
Figure 4: Integrated side handle on the ZLX-12P for convenient carrying.
Bedienung des Lautsprechers
The ZLX-12P incorporates a powerful Digital Signal Processor (DSP) accessible via a single knob and LCD display, allowing for quick and precise sound optimization.
DSP-Steuerung
Zugriff auf Menüs: Press the MASTER VOL/DSP knob to enter the DSP menu.
Navigation: Rotate the knob to scroll through menu options. Press the knob to select an option or confirm a setting.
Voreinstellungen: The DSP includes various presets optimized for different applications (e.g., Music, Live, Speech, Club). Select the preset that best suits your environment and audio source.
Subwoofer-Integration: If using a subwoofer, the DSP allows for crossover frequency adjustment to ensure seamless integration.
EQ-Einstellungen: Fine-tune the sound with built-in EQ options.
Standorteinstellungen: Optimize sound based on placement (e.g., Pole, Monitor, Tripod, Wall).
The LCD display provides visual feedback on current settings, input levels, and system status.
Lautstärkeregelung
Input Level Controls: Use the individual LINE/MIC knobs for Input 1 and Input 2 to set the gain for each connected source. Aim for a strong signal without clipping (distortion).
Master-Lautstärke: The MASTER VOL/DSP knob also functions as the master volume control. Rotate it to adjust the overall output level of the loudspeaker.
Überwachungsebenen: Observe the level meters on the LCD display to prevent signal overload. The front LED will indicate "limit" if the signal is too high.
Wartung
Regular maintenance ensures the longevity and optimal performance of your ZLX-12P loudspeaker.
Reinigung: Clean the exterior of the loudspeaker with a dry, soft cloth. Do not use abrasive cleaners, solvents, or waxes.
Belüftung: Ensure that all ventilation openings are clear and unobstructed to prevent overheating.
Lagerung: When not in use, store the loudspeaker in a dry environment, protected from extreme temperatures and direct sunlight.
Inspektion: Überprüfen Sie regelmäßig das Netzkabel und alle Kabel auf Beschädigungen. Beschädigte Kabel müssen umgehend ausgetauscht werden.
Grillpflege: The 18-gauge steel grille is durable but can be bent if subjected to excessive force. Handle with care during transport and setup.
Fehlerbehebung
This section addresses common issues you might encounter with your ZLX-12P loudspeaker.
Problem
Mögliche Ursache
Lösung
Keine Tonausgabe
Stromanschluss nicht vorhanden oder eingeschaltet.
Input level too low or muted.
Fehlerhaftes Audiokabel.
Incorrect DSP settings.
Stromanschluss und Schalter prüfen.
Increase input level and master volume.
Testen Sie es mit einem anderen Kabel.
Verify DSP settings (e.g., input source, mute).
Verzerrter Ton
Eingangssignal zu hoch (Übersteuerung).
Master-Lautstärke zu hoch.
Beschädigtes Lautsprecherbauteil.
Reduce input level until the "limit" LED no longer illuminates.
Lower master volume.
If distortion persists, contact qualified service personnel.
Hissing noise when idle
Einstellungen für hohe Verstärkung.
Probleme mit Erdschleifen.
Inhärent amplifier noise (minimal).
Ensure input levels are set appropriately, not excessively high.
Prüfen Sie, ob alle angeschlossenen Geräte ordnungsgemäß geerdet sind.
If the hiss is noticeable during quiet moments, consider adjusting gain staging or using a ground loop isolator if applicable.
Kein Strom
Netzkabel getrennt.
Durchgebrannte Sicherung.
Problem mit der Steckdose.
Verify power cord is securely connected.
Check the fuse (if accessible and user-serviceable, refer to service manual).
Testen Sie die Steckdose mit einem anderen Gerät.
Technische Daten
Key technical specifications for the Electro-Voice ZLX-12P loudspeaker:
Besonderheit
Detail
Modellname
ZLX-12P
Lautsprechertyp
Woofer, Active
LF-Wandler
EVS-12K, 300 mm (12 in) Woofer
HF-Wandler
DH-1K
Nennleistung
1000 W (Spitze)
Maximaler Schalldruck
126 dB
Frequenzbereich
50 Hz - 20 kHz
Frequenzgang
65 Hz - 18 kHz
Coverage (Nominal -6 dB) H x V
90° x 60°
Steckertyp
(2) XLR/TRS Combo Jack, (1) 3.5 mm Input, (1) XLR link Output
Gehäusematerial
Polypropylen
Grill
18 Gauge Steel with Black Powder Coat
Produktabmessungen (T x B x H)
14" x 14" x 24"
Artikelgewicht
34.4 Pfund
Stromquelle
Kabelgebundene Elektrik
Kontrollmethode
Touch (DSP knob)
Besonderheit
Leicht
Figure 5: Dimensions of the ZLX-12P loudspeaker, showing its height, width, and depth.
Garantie und Support
The Electro-Voice ZLX-12P loudspeaker comes with a limited warranty. For specific warranty terms and conditions, please refer to the warranty card included with your product or visit the official Electro-Voice website. For technical support, service, or replacement parts, please contact Electro-Voice customer service or an authorized service center.
Hersteller: Elektro-Stimme
Ask a question about this manual
Ask about setup, troubleshooting, compatibility, parts, safety, or missing instructions. Manuals+ will review the question and use this page’s manual context to help answer it.