
1. Einleitung
The BSIDE EMT01 is a handheld digital wood moisture meter designed for accurate moisture measurement in various wood species. This conductivity moisture meter is an essential tool for professionals and hobbyists in the wood industry, offering reliable performance for assessing timber conditions.
This manual provides detailed instructions for the proper use, setup, and maintenance of your EMT01 meter to ensure years of reliable service.
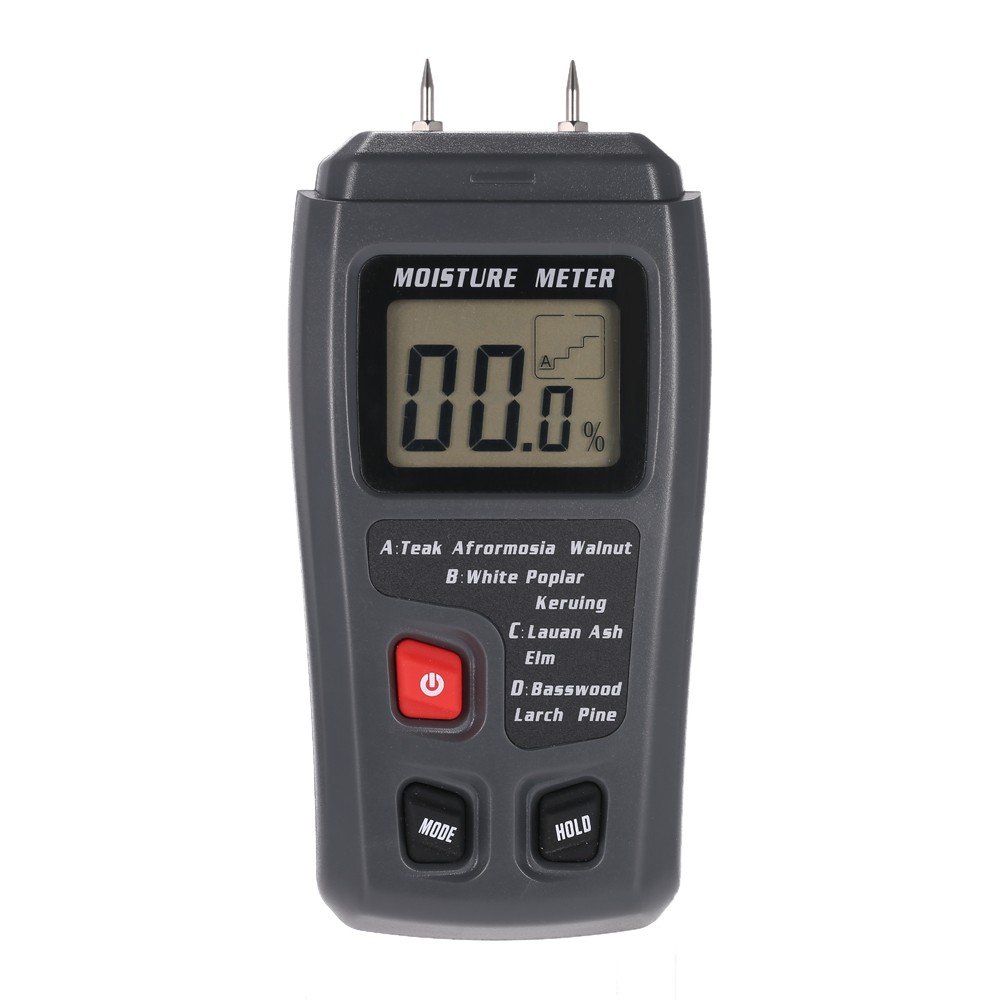
Image 1.1: The BSIDE EMT01 meter being used to measure moisture in a piece of wood.
2. Funktionen
The EMT01 wood moisture meter incorporates several features for efficient and accurate moisture detection:
- Großes LCD-Display: Clearly shows wood moisture percentage.
- Messbereich: 0% to 99.9% for wood.
- Hohe Genauigkeit: Up to ±0.5%.
- Auflösung: ± 0.1%.
- Vielseitige Anwendung: Suitable for wood, paper, cardboard, and other materials.
- Wood Group Calibration: Contains 4 wood groups with calibrations for approximately 50 species of wood.
- Datenhaltefunktion: Friert den angezeigten Messwert zur besseren Ablesbarkeit ein.
- Automatisches Ausschalten: Automatically shuts down after approximately 15 minutes of inactivity to conserve battery life.
- Anzeige für niedrigen Batteriestand: Displays an icon when the battery needs replacement.
- Integrated Electrode Pins: Durable 10mm (0.4") pins for direct measurement.

Abbildung 2.1: Mehrere views of the EMT01 meter, showing its design and integrated pins.
3. Einrichtung
3.1 Einlegen der Batterie
The EMT01 meter requires one 9V 6F22 battery for operation. Follow these steps to install or replace the battery:
- Stellen Sie sicher, dass das Messgerät ausgeschaltet ist.
- Suchen Sie den Batteriefachdeckel auf der Rückseite des Messgeräts.
- Schieben Sie den Deckel nach unten, um das Fach zu öffnen.
- Schließen Sie eine neue 9V-Batterie an den Batterieclip an und achten Sie dabei auf die richtige Polarität.
- Place the battery into the compartment and slide the cover back into place until it clicks securely.

Image 3.1: The battery compartment of the EMT01 meter with the cover removed, ready for battery insertion.
3.2 Protective Cap Removal
Before taking measurements, carefully remove the protective cap covering the electrode pins. This cap also serves as a calibration check block.
4. Bedienungsanleitung
4.1 Ein-/Ausschalten
- To power on the meter, press the red LEISTUNG button. The LCD will display the current moisture reading.
- To power off the meter, press the red LEISTUNG button again. The meter will also automatically power off after approximately 15 minutes of inactivity.
4.2 Selecting Wood Group
The EMT01 meter has four pre-calibrated wood groups (A, B, C, D) to ensure accurate readings for different wood species. Refer to the list below and the meter's label to select the appropriate group:
- Gruppe A: Teak, Afromosia, Walnut, Rubber Tree, Imbuia, Kokrodua, Niangon, Bidinkala, Cork
- Gruppe B: White Poplar, Keruing, Beech, Cedar, Tola
- Gruppe C: Lauan, Ash, Elm, Fir, Maple, Padauk, Oak, Cherry
- Gruppe D: Basswood, Larch, Pine, Birch
To select a wood group, press the MODUS button repeatedly until the desired group (A, B, C, or D) is displayed on the LCD.
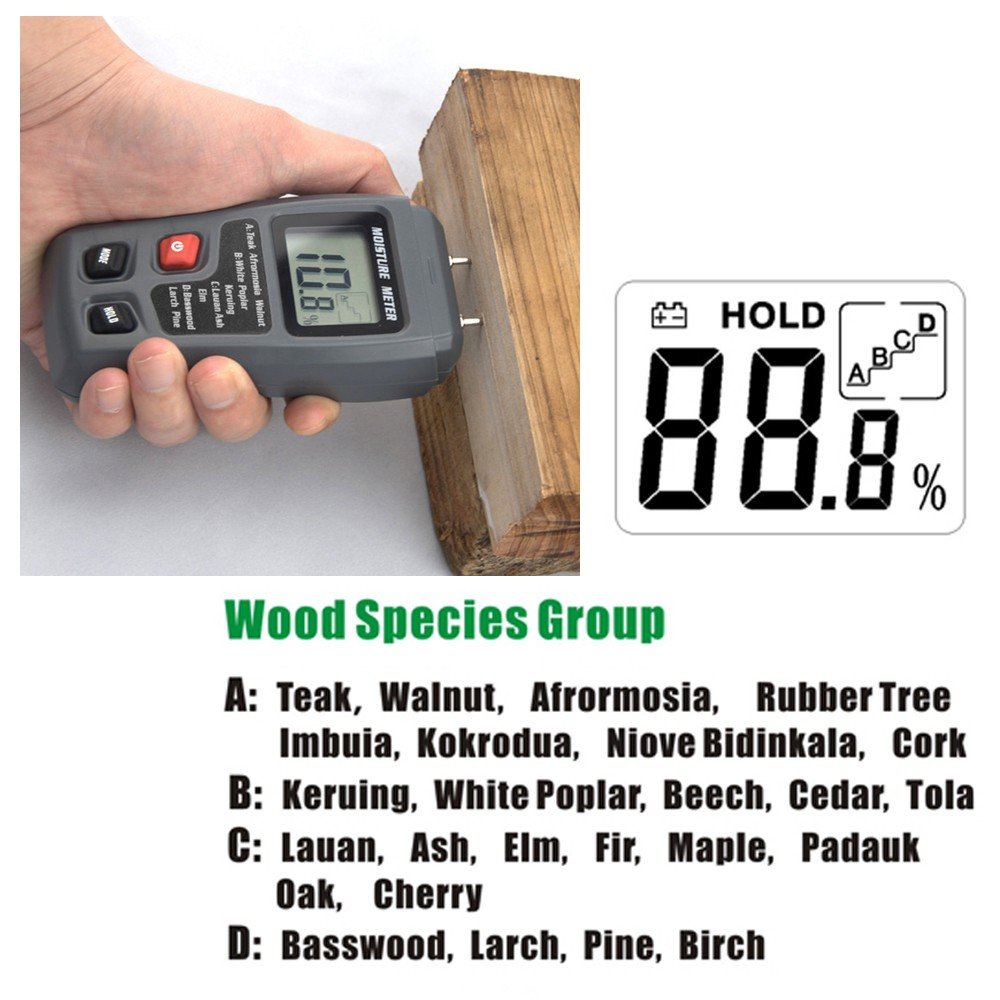
Image 4.1: Detailed breakdown of wood species categorized into groups A, B, C, and D for accurate measurement.
4.3 Messung durchführen
- Power on the meter and select the correct wood group.
- Carefully push the electrode pins into the wood surface to be measured. Ensure both pins penetrate the material sufficiently for good contact.
- Lesen Sie den Feuchtigkeitsgehalt in Prozent ab.tage displayed on the LCD.
- Um den aktuellen Messwert auf dem Display zu speichern, drücken Sie die Taste HALTEN Drücken Sie die Taste erneut, um die Haltefunktion aufzuheben.
- After measurement, gently pull the pins out of the wood and replace the protective cap.
Notiz: Für optimale Ergebnisse sollten Sie mehrere Messungen an verschiedenen Stellen des Materials vornehmen und den Durchschnitt berechnen.
5. Wartung
- Reinigung: Wischen Sie die Oberfläche des Zählers ab.asinMit einem trockenen, weichen Tuch abwischen. Keine Scheuermittel oder Lösungsmittel verwenden.
- Electrode Pins: Keep the pins clean and free from debris. If pins become dull or damaged, they may need replacement (replacement pins not included with standard package).
- Lagerung: When not in use, always replace the protective cap over the pins. Store the meter in a cool, dry place, away from direct sunlight and extreme temperatures. Remove the battery if storing for extended periods to prevent leakage.
6. Fehlerbehebung
| Problem | Mögliche Ursache | Lösung |
|---|---|---|
| Das Messgerät lässt sich nicht einschalten. | Batterie defekt oder falsch eingebaut. | Check battery installation. Replace with a new 9V battery. |
| Ungenaue Messwerte. | Incorrect wood group selected; pins not fully inserted; pins dirty or damaged. | Ensure correct wood group is selected. Push pins firmly into the material. Clean or replace pins if necessary. |
| Das Display zeigt „Niedrig“ oder „Hoch“ an. | Moisture content is outside the meter's measurement range. | The material is either too dry or too wet for the meter to provide a specific reading. |
| Meter powers off unexpectedly. | Auto power off activated; low battery. | This is normal behavior after 15 minutes of inactivity. If it happens during use, check for low battery indicator and replace battery. |
7. Spezifikationen
| Parameter | Wert |
|---|---|
| Anzeige | Large LCD characters display |
| Messprinzip | Elektrischer Widerstand |
| Range (Wood) | 0 % bis 99.9 % |
| Auflösung | 0.1 % |
| Genauigkeit | ±0.5 % |
| Electrode Pin Length | 10 mm (0.4 Zoll) |
| Elektrodenstifte | Integriert |
| Automatische Abschaltung | Nach ca. 15 Minuten |
| Stromversorgung | 1 x 9V 6F22 Batterie |
| Instrument Enclosures | ABS-Kunststoff |
| Betriebstemperatur | 0 °C bis 40 °C (32 °F bis 104 °F) |
| Luftfeuchtigkeit bei Betrieb | 85% Relative Humidity Maximum |
| Maße | 145 x 67 x 32 mm (5.7 x 2.6 x 1.3 Zoll) |
| Gewicht | 200 g |

Image 7.1: Visual summary of the EMT01's key technical specifications.
8. Garantie und Support
This product is covered by a standard manufacturer's warranty. For specific warranty details, please refer to the documentation provided with your purchase or contact BSIDE customer support.
For technical assistance, troubleshooting, or inquiries about replacement parts, please contact BSIDE customer service through their official webWebsite oder den Händler, bei dem das Produkt gekauft wurde.