
1. Einleitung
This manual provides essential information for the safe assembly, operation, maintenance, and troubleshooting of your Craftsman Model 113.24201 12-inch Band Saw/Sander. Please read and understand all instructions before operating the machine to prevent personal injury and machine damage. Keep this manual for future reference.
The Craftsman 113.24201 is a versatile woodworking tool designed for cutting various materials with its band saw function and for sanding with its integrated sander. Proper use and maintenance will ensure long-lasting performance and safety.
2. Wichtige Sicherheitshinweise
WARNUNG: Die Nichtbeachtung dieser Sicherheitshinweise kann zu schweren Verletzungen oder zum Tod führen.
- Tragen Sie stets eine Schutzbrille, die der Norm ANSI Z87.1 entspricht.
- Wear hearing protection during extended operation.
- Do not operate the machine while under the influence of drugs, alcohol, or medication.
- Stellen Sie sicher, dass der Arbeitsbereich sauber, gut beleuchtet und frei von Unordnung ist.
- Keep children and bystanders at a safe distance from the machine.
- Vor dem Einstellen von Einstellungen, dem Austausch von Zubehör oder der Durchführung von Wartungsarbeiten die Stromzufuhr unterbrechen.
- Use the correct blade and sanding belt for the material and task.
- Never reach into the cutting or sanding area while the machine is running.
- Securely fasten all guards and safety devices before operation.
- Always use a push stick or push block when cutting small pieces.
3. Aufbau und Montage
Carefully unpack all components and verify against the packing list. If any parts are missing or damaged, contact customer service immediately. Assembly typically involves mounting the machine to a stable workbench, installing the band saw blade, and attaching the sanding belt.
3.1 Montage der Maschine
Mount the band saw/sander securely to a sturdy workbench using appropriate bolts and washers. Ensure the workbench can support the weight and vibrations of the machine during operation.
3.2 Installing the Band Saw Blade
- Ziehen Sie das Netzkabel ab.
- Öffnen Sie die obere und untere Radabdeckung.
- Den Klingenspannungsknopf lösen.
- Carefully place the new blade around the upper and lower wheels, ensuring the teeth point downwards towards the table.
- Adjust the blade guides and thrust bearings so they are close to, but not touching, the blade.
- Tension the blade according to the indicator or by feel (it should deflect slightly when pressed).
- Close the wheel covers.
3.3 Attaching the Sanding Belt
- Ziehen Sie das Netzkabel ab.
- Locate the sanding belt tension lever and release it.
- Slide the old belt off (if applicable) and slide the new belt onto the sanding drums, ensuring the directional arrow on the belt matches the machine's rotation.
- Re-engage the tension lever.
- Adjust the tracking knob until the belt runs centrally on the drums when the machine is briefly turned on.
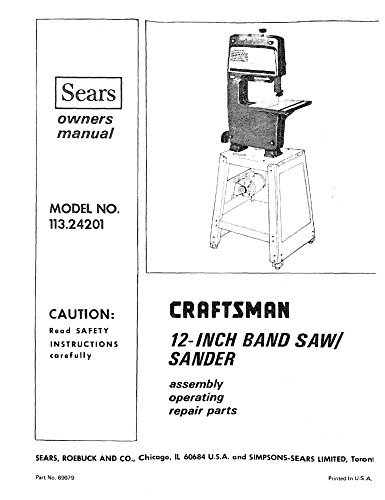
Figure 1: The Craftsman 113.24201 12-inch Band Saw/Sander, showing its dual functionality. The band saw blade is visible on the left, and the sanding belt mechanism is on the right. This image illustrates the overall design and key components of the machine.
4. Bedienungsanleitung
Before each use, inspect the machine for any damage, loose parts, or worn components. Ensure all guards are in place and functioning correctly.
4.1 Band Saw Operation
- Select the appropriate blade for your material and cut type.
- Adjust the blade guide post to be approximately 1/8 inch above the workpiece.
- Set the fence or miter gauge for accurate cuts.
- Turn on the machine and allow it to reach full speed.
- Feed the workpiece slowly and steadily into the blade, applying even pressure.
- Use a push stick for narrow cuts or when your hands are close to the blade.
- Turn off the machine and wait for the blade to stop completely before removing the workpiece or clearing sawdust.
4.2 Sander Operation
- Select the appropriate grit sanding belt for your task.
- Ensure the sanding belt is properly tracked and tensioned.
- Schalten Sie die Maschine ein.
- Apply the workpiece gently to the moving sanding belt, using light and even pressure.
- Move the workpiece consistently across the belt to avoid creating grooves or uneven surfaces.
- For edge sanding, use the edge of the belt. For surface sanding, use the flat platen area.
- Turn off the machine and wait for the belt to stop before removing the workpiece.
5. Wartung
Regular maintenance is crucial for the longevity and safe operation of your Craftsman Band Saw/Sander. Always disconnect power before performing any maintenance.
5.1 Reinigung
- Regularly clean sawdust and debris from the machine, especially around the blade guides, wheels, and sanding belt area.
- Use a vacuum cleaner or compressed air (with caution and eye protection) to remove fine dust.
- Wipe down metal surfaces with a clean cloth to prevent rust.
5.2 Blade and Belt Replacement
- Replace band saw blades when they become dull, bent, or broken. Refer to Section 3.2 for installation.
- Replace sanding belts when they become worn, torn, or no longer effectively remove material. Refer to Section 3.3 for installation.
5.3 Schmierung
Periodically lubricate moving parts, such as blade guide posts and tension mechanisms, with a light machine oil as recommended in the original manual (if available) or a general-purpose lubricant suitable for power tools.
6. Fehlerbehebung
This section addresses common issues you might encounter with your Craftsman Band Saw/Sander.
| Problem | Mögliche Ursache | Lösung |
|---|---|---|
| Maschine startet nicht | Power cord unplugged; tripped circuit breaker; faulty switch. | Check power connection; reset breaker; contact service if switch is faulty. |
| Band saw blade breaks frequently | Incorrect blade tension; dull blade; improper blade guides; forcing workpiece. | Adjust tension; replace blade; adjust guides; reduce feed pressure. |
| Das Schleifband rutscht oder läuft ab | Incorrect belt tension; improper tracking adjustment; worn belt. | Adjust tension; adjust tracking knob; replace belt. |
| Übermäßige Vibration | Loose mounting bolts; unbalanced wheels; worn bearings. | Tighten mounting bolts; inspect wheels for damage; contact service for bearing replacement. |
7. Spezifikationen
The following are general specifications for the Craftsman Model 113.24201 12-inch Band Saw/Sander. Specific details may vary slightly based on manufacturing year.
- Modell: 113.24201
- Typ: 12-inch Band Saw / Sander Combination
- Motor: (Typically) 1/2 HP to 3/4 HP (specifics may vary)
- Klingenlänge: Ungefähr 80 Zoll (2032 mm)
- Blade Width Capacity: 1/8 Zoll bis 1/2 Zoll
- Schleifbandgröße: Typically 4 x 36 inches (100 x 915 mm)
- Tischneigung: 0 bis 45 Grad
- Leistungsbedarf: 120 V, 60 Hz, einphasig
8. Garantie und Support
Information regarding warranty coverage and customer support for the Craftsman Model 113.24201 is not available in this document. Please refer to your original purchase documentation or contact Craftsman customer service for details on warranty terms and technical assistance.
For parts and service, please provide the model number (113.24201) and serial number (if applicable) to ensure accurate assistance.