
1. Einleitung
This manual provides detailed instructions for installing, configuring, and maintaining your GIGABYTE GA-B150M-D3H Micro ATX motherboard. The GA-B150M-D3H is designed to support 6th Generation Intel Core Processors and features Dual Channel DDR4 memory, PCIe Gen3 x4 M.2 connector, SATA Express, and 8-channel HD audio with Audio Noise Guard.
Please read this manual thoroughly before beginning installation to ensure proper setup and operation.
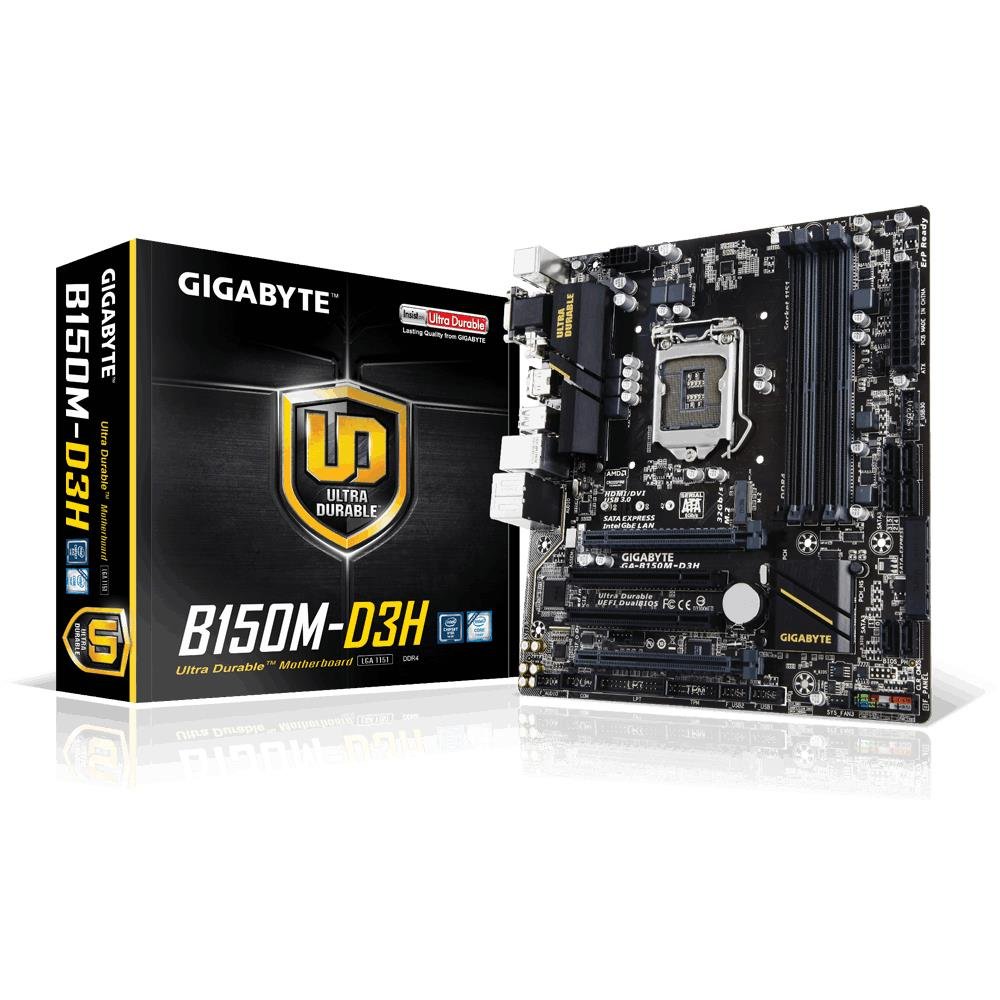
Image 1.1: GIGABYTE GA-B150M-D3H Micro ATX Motherboard. This image displays the overall layout of the motherboard, highlighting its compact Micro ATX form factor and various component slots.
2. Sicherheitshinweise
Beachten Sie die folgenden Sicherheitsvorkehrungen, um Schäden am Motherboard und Verletzungen zu vermeiden:
- Vor dem Berühren von Bauteilen muss immer der Netzstecker aus der Steckdose gezogen werden.
- Tragen Sie ein antistatisches Armband oder berühren Sie häufig einen geerdeten Metallgegenstand, um statische Elektrizität abzuleiten.
- Fassen Sie das Motherboard an den Kanten an, um eine Berührung empfindlicher Bauteile zu vermeiden.
- Das Motherboard sollte vor Feuchtigkeit und extremen Temperaturen geschützt werden.
- Sorgen Sie für ausreichende Belüftung im Computergehäuse, um eine Überhitzung zu vermeiden.
3. Packungsinhalt
Überprüfen Sie, ob alle Teile in Ihrer Motherboard-Verpackung vorhanden sind:
- GIGABYTE GA-B150M-D3H Motherboard
- Bedienungsanleitung
- E / A-Schild
- SATA-Kabel
- Treiber-CD/DVD
Hinweis: Der Inhalt kann je nach Region oder Revision leicht variieren.
4. Motherboard-Layout
Familiarize yourself with the various components and connectors on the GA-B150M-D3H motherboard.
Image 4.1: GIGABYTE GA-B150M-D3H Motherboard Layout. This image provides a visual reference for the location of key components such as the CPU socket, DIMM slots, PCIe slots, SATA ports, and M.2 connector.
Schlüsselkomponenten:
- LGA 1151 CPU-Sockel: For 6th Generation Intel Core Processors.
- DDR4 DIMM Slots (4): Supports Dual Channel DDR4 memory up to 2133 MHz.
- PCIe-Steckplätze: Includes PCIe Gen3 x16 for graphics cards and PCIe x1 slots for expansion.
- M.2 Connector: Supports PCIe NVMe & SATA SSDs with up to 32Gb/s data transfer.
- SATA Express Connector: For up to 16Gb/s data transfer.
- SATA 6Gb/s-Anschlüsse: For connecting traditional SATA storage devices.
- 24-poliger ATX-Stromanschluss: Hauptstromanschluss.
- 8-Pin ATX 12V Power Connector: CPU power input.
- Frontplatten-Header: For power button, reset button, LED indicators, and USB ports.
- Audioanschlüsse: 8-channel HD Audio with high quality capacitors and Audio Noise Guard.
5. Einrichtung und Installation
Befolgen Sie diese Schritte für die korrekte Installation Ihres Motherboards und der Komponenten.
5.1. Installation der CPU
- Locate the LGA 1151 CPU socket.
- Öffnen Sie den Hebel des CPU-Sockels und heben Sie die Ladeplatte an.
- Richten Sie die CPU vorsichtig am Sockel aus und achten Sie darauf, dass das goldene Dreieck auf der CPU mit dem Dreieck am Sockel übereinstimmt. Drücken Sie die CPU nicht mit Gewalt in den Sockel.
- Senken Sie die Lastplatte ab und sichern Sie sie mit dem Hebel.
5.2. Installation des CPU-Kühlers
Refer to your CPU cooler's instruction manual for specific installation steps. Ensure thermal paste is applied correctly between the CPU and cooler base.
5.3. Einbau des Arbeitsspeichers (RAM)
- Öffnen Sie die Klemmen an beiden Enden der DDR4-DIMM-Steckplätze.
- Richten Sie das Speichermodul am Steckplatz aus und achten Sie darauf, dass die Kerbe am Modul mit der entsprechenden Markierung im Steckplatz übereinstimmt.
- Drücken Sie beide Enden des Speichermoduls fest nach unten, bis die Klammern einrasten.
- For dual-channel performance, install memory modules in matching colored slots (e.g., DIMM1 and DIMM2).
5.4. Installing Expansion Cards
- Remove the metal bracket from the desired PCIe slot on your computer case.
- Align the expansion card with the PCIe slot and press down firmly until it is seated correctly.
- Secure the card with a screw to the computer case.
5.5. Connecting Storage Devices
- SATA-Geräte: Connect one end of the SATA data cable to a SATA 6Gb/s port on the motherboard and the other end to your hard drive or SSD. Connect the SATA power cable from your power supply to the device.
- M.2-SSD: Insert the M.2 SSD into the M.2 slot at an angle, then gently push it down and secure it with the provided screw.
- SATA Express: If using a SATA Express device, connect it to the designated SATA Express connector.
5.6. Anschließen der Frontplattenanschlüsse
Connect the cables from your computer case's front panel (power button, reset button, HDD LED, power LED, front USB, front audio) to the corresponding headers on the motherboard. Refer to the motherboard layout diagram for exact locations and pin assignments.
5.7. Anschluss des Netzteils
- Connect the 24-pin ATX main power connector from your power supply to the 24-pin power socket on the motherboard.
- Connect the 8-pin ATX 12V CPU power connector to the 8-pin socket near the CPU.
- Stellen Sie sicher, dass alle Stromanschlüsse fest sitzen.
6. Bedienungsanleitung
6.1. Erster Start
After assembling all components, connect your monitor, keyboard, and mouse. Power on the system. The system should display the GIGABYTE splash screen and then enter the BIOS/UEFI setup or attempt to boot from a connected storage device.
6.2. BIOS/UEFI-Einrichtung
Um ins BIOS/UEFI-Setup zu gelangen, drücken Sie die Taste DEL key repeatedly during the boot process when the GIGABYTE logo appears. Here you can configure system settings, boot order, and monitor hardware status. The GA-B150M-D3H features GIGABYTE UEFI Dual BIOS for enhanced reliability.
6.3. Treiberinstallation
After installing your operating system, install the necessary drivers for the motherboard components. These can be found on the included driver CD/DVD or downloaded from the official GIGABYTE website. Key drivers include chipset, audio (Realtek ALC892 codec), LAN, and any integrated graphics drivers.
6.4. Installation des Betriebssystems
Insert your operating system installation media (USB drive or DVD) and configure the boot order in the BIOS/UEFI to boot from it. Follow the on-screen instructions to install your preferred operating system (e.g., Windows 8.1, Windows 10).
7. Wartung
7.1. Reinigung
Reinigen Sie regelmäßig das Innere Ihres Computergehäuses, um Staubansammlungen und damit verbundene Überhitzung zu vermeiden. Verwenden Sie Druckluft, um Staub von Lüftern, Kühlkörpern und Komponenten des Mainboards zu entfernen. Stellen Sie sicher, dass das System vor der Reinigung ausgeschaltet und vom Stromnetz getrennt ist.
7.2. BIOS-Updates
GIGABYTE veröffentlicht regelmäßig BIOS-Updates, um Systemstabilität, Kompatibilität und Leistung zu verbessern. Besuchen Sie die offizielle GIGABYTE-Website. website for your motherboard model (GA-B150M-D3H) to check for the latest BIOS version and follow the provided instructions for updating. Exercise caution during BIOS updates, as an interruption can render the motherboard inoperable.
8. Fehlerbehebung
In diesem Abschnitt werden häufig auftretende Probleme behandelt.
8.1. No Power / System Does Not Turn On
- Prüfen Sie, ob das Netzteil korrekt an das Motherboard angeschlossen ist (24-polige und 8-polige Anschlüsse).
- Stellen Sie sicher, dass sich der Netzschalter in der Position EIN befindet.
- Überprüfen Sie, ob das Kabel des Netzschalters an der Vorderseite korrekt an den Anschluss auf dem Motherboard angeschlossen ist.
- Testen Sie das Netzteil mit einem anderen System oder einem Netzteilprüfgerät.
8.2. Keine Displayausgabe
- Ensure the monitor is connected to the correct graphics output (either integrated graphics on the motherboard or a dedicated graphics card).
- Setzen Sie die Grafikkarte und die Speichermodule neu ein.
- Versuchen Sie, mit nur einem installierten Speichermodul zu booten.
- Prüfen Sie, ob der Monitor eingeschaltet und auf die richtige Eingangsquelle eingestellt ist.
8.3. Systeminstabilität / Abstürze
- Überprüfen Sie die Temperaturen von CPU und GPU, um sicherzustellen, dass sie sich innerhalb der sicheren Betriebsgrenzen befinden.
- Verify that all drivers are installed and up to date.
- Führen Sie Speicherdiagnosetools aus, um den Arbeitsspeicher auf Fehler zu überprüfen.
- Stellen Sie sicher, dass das Netzteil alle Komponenten mit ausreichend und stabiler Leistung versorgt.
9. Spezifikationen
Detailed technical specifications for the GIGABYTE GA-B150M-D3H motherboard:
| Besonderheit | Spezifikation |
|---|---|
| Modellname | GA-B150M-D3H |
| Formfaktor | Micro-ATX (24.4 cm x 22.5 cm) |
| CPU-Sockel | LGA 1151 |
| Kompatible Prozessoren | Intel Core Prozessoren der 6. Generation |
| Chipsatz | Intel B150 Express Chipsatz |
| Speichertechnologie | DDR4 |
| Memory Slots | 4 x DDR4 DIMM sockets (Dual Channel) |
| Maximale Speicherkapazität | 16 GB |
| Speichertaktfrequenz | 2133 MHz |
| PCIe-Steckplätze | 1 x PCI Express x16, 1 x Total PCIe Ports |
| Speicherschnittstellen | PCIe Gen3 x4 M.2, SATA Express, SATA 6Gb/s |
| Audio-Codec | Realtek ALC892 Codec, 8-Kanal HD-Audio |
| USB-Anschlüsse | Total 8 USB Ports (including USB 2.0) |
| Hauptstromanschluss | 24-Pin ATX |
| CPU-Stromanschluss | 8-Pin ATX 12V |
| Einzigartige Funktionen | GIGABYTE UEFI Dual BIOS, Audio Noise Guard with LED Trace Path Lighting, App Center (Easy Tune, Cloud Station) |
10. Garantie und Support
For warranty information, please refer to the warranty card included in your product package or visit the official GIGABYTE webDie Garantiebedingungen können je nach Region variieren.
For technical support, driver downloads, BIOS updates, and further product information, please visit the GIGABYTE official support webWebsite:
https://www.gigabyte.com/Support
When contacting support, please have your motherboard model (GA-B150M-D3H) and serial number ready.