Aetertek AT-918C
Aetertek AT-918C Waterproof Remote Dog Training Collar User Manual
Modell: AT-918C
Einführung
This user manual provides detailed instructions for the safe and effective use of your Aetertek AT-918C Waterproof Remote Dog Training Collar. Please read this manual thoroughly before operating the device to ensure proper functionality and the well-being of your pet. This system is designed to assist in training dogs weighing from 15 to 150 pounds, offering 9 levels of shock, 1 vibration, and 1 sound correction.
Wichtige Sicherheitsinformationen
VORSICHT!
Proper fit of the collar is crucial. A collar worn for too long or made too tight on the pet's neck may cause skin damage, often misidentified as burns. To prevent pressure necrosis and ensure your pet's safety and comfort, please follow these guidelines:
- Vermeiden Sie, dem Hund das Halsband länger als 12 Stunden pro Tag anzulegen.
- Reposition the collar on the pet's neck every 1 to 2 hours if possible.
- Überprüfen Sie den Sitz des Kragens, um übermäßigen Druck zu vermeiden. Befolgen Sie die Anweisungen in diesem Handbuch.
- Schließen Sie niemals eine Leine an das elektronische Halsband an, da dies zu starkem Druck auf die Kontakte führt.
- When using a separate collar for a lead, ensure it does not put pressure on the electronic collar.
- Wash the dog's neck area and the contacts of the collar weekly with a damp Tuch.
- Untersuchen Sie den Kontaktbereich täglich auf Anzeichen eines Ausschlags oder einer Wunde.
- Wenn Sie einen Ausschlag oder eine Wunde feststellen, verwenden Sie das Halsband nicht weiter, bis die Haut verheilt ist.
- If the condition persists beyond 48 hours, consult your veterinarian.
Diese Schritte tragen dazu bei, dass Ihr Haustier sicher und komfortabel bleibt. Millionen von Haustieren fühlen sich wohl, wenn sie Edelstahlkontakte tragen. Manche Haustiere reagieren empfindlich auf Kontaktdruck. Möglicherweise stellen Sie nach einiger Zeit fest, dass Ihr Haustier das Halsband sehr tolerant ist. In diesem Fall können Sie einige dieser Vorsichtsmaßnahmen lockern. Es ist wichtig, die täglichen Kontrollen des Kontaktbereichs fortzusetzen. Wenn Rötungen oder Wunden festgestellt werden, unterbrechen Sie die Anwendung, bis die Haut vollständig verheilt ist.
Packungsinhalt
Überprüfen Sie, ob alle Artikel in Ihrem Paket vorhanden sind:
- 1 Rechargeable Transmitter
- 1 Waterproof and Rechargeable Receiver
- 1 Adjustable Strap (8 to 26-inch long)
- 1 Set of Metal Contact Points (pre-screwed and fixed on the receiver)
- 1 Shock Test Bulb
- 1 Beutel
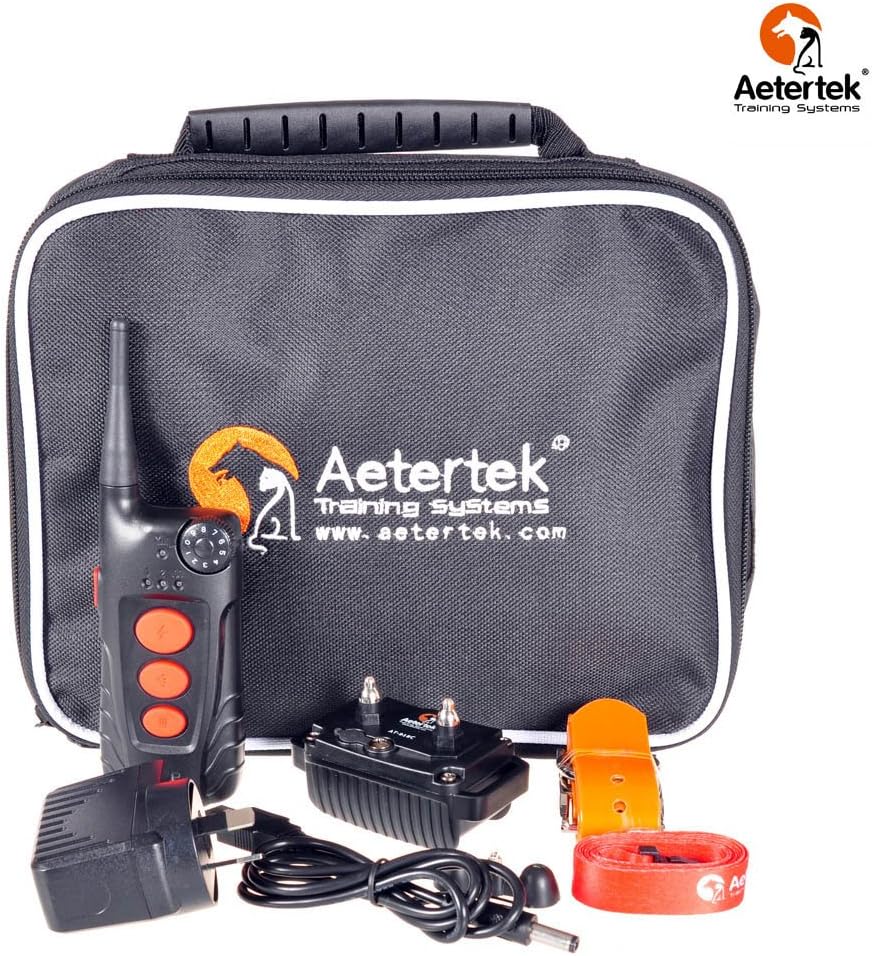
Image: Complete package contents of the Aetertek AT-918C training system, showing the remote transmitter, receiver collar, charging cables, and accessories within its storage pouch.
Produktkomponenten Überview
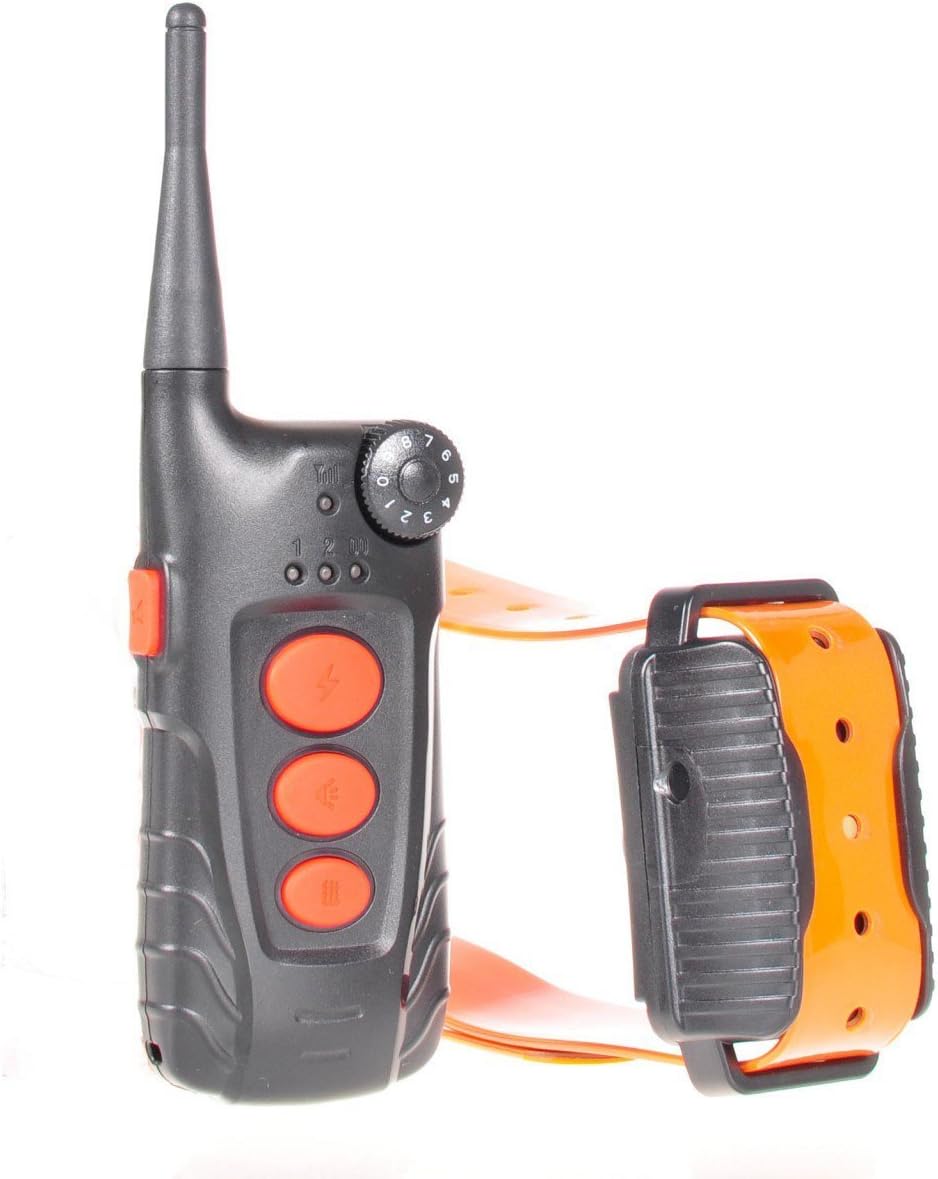
Image: The remote transmitter and the receiver collar of the AT-918C system, showcasing deren Design und relative Größe.

Image: The remote transmitter with its attached lanyard, providing a convenient way to carry the device.

Image: The receiver collar fully submerged in water, illustrating its waterproof design for use in various environments.
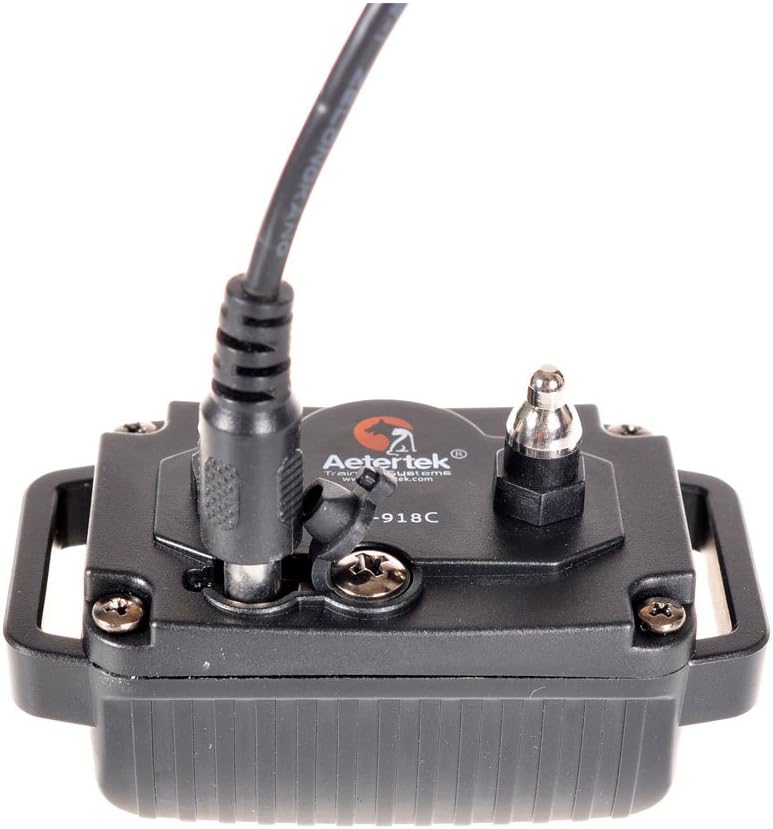
Bild: Eine detaillierte view of the receiver collar, highlighting the charging port and the metal contact points that deliver stimulation.

Image: The receiver collar attached to its adjustable orange strap, ready for fitting on a dog.
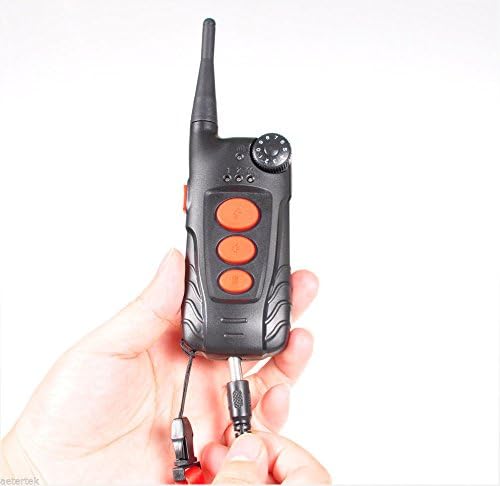
Image: A hand holding the remote transmitter, demonstrating its ergonomic design and the location of the charging port.
Installationshandbuch
1. Aufladen der Geräte
Both the transmitter and receiver are rechargeable. Fully charge both units before first use. A full charge typically takes 2-3 hours.
- Connect the charger to the charging port on the transmitter and receiver.
- Die Kontrollleuchte zeigt den Ladestatus an (z. B. rot für Ladevorgang, grün für vollständig geladen).
2. Koppeln von Sender und Empfänger
The units are usually pre-paired from the factory. If re-pairing is needed:
- Stellen Sie sicher, dass beide Geräte ausgeschaltet sind.
- Turn on the receiver by pressing and holding the power button until the indicator light flashes.
- Within 10 seconds, press and hold the power button on the transmitter until its indicator light flashes.
- Once paired, the receiver's light will stop flashing and remain solid, or indicate successful pairing.
3. Anpassen des Halsbandes
Proper fit is essential for effective and safe operation. The contact points must have direct contact with your dog's skin.
- Position the receiver on the dog's neck, centered below the chin.
- Adjust the strap so it is snug, but not too tight. You should be able to fit one finger comfortably between the strap and your dog's neck.
- Kürzen Sie bei Bedarf überschüssige Bandlänge.
Bedienungsanleitung
Senderfunktionen
The remote transmitter features dedicated buttons for each correction type, simplifying operation:
- Schocktaste: Delivers static stimulation. Use the dial on the transmitter to select from 9 levels of shock intensity. Start with the lowest level and increase gradually if needed.
- Vibrationstaste: Delivers a vibration correction. This has one intensity level.
- Signalton-Taste: Emits an audible tone. This can be used as a warning or positive reinforcement.
- Ein-/Aus-Taste: Schaltet den Sender ein oder aus.
Trainingsmodi
The AT-918C offers multiple training modes to suit various behavioral issues:
- Remote Training: Use the transmitter to deliver beep, vibration, or shock corrections as needed for specific behaviors (e.g., jumping, digging, running away).
- Automatic Bark Control: The receiver collar has a built-in automatic bark function. This feature can be turned on or off. When active, the collar will automatically deliver a correction (typically beep, then vibration, then shock if barking persists) when it detects excessive barking.
Testen der Schockfunktion
To ensure the shock function is working, use the provided test bulb:
- Place the test bulb's metal wires across the receiver's contact points.
- Press the shock button on the transmitter. The test bulb should light up, indicating the shock function is active.
Wartung und Pflege
- Reinigung: Reinigen Sie den Empfängerkragen und die Kontaktstellen regelmäßig mit einem Desinfektionsmittel.amp cloth to prevent dirt buildup and ensure proper contact with the dog's skin. Clean the dog's neck area weekly.
- Akkulaufzeit: Recharge both the transmitter and receiver when the battery indicator shows low power. Consistent charging helps maintain battery health.
- Lagerung: When not in use for extended periods, store the device in a cool, dry place. Ensure both units are fully charged before storing.
- Wassereinwirkung: While the receiver is waterproof, prolonged submersion or exposure to saltwater should be followed by rinsing with fresh water and thorough drying.
Anleitung zur Fehlerbehebung
| Problem | Mögliche Ursache | Lösung |
|---|---|---|
| Collar not working (no response) | Low battery; Not paired; Out of range; Receiver off. | Charge both units; Re-pair transmitter and receiver; Move closer to the dog; Turn on receiver. |
| Dog not responding to correction | Collar too loose; Contact points not touching skin; Intensity level too low; Dog is desensitized. | Adjust collar fit; Ensure contact points are clean; Increase intensity gradually; Re-evaluate training approach. |
| Automatic bark function not working or erratic | Feature is turned off; Collar not detecting barks properly; Malfunction. | Ensure auto bark feature is enabled; Check collar fit and position; Contact support if issue persists. |
| Reduzierte Reichweite | Umwelteinflüsse; niedriger Batteriestand. | Move to an open area; Charge both units. |
Produktspezifikationen
- Modell: AT-918C
- Marke: Aetertek
- Reichweite: Bis zu 600 Yards (ca. 550 Meter)
- Schockstufen: 9 progressive levels
- Vibration: 1 Ebene
- Signalton: 1 Ton
- Wasserdicht: 100% waterproof receiver
- Wiederaufladbar: Sowohl Sender als auch Empfänger
- Dog Size Compatibility: 15 bis 150 Pfund
- Länge des Kragenriemens: Einstellbar von 8 bis 26 Zoll
- Artikelgewicht: 5 Unzen (ca. 142 Gramm)
- Batterien: 2 Lithium-Polymer-Batterie (im Lieferumfang enthalten)
Garantie und Support
For warranty information or technical support, please refer to the contact details provided with your purchase or visit the official Aetertek webBewahren Sie Ihren Kaufbeleg als Kaufnachweis für Garantieansprüche auf.
For additional resources and training tips, you may visit www.aetertek.com (Hinweis: Dies ist ein Platzhalter) URL for demonstration purposes. Please refer to your product's actual support information).
Ask a question about this manual
Ask about setup, troubleshooting, compatibility, parts, safety, or missing instructions. Manuals+ will review the question and use this page’s manual context to help answer it.