
1. Einleitung
Thank you for choosing the WINGONEER DC 5V Brushless CPU Cooling Fan. This fan is designed to provide efficient cooling for your Raspberry Pi 3, Raspberry Pi 2 Model B, or RPI B+ to help maintain optimal operating temperatures and prevent thermal throttling. This manual provides detailed instructions for installation, operation, and troubleshooting.
2. Packungsinhalt
Bitte überprüfen Sie, ob alle Artikel in Ihrem Paket enthalten sind:
- 1 x DC 5V Brushless CPU Cooling Fan
- 4 x Befestigungsschrauben
- 4 x Nüsse
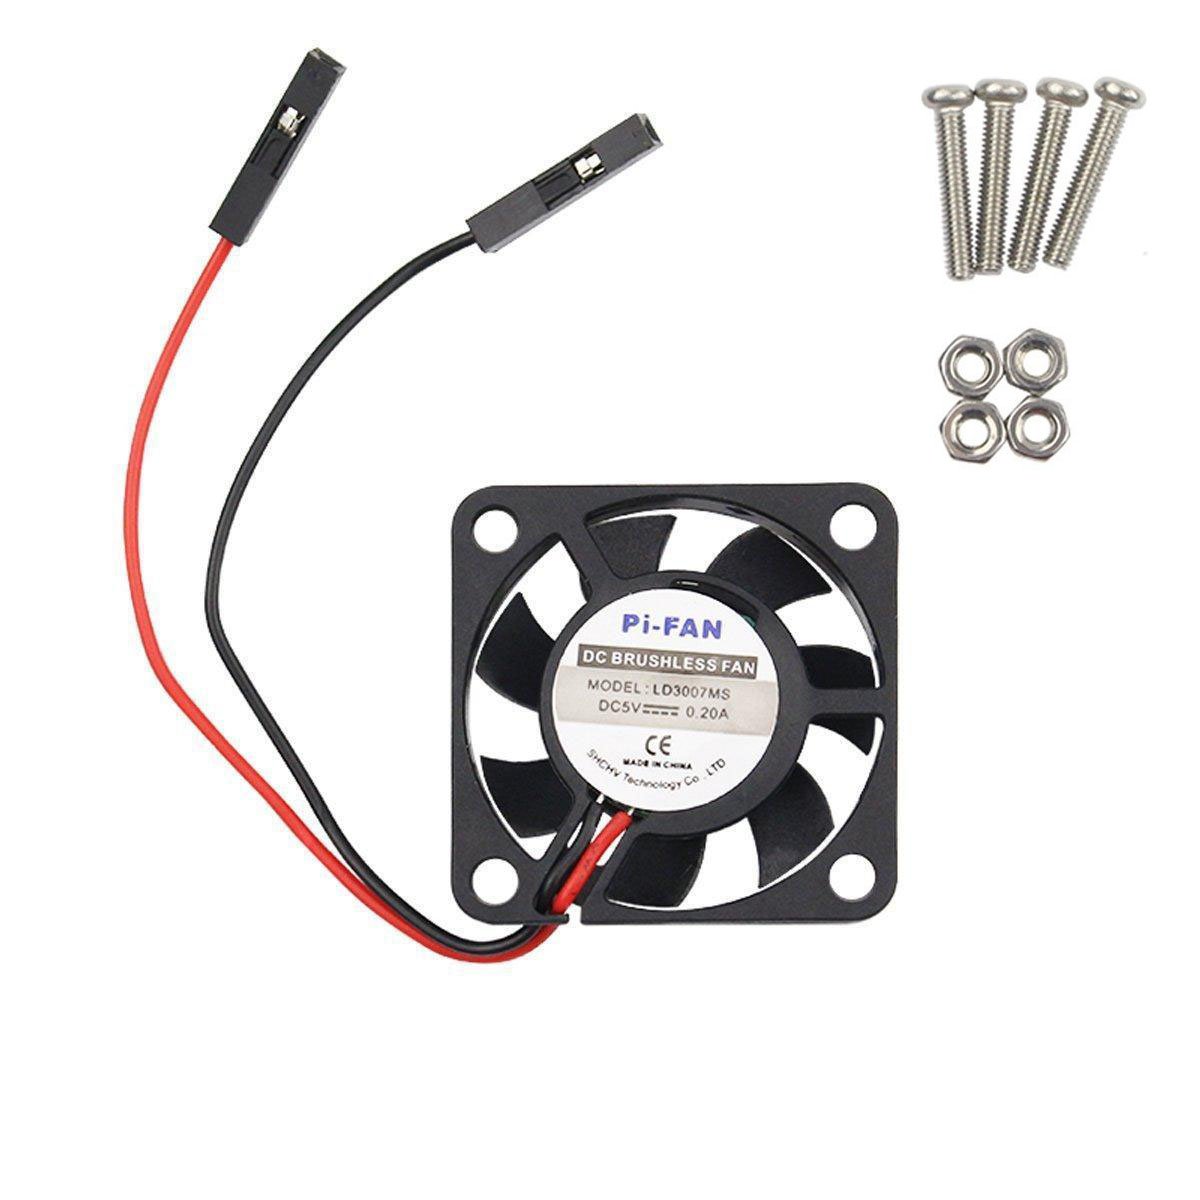
Image: The WINGONEER DC 5V Brushless CPU Cooling Fan, along with the included mounting screws and nuts.

Bild: Eine Nahaufnahme view of the four mounting screws and four nuts provided for fan installation.
3. Einrichtung und Installation
Follow these steps to install your cooling fan:
3.1. Connecting the Fan to Raspberry Pi GPIO Pins
The fan can be connected to either the 5V or 3.3V GPIO pins on your Raspberry Pi. The 5V connection provides maximum cooling but may result in higher noise levels. The 3.3V connection offers quieter operation with slightly reduced cooling performance.

Image: Schematic showing the GPIO pin locations for connecting the fan to either 5V (red circles) or 3.3V (red circles) power on the Raspberry Pi. Note indicates 5V connection may be noisier but reduces heat better.
3.1.1. 5V Connection Method
Connect the red wire of the fan to the 5V pin and the black wire to a Ground (GND) pin on your Raspberry Pi's GPIO header. Refer to the diagram for exact pin locations.

Image: Visual guide demonstrating how to connect the fan's 5V (red) and Ground (black) wires to the corresponding GPIO pins on the Raspberry Pi.
3.1.2. 3.3V Connection Method
For quieter operation, connect the red wire of the fan to the 3.3V pin and the black wire to a Ground (GND) pin on your Raspberry Pi's GPIO header. Refer to the diagram for exact pin locations.
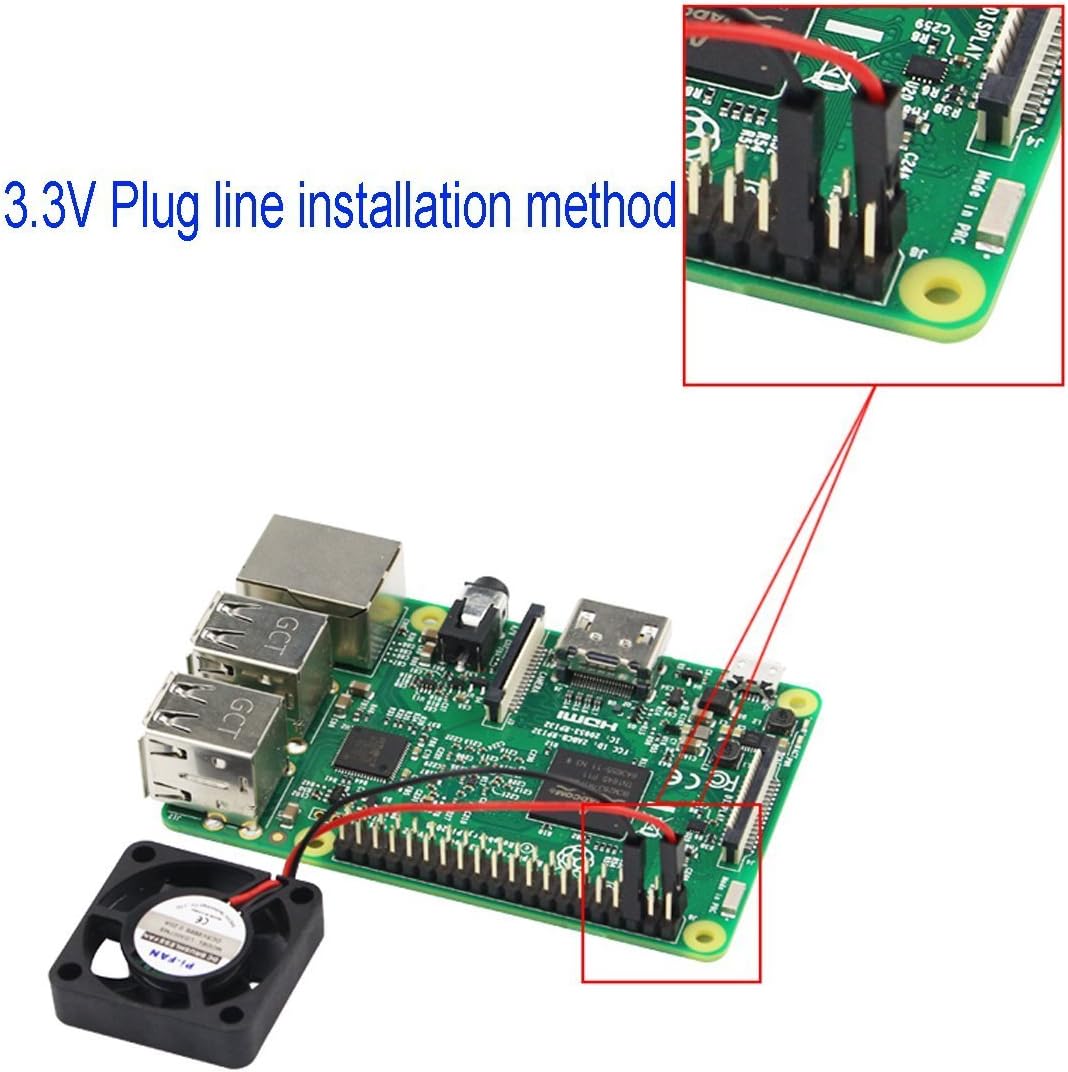
Image: Visual guide demonstrating how to connect the fan's 3.3V (red) and Ground (black) wires to the corresponding GPIO pins on the Raspberry Pi.
3.2. Montage des Lüfters
Use the provided screws and nuts to securely mount the fan to your Raspberry Pi or compatible enclosure. Ensure the fan is positioned to direct airflow over the CPU for optimal cooling.
4. Bedienung
Once installed and connected, the fan will begin operating as soon as your Raspberry Pi is powered on. No additional software or configuration is typically required for basic operation.
4.1. Geräuschpegel
The fan operates at a low noise level of approximately 25 decibels. Connecting to the 3.3V GPIO pins will result in quieter operation compared to the 5V connection, which provides maximum airflow and cooling.
5. Wartung
To ensure longevity and optimal performance of your cooling fan, consider the following maintenance tips:
- Regelmäßige Reinigung: Periodically inspect the fan blades and surrounding area for dust accumulation. Use a soft brush or compressed air to gently remove any dust.
- Inspektion: Check the fan for any signs of damage or loose connections. Ensure the mounting screws are secure.
6. Fehlerbehebung
6.1. Fan Not Spinning
- Verbindungen prüfen: Ensure the red and black wires are securely connected to the correct GPIO pins (5V or 3.3V and GND).
- Stromversorgung: Verify that your Raspberry Pi is receiving adequate power.
- Hindernisse: Prüfen Sie, ob irgendwelche physischen Hindernisse die Drehung der Lüfterflügel verhindern.
6.2. Übermäßiger Lärm
- 3.3V Anschluss: If connected to 5V, try switching to the 3.3V GPIO pins for reduced noise.
- Montage: Ensure the fan is securely mounted and not vibrating against any surfaces. Loose screws can cause noise.
- Staub: Entfernen Sie jeglichen Staub von den Lüfterflügeln.
6.3. Insufficient Cooling
- 5V Anschluss: Ensure the fan is connected to the 5V GPIO pins for maximum cooling performance.
- Luftstrombehinderung: Check that there are no obstructions blocking the fan's airflow to and from the Raspberry Pi's CPU.
- Thermal Paste/Pads: If using a case, ensure proper thermal paste or pads are applied between the Raspberry Pi's CPU/RAM and any heatsinks or the case itself (if applicable).
7. Spezifikationen
| Besonderheit | Spezifikation |
|---|---|
| Marke | WINGONEER |
| Modell | B01M16KDEG |
| Technische Daten | 1.18"L x 0.28"B x 1.18"H (ca. 30 mm x 7 mm x 30 mm) |
| Typ des Stromanschlusses | 2-polig |
| Bandtage | 5 Volt |
| Kühlmethode | Luft |
| Kompatible Geräte | Raspberry Pi 3, Raspberry Pi 2 Model B, RPI B+ |
| Geräuschpegel | 25 Dezibel |
| Material | Plastik |
| Maximale Drehzahl | 9000 U/min |
| Gewicht | Ca. 6.0g |

Image: The WINGONEER cooling fan displayed on a digital scale, indicating a weight of 6.0 grams.
8. Garantie und Support
Informationen zur Garantie und zum technischen Support finden Sie auf der offiziellen Website des Herstellers. webBesuchen Sie die Website oder kontaktieren Sie direkt den Kundenservice. Bewahren Sie Ihren Kaufbeleg für eventuelle Garantieansprüche auf.