
Einführung
Vielen Dank für Ihren Einkauf.asing the Crofton KHC617D Halogen Oven. This versatile appliance utilizes halogen heating technology to cook food efficiently and healthily. Please read this instruction manual thoroughly before first use to ensure safe operation and optimal performance. Keep this manual for future reference.
Wichtige Sicherheitshinweise
- Stellen Sie stets sicher, dass das Gerät auf einer stabilen, hitzebeständigen Oberfläche steht.
- Do not immerse the power unit, cord, or plug in water or any other liquid.
- Halten Sie Kinder und Haustiere während des Betriebs vom Gerät fern.
- Heiße Oberflächen nicht berühren. Ofenhandschuhe oder Griffe verwenden.
- Ziehen Sie den Stecker aus der Steckdose, wenn Sie das Gerät nicht benutzen und bevor Sie es reinigen.
- Betreiben Sie das Gerät nicht mit einem beschädigten Kabel oder Stecker oder nachdem das Gerät eine Fehlfunktion aufweist oder in irgendeiner Weise beschädigt wurde.
- Sorgen Sie während des Gebrauchs für ausreichende Belüftung rund um den Ofen.
- Lassen Sie das Gerät während des Betriebs niemals unbeaufsichtigt.
Produkt überview
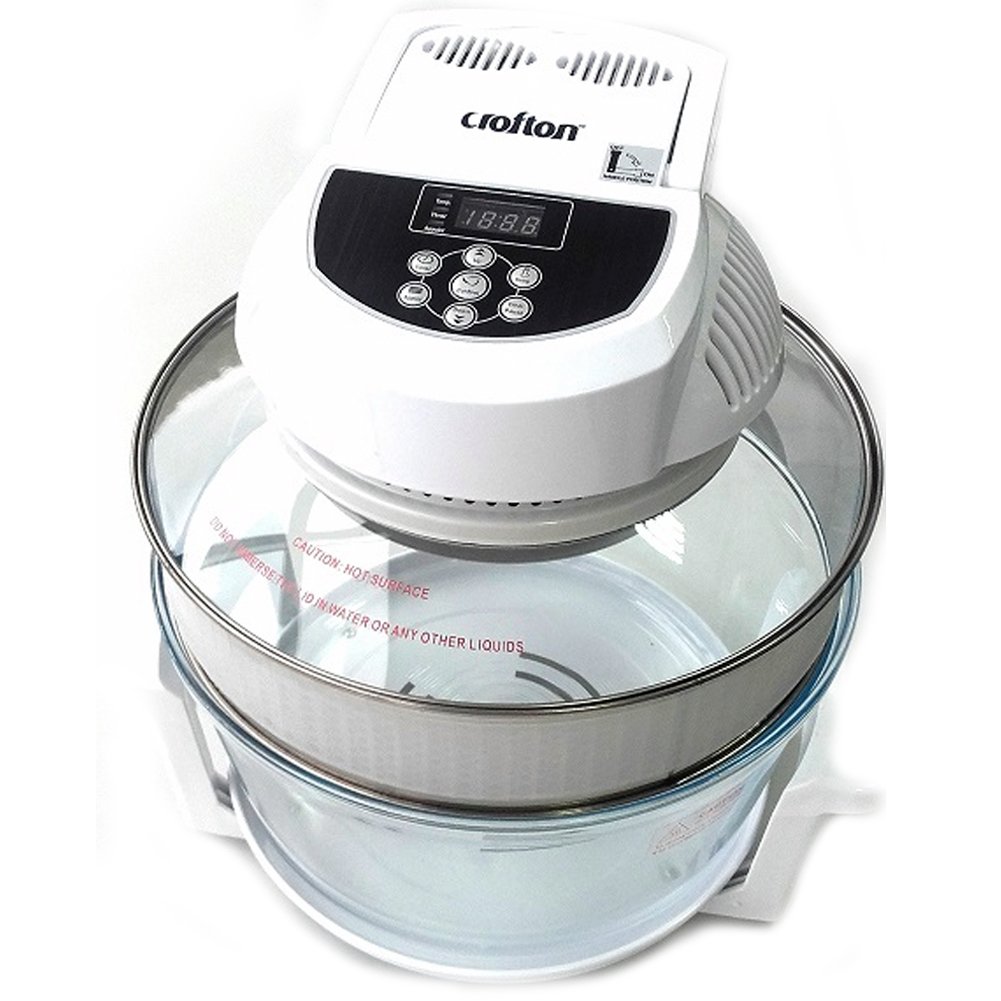
Bedienfeld
The digital control panel allows for precise adjustment of cooking time and temperature.
Mitgeliefertes Zubehör
- Extension Ring: Increases the oven's capacity for larger items.
- High Rack & Low Rack: For cooking different types of food simultaneously or at varying distances from the heating element.
- Lifting Tongs: For safely handling hot racks and food.


Aufstellen
- Auspacken: Entfernen Sie vorsichtig sämtliches Verpackungsmaterial und Zubehör aus dem Karton.
- Erstreinigung: Before first use, wash the glass bowl, racks, and other accessories in warm, soapy water. Wipe the exterior of the lid with a damp Tuch. Stellen Sie sicher, dass alle Teile vor der Montage vollständig trocken sind.
- Platzierung: Place the glass bowl on a stable, heat-resistant surface. Ensure there is sufficient space around the oven for ventilation.
- Platzierung des Deckels: Carefully place the lid onto the glass bowl. Ensure the handle is in the 'OFF' position before plugging in.
Bedienungsanleitung
Grundlegende Bedienung
- Essen zubereiten: Place food on the appropriate rack (high or low) inside the glass bowl. If using the extension ring, place it on top of the glass bowl before placing the lid.
- Deckel schließen: Ensure the lid is securely placed on the glass bowl or extension ring.
- Einschalten: Plug the oven into a suitable electrical outlet. Move the handle to the 'ON' position. The digital display will illuminate.
- Temperatur einstellen: Press the 'Temp' button. Use the 'Up' and 'Down' arrows to adjust the desired cooking temperature (60°C to 250°C). Press 'Confirm' to set.
- Zeit einstellen: Press the 'Timer' button. Use the 'Up' and 'Down' arrows to adjust the desired cooking time (0 to 60 minutes). Press 'Confirm' to set.
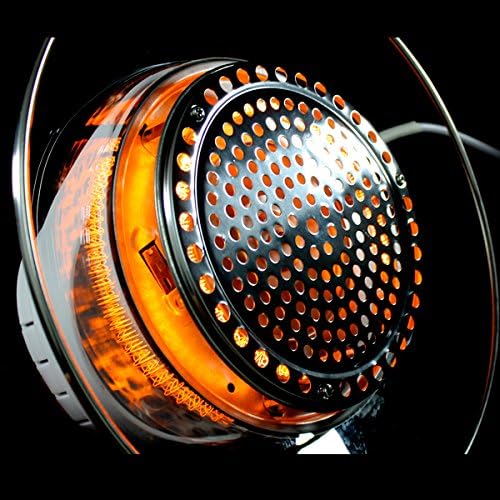
- Beginnen Sie mit dem Kochen: The oven will begin cooking automatically after confirming the time and temperature. The heating element will glow, and the fan will operate.
- Pause/Clear: During operation, press 'Clear/Pause' to temporarily stop cooking. Press again to resume. To clear settings, hold 'Clear/Pause'.
- Kochen beenden: Once the set time expires, the oven will beep and stop heating. Move the handle to the 'OFF' position and unplug the appliance. Carefully remove food using oven mitts and lifting tongs.
Kochfunktionen
The Crofton KHC617D is suitable for a variety of cooking methods:
- Braten: Ideal für Fleisch und Gemüse.
- Backen: Suitable for cakes, pastries, and bread.
- Braten: Achieves crispy results with less oil.
- Grillen: Perfect for steaks, chicken, and fish.
- Dämpfen: Use with a steaming rack and a small amount of water in the bottom of the bowl.
- Auftauen: Taut gefrorene Lebensmittel schonend auf.
- Grill: Simulates barbecue cooking for certain foods.
Wartung und Reinigung
- Stecker ziehen und abkühlen lassen: Vor der Reinigung muss der Backofen immer vom Stromnetz getrennt und vollständig abgekühlt sein.
- Glass Bowl and Accessories: The glass bowl, racks, and other removable accessories are dishwasher safe. Alternatively, wash them in warm, soapy water and rinse thoroughly.
- Lid (Heating Unit): Wischen Sie die Außenseite des Deckels mit einem Tuch ab.amp cloth. Do not immerse the lid in water or spray it with liquids. For stubborn food residue on the inside of the lid (around the heating element), use a damp cloth and a mild, non-abrasive cleaner. Ensure no liquid enters the electrical components.
- Self-Cleaning Function (if applicable): Some models may have a self-cleaning function. If available, add a small amount of water and detergent to the glass bowl, set the temperature to 100°C, and run for 10-15 minutes. Then, wipe clean.
- Lagerung: Bewahren Sie den sauberen und trockenen Ofen an einem kühlen, trockenen Ort auf.
Fehlerbehebung
| Problem | Mögliche Ursache | Lösung |
|---|---|---|
| Der Ofen lässt sich nicht einschalten. | Not plugged in; Handle in 'OFF' position; Power outage. | Ensure plug is securely in outlet; Move handle to 'ON'; Check household power supply. |
| Heating element not glowing. | Temperature not set; Timer not set; Overheating protection activated. | Set desired temperature and time; Allow oven to cool down if it was recently used. |
| Das Essen gart nicht gleichmäßig. | Food overloaded; Racks incorrectly placed; Uneven food distribution. | Do not overload the oven; Ensure food is spread out; Turn food halfway through cooking. |
| Rauch oder ungewöhnlicher Geruch beim Kochen. | Food residue; Excessive fat/oil; First use odor. | Clean the oven thoroughly; Use less oil or trim fat; Initial odors are normal and will dissipate. |
Technische Daten
- Modell: KHC617D
- Leistung: 1200-1400 Watt
- Bandtage: 220-240 V ~ 50 Hz
- Kapazität: 12 Liters (expandable with extension ring)
- Temperaturbereich: 60 °C - 250 °C
- Timer: 0 - 60 Minuten
- Material: Alloy Steel, Heat-resistant Glass
- Abmessungen (montiert): Ca. 40 cm (B) x 33 cm (T) x 20 cm (H)
Garantie und Support
For warranty information or technical support, please refer to the warranty card included with your purchase or contact your retailer. Keep your proof of purchase for any warranty claims.