
Einführung
Welcome to the user manual for your Fuvision 16GB 1080P HD Spy Pen Camera Video Recorder. This manual provides detailed instructions on how to set up, operate, and maintain your device. Please read it carefully to ensure proper usage and to maximize the product's functionality.
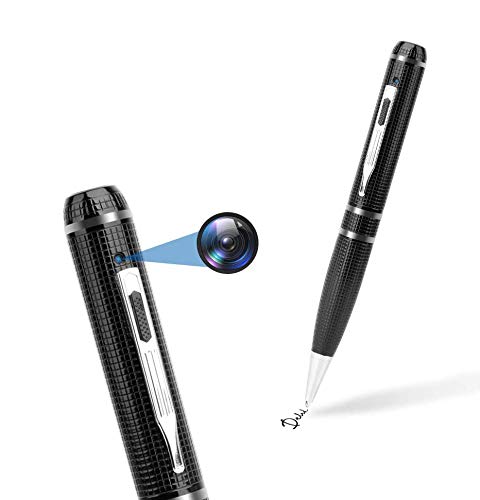
An image showing the Fuvision 16GB 1080P HD Spy Pen Camera, highlighting its discreet design as a functional writing pen.

A person holding the Fuvision Spy Pen Camera, illustrating how its design allows it to be discreetly used as a regular pen.
Packungsinhalt
Bitte überprüfen Sie, ob alle folgenden Artikel in Ihrem Paket enthalten sind:
- Fuvision 16GB 1080P HD Spy Pen Camera
- USB-Daten-/Ladekabel
- 3 x Pen Refills
- Benutzerhandbuch (dieses Dokument)
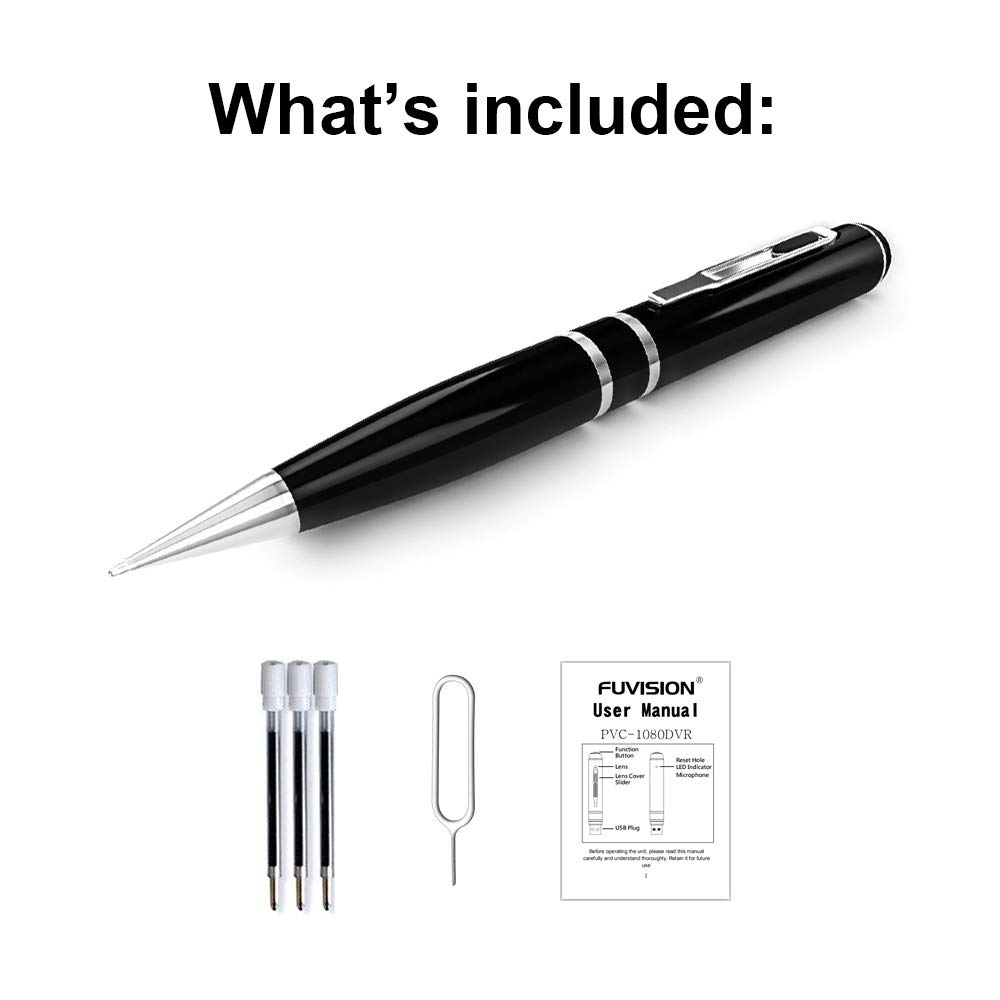
An image displaying all items included in the package: the Fuvision Spy Pen Camera, three ink refills, a USB data/charging cable, and a printed user manual.
Produkt überview und Komponenten
Familiarize yourself with the various parts of your Fuvision Spy Pen Camera:

A detailed diagram of the Fuvision Spy Pen Camera, pointing out key components such as the Reset Hole, LED Indicator, USB Plug, Function Button, Lens Cover Slider, and the Camera Lens.

Another diagram illustrating the Fuvision Spy Pen Camera's features, including the ON/OFF button, USB port, HD camera location, and the functional ball-point pen tip.
- Funktionstaste: Used for powering on/off, starting/stopping recording, and switching modes.
- Kameraobjektiv: The hidden lens for video and photo capture.
- LED-Anzeige: Provides status feedback (power, recording, photo mode).
- USB-Stecker: Located at the top, used for charging and data transfer.
- Loch zurücksetzen: For resetting the device if it becomes unresponsive.
- Ball-Point Pen: Fully functional writing pen.
Aufstellen
1. Aufladen des Geräts
Before first use, fully charge the pen camera. Connect the USB plug of the pen to a computer's USB port or a 5V DC USB wall adapter using the provided USB cable. The charging time is approximately 4 hours. The LED indicator will show charging status (specific LED behavior for charging is not detailed, assume it turns off or changes color when fully charged).
2. Erstes Einschalten
After charging, the device is ready for use. The pen has a built-in 16GB memory, so no external memory card installation is required.
Bedienungsanleitung
1. Ein- und Ausschalten
- So schalten Sie das Gerät ein: Press and hold the Function Button on the top for a few seconds until the LED lights up. It will flash purple a few times, then turn off. This indicates the device has started recording. The LED is off during recording to maintain discretion.
- So schalten Sie das Gerät aus: Press and hold the Function Button for a few seconds until the LED flashes purple a few times, then turns off completely.
2. Video Recording Mode
- Aufnahme starten: When the device is powered on, it automatically begins recording video. The LED will flash purple a few times and then turn off, indicating active recording.
- Aufnahme beenden: Press the Function Button once quickly. The recording will stop, and a red LED will turn on, indicating the pen is in STANDBY mode.
- Loop-Aufnahme: The device supports loop recording, which means it will automatically overwrite the oldest files wenn der Speicher voll ist.
3. Fotomodus
- Switching to Photo Mode: From STANDBY mode (red LED on), double-click the Function Button. The red LED will change to blue, indicating the device is now in Photo Mode.
- Ein Foto machen: In Photo Mode (blue LED on), press the Function Button once. The purple light will blink a few times to confirm a photo has been taken.
- Exiting Photo Mode: Double-click the Function Button again. The device will return to STANDBY mode (red LED on).
4. Anschließen an einen Computer
To transfer recorded videos and photos, connect the pen camera to your computer using the provided USB cable. The device will appear as a removable disk drive. It is compatible with Windows XP/2003/Windows7/8/10 and Apple Mac OS X - 10.7 operating systems.
Wartung
1. Allgemeine Pflege
- Vermeiden Sie es, das Gerät fallen zu lassen oder starken Stößen auszusetzen.
- Halten Sie das Gerät von Wasser, Feuchtigkeit und extremen Temperaturen fern.
- Store the pen in a cool, dry place when not in use.
2. Reinigung
Use a soft, dry cloth to clean the exterior of the pen. Do not use liquid cleaners or solvents, as they may damage the device.
Fehlerbehebung
Häufige Probleme und Lösungen:
- Gerät lässt sich nicht einschalten: Ensure the battery is fully charged. Connect to a power source and charge for 4 hours.
- Aufnahme startet nicht: Check if the device is powered on correctly (LED flashes purple then turns off). Ensure the battery has sufficient charge.
- Verbindung zum Computer kann nicht hergestellt werden: Try a different USB port or a different computer. Ensure the USB cable is securely connected.
- Gerät reagiert nicht: Locate the Reset Hole (refer to Product Overview) and gently press it with a thin object (like a paperclip) to reset the device.
Technische Daten
Detailed technical specifications for the Fuvision 16GB 1080P HD Spy Pen Camera:

Ein Bild zeigtasing the clear video quality produced by the Fuvision Spy Pen Camera, indicating its 1080P Full HD resolution with still shot functionality.
| Videoauflösung | 1080P (1920x1080) @ 30fps |
| Fotoauflösung | JPG 4032x3024 |
| Pixel | 2.0 Mega Pixel CMOS |
| Interner Speicher | 16 GB |
| Akkulaufzeit | Ungefähr 120 Minuten ununterbrochene Aufnahme |
| Aufnahmemodi | Continuous record, Loop Recording |
| Videoformat | AVI |
| USB-Schnittstelle | 2.0 |
| Ladevolumentage | DC-5V (500mA) |
| Ladezeit | Ungefähr 4 Stunden |
| View Winkel | 65° |
| Betriebssystemkompatibilität | Windows XP/2003/Windows7/8/10, Apple Mac OS X - 10.7 and above |
| Maße | 155 × 14.5 × 14.5 mm (6.1 × 0.57 × 0.57 Zoll) |
| Artikelgewicht | 100 g (0.22 Pfund) |
| Stromquelle | Batteriebetrieben (1 Lithium-Ionen-Akku im Lieferumfang enthalten) |
| Empfohlene Verwendung | Motion Detection (feature mentioned in product details, but not detailed in operation) |
Wichtige Sicherheitsinformationen
- Versuchen Sie nicht, das Gerät zu zerlegen oder zu modifizieren.
- Außerhalb der Reichweite von Kindern aufbewahren.
- Entsorgen Sie die Batterie gemäß den örtlichen Vorschriften.
- Verwenden Sie zum Laden und zur Datenübertragung ausschließlich das mitgelieferte USB-Kabel.