
1. Einleitung
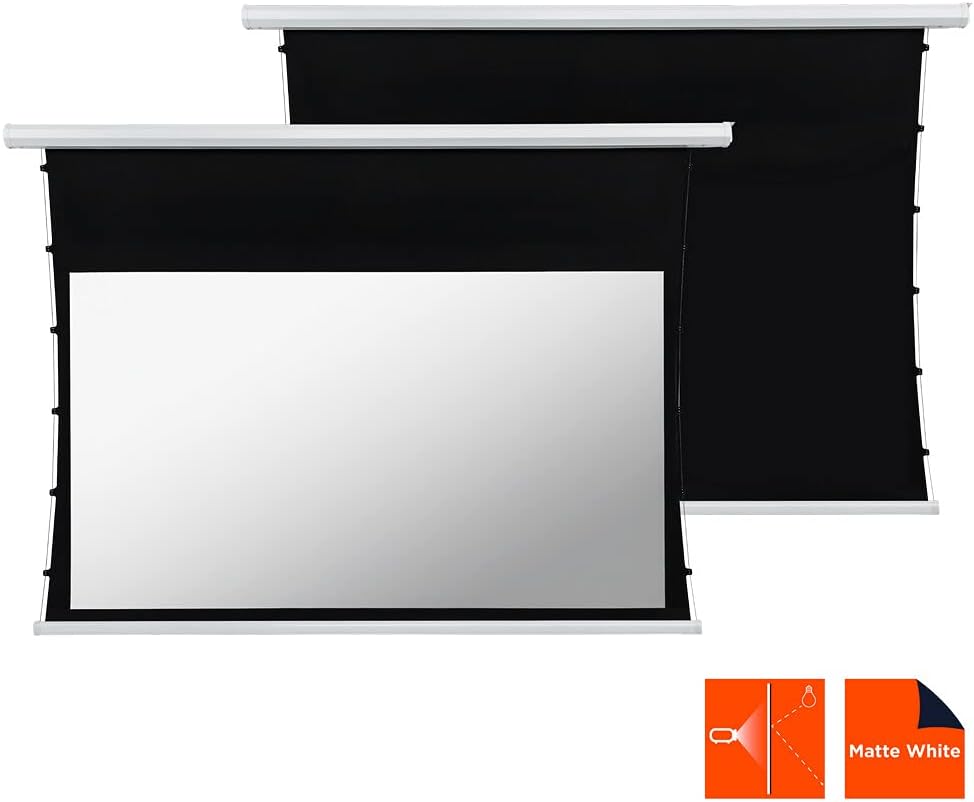
This manual provides comprehensive instructions for the installation, operation, and maintenance of your celexon Basic Motorized and Tensioned Projection Screen. Designed for optimal visual performance, this screen features a unique cord tension system that ensures a consistently flat and smooth projection surface, even after extended use. It is compatible with both 3D and 4K content, offering a superior viewing experience for home cinema, presentations, and more. The screen's black backing and black drop enhance contrast, delivering vibrant and sharp images.
2. Sicherheitshinweise
- Lesen Sie vor Installation und Betrieb alle Anweisungen sorgfältig durch.
- Stellen Sie sicher, dass das Netzteil mit der Lautstärke übereinstimmttagDie auf dem Produktetikett angegebenen Anforderungen.
- Do not attempt to disassemble or repair the screen yourself. Refer all servicing to qualified personnel.
- Keep the screen away from direct sunlight, heat sources, and moisture.
- Ensure the mounting surface is strong enough to support the weight of the screen.
- Keep children and pets away from the screen during operation to prevent accidents.
- Avoid touching the screen surface with sharp objects or abrasive materials.
3. Packungsinhalt
Bitte prüfen Sie das Paket auf folgende Artikel:
- celexon Basic Motorized and Tensioned Projection Screen
- Fernbedienung
- Montagezubehör (Schrauben, Dübel, Halterungen)
- Stromkabel
- Benutzerhandbuch (dieses Dokument)
If any items are missing or damaged, please contact celexon customer support.
4. Einrichtung und Installation
The celexon Basic Motorized and Tensioned Projection Screen is designed for both wall and ceiling mounting. Follow these steps for a secure installation.
4.1 Screen Dimensions
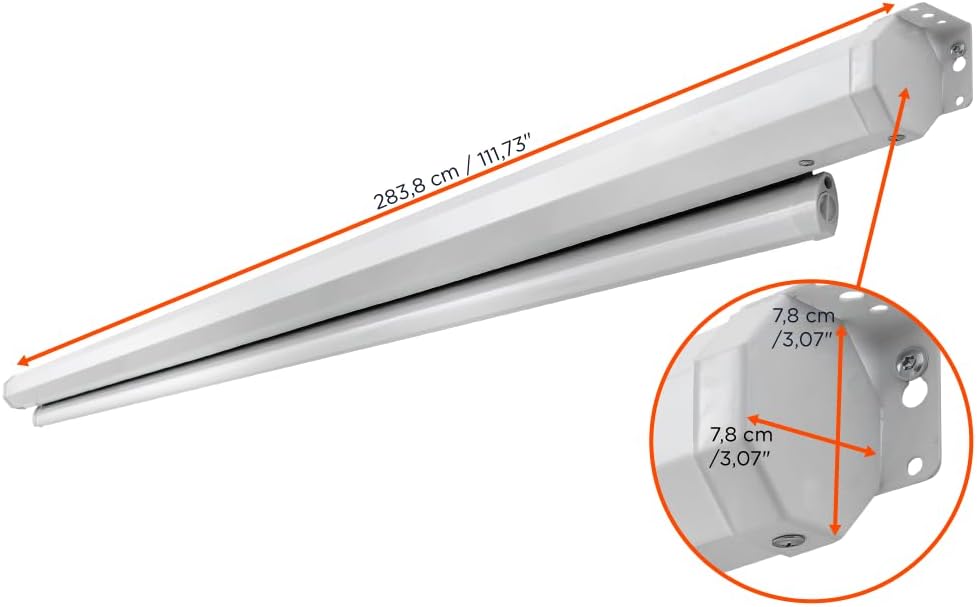
The screen features a usable surface area of 240 x 135 cm (108 inches diagonal) with a 16:9 aspect ratio. The overall casing dimensions are approximately 275.9 cm (length) x 8 cm (height) x 11 cm (depth).


4.2 Montageanleitung
- Ort wählen: Select a suitable location on a wall or ceiling that can safely support the screen's weight (approximately 12.8 kg / 28.21 lbs). Ensure there are no electrical wires or pipes behind the drilling points.
- Bohrpunkte markieren: Using the provided mounting brackets as a template, mark the drilling points on the wall or ceiling. Ensure the points are level and correctly spaced.
- Bohrlöcher: Drill holes at the marked points using an appropriate drill bit for your wall/ceiling material. Insert wall anchors if necessary.
- Klammern anbringen: Securely fasten the mounting brackets to the wall or ceiling using the provided screws.
- Bildschirm montieren: Carefully lift the screen and attach it to the installed mounting brackets. Ensure it clicks securely into place.
- Strom anschließen: Plug the power cable into the screen's power input and then into a suitable power outlet.
5. Bedienungsanleitung
Your celexon motorized screen is operated via the included remote control.

- Bildschirm erweitern: Drücken Sie die RUNTER button on the remote control to lower the screen. The screen will automatically stop when fully extended.
- Bildschirm einfahren: Drücken Sie die UP button on the remote control to raise the screen. The screen will automatically stop when fully retracted.
- Stoppbildschirm: Drücken Sie die STOPPEN button on the remote control to halt the screen at any desired position.
The integrated cord tension system ensures that the screen surface remains optimally flat and balanced during extension and retraction, providing a consistently smooth projection area.
6. Wartung
- Reinigung der Bildschirmoberfläche: Verwenden Sie ein weiches,amp cloth with mild soap and water to gently clean the screen surface. Do not use abrasive cleaners, solvents, or harsh chemicals, as these can damage the screen material. Allow the screen to air dry completely before retracting.
- Reinigung des Casing: Wischen Sie den Bildschirm ab.asing mit einem trockenen oder leicht damp Tuch, um Staub zu entfernen.
- Motorpflege: The motor is maintenance-free. Avoid obstructing the screen's movement or forcing it manually.
- Lagerung: When not in use for extended periods, ensure the screen is fully retracted and stored in a dry, dust-free environment.
7. Fehlerbehebung
| Problem | Mögliche Ursache | Lösung |
|---|---|---|
| Der Bildschirm reagiert nicht auf die Fernbedienung. |
|
|
| Screen stops midway or moves erratically. |
|
|
| Screen surface appears wrinkled or uneven. |
|
|
8. Spezifikationen
| Besonderheit | Detail |
|---|---|
| Marke | celexon |
| Modell | Basic Motorized and Tensioned Screen |
| Bildschirmabmessungen (B x H) | 240 x 135 cm |
| Diagonale Größe | 108 Zoll |
| Seitenverhältnis | 16:9 |
| Produktabmessungen (L x H) | 2.76m x 0.08m (casing) |
| Material | Polyester (screen surface) |
| Beschreibung der Bildschirmoberfläche | Mattweiß |
| Gewinnen | 0.9 |
| Viewing-Winkel | 150° |
| Montagetyp | Wand- oder Deckenmontage |
| Kompatibilität | 3D and 4K UHD |

9. Garantie und Support
celexon products are manufactured to high quality standards. For information regarding warranty coverage and terms, please refer to the warranty card included with your product or visit the official celexon website. If you encounter any issues or require technical assistance, please contact celexon customer support through their official channels. Please have your product model and purchase details ready when contacting support.