
1. Einleitung
This manual provides instructions for the installation, operation, and maintenance of your FreedConn TCOM VB Bluetooth Motorcycle Intercom. Please read this manual thoroughly before use to ensure proper functionality and safety.
2. Hauptmerkmale
- Bluetooth V5.0 for stable connectivity.
- Intercom communication for 2-3 riders with an 800m range.
- Universal pairing with most Bluetooth headsets.
- Hands-free calling for mobile phones.
- Stereo music playback and music sharing with a passenger.
- Eingebautes UKW-Radio.
- CVC noise reduction technology for clear audio.
- IP65 wasserdichte Bewertung.
- LCD screen for easy information display.
- Long battery life: up to 10 hours talk time, 7 hours intercom, 300 hours standby.

Bild: Überview of FreedConn TCOM VB Intercom key features.
3. Packungsinhalt
Überprüfen Sie, ob alle Artikel in Ihrem Paket vorhanden sind:
- TCOM-VB Main Unit (x2 for this package)
- Boom Microphone / Button Microphone (x2 sets)
- Speaker Pads (x12)
- Clip Bracket (x2)
- 3M Adhesive Mount (x2)
- Inbusschlüssel (x2)
- USB-Datenkabel (x2)
- Benutzerhandbuch (x1)

Image: Contents of the FreedConn TCOM VB package.
4. Einrichtung und Installation
4.1 Montage der Gegensprechanlage
The TCOM VB unit can be mounted using either the clip bracket or the adhesive mount.
- Ort wählen: Select a suitable flat surface on the left side of your helmet.
- Montage der Cliphalterung:
- Lösen Sie die Schrauben an der Klemmhalterung.
- Slide the bracket between the helmet shell and the inner padding.
- Ziehen Sie die Schrauben fest, um die Halterung zu befestigen.
- Montage der Klebehalterung:
- Clean the helmet surface thoroughly.
- Peel off the protective film from the 3M adhesive mount.
- Drücken Sie die Halterung mindestens 30 Sekunden lang fest auf die Helmoberfläche. Lassen Sie den Klebstoff vor der Verwendung 24 Stunden aushärten.
- Haupteinheit anschließen: Slide the TCOM VB main unit onto the installed bracket until it clicks into place.
4.2 Installation von Lautsprecher und Mikrofon
Montieren Sie die Lautsprecher und das Mikrofon im Inneren Ihres Helms.
- Lautsprecherplatzierung: Attach the speakers to the inside of the helmet, aligning them with your ears. Use the provided speaker pads for comfort and optimal sound.
- Mikrofonauswahl: Choose between the boom microphone (for open-face helmets) or the button microphone (for full-face helmets).
- Platzierung des Mikrofons: Position the microphone close to your mouth for clear voice transmission.
- Kabel anschließen: Plug the speaker and microphone cables into the corresponding ports on the TCOM VB main unit.

Image: Hard and soft cable microphone options for helmet installation.
Image: Step-by-step installation guide for the intercom unit.
5. Bedienungsanleitung
5.1 Ein-/Ausschalten
- Einschalten: Press and hold the Power button for approximately 3 seconds until the blue indicator light flashes.
- Ausschalten: Press and hold the Power button for approximately 3 seconds until the red indicator light flashes and the unit powers down.
5.2 Bluetooth-Kopplung (Telefon/GPS)
To connect your TCOM VB to a mobile phone or GPS device:
- Ensure the TCOM VB unit is powered off.
- Press and hold the Power button for approximately 5-7 seconds until the red and blue indicator lights flash alternately. This indicates pairing mode.
- Aktivieren Sie Bluetooth auf Ihrem Smartphone oder GPS-Gerät und suchen Sie nach neuen Geräten.
- Select "FreedConn TCOM VB" from the list of available devices.
- Geben Sie bei Aufforderung die PIN „0000“ ein.
- Once paired, the blue indicator light will flash slowly.

Image: Bluetooth pairing with smartphone and GPS.
5.3 Intercom-Kopplung und Kommunikation
The TCOM VB supports intercom communication for up to 3 riders, with 2 riders communicating simultaneously.
- Pairing Two Units (A & B):
- Ensure both units A and B are powered off.
- Press and hold the Power button on both units A and B simultaneously for 5-7 seconds until they enter pairing mode (red and blue lights flash alternately).
- Press the Power button on either unit A or B once. The units will search and pair with each other. Once paired, the blue light will flash slowly on both.
- Pairing Three Units (A, B, & C):
- First, pair units A and B as described above. Turn off both A and B after successful pairing.
- Next, pair units B and C. Turn off both B and C after successful pairing.
- To initiate a 3-way intercom: Power on all three units. Press the Power button on unit C once to connect to B. Then, press the Power button on unit B once to connect to A. All three units should now be connected.
- Initiate Intercom Call: After pairing, a short press of the Power button will initiate or end an intercom call.
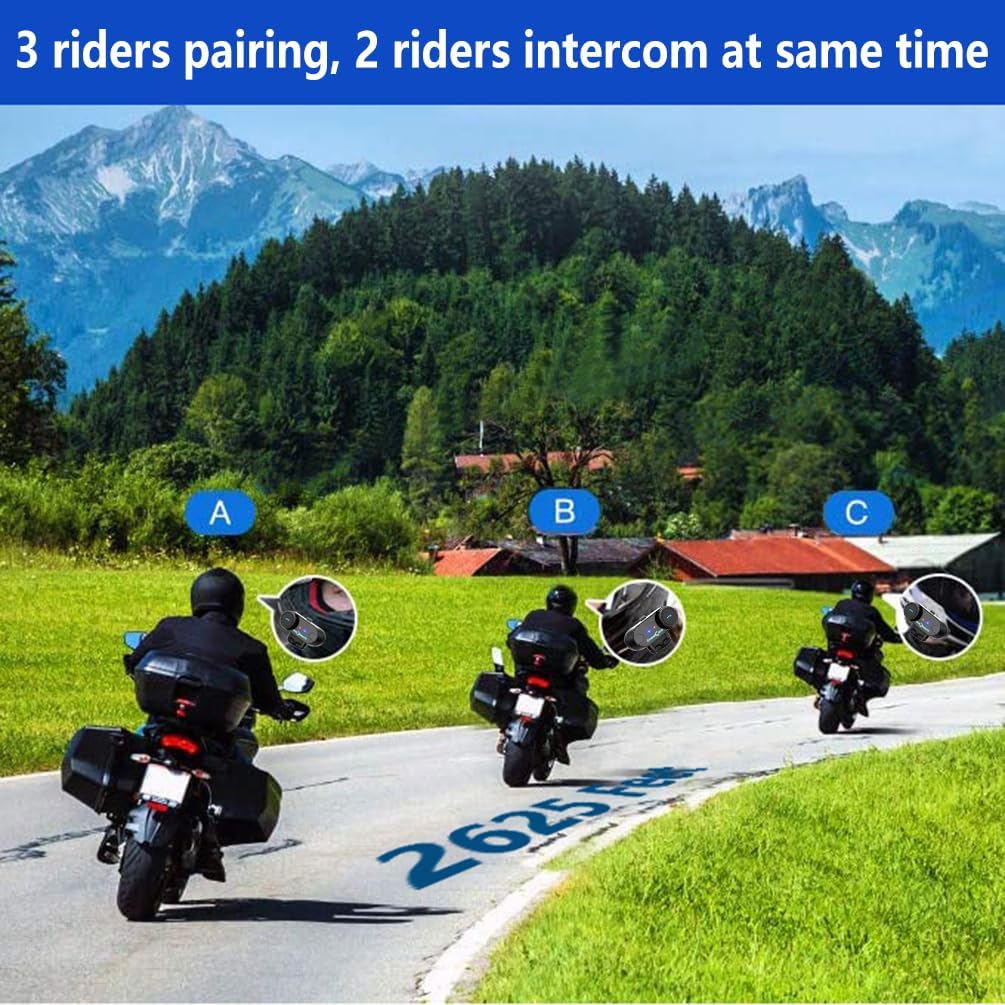
Image: 3 riders pairing, 2 riders intercom at the same time.

Image: Universal pairing feature.
Video: This video demonstrates the pairing process for three T-COMSC intercom units. The pairing steps are generally similar for TCOM VB models. First, pair two devices (A and B), then turn them off. Next, pair device B with device C. Finally, power on all three and initiate connections from C to B, then B to A for a three-way intercom.
5.4 Telefonfunktionen
- Anruf annehmen: Drücken Sie kurz die Telefontaste.
- Anruf beenden: Drücken Sie kurz die Telefontaste.
- Anruf ablehnen: Halten Sie die Telefontaste 2 Sekunden lang gedrückt.
- Wahlwiederholung letzte Nummer: Drücken Sie zweimal die Telefontaste.
- Voice Assistant (Siri/S-Voice): Short press the Voice Assistant button (if available) or a specific button combination as per your device's manual.
5.5 Musikwiedergabe
- Abspielen/Pause: Drücken Sie kurz die Play/Pause-Taste.
- Nächster Titel: Short press the "Next" button or rotate the multi-function knob clockwise.
- Vorheriges Lied: Short press the "Previous" button or rotate the multi-function knob counter-clockwise.
- Musik teilen: While playing music, activate the music sharing function (refer to specific button combination in the full manual) to share audio with a paired intercom unit.
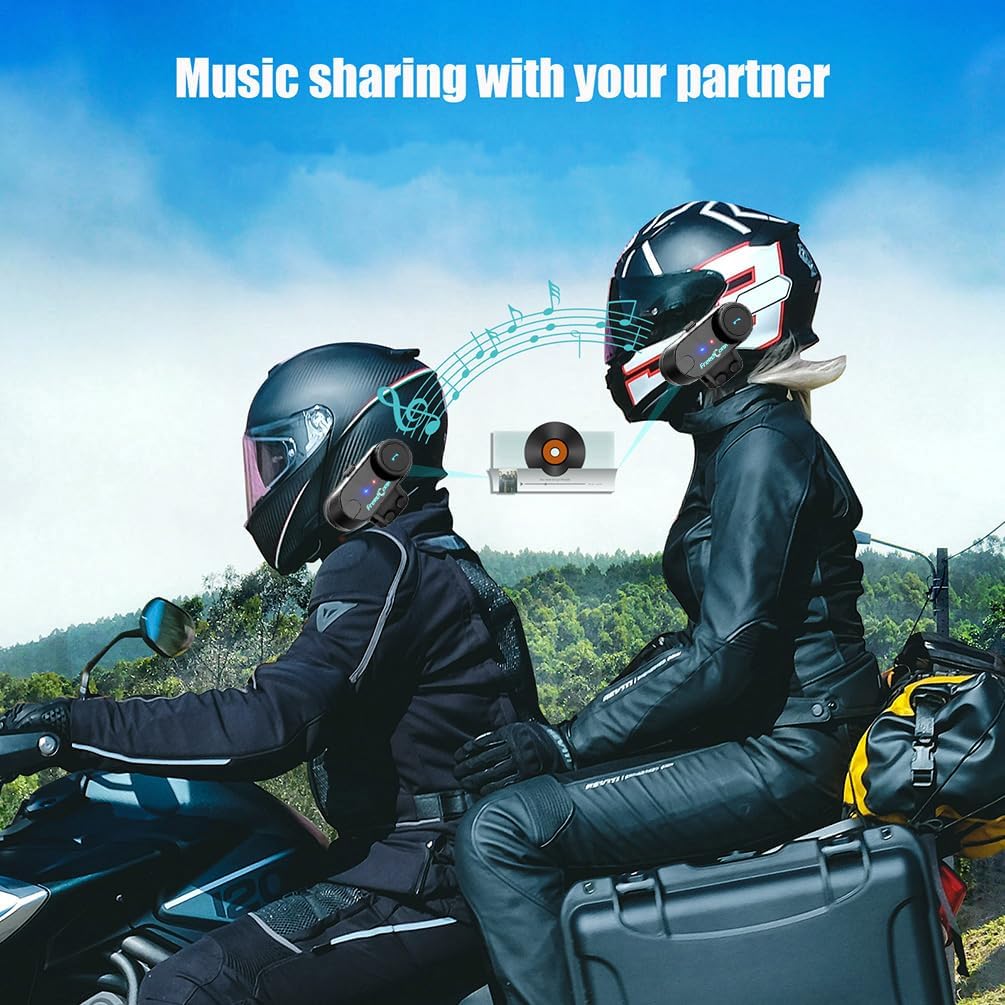
Image: Music sharing with a partner.
5.6 UKW-Radio
- FM-Radio ein-/ausschalten: Die FM-Taste 2 Sekunden lang gedrückt halten.
- Scanstationen: Short press the "Next" or "Previous" button to scan for available FM stations.

Image: Built-in FM Radio feature.
5.7 Lautstärkeregelung
Adjust the volume using the multi-function knob or dedicated volume buttons (if present).
- Lautstärke erhöhen: Rotate the multi-function knob clockwise or press the Volume Up button.
- Lautstärke verringern: Rotate the multi-function knob counter-clockwise or press the Volume Down button.
6. Wartung
- Reinigung: Wischen Sie das Gerät mit einem weichen, damp Tuch. Verwenden Sie keine scharfen Chemikalien oder Scheuermittel.
- Wasserbeständigkeit: The unit is IP65 waterproof, meaning it is protected against low-pressure water jets from any direction. It is not designed for submersion. Ensure the USB port cover is securely closed when not charging.
- Laden: Charge the unit using the provided USB cable. A full charge takes approximately 2.5 hours. The indicator light will change to indicate charging status (e.g., red during charging, blue when fully charged).
- Lagerung: Bewahren Sie das Gerät an einem kühlen, trockenen Ort auf, wenn es längere Zeit nicht benutzt wird.

Image: Battery life and waterproof features.
7. Fehlerbehebung
| Problem | Mögliche Ursache | Lösung |
|---|---|---|
| Kein Strom | Schwache Batterie | Laden Sie das Gerät 2.5 Stunden lang auf. |
| Kopplung mit Telefon/GPS nicht möglich | Unit not in pairing mode; Bluetooth disabled on device | Ensure unit is in pairing mode (red/blue flashing). Enable Bluetooth on your device. |
| Gegensprechanlage verbindet sich nicht | Units not paired correctly; out of range | Repeat intercom pairing steps. Ensure units are within 800m range. |
| Low audio volume or no sound from speakers | Speakers not positioned correctly; volume too low; cable loose | Adjust speaker position closer to ears. Increase volume. Ensure speaker cable is fully inserted. |
| Poor microphone quality / background noise | Microphone not positioned correctly; wind noise | Position microphone closer to mouth. Ensure CVC noise reduction is active. Consider using a different microphone type if applicable. |
Notiz: If your two speakers or one side speaker are not working, ensure the headset cable is completely inserted into the interface and that the speaker is inserted into the correct port. If the volume is low, adjust the speaker placement as close to your ears as possible.
8. Spezifikationen
| Modell: | T-COMVB-800M |
| Bluetooth-Version: | 5.0 |
| Reichweite der Gegensprechanlage: | Up to 800 meters (between 2 riders) |
| Max Riders: | 3 (2 simultaneous communication) |
| Batteriekapazität: | 400 mAh |
| Ladezeit: | Ca. 2.5 Stunden |
| Gesprächszeit: | Bis zu 10 Stunden |
| Sprechzeit: | Bis zu 7 Stunden |
| Standby-Zeit: | Bis zu 300 Stunden |
| Wasserbeständigkeit: | IP65 |
| Lautsprecherdurchmesser: | 40 mm |
| Impedanz: | 32 Ohm |
| Frequenzbereich: | 20 Hz – 20,000 Hz |
| Geräuschpegelkontrolle: | Aktive Geräuschunterdrückung (CVC) |
| Kompatible Geräte: | Mobile phones, MP3 players, GPS devices |
9. Garantie und Support
Informationen zur Garantie und zum technischen Support finden Sie auf der offiziellen FreedConn-Website. webBesuchen Sie unsere Website oder wenden Sie sich an Ihren Händler vor Ort. Bewahren Sie Ihren Kaufbeleg als Kaufnachweis für Garantieansprüche auf.
For common issues, please consult the troubleshooting section of this manual or the online FAQ resources provided by FreedConn.