
Projecta IC3500
Projecta 12V 35A Automatik 7 StagBenutzerhandbuch für das e-Akkuladegerät IC3500
Model: IC3500 | Brand: Projecta
1. Einführung und Endeview
The Projecta IC3500 is an advanced 12V 35A automatic 7-stage battery charger designed for a wide range of battery types, including Wet, Calcium, AGM, and Gel. Its sophisticated charging algorithm ensures optimal battery health, extended life, and superior performance, making it ideal for high-power demands in applications such as caravans, motor homes, automotive, and marine vehicles.
This manual provides essential information for the safe and effective operation, setup, and maintenance of your Projecta IC3500 battery charger.

Figure 1: Projecta IC3500 Battery Charger with power cord and battery clamps.
2. Hauptmerkmale
- 7-Stage Automatisches Laden: Utilizes a comprehensive charging process to optimize battery performance and longevity.
- Multichemische Kompatibilität: Supports Wet, Calcium, AGM, and Gel battery types. The charging profile can be set to suit the specific battery chemistry.
- Einstellbarer Ausgang: Output current can be adjusted (2A, 8A, 16A, 35A) to suit different battery sizes. Includes a 1.8m temperature compensation probe for precise charging based on ambient temperature.
- Stromversorgungsmodus: Functions as a stable 12V power supply, useful for retaining vehicle computer settings during battery changes or for running 12V appliances.
- Kabelgebundene Fernbedienung: Features a remote control with a 4.5m lead, allowing the charger to be mounted out of sight while maintaining full control and monitoring.
- Langlebiges und sicheres Design: Constructed for shock and dust resistance. Incorporates spark-free and polarity-protected connections for enhanced safety.
- LCD Screen with LED Indicators: Provides clear feedback on charging status.

Abbildung 2: Nahaufnahme view of the charger's LCD display, showing current output and battery type selection.
3. Einrichtung und Installation
3.1 Auspacken und Prüfen
Carefully remove the charger from its packaging. Inspect the unit for any signs of damage during transit. Ensure all components, including the charger unit, battery clamps, power cord, temperature compensation probe, and remote control, are present.
3.2 Sicherheitsvorkehrungen
- Das Ladegerät sollte stets in einem gut belüfteten Bereich betrieben werden.
- Stellen Sie sicher, dass das Ladegerät vom Netzanschluss getrennt ist, bevor Sie Verbindungen zur Batterie herstellen oder trennen.
- Tragen Sie beim Umgang mit Batterien geeignete persönliche Schutzausrüstung, einschließlich Augenschutz und Handschuhen.
- Avoid sparks or flames near batteries, as they can produce explosive gases.
- Laden Sie keine gefrorenen Batterien auf.
- Außerhalb der Reichweite von Kindern aufbewahren.
3.3 Anschließen des Ladegeräts
- Ensure the charger is unplugged from the mains power.
- Verbinden Sie den roten Pluspol (+) clamp an den Pluspol (+) der Batterie anschließen.
- Schließen Sie den schwarzen negativen (-) cl . anamp to the negative (-) terminal of the battery. For vehicles, connect the black clamp zum Fahrzeugchassis, weg von der Batterie und der Kraftstoffleitung, falls sich die Batterie noch im Fahrzeug befindet.
- Plug the charger's AC power cord into a standard 240VAC, 50Hz power outlet.
- If using the temperature compensation probe, connect it to the designated port on the charger and place the probe securely on the battery surface.
- If using the wired remote control, connect it to the appropriate port on the charger.
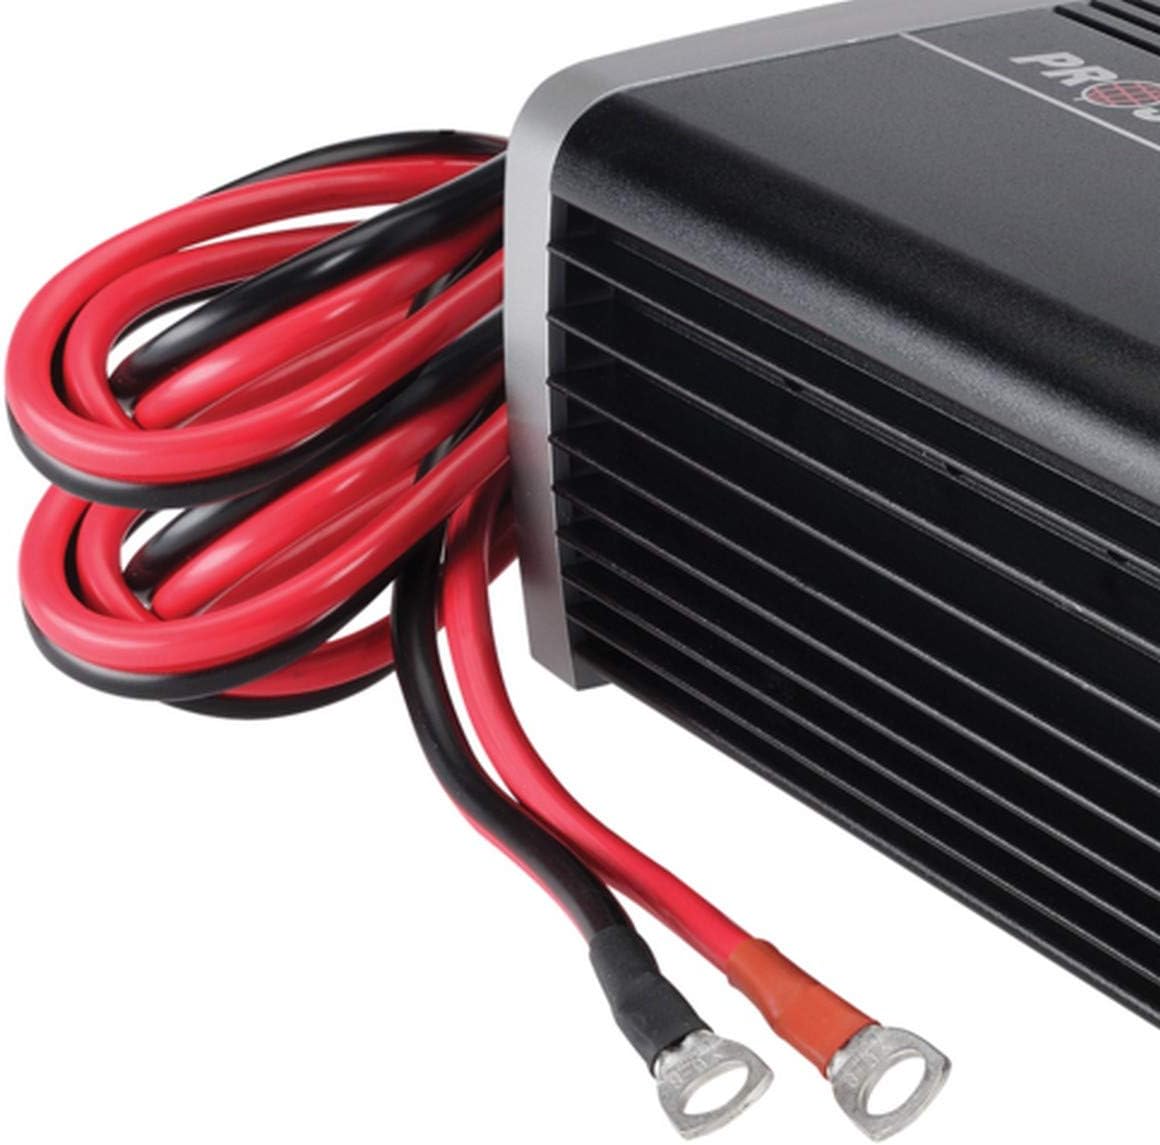
Figure 3: Battery connection cables of the Projecta IC3500 charger.
4. Bedienungsanleitung
4.1 Einschalten und erste Anzeige
Once connected to the battery and mains power, the charger will power on. The LCD screen will illuminate, and the "POWER ON" LED (Red Light) will be on.

Figure 4: Front panel with LCD display and status indicators.
4.2 Selecting Battery Type and Charge Rate
Use the control buttons on the front panel or remote control to select the appropriate battery chemistry (Wet, Calcium, AGM, or Gel) and the desired charge rate (2A, 8A, 16A, 35A). Refer to your battery's specifications for the recommended charging parameters.
- Ladevolumentage Einstellungen:
- GEL: 14.1 V
- AGM: 14.4V
- WET: 14.7V
- CALCIUM: 16.0V
4.3 7-Stage Ladevorgang
The charger automatically progresses through the following stages:
- Desulfatierung: Recovers sulphated batteries.
- Weicher Start: Führt der Batterie sanft Strom zu.
- Sammelladung: Charges the battery to approximately 80% capacity. The "BULK CHARGE" LED (Blue Light) will be on.
- Absorption: Lädt den Akku mit abnehmender Geschwindigkeit auf 100 % Kapazität auf.asing current. The "ABSORPTION" LED will be on.
- Analyse: Prüft die Batterie, um sicherzustellen, dass sie die Ladung hält.
- Überholung: Applies a controlled overcharge to recondition deeply discharged or neglected batteries (if selected).
- Wartung/Instandhaltung: Maintains the battery at full charge. The "FULLY CHARGED" LED (Green Light) will be on.
The charger will automatically switch to the next stage as needed. The "Blue Light On" indicates charging is in progress, and "Green Light On" indicates fully charged and maintaining.
4.4 Stromversorgungsmodus
To activate Power Supply Mode, refer to the specific instructions in the full manual. This mode provides a stable 12V output, preventing loss of vehicle computer settings when the main battery is disconnected or for powering 12V accessories.

Figure 5: The charger is compatible with various battery types, including automotive, marine, and deep cycle batteries.

Figure 6: Application guide illustrating compatibility with Automotive, Marine, and Deep Cycle batteries (AGM & Gel).
5. Wartung
- Reinigung: Disconnect the charger from all power sources and batteries before cleaning. Wipe the casing with a soft, dry cloth. Do not use harsh chemicals or abrasive cleaners.
- Kabelinspektion: Regularly inspect the power cord and battery cables for any signs of damage, fraying, or corrosion. Replace damaged cables immediately.
- Lagerung: When not in use, store the charger in a cool, dry place, away from direct sunlight and moisture. Ensure cables are neatly coiled to prevent damage.
- Batterieklemmen: Für eine optimale Verbindung müssen die Batteriepole sauber und frei von Korrosion sein.
6. Fehlerbehebung
| Problem | Mögliche Ursache | Lösung |
|---|---|---|
| Charger not powering on (No Red Light) | No AC power; faulty power cord; internal fault. | Check AC outlet and power cord connection. Ensure power switch is ON. If problem persists, contact support. |
| Charger not charging (No Blue Light) | Falscher Batterieanschluss (verpolte Batterie); Batteriespannungtage too low; battery faulty. | Verify correct positive/negative connections. Ensure battery voltage is above 2.5V. Test battery condition. |
| Charger displays error code | Specific fault detected (e.g., short circuit, over-temperature). | Refer to the full manual for specific error code meanings. Disconnect and reconnect the charger. Ensure proper ventilation. |
| Akku wird nicht vollständig geladen | Incorrect battery type selected; battery capacity too large for selected charge rate; battery sulphation; faulty battery. | Ensure correct battery type is selected. Increase charge rate if appropriate. Consider using recondition mode if available and suitable for battery type. Test battery health. |
7. Spezifikationen
| Attribut | Detail |
|---|---|
| Typ | 7 Stage Automatisch |
| Eingang | 240 VAC, 50 Hz, 570 W |
| Ausgangsvolumentage | 12 V |
| Ausgangsstrom | 2A, 8A, 16A, 35A (Adjustable) |
| Mindeststartlautstärketage | 2.5 V |
| Rückenablauf | Charger 1mA, With Remote 2mA |
| Zulassungen | Electrical Safety, EMC |
| Ladevolumentage (GEL) | 14.1 V |
| Ladevolumentage (AGM) | 14.4 V |
| Ladevolumentage (WET) | 14.7 V |
| Ladevolumentage (CALCIUM) | 16.0 V |
| Technische Daten | 38 x 9.8 x 30 cm |
| Artikelgewicht | 3.42 kg |
| Modellnummer | IC3500 |

Figure 7: Dimensional drawing of the Projecta IC3500 charger.
8. Garantie und Support
For warranty information and technical support, please refer to the warranty card included with your product or visit the official Projecta webBewahren Sie Ihren Kaufbeleg für eventuelle Garantieansprüche auf.
For further assistance, you may contact Projecta customer service through their official channels.
Ask a question about this manual
Ask about setup, troubleshooting, compatibility, parts, safety, or missing instructions. Manuals+ will review the question and use this page’s manual context to help answer it.