
1. Einleitung
Thank you for choosing the Robotime DG102 Sam's Study DIY Miniature House Kit. This kit provides an engaging and creative experience, allowing you to construct a detailed miniature replica of a cozy study. Designed to stimulate creativity, manual dexterity, and patience, this educational toy is composed of safe materials suitable for assembly by individuals aged 3 years and above, with adult supervision recommended for younger users due to small parts.

Image 1.1: Fully assembled Robotime DG102 Sam's Study miniature house.
2. Sicherheitshinweise
- Warnung vor Kleinteilen: This kit contains small parts which may pose a choking hazard for children under 3 years of age. Adult supervision is highly recommended during assembly, especially when children are involved.
- Scharfe Kanten: Some components may have sharp edges or points before assembly. Handle with care to avoid injury.
- Verwendung des Klebstoffs: The kit includes adhesive. Use glue in a well-ventilated area. Avoid contact with eyes and skin. In case of contact, rinse thoroughly with water. Keep out of reach of small children.
- Werkzeuge: If using additional tools (e.g., scissors, tweezers, craft knife), ensure they are used safely and stored properly.
- Entsorgung: Dispose of all packaging materials and unused components responsibly.
3. Packungsinhalt
Before beginning assembly, please verify that all components listed below are present in your kit. Refer to the included instruction booklet for a detailed parts list and diagrams.
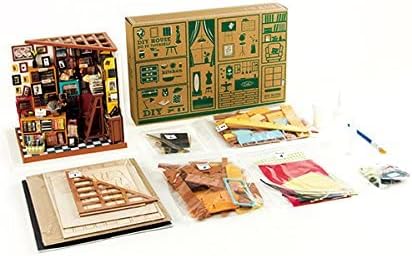
Bild 3.1: Überview of kit components.
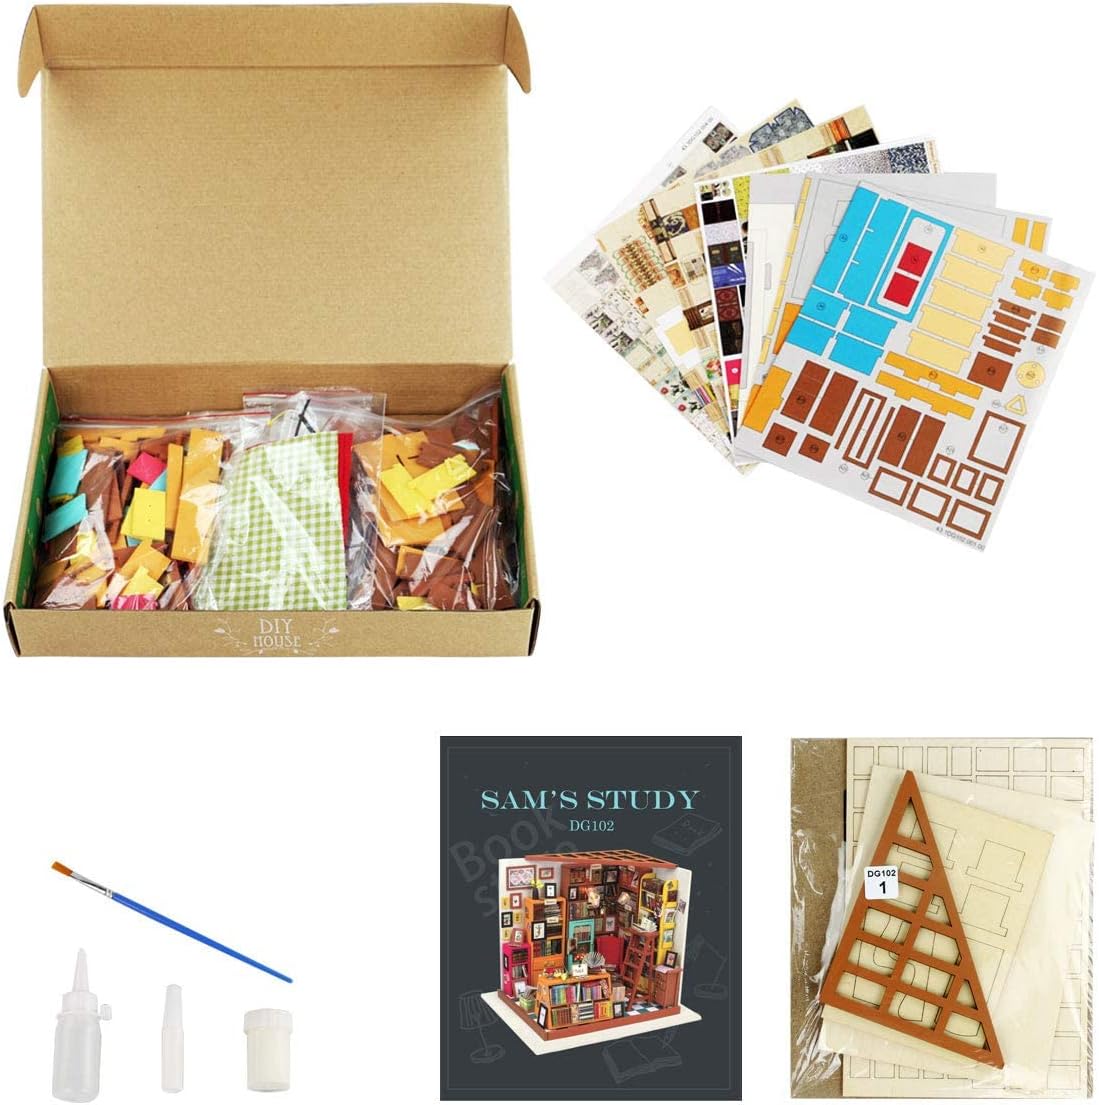
Image 3.2: Contents as packaged within the box.
- Pre-cut wooden sheets for structural components and furniture.
- Printed paper sheets for wallpaper, books, and decorative elements.
- Fabric pieces for upholstery and soft furnishings.
- Small plastic or metal accessories (e.g., miniature frames, lampS).
- LED lights and wiring (if applicable for lighting features).
- Klebstoff (Leim).
- Paintbrush or applicator.
- Detailed instruction booklet with diagrams.
4. Aufbau- und Montageanleitung
Assembly of the Robotime DG102 kit requires patience and attention to detail. Follow the step-by-step instructions and diagrams provided in the included booklet carefully. The general assembly process is outlined below:
- Vorbereitung:
- Unpack all components and organize them by type or step as indicated in the instruction booklet.
- Sorgen Sie für einen sauberen und gut beleuchteten Arbeitsplatz.
- Gather any additional tools you might need (e.g., small scissors, tweezers, ruler, craft knife).
- Basismontage:
- Assemble the base structure according to the diagrams. This typically involves interlocking wooden pieces.
- Apply wallpaper or flooring elements to the base as instructed.
- Wall and Structure Assembly:
- Construct the walls and main structural elements. Pay close attention to the orientation of each piece.
- Secure components using the provided adhesive. Allow sufficient drying time for each section before proceeding.
- Furniture and Decorative Elements:
- Assemble the miniature furniture pieces (e.g., bookshelves, chairs, tables).
- Cut and apply paper elements like books, pictures, and other decorations.
- Attach small accessories to their designated places.

Abbildung 4.1: Detailansicht view of assembled furniture and decorations.
- Lighting Installation (if applicable):
- If your kit includes LED lights, carefully follow the wiring diagrams to install them.
- Ensure all connections are secure and hidden as much as possible.
- Test the lights before fully sealing any sections.
- Letzter Schliff:
- Add any remaining small details, such as plants, rugs, or final decorative items.
- Ensure all parts are securely glued and the structure is stable.
Notiz: The instruction booklet provided with your kit contains specific, detailed diagrams and step-by-step guidance for each component. Always refer to it for precise assembly.
5. Bedienung (Anzeige und Handhabung)
Once assembled, your Robotime DG102 Sam's Study miniature house is ready for display. Treat it as a delicate decorative item.
- Platzierung: Place the miniature house on a stable, flat surface away from direct sunlight, excessive heat, or humidity to prevent material warping or fading.
- Handhabung: Always lift the model from its base. Avoid applying pressure to delicate parts or pulling on small accessories.
- Beleuchtung: If your model includes LED lights, ensure the battery compartment (if applicable) is easily accessible for battery replacement. Turn off lights when not in use to conserve battery life.

Image 5.1: The assembled miniature house in a display setting.
6. Wartung
- Reinigung: Dust the miniature house gently with a soft, dry brush or a microfiber cloth. Avoid using water or chemical cleaners, as they may damage the materials or paint.
- Reparaturen: If any small parts detach, reattach them carefully using a suitable craft adhesive.
- Lagerung: If storing the model, place it in a sturdy box to protect it from dust and physical damage.
7. Fehlerbehebung
| Problem | Mögliche Ursache | Lösung |
|---|---|---|
| Fehlende oder beschädigte Teile | Verpackungsfehler oder Transportschaden. | Carefully check all packaging. If parts are genuinely missing or damaged, contact Robotime customer support with your purchase details. |
| Teile passen nicht zusammen | Incorrect orientation or excess material. | Double-check the instruction diagrams for correct orientation. Gently sand or trim excess material if necessary, but be careful not to remove too much. |
| Glue not holding parts | Insufficient glue, improper application, or not enough drying time. | Apply a thin, even layer of glue. Hold parts firmly in place for a few moments and allow ample drying time before moving. Ensure surfaces are clean. |
| Lichter funktionieren nicht (falls zutreffend) | Incorrect wiring, dead batteries, or faulty LED. | Check battery installation and replace batteries if needed. Verify all wire connections are secure and follow the wiring diagram precisely. |
8. Spezifikationen
| Besonderheit | Detail |
|---|---|
| Produktmodell | DG102 |
| Produktabmessungen (montiert) | 21.7 x 5.7 x 32.8 cm (ca. 8.5 x 2.2 x 12.9 Zoll) |
| Artikelgewicht | 970 Gramm (ca. 2.14 Pfund) |
| Empfohlenes Alter | 3 years and up (adult supervision recommended) |
| Hauptmaterial | Synthetic Wood |
| Lernziele | Patience training, concentration ability, manual dexterity, creativity |
| Montage erforderlich | Ja |
| Batterien erforderlich/im Lieferumfang enthalten | No (for basic kit, check specific lighting components if included) |
9. Garantie und Support
ROBOTIME products are manufactured with quality and care. For any questions regarding missing parts, assembly difficulties, or product defects, please contact the retailer where you purchased the kit or visit the official ROBOTIME webWebsite mit Informationen zum Kundensupport.
Bitte bewahren Sie Ihren Kaufbeleg für eventuelle Garantieansprüche oder Supportanfragen auf.