
1. Einleitung
Thank you for choosing the Car and Driver CDC-632 Dash Cam. This device is designed to record your journeys in high definition, providing security and peace of mind on the road. It features 2K Ultra HD video recording, built-in Wi-Fi, GPS tracking, and app connectivity for convenient operation and file Management.
2. Packungsinhalt
Bitte kreuzen Sie das Kästchen für die folgenden Elemente an:
- Car and Driver CDC-632 Dash Cam
- Saugnapfhalterung für die Windschutzscheibe
- Auto-Adapter
- 8 GB Micro-SD-Karte

Image: The retail packaging for the Car and Driver CDC-632 Dash Cam, highlighting key features like G-sensor, 1080P Full HD HDR, Wi-Fi, Loop Recording, and GPS Tracking. An 8GB memory card is also indicated as included.
3. Produktüberschreitungview
Familiarize yourself with the components of your dash cam.

Image: The Car and Driver CDC-632 Dash Cam attached to its suction mount. The 2.4-inch LCD screen is visible, displaying a road view with recording indicators, resolution (1920x1080 P60), and current date/time.
Front View

Bild: Nahaufnahme von vorn view of the Car and Driver CDC-632 Dash Cam, highlighting the central camera lens and ventilation grilles on the sides.
Hinteren View (LCD Bildschirm)

Abbildung: Die Rückseite view of the Car and Driver CDC-632 Dash Cam, featuring the 2.4-inch LCD screen displaying a road scene with HDR indicator, exposure value, and battery status. Control buttons are visible below the screen.
4. Installation
4.1 Montage der Dashcam
- Reinigen Sie den Bereich der Windschutzscheibe, an dem Sie die Dashcam anbringen möchten.
- Befestigen Sie die Saugnapfhalterung an der Dashcam.
- Drücken Sie den Saugnapf fest gegen die Windschutzscheibe und betätigen Sie den Hebel, um ihn zu sichern.
- Passen Sie den Winkel der Dashcam an, um eine klare Sicht zu gewährleisten view der vor uns liegenden Straße.
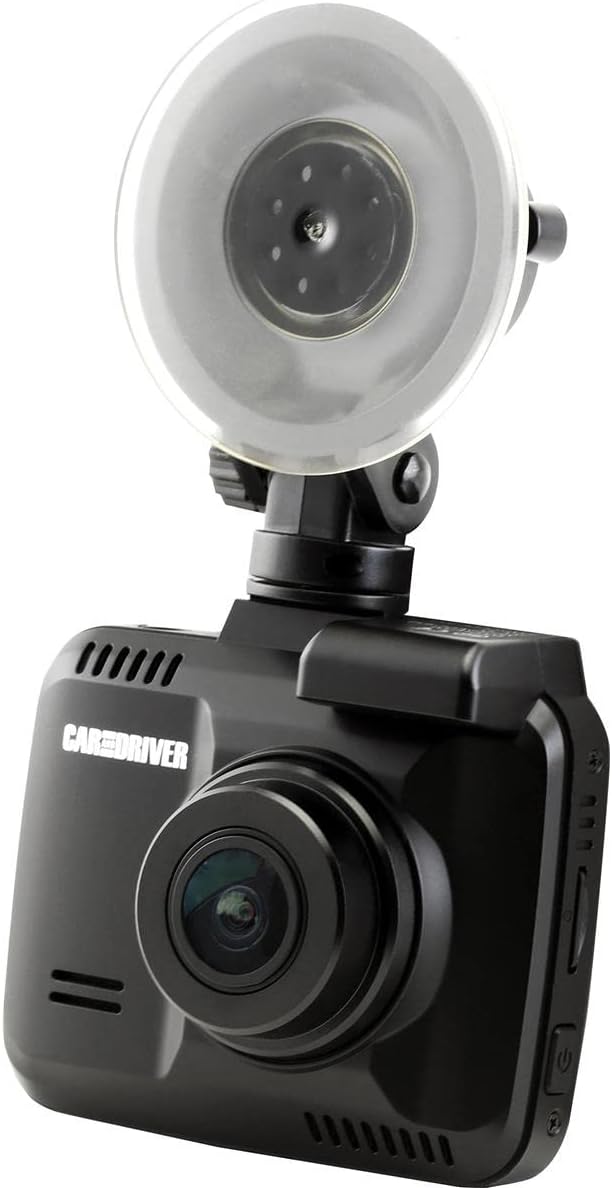
Image: The Car and Driver CDC-632 Dash Cam is shown mounted on a car's windshield using its suction cup. The camera is angled to capture the road ahead, with the power cable connected.
4.2 Einschalten des Geräts
- Connect the car adapter to the dash cam's power input port.
- Plug the car adapter into your vehicle's 12V power outlet (cigarette lighter socket).
- Die Dashcam schaltet sich normalerweise automatisch ein, sobald die Zündung des Fahrzeugs eingeschaltet wird, und beginnt mit der Aufnahme.
5. Ersteinrichtung
5.1 Einlegen der Micro-SD-Karte
The dash cam supports Micro-SD cards up to 64GB. An 8GB Micro-SD card is included.
- With the dash cam powered off, locate the Micro-SD card slot on the side of the device.
- Insert the Micro-SD card with the gold contacts facing the back of the dash cam until it clicks into place.
- Zum Herausnehmen die Karte vorsichtig hineindrücken, bis sie herausspringt.
5.2 Formatting the Micro-SD Card
It is recommended to format the Micro-SD card before first use and periodically thereafter to ensure optimal performance and prevent data corruption.
- Die Dashcam einschalten.
- Navigate to the 'Settings' menu using the control buttons.
- Select 'Format SD Card' and confirm the action. All data on the card will be erased.
5.3 Datums- und Uhrzeiteinstellungen
Ensure the correct date and time are set for accurate timestampAufnahme von Aufzeichnungen.
- Öffnen Sie das Menü „Einstellungen“.
- Locate 'Date/Time' settings.
- Mit den Navigationsschaltflächen können Sie Jahr, Monat, Tag, Stunde und Minute einstellen.
- Bestätigen Sie Ihre Auswahl.
6. Grundlegende Bedienung
6.1 Automatische Aufnahme
Once powered on, the dash cam will automatically begin recording in a continuous loop. The recording indicator (usually a red dot or icon) will appear on the screen.
6.2 Loop-Aufnahme
The dash cam records video in segments (e.g., 1, 3, or 5 minutes). When the Micro-SD card is full, the oldest unlocked fileDie vorhandenen Aufnahmen werden durch neue überschrieben. Dies gewährleistet eine kontinuierliche Aufzeichnung ohne manuelle Eingriffe.
6.3 G-Sensor Protection
The built-in G-sensor detects sudden impacts or collisions. When triggered, the current video segment will be automatically locked and saved to a protected folder, preventing it from being overwritten by loop recording. The sensitivity of the G-sensor can usually be adjusted in the settings menu.
6.4 NiteVision Recording
The dash cam features NiteVision technology with intelligent IR for enhanced recording clarity in low-light conditions or at night.
7. Erweiterte Funktionen
7.1 WLAN-Konnektivität und App-Steuerung
The dash cam features 802.11 B/G/N 2.4GHZ Wi-Fi connectivity, allowing you to connect your smartphone via the Car and Driver App.
- Download the Car and Driver App from your smartphone's app store.
- Aktivieren Sie WLAN auf Ihrer Dashcam über das Einstellungsmenü.
- Stellen Sie mit Ihrem Smartphone eine Verbindung zum WLAN-Netzwerk der Dashcam her (SSID und Passwort werden normalerweise auf dem Bildschirm der Dashcam angezeigt).
- Open the Car and Driver App to access live view, playback recordings, download files, and adjust settings remotely.
7.2 GPS-Tracking
The built-in GPS module accurately records your driving location and speed. This data can be viewed during video playback using the dedicated Car and Driver App or compatible desktop software, providing crucial information for incident analysis.
8. Wiedergabe und File Management
8.1 On-Device Playback
- Stop recording (if active).
- Enter playback mode via the menu buttons.
- Browse through recorded videos. Locked files are usually in a separate folder.
- Wählen Sie ein Video aus, um es auf dem 2.4-Zoll-LCD-Bildschirm abzuspielen.
8.2 App Playback and Download
Using the Car and Driver App, you can wirelessly view, download, and manage recorded videos on your smartphone. This is the most convenient method for accessing files.
8.3 Computerwiedergabe
You can also remove the Micro-SD card and insert it into a computer's card reader to access files directly. Dedicated player software may be required to view GPS data alongside the video.
9. Wartung
9.1 Reinigung der Dashcam
- Ensure the device is powered off and disconnected from power.
- Use a soft, dry cloth to wipe the dash cam body.
- Verwenden Sie für die Linse ein spezielles Linsenreinigungstuch und eine spezielle Linsenreinigungslösung, um Kratzer zu vermeiden.
- Verwenden Sie keine aggressiven Chemikalien oder Scheuermittel.
9.2 Micro-SD Card Care
- Periodically format the Micro-SD card (monthly is recommended) to maintain optimal performance and prevent file Fehler.
- Use high-quality, reputable brand Micro-SD cards designed for dash cam use (Class 10 or higher).
10. Fehlerbehebung
- Dashcam lässt sich nicht einschalten: Ensure the car adapter is securely plugged into both the dash cam and the vehicle's 12V power outlet. Check if the vehicle's power outlet is functional.
- Die Aufnahme stoppt oder friert ein: Format the Micro-SD card. Ensure you are using a high-speed (Class 10 or higher) Micro-SD card. Try a different Micro-SD card.
- Schlechte Videoqualität: Reinigen Sie das Kameraobjektiv. Stellen Sie sicher, dass die Schutzfolie vom Objektiv entfernt wurde. Überprüfen Sie die Videoauflösungseinstellungen.
- Probleme mit der Wi-Fi-Verbindung: Ensure Wi-Fi is enabled on the dash cam. Restart both the dash cam and your smartphone. Make sure you are within close proximity to the dash cam.
- GPS funktioniert nicht: Stellen Sie sicher, dass die Dashcam ein klares Bild hat. view of the sky. It may take a few minutes for the GPS signal to be acquired after powering on.
- Schaltflächen reagieren nicht: Try resetting the device (if a reset button is available, use a thin object to press it).
11. Spezifikationen
| Besonderheit | Detail |
|---|---|
| Modellname | Ultra HD-Dashcam |
| Modellnummer | CDC-632 |
| Auflösung der Videoaufnahme | 2K |
| Bereich View | 130 Grad |
| Bildschirmgröße | 2.4 Zoll |
| Konnektivitätstechnologie | Wi-Fi (802.11 B/G/N 2.4GHZ) |
| Besondere Merkmale | Built-In WiFi, Night Vision (NiteVision), Built-in G-sensor, GPS Tracking |
| Montagetyp | Saughalterung |
| Flash-Speichertyp | MicroSD (bis zu 64 GB) |
| Bildfrequenz | 30 FPS |
| Kontrollmethode | Touch (via physical buttons) |
| Artikelgewicht | 10.4 Unzen |
12. Garantieinformationen
This Car and Driver CDC-632 Dash Cam comes with a 1 Jahr Herstellergarantie from the date of purchase. Please retain your proof of purchase for warranty claims. The warranty covers defects in materials and workmanship under normal use. It does not cover damage caused by misuse, accidents, unauthorized modifications, or natural disasters.
13. Kundendienst
If you encounter any issues or have questions not covered in this manual, please contact Car and Driver customer support. Refer to the product packaging or the official Car and Driver webWebsite für Kontaktdaten.