
1. Produktüberschreitungview und Kompatibilität
This MMOBIEL Digitizer Touch Screen Front Display Glass Assembly is designed for the iPad 5 2017 models. It includes pre-installed components for easier installation and supports the Smart Sleep and Wake up function.
1.1. Packungsinhalt
- Digitizer Touch Screen Front Display Glass Assembly
- Pre-installed Flex Cable
- Pre-installed Camera Bracket Holder
- Pre-installed Adhesive Stickers
- Comprehensive Tool Kit (see Section 3)
1.2. Kompatibilität
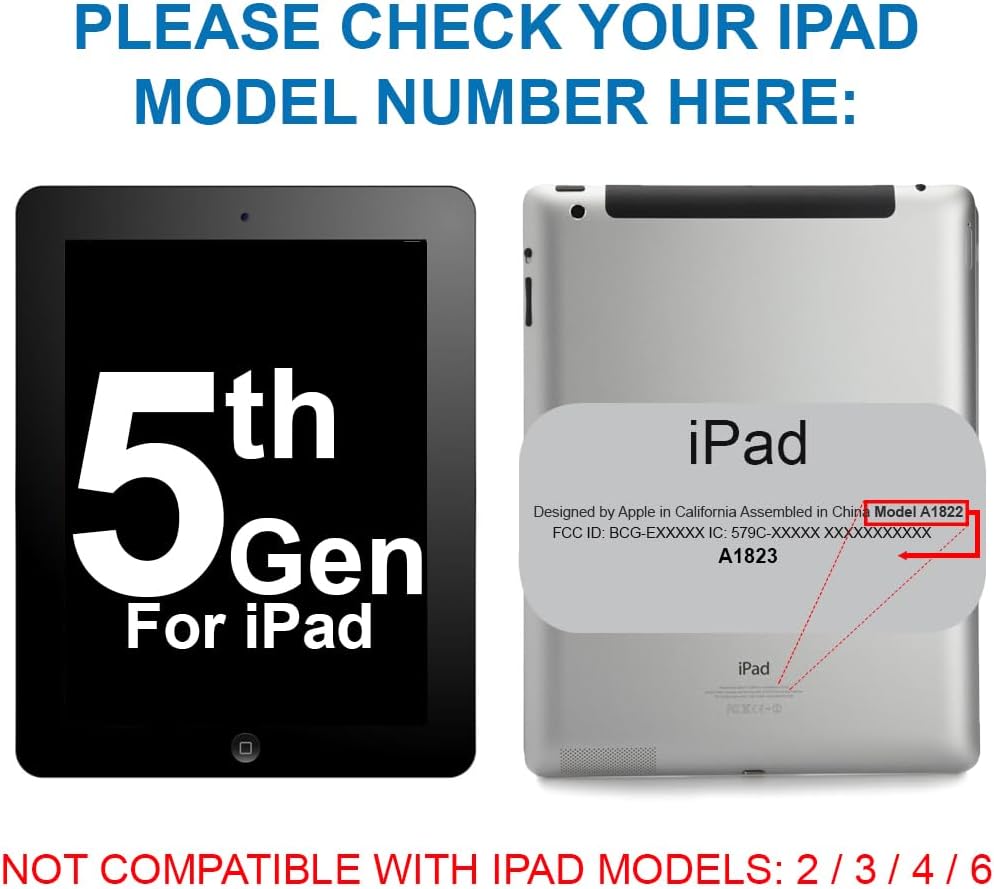
This digitizer is compatible NUR with the following iPad 5 2017 9.7 Inch models:
- A1822 (W-lan)
- A1823 (Wi-Fi + Cellular)
Important: Please verify your iPad's model number before proceeding with installation. The model number is located on the back of your device.

2. Sicherheitshinweise
Performing electronic repairs requires caution. Please read and adhere to the following safety guidelines:
- Ausschalten: Always ensure your device is completely powered off before beginning any repair.
- Batterie abklemmen: If possible, disconnect the battery to prevent accidental short circuits.
- Statische Elektrizität: Work in a static-free environment. Use an anti-static wrist strap if available.
- Vorsichtig handhaben: Electronic components, especially flex cables and glass, are fragile. Avoid excessive force.
- Augenschutz: Consider wearing safety glasses to protect against small flying debris, especially when dealing with cracked glass.
- Scharfe Werkzeuge: Exercise extreme care when using sharp tools like spudgers and tweezers.
- Retain Original Home Button: For Touch ID functionality, you must transfer the original home button from your old digitizer to the new one.
3. Erforderliches Werkzeug
The MMOBIEL Digitizer comes with a comprehensive tool kit to assist with the installation. The kit typically includes:
- 1 x Pinzette
- 1 x Mikrofaser-Reinigungstuch
- 1 x Saugnapf
- 2 x Spudger (plastic opening tools)
- 1 x Plectrum (guitar pick style opening tool)
- 1 x Screwdriver (Phillips)
- 1 x SIM-Needle (for SIM tray removal, if applicable)

4. Installationsanleitung
This section outlines the general steps for replacing your iPad's digitizer. It is highly recommended to watch a detailed video tutorial specific to your iPad model (iPad 5 2017, A1822/A1823) before starting.
4.1. Vorbereitung
- Sicherungsdaten: Ensure all important data on your iPad is backed up.
- Ausschalten: Completely power off your iPad.
- Heat Edges: Carefully apply heat to the edges of the old digitizer using a heat gun or hairdryer. This softens the adhesive. Do not overheat.
4.2. Removing the Old Digitizer
- Pry Open: Use the suction cup to create a small gap, then insert a plectrum or spudger to carefully pry around the edges, separating the old digitizer from the frame. Be extremely gentle, especially near the home button and camera.
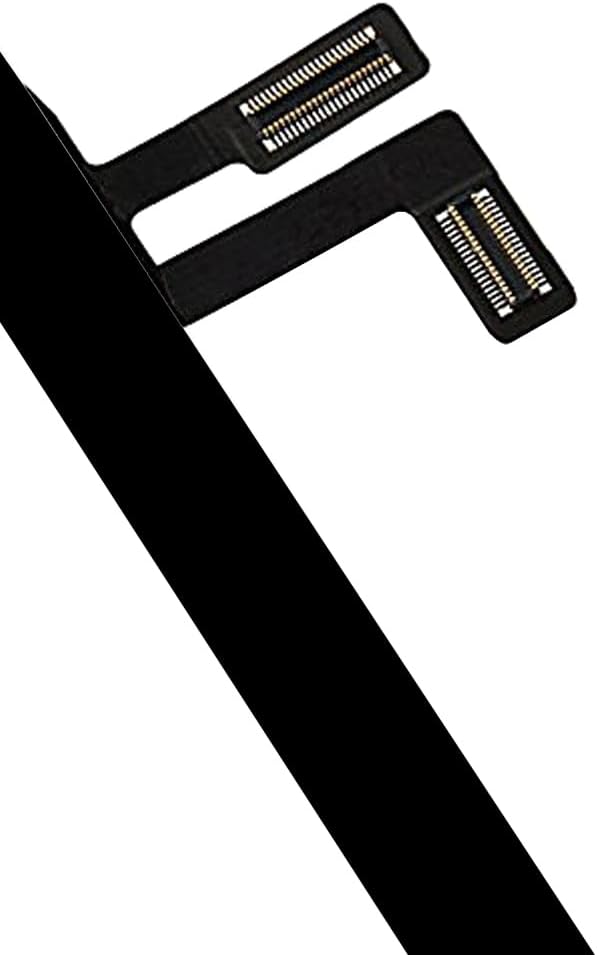
- Kabel trennen: Once the digitizer is partially lifted, locate and carefully disconnect the flex cables connecting it to the iPad's logic board. There are usually two flex cables for the digitizer and one for the home button.
- Remove Home Button: Carefully remove the home button assembly from the old digitizer. This is crucial for retaining Touch ID functionality.
4.3. Installing the New Digitizer
- Rahmen reinigen: Thoroughly clean the iPad's frame, removing any old adhesive residue or glass fragments.
- Install Home Button: Transfer your original home button assembly to the new MMOBIEL digitizer. Ensure it is correctly aligned and secured.
- Kabel anschließen: Carefully connect the new digitizer's flex cables to the logic board. Ensure they are seated correctly and securely.
- Testfunktionalität: Before fully sealing, power on the iPad and test the touchscreen responsiveness across the entire screen, as well as the home button and front camera. If issues arise, power off and recheck cable connections.
- Klebefolie entfernen: Once tested and confirmed working, remove the protective film from the pre-installed adhesive on the new digitizer.
- Sicherer Digitalisierer: Carefully align the new digitizer with the iPad frame and gently press down along the edges to secure it. Apply even pressure.
- Endkontrolle: Power on your iPad and perform a final check of all functions.


5. Operating the Digitizer
The MMOBIEL Digitizer is designed to restore full touch functionality to your iPad. It also supports the Smart Sleep and Wake up function, allowing your iPad to automatically sleep or wake when a compatible cover is opened or closed.
- Touch Responsiveness: The digitizer provides precise and responsive touch input.
- Multi-Touch-Gesten: All standard multi-touch gestures (pinch-to-zoom, swipe, etc.) will function as expected.
- Smart Sleep/Wake: This feature works with compatible iPad covers that utilize magnets to detect opening and closing.
6. Wartung
To ensure the longevity and optimal performance of your new digitizer, follow these maintenance tips:
- Reinigung: Use a soft, lint-free cloth (like the included microfiber cloth) to gently wipe the screen. For stubborn smudges, slightly dampReinigen Sie das Tuch mit Wasser oder einem für Bildschirme geeigneten Reiniger. Vermeiden Sie aggressive Chemikalien.
- Schutz: Um zukünftigen Schäden vorzubeugen, sollten Sie die Verwendung einer Displayschutzfolie und einer Schutzhülle in Betracht ziehen.
- Druck vermeiden: Do not apply excessive pressure to the screen, as this can damage the digitizer or underlying LCD.
- Temperatur: Avoid exposing your iPad to extreme temperatures, which can affect adhesive and component integrity.
7. Fehlerbehebung
Sollten nach der Installation Probleme auftreten, befolgen Sie bitte die folgenden Schritte zur Fehlerbehebung:
7.1. Touchscreen Not Responding or Partial Response
- Recheck Flex Cables: Power off the iPad, carefully reopen it, and ensure all digitizer flex cables are securely and correctly connected to the logic board. A loose connection is a common cause.
- Kabel prüfen: Visually inspect the flex cables for any tears, creases, or damage. Damaged cables will need replacement.
- iPad neu starten: Sometimes a simple restart can resolve minor software glitches affecting touch input.
7.2. Home Button Not Working (No Touch ID)
- Original Home Button: Ensure you have transferred the Original home button from your old digitizer. Touch ID functionality is tied to the original home button and cannot be replaced.
- Home Button Flex Cable: Check the home button's flex cable connection to the logic board.
- Physischer Schaden: Inspect the home button assembly for any physical damage during transfer.
7.3. Display Issues (e.g., No Image, Lines, Flickering)
Note: This product is a digitizer (touch screen glass) only, not the LCD (display screen). If you have display issues, it indicates a problem with the LCD or its connection, not the digitizer.
- LCD Flex Cable: Power off and recheck the LCD's flex cable connection to the logic board.
- LCD Damage: The LCD itself might be damaged and require replacement.
8. Spezifikationen
| Besonderheit | Detail |
|---|---|
| Marke | MMOBIEL |
| Kompatible Geräte | iPad 5 2017 (Models A1822, A1823) |
| Bildschirmgröße | 9.7 Zoll |
| Material | Glas |
| Artikel Härte | 9H |
| Besonderheit | Smart Sleep and Wake Functionality |
| Farbe | Schwarz |
| Artikelgewicht | 14.1 Unzen |
| Technische Daten | 9.45 x 9.45 x 0.5 Zoll |
9. Garantie und Support
MMOBIEL strives to provide high-quality products and customer satisfaction. For any questions, concerns, or support regarding your digitizer replacement, please contact MMOBIEL customer service through the retailer where the product was purchased.
Please note that improper installation or physical damage during the repair process may void any applicable warranty. Always follow installation instructions carefully.


