1. Einleitung
This manual provides essential information for the installation, configuration, operation, and maintenance of the MOXA AWK-1137C-US-T 802.11n Wireless AP Client. This device is designed for industrial wireless applications, offering reliable 802.11n connectivity in challenging environments with a wide operating temperature range.
2. Sicherheitshinweise
- Always disconnect power before cleaning or servicing the device.
- Sorgen Sie für eine ordnungsgemäße Erdung, um elektrische Gefahren zu vermeiden.
- Betreiben Sie das Gerät innerhalb der angegebenen Temperatur- und Feuchtigkeitsbereiche.
- Setzen Sie das Gerät keiner Feuchtigkeit oder extremen Temperaturen aus.
- Die Installation und Wartung sollte nur von qualifiziertem Personal durchgeführt werden.
3. Packungsinhalt
Überprüfen Sie, ob Ihr Paket die folgenden Artikel enthält:
- MOXA AWK-1137C-US-T Wireless AP Client unit
- Kurzanleitung zur Installation
- Documentation CD (or link to online resources)
- Mounting kit (if applicable)
- Power adapter or terminal block (if applicable)
Falls Artikel fehlen oder beschädigt sind, kontaktieren Sie bitte umgehend Ihren Händler.
4. Hardware-Overview
The AWK-1137C-US-T features robust industrial design. Key components typically include:
- Ethernet-Ports: Für kabelgebundene Netzwerkverbindungen.
- Antennenanschlüsse: For external antennas to optimize wireless signal.
- Leistungsaufnahme: Terminal block for DC power input.
- LED-Anzeigen: Provide status information for power, WLAN, and Ethernet activity.
- Reset-Taste: For restoring factory default settings.
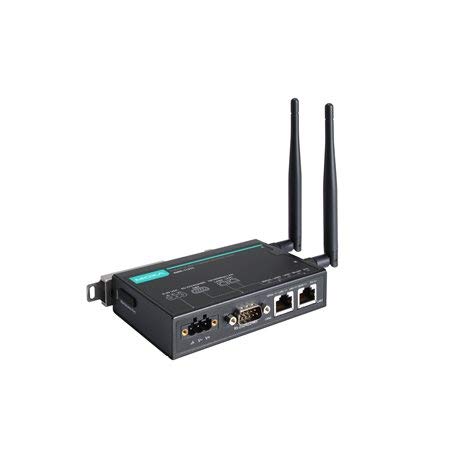
Figure 1: MOXA AWK-1137C-US-T Wireless AP Client. This image shows the compact industrial design of the device, typically featuring antenna ports, Ethernet connections, and power input.
5. Einrichtung
5.1 Montage
The AWK-1137C-US-T supports DIN-rail mounting. Attach the DIN-rail kit to the device and snap it onto a standard DIN-rail. Ensure the device is securely fastened to prevent vibration or accidental dislodgement.
5.2 Stromanschluss
- Connect a suitable DC power source (e.g., 12-48 VDC) to the device's power input terminal block.
- Ensure correct polarity (+ and -) as indicated on the device.
- Tighten the screws on the terminal block to secure the power wires.
5.3 Netzwerkverbindung
- Connect an Ethernet cable from your network switch or router to the Ethernet port on the AWK-1137C-US-T.
- Attach appropriate antennas to the antenna connectors. Ensure they are securely tightened.
5.4 Erstkonfiguration
Um auf das Gerät zuzugreifen web-basierte Verwaltungsschnittstelle:
- Connect a computer directly to the device's Ethernet port or ensure it is on the same network segment.
- Configure your computer's IP address to be in the same subnet as the device's default IP address (refer to the Quick Installation Guide for the default IP).
- Öffnen Sie ein web browser and enter the device's default IP address.
- Melden Sie sich mit dem Standardbenutzernamen und -passwort an (siehe Schnellinstallationsanleitung).
- Change the default password immediately for security.
6. Betrieb
6.1-Betriebsmodi
The AWK-1137C-US-T can operate in various modes, including Access Point (AP) and Client mode. Select the appropriate mode based on your network requirements.
- Access Point (AP)-Modus: The device acts as a central hub for wireless clients to connect.
- Client-Modus: The device connects to an existing Access Point, extending wired network connectivity wirelessly.
6.2 WLAN-Einstellungen
Configure the following wireless parameters via the web Schnittstelle:
- SSID: The name of your wireless network.
- Kanal: Select an appropriate wireless channel to avoid interference.
- Band: Configure for 2.4 GHz or 5 GHz operation, depending on the model and environment.
- Sendeleistung: Adjust the output power for optimal coverage and compliance.
6.3 Sicherheitseinstellungen
Implement strong wireless security to protect your network:
- Verschlüsselung: Use WPA2/WPA3-PSK or Enterprise for robust security.
- Password/Passphrase: Choose a strong, unique password.
- MAC-Adressfilterung: Optionally restrict access to specific devices.
7. Wartung
7.1 Firmware-Updates
Regularly check the MOXA website for the latest firmware updates. Firmware updates can provide new features, performance improvements, and security patches. Follow the instructions provided with the firmware package for a safe update process.
7.2 Reinigung
Clean the device periodically with a soft, dry cloth. Do not use liquid or aerosol cleaners. Ensure the device is powered off before cleaning.
7.3 Umweltaspekte
Ensure the operating environment remains within the specified temperature and humidity limits (-40 to 75°C). Avoid placing the device near heat sources or in direct sunlight.
8. Fehlerbehebung
8.1 Kein Strom
- Check the power cable connection and ensure the power source is active.
- Überprüfen Sie die Lautstärke der Stromversorgungtage is within the device's specified range.
- Inspect the power input terminal block for loose connections.
8.2 Keine Netzwerkverbindung
- Check Ethernet cable connections and ensure they are properly seated.
- Verify that the network switch or router is functioning correctly.
- For wireless connections, ensure the SSID, security settings, and channel match the connected AP/client.
- Check the LED indicators for network activity.
8.3 Langsame WLAN-Geschwindigkeit
- Ensure antennas are properly connected and positioned for optimal signal.
- Check for sources of interference (e.g., other wireless devices, microwave ovens).
- Adjust the wireless channel to a less congested one.
- Verify that the device is operating in 802.11n mode and not a slower standard.
8.4 Zurücksetzen auf Werkseinstellungen
If configuration issues persist, you may need to reset the device to its factory default settings. Locate the reset button (often recessed) and press and hold it for approximately 5-10 seconds while the device is powered on. The device will reboot with default settings.
9. Spezifikationen
| Besonderheit | Spezifikation |
|---|---|
| Modellnummer | AWK-1137C-US-T |
| Wireless-Standard | 802.11n |
| Betriebsband | US-Band |
| Betriebstemperatur | -40 bis 75 °C |
| Verpackungsabmessungen | 7.87 x 6.57 x 1.97 Zoll |
| Artikelgewicht | 1.15 Pfund |
| Hersteller | MOXA |
| Datum der ersten Verfügbarkeit | 30. April 2018 |
10. Garantie und Support
10.1 Garantieinformationen
MOXA products typically come with a standard warranty. For detailed warranty terms and conditions, please refer to the official MOXA webDie Website oder die Ihrem Produkt beiliegende Garantiekarte finden Sie hier. Bewahren Sie Ihren Kaufbeleg für Garantieansprüche auf.
10.2 Technischer Support
For technical assistance, product documentation, or driver downloads, please visit the official MOXA support website. You can also contact MOXA's customer support team directly through the contact information provided on their webWebsite.


