
KICKER 45L7R122
Kicker 45L7R122 12-Zoll L7R Auto-Subwoofer und Rockville RQB12 Gehäuse – Bedienungsanleitung
Einführung
This manual provides essential instructions for the proper installation, operation, and maintenance of your Kicker 45L7R122 12-inch L7R Solo-Baric Car Subwoofer and the accompanying Rockville RQB12 Single 12-inch Side Ported Sub Box Enclosure. Please read this manual thoroughly before attempting installation or operation to ensure optimal performance and safety.
Sicherheitshinweise
- Vor Beginn jeglicher elektrischer Arbeiten muss immer der Minuspol der Fahrzeugbatterie abgeklemmt werden.
- Stellen Sie sicher, dass alle Leitungen ordnungsgemäß isoliert und befestigt sind, um Kurzschlüsse und Beschädigungen zu vermeiden.
- Use appropriate gauge wiring for power, ground, and speaker connections as specified by your amplifier and subwoofer requirements.
- Mount the subwoofer and enclosure securely to prevent movement during vehicle operation, which could cause injury or damage.
- Vermeiden Sie es, den Subwoofer übermäßiger Feuchtigkeit oder extremen Temperaturen auszusetzen.
- Wenn Sie sich bei irgendeinem Teil des Installationsprozesses unsicher sind, wenden Sie sich an einen professionellen Car-Audio-Einbauer.
Packungsinhalt
Überprüfen Sie, ob alle Artikel in Ihrem Paket vorhanden sind:
- One (1) Kicker 45L7R122 12-inch L7R Solo-Baric Car Subwoofer
- One (1) Rockville RQB12 Single 12-inch Side Ported Sub Box Enclosure
- Ten (10) Drywall Wood Screws (for mounting subwoofer to enclosure)
- Twelve (12) Feet of 14 AWG Blue Speaker Wire
- Two (2) Spade Terminals
- Benutzerhandbuch (dieses Dokument)
- Kicker Stickers (promotional items)

Image: Kicker 45L7R122 12-inch L7R Solo-Baric Car Subwoofer, Rockville RQB12 Single 12-inch Side Ported Sub Box Enclosure, speaker wire, and mounting screws.
Setup und Installation
1. Subwoofer Mounting
- Carefully place the Kicker 45L7R122 subwoofer into the opening of the Rockville RQB12 enclosure. Ensure the subwoofer is centered and flush with the enclosure's surface.
- Align the mounting holes of the subwoofer with the pre-drilled holes on the enclosure.
- Using the provided drywall wood screws, secure the subwoofer to the enclosure. Tighten screws evenly in a cross pattern to ensure a tight, airtight seal. Do not overtighten.

Bild: Vorderseite view of the Kicker 45L7R122 12-inch L7R Solo-Baric Car Subwoofer, showing the square cone and surround.

Bild: Abgewinkelt view of the Kicker 45L7R122 subwoofer, highlighting its square design and robust frame.
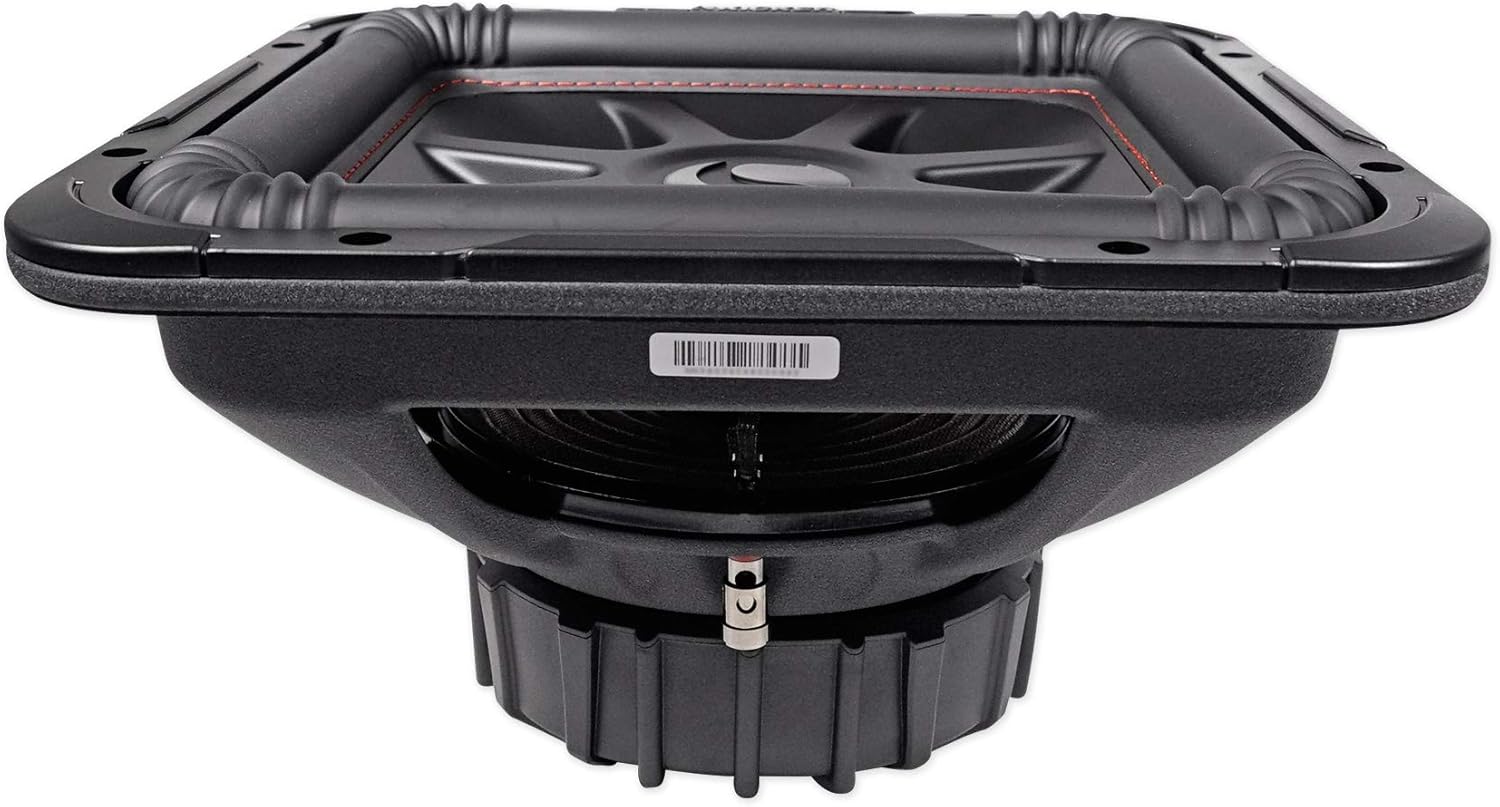
Bild: Seitenansichtfile of the Kicker 45L7R122 subwoofer, showing its mounting depth and overall structure.
2. Enclosure Placement
The Rockville RQB12 is a single 12-inch side ported enclosure designed for optimal bass response. Choose a secure location in your vehicle, typically the trunk or cargo area, where the enclosure will not shift during driving. Ensure the port is not obstructed.
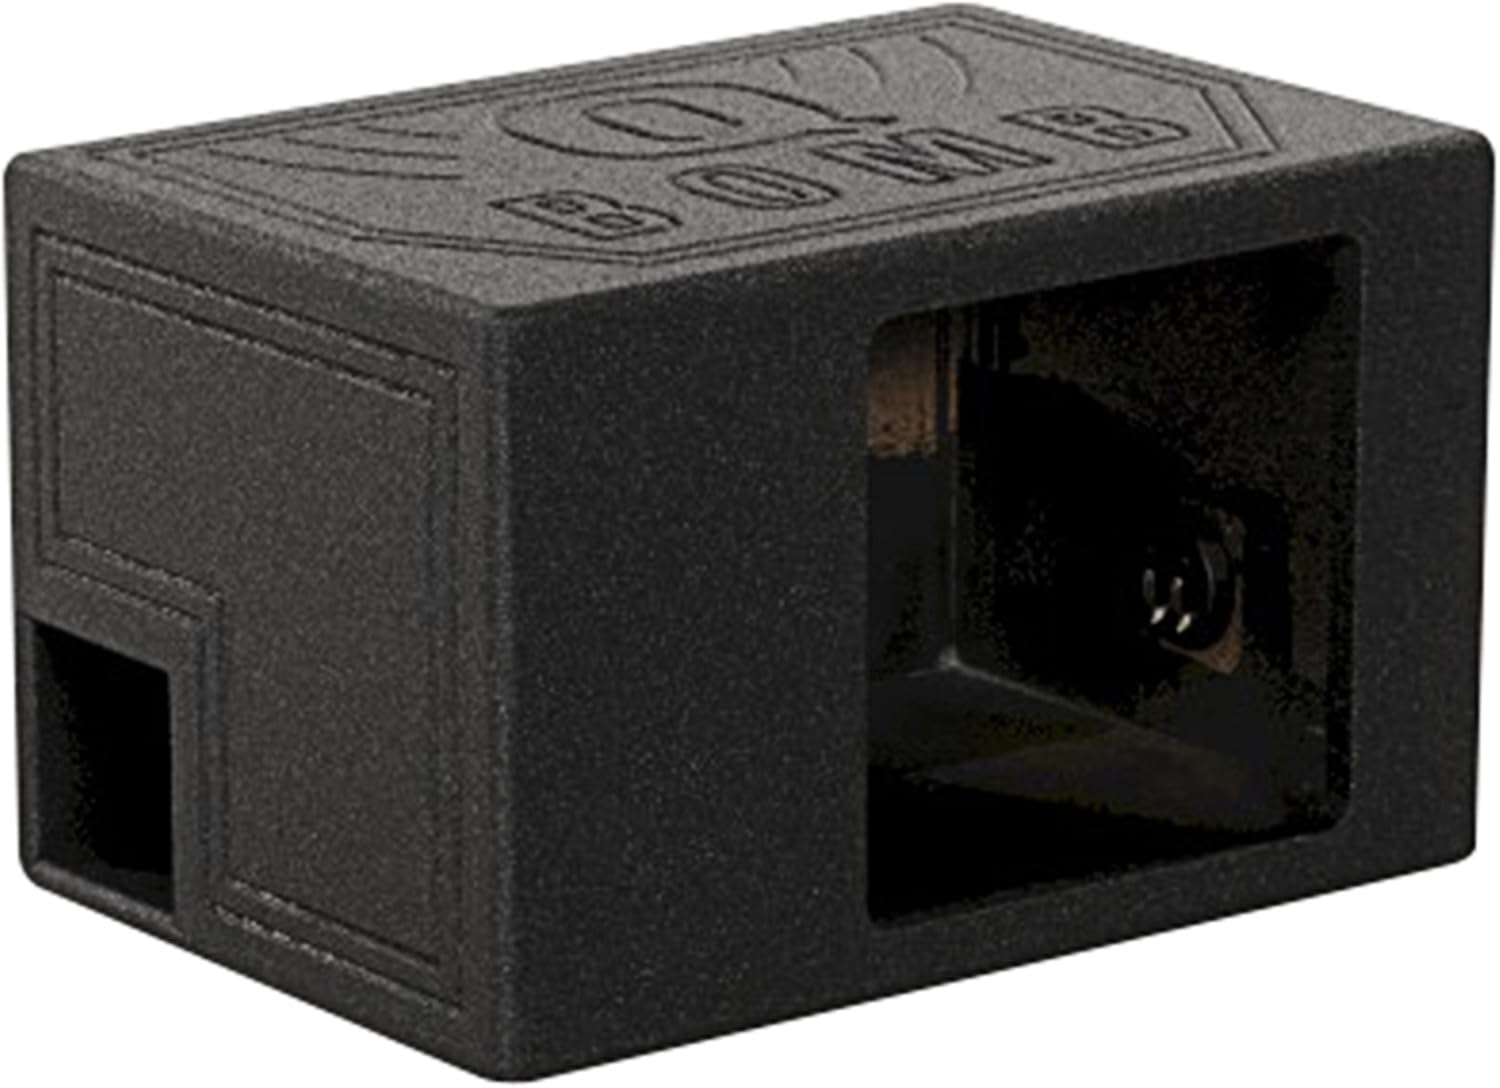
Bild: Vorderseite view of the Rockville RQB12 single 12-inch side ported subwoofer enclosure.

Bild: Abgewinkelt view of the Rockville RQB12 enclosure, showing the side port and textured finish.

Image: Rockville RQB12 enclosure with dimensions labeled: 13.5 inches (height), 22 inches (width), 15 inches (depth).
3. Kabelverbindungen
The Kicker 45L7R122 subwoofer features a Dual Voice Coil (DVC) 2-ohm configuration. This allows for various wiring options to achieve different impedance loads at your amplifier. The most common configurations are:
- 1-ohm Load: Wire the two 2-ohm voice coils in parallel. Connect the positive terminal of coil 1 to the positive terminal of coil 2, and the negative terminal of coil 1 to the negative terminal of coil 2. Then connect the amplifier's positive output to the combined positive terminals and the amplifier's negative output to the combined negative terminals.
- 4-ohm Load: Wire the two 2-ohm voice coils in series. Connect the positive terminal of coil 1 to the negative terminal of coil 2. Then connect the amplifier's positive output to the remaining positive terminal (coil 2) and the amplifier's negative output to the remaining negative terminal (coil 1).
Use the provided 14 AWG speaker wire and spade terminals to make secure connections. Ensure polarity is correct (+ to + and - to -) between the subwoofer and your ampVerstärker. Siehe Ihren amplifier's manual for specific wiring instructions and impedance compatibility.

Bild: Rückseite view of the Kicker 45L7R122 subwoofer, showing the dual voice coil terminals for wiring connections.
Bedienungsanleitung
- After completing all wiring and mounting, reconnect the vehicle's battery.
- Schalten Sie Ihr Auto-Audiosystem ein.
- Beginnen Sie mit dem ampDie Verstärkungsregelung des Verstärkers ist auf die minimale Einstellung eingestellt.
- Spiele ein bekanntes Musikstück mit starkem Bassanteil.
- Erhöhen Sie langsam die amplifier's gain until you hear distortion, then back off slightly. This sets the maximum clean output level.
- Adjust bass boost, crossover frequencies, and phase settings on your amplifier or head unit to blend the subwoofer output seamlessly with your main speakers.
Wartung
- Überprüfen Sie regelmäßig alle Kabelverbindungen auf festen Sitz und Korrosion.
- Keep the subwoofer cone and surround free from dust and debris. Use a soft, dry cloth for cleaning.
- Ensure the enclosure is free from damage and that the subwoofer remains securely mounted.
- Avoid placing heavy objects on the subwoofer or enclosure.
Fehlerbehebung
| Problem | Mögliche Ursache | Lösung |
|---|---|---|
| Kein Ton vom Subwoofer | Keine Macht zu amplifier; loose wiring; incorrect input signal; ampVerstärker im Schutzmodus. | Überprüfen amplifier power, ground, and remote turn-on connections. Verify RCA signal cables. Check speaker wire connections. Consult amplifier manual for protect mode indicators. |
| Verzerrter Ton | Amplifier gain set too high; incorrect crossover settings; damaged subwoofer. | Reduzieren amplifier gain. Adjust crossover frequency. Inspect subwoofer cone and surround for damage. |
| Schwacher oder dumpfer Bass | Incorrect phase setting; insufficient amplifier power; enclosure leak. | Phasenschalter einschalten ampVerstärker/Kopfeinheit. Sicherstellen amplifier power matches subwoofer RMS. Check enclosure for air leaks. |
| Subwoofer cuts out | Überhitzung amplifier; short circuit in wiring; low voltage. | Ensure proper ventilation for amplifier. Inspect all wiring for shorts. Check vehicle's charging system. |
Technische Daten
Kicker 45L7R122 12-inch L7R Subwoofer
- Modellname: 45L7R122
- Lautsprechertyp: Subwoofer
- Subwoofer-Durchmesser: 12 Zoll
- RMS-Belastbarkeit: 600 Watt
- Umgang mit Spitzenleistung: 1200 Watt
- Frequenzgang: 35 Hz - 21 kHz (Subwoofer only, system response may vary)
- Impedanz: Dual Two-Ohm Voice Coil (DVC 2-Ohm)
- Empfindlichkeit: 86.7 dB
- Einbautiefe: 6.88 Zoll
- Montagedurchmesser: 11.06 Zoll
- Recommended Sealed Box Volume: 0.88 - 2.0 Kubikfuß
- Recommended Vented Box Volume: 1.75 - 3.25 Kubikfuß
- Merkmale: Wrap Around Gasketing, Patented Ribbed Corners, Injection-Molded SoloKon Woofer, 360-Degree Back Bracing, UniPlate Back Plate And Pole Piece, Bumped Back Plate, Thick Tinsel Leads, Large Ceramic Magnet, Steel Basket With Spoke Design, Nickel Plated Speaker Terminals.
Rockville RQB12 Single 12-inch Side Ported Enclosure
- Typ: Single 12-inch Side Ported Enclosure
- Material: 3/4" MDF
- Beenden: Durable Bed Liner
- Terminals: High Quality Spring Loaded Terminals
- Luftraum: 1.8 Kubikfuß
- Abstimmfrequenz: 43 Hz
- Produktabmessungen (H x B x T): 13.5" x 22" x 15" Zoll
Garantie und Support
For warranty information and technical support regarding the Kicker 45L7R122 subwoofer, please refer to the official Kicker website or contact Kicker customer service directly. For the Rockville RQB12 enclosure, please contact Rockville support. Keep your purchase receipt as proof of purchase for any warranty claims.
You can visit the KICKER Store for more information: KICKER Official Store
Ask a question about this manual
Ask about setup, troubleshooting, compatibility, parts, safety, or missing instructions. Manuals+ will review the question and use this page’s manual context to help answer it.