
1. Einleitung
This manual provides detailed instructions for the installation, operation, and maintenance of your JahyShow GBS8200 Video Converter Board. This device is designed to convert various analog video signals (CGA, EGA, YUV, RGB) into a standard VGA output, making it suitable for connecting older arcade systems and game consoles to modern VGA-compatible displays.
2. Funktionen
- Converts CGA/EGA/VGA/YUV Component input signals to VGA video signals.
- Automatic scanning for CGA/EGA/VGA signals (15KHz, 24KHz, 31KHz).
- Automatic scanning for YUV Component signals (480i, 576i, 720i, 1080i, 480p, 576p, 720p, 1080p).
- On-Screen Display (OSD) menu available in English and Chinese.
- True digital 24-bit A/D converter for 16.7-million color conversion.
- Supports image position and image zoom control.
- Compatible with various gaming systems including arcade, PlayStation, Xbox, and Wii.
3. Packungsinhalt
Bitte überprüfen Sie, ob alle Artikel in Ihrem Paket vorhanden sind:
- 1 x JahyShow GBS8200 CGA/EGA/RGB to VGA Game Video Converter Board
- 1 x 6-pin signal wire
- 1 x 2-pin power supply wire
4. Spezifikationen
| Parameter | Wert |
|---|---|
| Eingangsleistung | DC 5V ±0.5V (2A) via P7 or P9 |
| CGA / EGA Input | 14.5kHz ~ 16.5kHz / 23.5 ~ 25.5kHz / 30.5 ~ 32.5 kHz (Auto scan) via P3, P10, or P11 |
| RGBHV Input | 30.5 ~ 32.5 kHz (Auto scan) via P10 or P11 |
| VGA-Eingang | 30.5 ~ 32.5 kHz (Auto scan) via P10 or P11 |
| Ypbpr Input | 480p, 576p, 720p, 1080p (Auto scan) via P2 |
| Ycbcr Input | 480i, 576i, 720i, 1080i (Auto scan) via P2 |
| VGA Output Resolutions | 640x480, 800x600, 1024x768, 1360x768 |
| Benutzerkontrollen | Input Switch, Image Zoom, Input Zoom, Image Position, Output Resolution, R/G/B Gain Adjust |
| Maße | 11.8 x 10.8 x 1.4 cm (4.65 x 4.25 x 0.55 Zoll) |
| Artikelgewicht | 5.2 Unzen |
| Kompatible Geräte | Monitors, Virtual Reality Headsets |
| Steckertyp | VGA |
5. Einrichtung und Anschlüsse
Follow these steps to properly set up your GBS8200 Video Converter Board:
- Connect Input Signal: Depending on your source, connect the CGA/EGA/YUV/RGB signal to the corresponding input pins (P3, P10, P11, or P2) on the converter board using the provided 6-pin signal wire or other appropriate cables.
- VGA-Ausgang anschließen: Connect a standard VGA cable from the VGA output port on the GBS8200 board to your VGA-compatible monitor or display.
- Strom anschließen: Use the provided 2-pin power supply wire to connect the board to a DC 5V ±0.5V (2A) power source. Ensure correct polarity. The power input can be via P7 or P9.
- Einschalten: Once all connections are secure, power on your video source and the display. The converter board will automatically detect and process the input signal.

Abbildung 5.1: Überview of the GBS8200 Video Converter Board with connected signal and power wires.

Abbildung 5.2: Abgewinkelt view highlighting the power input and VGA output ports on the GBS8200 board.
6. Operation and Menu Controls
The GBS8200 board features several buttons for controlling its functions and accessing the On-Screen Display (OSD) menu.
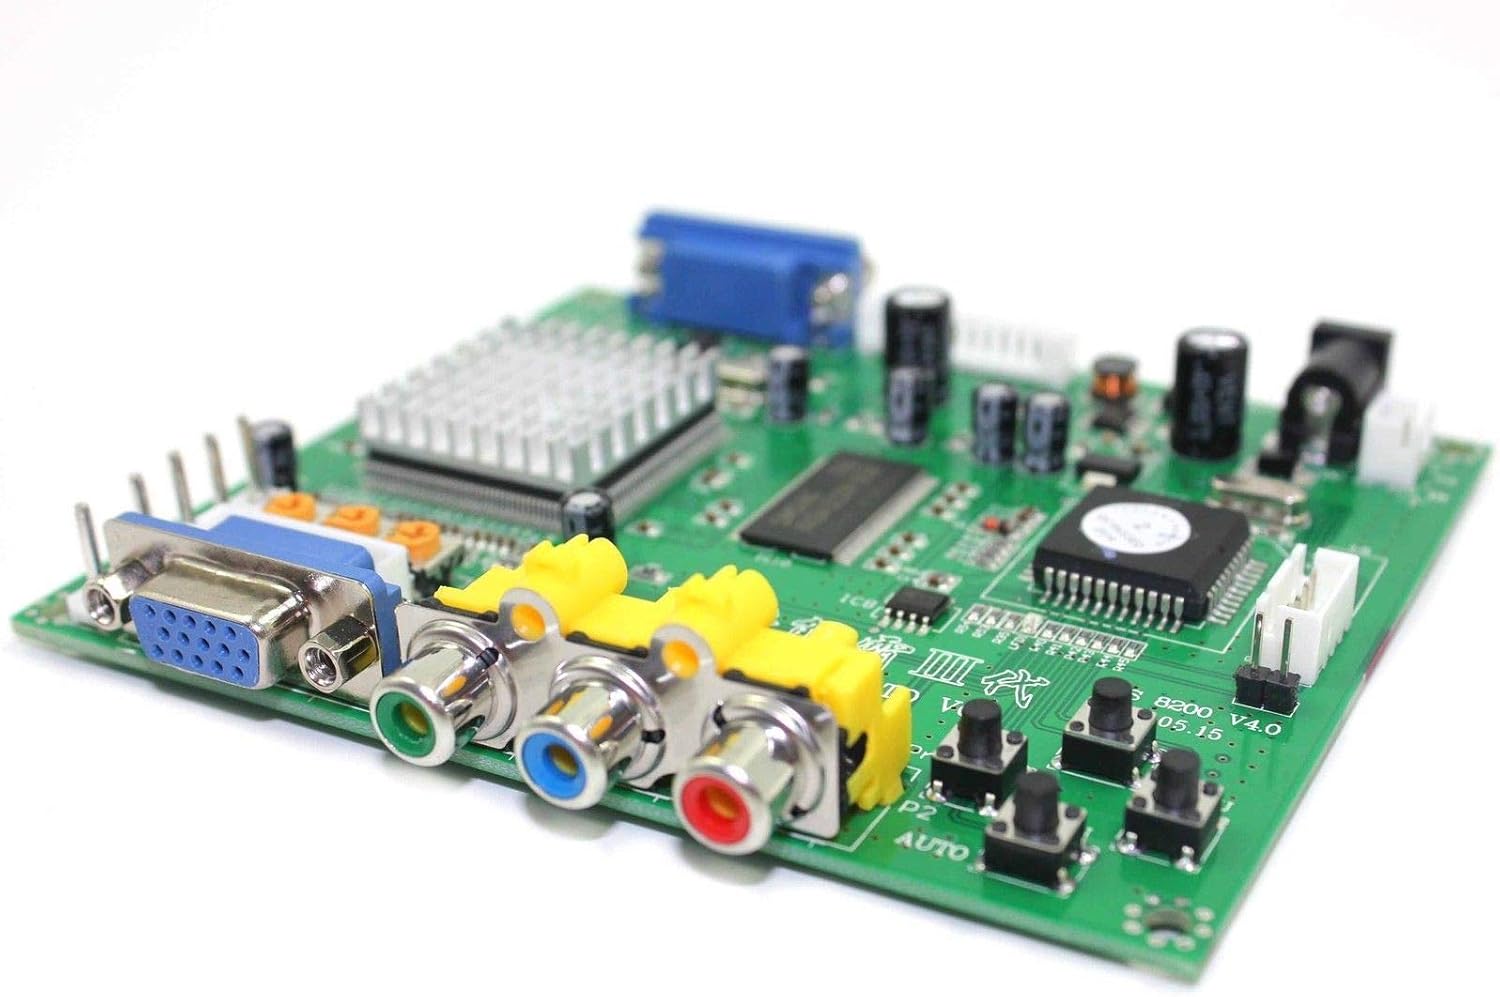
Abbildung 6.1: Seite view of the GBS8200 board, illustrating the various input/output ports and the control buttons.
- MENU-Taste: Press this button to open the OSD menu. Press again to enter selected options within the menu.
- AUF-Taste: Dient zur Navigation durch Menüoptionen oder zur Erhöhung von Werten.
- DOWN/AUTO Button: Used to navigate down through menu options or decrease values. A single press will initiate an auto-scan for CGA/EGA signals. Pressing and holding this button for over 5 seconds (outside of the OSD menu) will reset the system to factory defaults.
- SW (Switch) Button: Used to switch between Ypbpr, RGBS, and RGBHV input signals. This operation is invalid when the OSD menu is open.
- Clamp sp & Clamp Tasten: These buttons are for advanced image synchronization adjustments. It is recommended not to adjust these buttons unless you observe specific display issues such as black artifacts or picture discoloration on your monitor. For most users, these settings should be left at their default values.
Für eine detailliertere Funktionssteuerung konsultieren Sie bitte das Bildschirmmenü nach der Aktivierung.
7. Fehlerbehebung
If you encounter issues with your GBS8200 Video Converter Board, please refer to the following common problems and solutions:
- Kein Signal / Schwarzer Bildschirm:
- Ensure all cables (input signal, VGA output, power) are securely connected.
- Verify the power supply is providing the correct DC 5V ±0.5V (2A).
- Press the 'DOWN/AUTO' button once to initiate an auto-scan for CGA/EGA signals.
- Use the 'SW' button to cycle through input signal types (Ypbpr/RGBS/RGBHV) to match your source.
- Check your monitor's input selection to ensure it is set to the correct VGA input.
- Distorted or Discolored Image:
- Access the OSD menu to adjust R/G/B gain settings.
- If black artifacts or severe discoloration persist, you may cautiously adjust the 'Clamp sp' and 'Clamp' buttons. Make small adjustments and observe the effect.
- Ensure the input signal quality from your source device is stable.
- OSD Menu in Chinese:
- Navigate to the fourth option in the OSD menu, which typically corresponds to language selection, and choose English.
- System reagiert nicht:
- Press and hold the 'DOWN/AUTO' button for over 5 seconds (when OSD is not active) to perform a system reset.
- Disconnect and reconnect the power supply to restart the device.
8. Wartung
To ensure the longevity and optimal performance of your GBS8200 Video Converter Board:
- Bewahren Sie die Platine in einer sauberen, trockenen Umgebung auf, fern von Staub und Feuchtigkeit.
- Setzen Sie die Platine keinen extremen Temperaturen oder direkter Sonneneinstrahlung aus.
- Do not attempt to open the main chip heatsink or modify the board, as this may void any potential warranty and cause damage.
- Reinigen Sie die Platine bei Bedarf vorsichtig mit einem weichen, trockenen Tuch. Verwenden Sie keine flüssigen Reinigungsmittel.

Abbildung 8.1: Nahaufnahme view of the main processing chip and its heatsink on the GBS8200 board.
9. Support & Garantie
For further assistance or technical support, please visit the official JahyShow store on Amazon or contact their customer service. While specific warranty details are not provided in this manual, standard consumer rights and return policies typically apply.
JahyShow Store: Visit JahyShow on Amazon