1. Wichtige Sicherheitshinweise
Please read this instruction manual carefully before using the appliance and save it for future reference. Incorrect use may result in electric shock, fire, or serious injury.
- Dieses Gerät ist nur für den Hausgebrauch bestimmt. Nicht im Freien oder auf nassen Oberflächen verwenden.
- Kinder dürfen den Staubsauger nicht bedienen. Bei der Benutzung in der Nähe von Kindern ist eine enge Aufsicht erforderlich.
- Nehmen Sie keine entflammbaren oder brennbaren Flüssigkeiten wie Benzin auf und verwenden Sie sie nicht in Bereichen, in denen sie vorhanden sein könnten.
- Heben Sie keine brennenden oder rauchenden Gegenstände auf, z. B. Zigaretten, Streichhölzer oder heiße Asche.
- Nicht ohne eingesetzten Staubbecher und/oder Filter verwenden.
- Turn off the appliance before connecting or disconnecting the motorized brush, crevice tool, or square brush.
- Verwenden Sie zum Aufladen ausschließlich das vom Hersteller mitgelieferte Ladegerät.
- Fassen Sie das Ladegerät oder das Gerät nicht mit nassen Händen an.
2. Produktüberschreitungview
The Princess 339490 Rapido Cordless Stick Vacuum Cleaner is designed for efficient cleaning of various surfaces. It features a powerful motor, a removable battery, and multiple attachments for versatile use.
Enthaltene Komponenten:
- Princess Rapido Cordless Vacuum Unit
- Wandmontierte Ladestation
- Fugendüse
- Quadratische Bürste
- Li-Ionen-Akku
- Main Brush Head (Motorized)
- Vakuumröhre
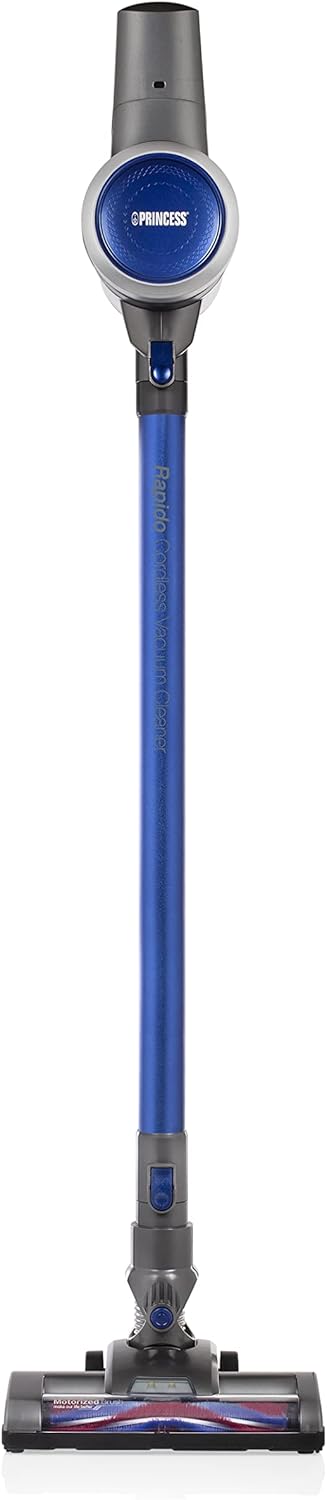
Abbildung 2.1: Vorderseite view of the Princess 339490 Rapido Cordless Stick Vacuum Cleaner.

Abbildung 2.2: Schräg view of the Princess 339490 Rapido Cordless Stick Vacuum Cleaner, showing its sleek design.

Figure 2.3: Close-up of the motorized brush head, designed for effective cleaning on various floor types.

Figure 2.4: The vacuum unit configured as a handheld cleaner with the crevice tool attached, ideal for tight spaces.
3. Einrichtung
3.1 Montage
- Attach the Vacuum Tube: Insert the vacuum tube into the main vacuum unit until it clicks securely into place.
- Bringen Sie den Hauptbürstenkopf an: Connect the motorized brush head to the other end of the vacuum tube, ensuring it locks firmly.
- Installieren Sie die Batterie: Slide the Li-ion battery pack into the designated slot on the main vacuum unit until it clicks. Ensure it is fully seated.

Figure 3.1: Proper insertion of the Li-ion battery pack into the main vacuum unit.
3.2 Laden
Before first use, fully charge the battery for approximately 4 hours.
- Montieren Sie die Ladestation: Secure the wall-mounted charging station in a convenient location near a power outlet.
- Place the Vacuum: Hang the assembled vacuum cleaner on the charging station. Ensure the charging contacts align.
- An die Stromversorgung anschließen: Plug the charging station into a standard electrical outlet.
- Aufladen des Monitors: The charging indicator light on the vacuum unit will illuminate during charging. It will change color or turn off when fully charged.
Figure 3.2: The charging indicator light, which shows the charging status of the battery.
4. Bedienungsanleitung
4.1 Ein-/Ausschalten
To turn the vacuum cleaner on, press the power button located on the handle. Press it again to turn off the appliance.

Figure 4.1: The handle and trigger mechanism for operating the vacuum cleaner.
4.2 Verwendung als Stielstaubsauger
With the vacuum tube and main brush head attached, the appliance functions as a stick vacuum, suitable for floors and carpets. The luxury brush head is designed to transition smoothly between hard floors and carpets without needing to change attachments.
4.3 Verwendung als Handstaubsauger
To convert to a handheld vacuum, detach the vacuum tube and main brush head from the main unit. You can then attach the crevice tool or square brush directly to the main vacuum unit for cleaning stairs, upholstery, or car interiors.
Figure 4.2: The main unit used as a handheld vacuum with the crevice tool for detailed cleaning.
4.4 Akkulaufzeit
The fully charged Li-ion battery provides approximately 32 minutes of continuous operation, allowing you to clean an entire floor without interruption.
5. Wartung
Regelmäßige Wartung gewährleistet optimale Leistung und verlängert die Lebensdauer Ihres Staubsaugers.
5.1 Den Mülleimer leeren
The dustbin should be emptied regularly, especially when the MAX line is reached.
- Stellen Sie sicher, dass der Staubsauger ausgeschaltet ist.
- Hold the main unit over a waste bin.
- Drücken Sie den Entriegelungsknopf des Abfallbehälters, um die untere Klappe zu öffnen und den Inhalt zu entleeren.
- Schließen Sie die Klappe fest, bis sie einrastet.

Figure 5.1: The transparent dustbin showing the HEPA filter inside, indicating the MAX fill line.
5.2 Reinigung des HEPA-Filters
The removable HEPA filter should be cleaned periodically to maintain suction power.
- Schalten Sie den Staubsauger aus und entnehmen Sie den Staubbehälter.
- Den HEPA-Filter vorsichtig aus dem Abfallbehälter entnehmen.
- Klopfen Sie den Filter leicht über einem Abfalleimer ab, um losen Staub zu entfernen.
- Spülen Sie den Filter gegebenenfalls unter fließendem kaltem Wasser ab. Stellen Sie sicher, dass er vor dem Wiedereinsetzen vollständig trocken ist.
- Reassemble the filter and dustbin, then attach to the main unit.
5.3 Reinigung der Bürstenwalze
Periodically check the motorized brush roll for tangled hair or debris.
- Stellen Sie sicher, dass der Staubsauger ausgeschaltet und von der Ladestation getrennt ist.
- Detach the main brush head from the vacuum tube.
- Locate the release mechanism for the brush roll (refer to diagrams in the full manual if needed).
- Entfernen Sie die Bürstenrolle und schneiden Sie verhedderte Haare oder Fasern vorsichtig mit einer Schere ab.
- Setzen Sie die Bürstenwalze wieder ein und befestigen Sie sie.
6. Fehlerbehebung
If you encounter issues with your Princess 339490 Rapido, refer to the following common problems and solutions:
| Problem | Mögliche Ursache | Lösung |
|---|---|---|
| Vakuum lässt sich nicht einschalten | Batterie nicht geladen oder nicht richtig eingesetzt. | Ensure battery is fully charged and correctly inserted. Check charging station connection. |
| Geringe Saugleistung | Dustbin full, filter clogged, or blockage in the tube/brush head. | Empty dustbin. Clean HEPA filter. Check for and remove any blockages in the tube or brush head. |
| Bürstenrolle dreht sich nicht | Hair or debris tangled in the brush roll, or brush head not properly attached. | Clean the brush roll of any obstructions. Ensure the brush head is securely attached to the tube. |
| Kurze Akkulaufzeit | Akku nicht vollständig geladen oder Akkuverschleiß. | Ensure battery is fully charged (4 hours). If runtime remains significantly reduced, the battery may need replacement. |
7. Spezifikationen
- Modellnummer: 01.339490.01.001
- Leistung: 130 Watt
- Bandtage: 22.2 Volt
- Akku-Typ: Lithium-Ionen
- Batterielaufzeit: Bis zu 32 Minuten
- Ladezeit: Ungefähr 4 Stunden
- Staubkapazität: 0.8 Liter
- Filtertyp: HEPA, Cartridge
- Geräuschpegel: 70 Dezibel
- Abmessungen (L x B x H): 109 x 22 x 23 cm
- Gewicht: 2.6 kg
- Besondere Merkmale: Cordless, Bagless, Handheld conversion, Motorized brush head
8. Garantie und Support
8.1 Garantieinformationen
The Princess 339490 Rapido Cordless Stick Vacuum Cleaner comes with a 24 Monate Herstellergarantie from the date of purchase. This warranty covers defects in materials and workmanship under normal household use. It does not cover damage resulting from misuse, neglect, accident, alteration, or improper maintenance.
Bitte bewahren Sie Ihren Kaufbeleg für Garantieansprüche auf.
8.2 Kundendienst
For technical assistance, warranty claims, or to order replacement parts, please contact Princess customer support:
- WebWebsite: www.princesshome.eu/en-gb/service
- E-Mail: support@princesshome.eu
- Telefon: Refer to your regional Princess webWebseite für lokale Telefonnummern.