Einführung
This manual provides comprehensive instructions for setting up and operating your TMC 8-Inch Digital Day Clock (Model CDD-8D-W). This clock is designed with a large, clear display to show the time, day, date, and period of the day (Morning, Afternoon, Evening, Night). It includes features such as multiple alarms, medication reminders, adjustable brightness, and the ability to play media from an SD card. Please read this manual thoroughly to ensure proper use and maintenance of your device.
Produkt überview
Familiarize yourself with the components and controls of your TMC Digital Day Clock.

Abbildung 1: Vorderseite view of the TMC 8-inch digital day clock.

Abbildung 2: Rückseite view of the clock with control buttons, ports, and detachable stand.
Schlüsselkomponenten:
- Bildschirm: 8-inch LED display for time, day, date, and period of day.
- Control Buttons (Rear): Power, Menu, Navigation (Up/Down/Left/Right/Enter).
- SD-Kartensteckplatz: For playing videos, music, or displaying photos.
- DC-Eingangsanschluss: Zum Anschluss des Netzteils.
- Loch zum Aufhängen: Zur Wandmontage.
- Lautsprecher: For alarm sounds and media audio.
- Abnehmbarer Ständer: Für Tischplatzierung.
Aufstellen
1. Stromanschluss:
- Connect the provided power adapter to the DC IN port on the back of the clock.
- Plug the adapter into a standard electrical outlet. The clock will power on automatically.
2. Grundeinstellungen:
Upon first power-on, or after a reset, you may need to set the time, date, and language. Use the control buttons on the back of the clock to navigate the menu.
- Drücken Sie die Speisekarte Taste, um das Einstellungsmenü aufzurufen.
- Verwenden Sie die Hoch/Runter buttons to highlight options.
- Verwenden Sie die Links rechts Schaltflächen zum Ändern von Werten.
- Drücken Sie die Eingeben button (center of navigation cluster) to confirm selections.

Figure 3: The clock display after initial setup, showing time, day, and date.
Video Guide: Setting Up Your Clock
This video demonstrates how to navigate the clock's menu to set the time, date, language, brightness, and alarm settings.
Betrieb
Uhrzeit und Datum einstellen:
- Drücken Speisekarte.
- Navigate to 'Set Time' and 'Set Date' using Hoch/Runter buttons. Adjust values with Links rechts.
- Select 'Time Mode' to choose between 12-hour or 24-hour format.
- Select 'Date Mode' to choose between Month-Day-Year or Day-Month-Year format.
- Navigate to 'Language' to select your preferred language (8 languages supported).
- Drücken Speisekarte again to exit and save settings.
Anpassen der Helligkeit:
The clock features 5 levels of display brightness and an automatic dimming function.
- Drücken Speisekarte.
- Navigate to 'Automatic Brightness' to enable or disable the auto-dimming feature.
- If 'Automatic Brightness' is off, you can manually adjust 'Brightness-day' and 'Brightness-night' (levels 1-10).

Figure 4: The clock demonstrating automatic dimming for day and night for optimal visibility.
Lautstärke anpassen:
The clock offers 10 adjustable alarm volume levels.
- Drücken Speisekarte.
- Navigate to 'Volume' and use Links rechts buttons to adjust the level (1-10).
Alarms & Reminders
The clock supports 5 custom alarms and 3 dedicated medication reminders.
Setting Custom Alarms:
- Drücken Speisekarte.
- Navigate to 'Alarm Status' and set it to 'On'.
- Scroll down to 'Alarm01' through 'Alarm05'.
- Select an alarm, then use Links rechts to set the time and frequency (e.g., Once, Everyday, Mon-Fri, Weekends).
- Drücken Speisekarte zu beenden und zu speichern.
Setting Medication Reminders:
Three pre-set medication reminders are available for Morning, Afternoon, and Night.
- Drücken Speisekarte.
- Navigate to 'Morning Medication Reminder', 'Afternoon Medication Reminder', or 'Evening Medication Reminder'.
- Select a reminder and use Links rechts to set the time and frequency.
- Drücken Speisekarte zu beenden und zu speichern.

Figure 5: The clock displaying a medication reminder, illustrating its use for daily routines.

Abbildung 6: Bspample of a medication reminder displayed on the clock screen.
Medienwiedergabe (SD-Karte)
The clock supports playing videos, music, and displaying photos from an SD card (not included).
Steps for Media Playback:
- Download your desired photos, videos, or music files onto an SD card.
- Locate the SD card slot on the side of the clock.
- Schieben Sie die SD-Karte in den Steckplatz, bis sie einrastet.
- The clock should automatically detect the SD card. Navigate to the media playback option in the menu to choose photos, videos, or music to play.
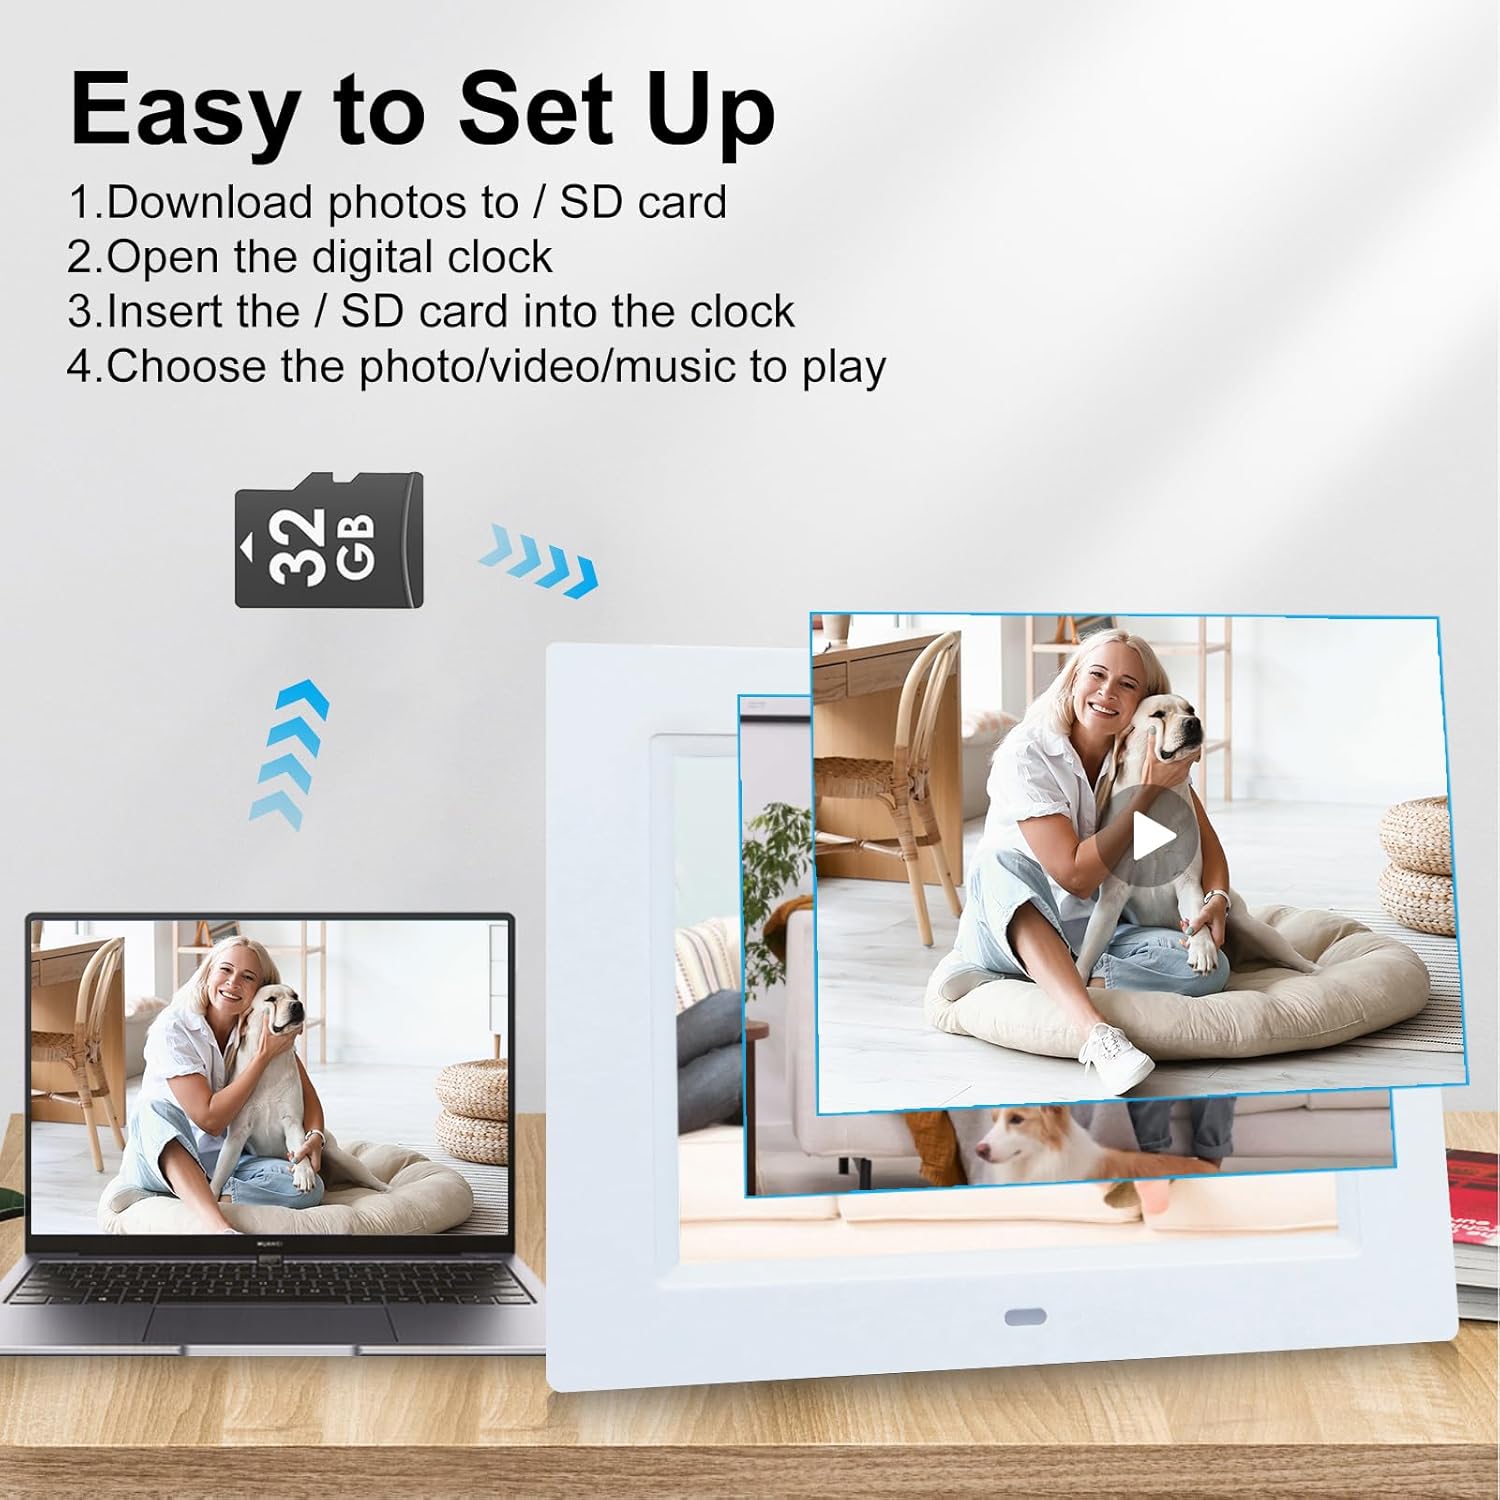
Figure 7: Instructions for inserting an SD card to play media files.
Montageoptionen
The TMC Digital Day Clock offers versatile placement options.
Platzierung der Tischplatte:
Use the detachable stand located on the back of the clock. Pull it out to support the clock on any flat surface, such as a desk, nightstand, or counter. The stand allows for angle adjustment.
Wandmontage:
The clock features a hanging hole on its back for easy wall mounting. Ensure the stand is folded in before mounting. Use appropriate wall hardware (not included) for secure installation.

Figure 8: The clock with its detachable stand and wall-mounting option.
Fehlerbehebung
If you encounter issues with your TMC Digital Day Clock, refer to the following common solutions:
- Clock Not Powering On: Stellen Sie sicher, dass das Netzteil sowohl mit der Uhr als auch mit einer funktionierenden Steckdose fest verbunden ist.
- Falsche Zeit-/Datumsanzeige: Access the settings menu (press Menu button) and verify the 'Set Time' and 'Set Date' are correct. Check 'Time Mode' (12/24 Hour) and 'Date Mode' (Month-Day-Year / Day-Month-Year) settings.
- Alarm Not Sounding/Stopping: Check 'Alarm Status' in the menu to ensure alarms are enabled. Verify individual alarm times and frequencies. To stop a sounding alarm, press any button on the back of the clock.
- Anzeige zu hell/zu dunkel: Adjust 'Brightness-day' and 'Brightness-night' settings in the menu. Ensure 'Automatic Brightness' is set according to your preference.
- SD Card Media Not Playing: Ensure the SD card is inserted correctly and contains compatible media files (photos, videos, music). Check the media playback settings in the menu.
- No Sound from Media/Alarms: Check the 'Volume' setting in the menu.
Sollten die Probleme weiterhin bestehen, wenden Sie sich bitte an den Kundendienst, um weitere Unterstützung zu erhalten.
Technische Daten
| Besonderheit | Detail |
|---|---|
| Marke | TMC |
| Modellnummer | CDD-8D-W |
| Anzeigetyp | Digitale LED |
| Bildschirmgröße | 8 Zoll |
| Technische Daten | 7.5 Zoll B x 8.7 Zoll H |
| Artikelgewicht | 1.1 Pfund |
| Stromquelle | Corded Electric (5V, 1500mA) |
| Besondere Merkmale | Adjustable Volume, 5 Alarms, 3 Medication Reminders, Auto Dimmable, Large Display, Multilingual (8 languages), SD Card Playback |
| Montagetyp | Wall Mount/Tabletop |
| Materialtyp | Acrylnitril-Butadien-Styrol (ABS-Kunststoff) |
Garantie und Support
TMC products are manufactured with quality and care. This product comes with a limited warranty. For detailed warranty information, product support, or to report any issues, please contact TMC customer service. Refer to the product packaging or the official TMC webWebsite für Kontaktdaten.