
BSIDE ADMS6
BSIDE Smart Digital Multimeter ADMS6 User Manual
Model: ADMS6 | Brand: BSIDE
Einführung
The BSIDE Smart Digital Multimeter ADMS6 is designed for ease of use, especially for beginners, by automatically identifying tested parameters and selecting the appropriate range. This eliminates the need for manual function knob switching, streamlining the measurement process. Its compact design and integrated probe holders enhance portability and safety.

Image: The BSIDE Smart Digital Multimeter ADMS6, showcasing its main unit and included test probes. The device features a clear digital display and a central rotary switch.
Hauptmerkmale
- Automatic Identification Design: Erkennt automatisch die AC/DC-Lautstärketage, AC/DC current, frequency (Hz), continuity, and resistance, eliminating manual range selection.
- Transparent "Hz" Button: This button illuminates green or red to indicate AC voltage strength, live wire detection, or continuity.
- Dual Side Probe Holder Design: Test probes can be securely fixed in integrated holders for convenient single-hand measurements or safely stored to prevent accidental contact with the tips.

Image: The multimeter demonstrating its dual-side probe holder design. One view shows probes extended and fixed for use, while another shows them retracted and hidden for safe storage.
- Recoverable Fuses Design: Features self-resetting fuses to protect the device and reduce repair time and costs.
- Schutzhülle: Durable case provides protection against shocks, friction, and bumps, and is easy to remove and replace.
- Backtop Stand: Integrated stand allows for convenient hands-free operation.

Image: The multimeter with its backtop stand partially extended, illustrating how it can be propped up for easier viewwährend des Gebrauchs.
- Kompakt und tragbar: Designed to be pocket-sized for easy carrying.

Image: The compact BSIDE multimeter shown fitting into a standard jeans pocket, highlighting its portability.
Packungsinhalt
Bitte überprüfen Sie nach dem Öffnen des Pakets, ob alle unten aufgeführten Artikel vorhanden und in einwandfreiem Zustand sind:
- 1 x BSIDE Smart Digital Multimeter ADMS6
- 1 x Set of Test Probes
- 1 x Benutzerhandbuch

Image: A visual representation of the package contents, showing the multimeter, its test probes, and the included user manual.
Note: Batteries (2 x AAA) are not included in the package due to aviation security regulations. Please purchase them separately.
Aufstellen
Einlegen der Batterie
- Suchen Sie die Abdeckung des Batteriefachs auf der Rückseite des Multimeters.
- Use a screwdriver (not included) to open the battery compartment.
- Legen Sie zwei 1.5V AAA-Batterien ein und achten Sie dabei auf die richtige Polarität (+ und -), wie im Batteriefach angegeben.
- Bringen Sie die Batteriefachabdeckung wieder an und sichern Sie sie mit der Schraube.
Anschluss von Testspitzen
- Stecken Sie die rote Messleitung in die Eingangsbuchse "VΩHz".
- Stecken Sie die schwarze Messleitung in die "COM" (gemeinsame) Eingangsbuchse.
- For current measurements (mA), insert the red test lead into the "mA" input jack and the black test lead into the "COM" jack.
Bedienungsanleitung
The ADMS6 features an intelligent automatic identification system, simplifying most measurements. Turn the rotary switch to the desired general measurement mode (e.g., Multimeter, V-Alert, Live Check).
Automatic Measurement Mode (Multimeter)
When the rotary switch is set to "Multimeter", the device will automatically detect and measure:
- AC/DC-Voltage: Connect probes across the circuit or component.
- Wechsel-/Gleichstrom: Connect probes in series with the circuit.
- Widerstand (Ω): Verbinden Sie die Messspitzen mit der gesamten Komponente.
- Kontinuität: If resistance is less than 30Ω, the beeper will sound.
- Frequenz (Hz): The device will automatically detect frequency.

Image: The multimeter's display showing its smart identification feature, where it automatically detects the measurement type. The "Hz" button is illuminated, indicating its function.
V-Alert (Non-Contact Voltage Erkennung)
Set the rotary switch to "V-Alert". Bring the top of the multimeter close to an AC voltage source. The device will beep and the "Hz" button will light up, indicating the presence of voltage. The intensity of the light (green/red) indicates voltage Stärke.
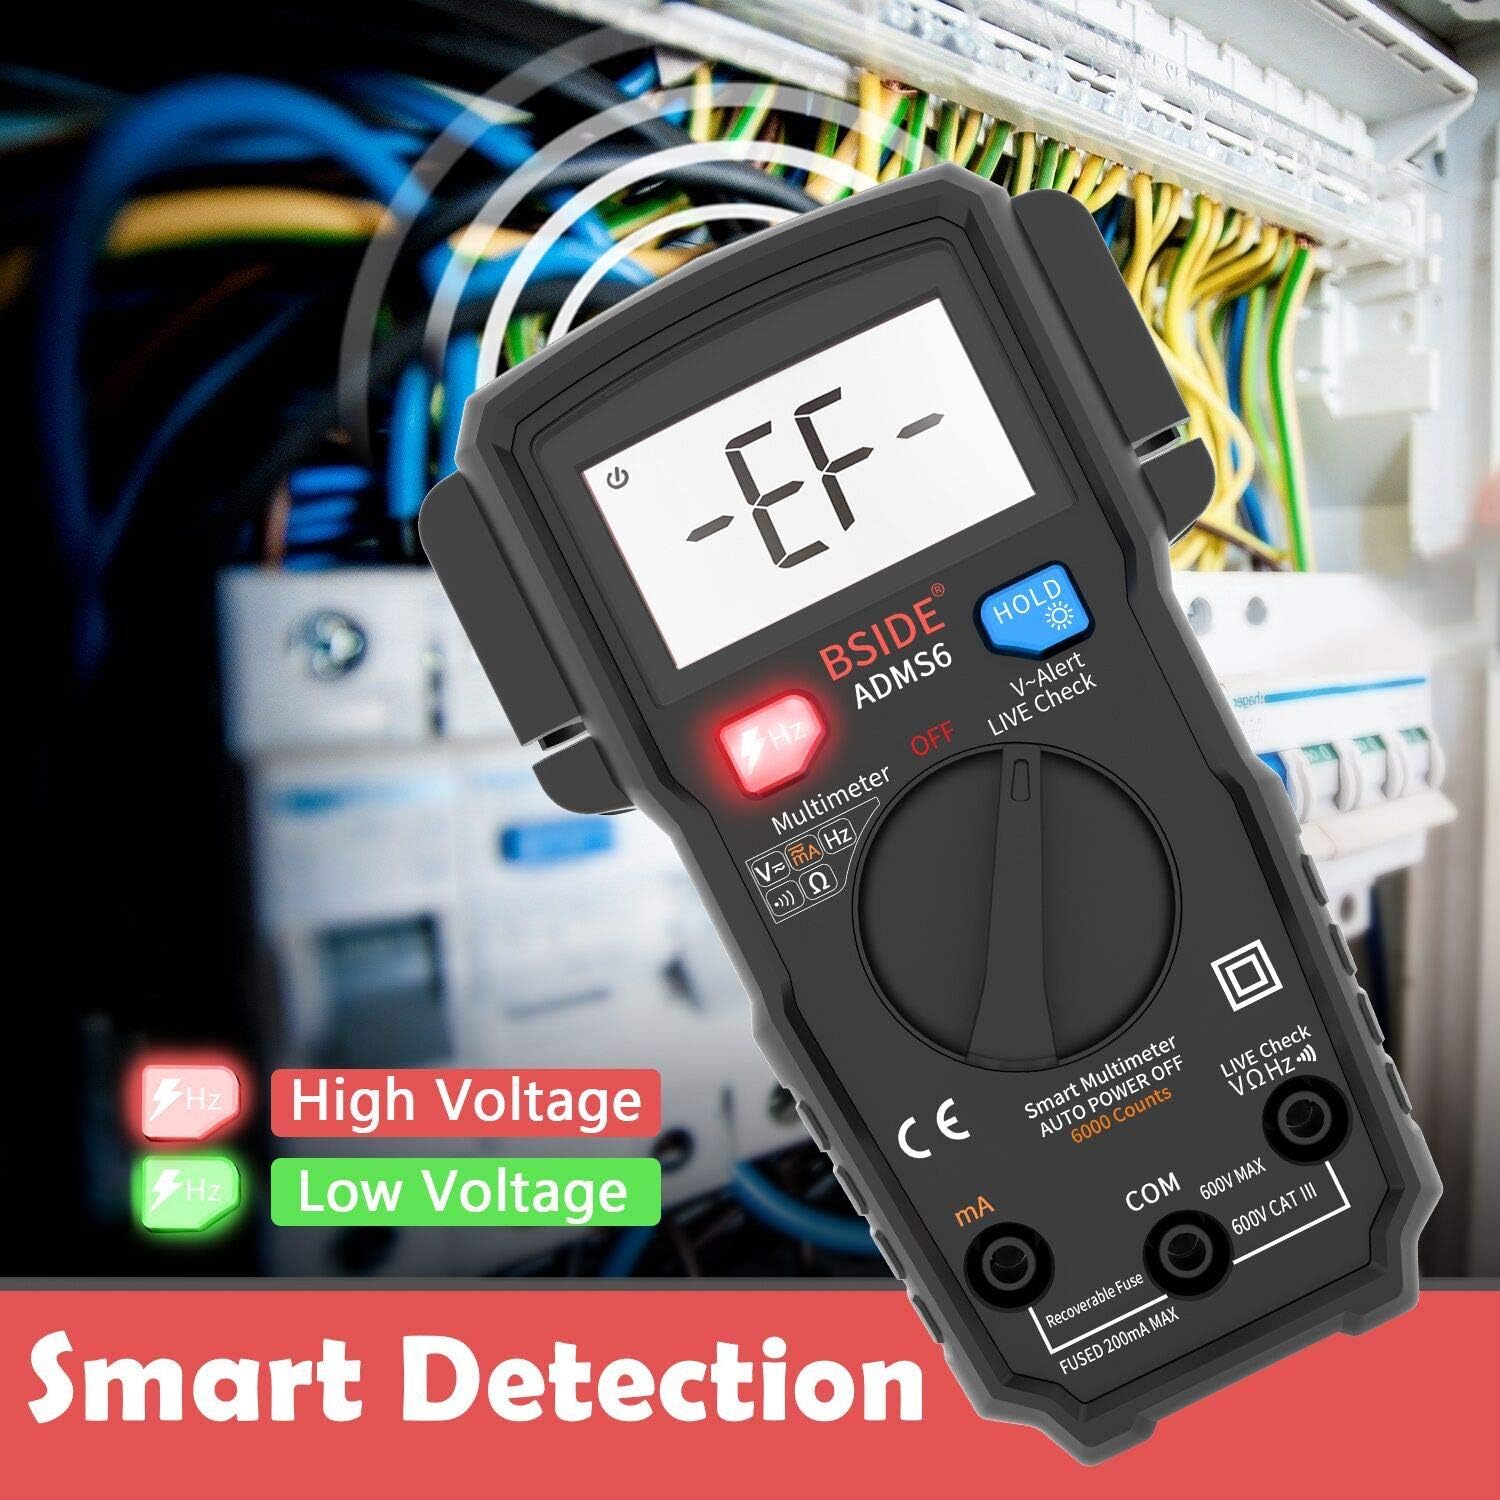
Image: The multimeter's display showing "-EF-" during V-Alert mode, with the "Hz" button illuminating red for high voltage and green for low voltage, indicating smart detection.
Prüfung auf stromführende Leitungen
Set the rotary switch to "Live Check". Use the red probe to touch the wire. If it's a live wire, an alarm beep will sound, the LCD screen will display "LIVE", and the "Hz" button will light up.
HOLD-Funktion
Drücken Sie die Taste „HOLD“, um den aktuellen Messwert auf dem Display einzufrieren. Drücken Sie sie erneut, um die Speicherung aufzuheben und die Live-Messungen fortzusetzen.
Hintergrundbeleuchtung
Press the "HOLD" button for a few seconds to turn the backlight on or off, improving visibility in low-light conditions.
Technische Daten
| Parameter | Wert |
|---|---|
| Anzeige | 6000 Zählwerte |
| Gleichstrom | 600uA/6000uA/60mA/200mA ±(1.2%+3) |
| Wechselstrom | 600uA/6000uA/60mA/200mA ±(1.5%+5) |
| DC-Voltage | 60mV/600mV/6V/60V/600V ±(0.8%+3) |
| AC-Lautstärketage | 60mV/600mV/6V/60V/600V ±(1.2%+5) |
| Widerstand | 6Ω/60Ω/600Ω/6kΩ ±(1.2%+3) |
| Frequenz | 10Hz/100Hz/1KHz ±(1.0%+5) |
| Durchgangssummer | Sounds if resistance < 30Ω |
| Leistung | 2 x 1.5 V AAA-Batterien |
| Abmessungen (L x B x H) | 139 x 83 x 36 mm (5.35 x 3.23 x 1.14 Zoll) |
| Gewicht | 160 g (5.2 Unzen) |
| Sicherheitsbewertung | 600 V KAT III |
Wartung
Reinigung
Um das Multimeter zu reinigen, wischen Sie das Gehäuse mit einem feuchten Tuch ab.amp cloth and a mild detergent. Do not use abrasives or solvents. Ensure the device is powered off and probes are disconnected before cleaning.
Batteriewechsel
When the battery indicator appears on the display, replace the batteries promptly to ensure accurate readings. Refer to the "Battery Installation" section for instructions.
Sicherungsschutz
The ADMS6 features recoverable fuses. In case of an overload, the fuse will trip to protect the circuit. Allow a short period for the fuse to reset. If the issue persists, ensure correct measurement procedures are followed.

Image: A close-up of the multimeter's internal circuit board, highlighting the "Smart Anti-burn" feature, which includes a recoverable fuse for circuit protection.
Lagerung
Bei längerer Nichtbenutzung die Batterien entfernen, um ein Auslaufen zu verhindern. Das Multimeter an einem kühlen, trockenen Ort, vor direkter Sonneneinstrahlung und extremen Temperaturen geschützt aufbewahren.
Fehlerbehebung
- Kein Display/Strom eingeschaltet:
- Prüfen Sie, ob die Batterien richtig eingesetzt sind und ausreichend geladen sind. Tauschen Sie sie gegebenenfalls aus.
- Ensure the rotary switch is not in the "OFF" position.
- Ungenaue Messwerte:
- Verify that the test probes are securely connected to the correct input jacks.
- Ensure the probes are making good contact with the circuit or component being tested.
- Prüfen Sie den Batteriestand; ein niedriger Batteriestand kann die Genauigkeit beeinträchtigen.
- "OL" (Überlastung) wird angezeigt:
- The measured value exceeds the meter's maximum range for the selected function. Ensure you are within the specified limits.
- Kein Kontinuitätssignal:
- Ensure the resistance is below 30Ω for the beeper to activate.
- Check for open circuits or poor connections.
Garantie und Support
BSIDE products are manufactured to high-quality standards. For specific warranty information, please refer to the warranty card included with your product or visit the official BSIDE website. If you encounter any issues or require technical assistance, please contact BSIDE customer support through their official channels. Keep your purchase receipt as proof of purchase for warranty claims.
Weitere Unterstützung finden Sie unter BSIDE Brand Store on Amazon.
Ask a question about this manual
Ask about setup, troubleshooting, compatibility, parts, safety, or missing instructions. Manuals+ will review the question and use this page’s manual context to help answer it.