
1. Einleitung
The AUTOOL LM120 Digital Manifold Gauge is an intelligent electronic instrument designed to assist in the installation, testing, and maintenance of refrigeration equipment. This includes systems such as air conditioners, refrigerators, and cold storage units. It provides precise measurements for pressure, temperature, and vacuum, along with advanced diagnostic capabilities.

Image 1.1: AUTOOL LM120 Digital Manifold Gauge in use, connected to an automotive air conditioning system.
2. Sicherheitshinweise
Bitte lesen und verstehen Sie alle Sicherheitshinweise, bevor Sie das Gerät in Betrieb nehmen. Die Nichtbeachtung dieser Hinweise kann zu Verletzungen oder Schäden am Gerät führen.
- Always wear appropriate personal protective equipment (PPE), including safety glasses and gloves, when working with refrigeration systems and refrigerants.
- Ensure adequate ventilation in the work area to prevent the accumulation of refrigerant gases.
- Setzen Sie das Gerät keinen extremen Temperaturen, direkter Sonneneinstrahlung oder korrosiven Umgebungen aus.
- Handle refrigerant hoses and connections with care to prevent leaks and accidental discharge.
- Refer to local regulations and industry standards for the safe handling, recovery, and disposal of refrigerants.
- Do not attempt to repair or modify the device. Contact qualified personnel for service.
3. Produktüberschreitungview und Komponenten
The LM120 Digital Manifold Gauge features a robust design with an intuitive interface. Familiarize yourself with the components shown below.

Image 3.1: Detailed diagram of the LM120 Digital Manifold Gauge components.
- Haken
- Clamp-on Temperature Probe Socket
- LCD Anzeige
- Funktionstaste
- Run/Stop-Taste
- Null-Taste
- R+/R- Refrigerant Type Selection Buttons
- Dimmtaste
- Einheitentaste
- °C/°F-Taste
- Netzschalter
- Niederdruckventil
- Refrigerant Observation Window
- Hochdruckventil
- 1/4 inch Low Pressure Inlet
- Überdruckventil
- 1/4 inch High Pressure Inlet
- Refrigerant Inlet / Vacuum Pump Inlet
4. Einrichtung
Vor der ersten Benutzung muss sichergestellt werden, dass das Gerät betriebsbereit ist.
4.1 Erstes Einschalten
- Halten Sie die Netzschalter (11) to turn on the device.
- The LCD Display (3) will illuminate and show the initial readings.
4.2 Anschlussschläuche
Connect the appropriate refrigeration hoses to the inlets on the manifold gauge.
- Connect the low-pressure hose to the 1/4 inch Low Pressure Inlet (15).
- Schließen Sie den Hochdruckschlauch an die 1/4 inch High Pressure Inlet (17).
- Connect the service hose (for vacuum pump or refrigerant tank) to the Refrigerant Inlet / Vacuum Pump Inlet (18).
- Stellen Sie sicher, dass alle Verbindungen dicht sind, um Lecks zu vermeiden.
4.3 Connecting Temperature Probes (Optional)
For dual temperature measurement, connect compatible clamp-on temperature probes (not included) to the Clamp-on Temperature Probe Socket (2).
5. Bedienungsanleitung
This section details the various functions and how to operate the AUTOOL LM120.
5.1 Anzeige überview
The large LCD provides clear, real-time data for pressure, temperature, and other parameters.

Image 5.1: The smart digital display provides clear readings for various parameters.
5.2 Einheitenauswahl
To change pressure or temperature units:
- Drücken Sie die Einheitentaste (9) to cycle through available pressure units (e.g., Kpa, Psi, Bar).
- Drücken Sie die °C/°F-Taste (10) to switch between Celsius and Fahrenheit temperature displays.
5.3 Refrigerant Type Setting
The device has a built-in database of 89 refrigerants. Select the correct refrigerant type for accurate calculations.

Image 5.2: Setting the refrigerant type on the LM120 display.
- Verwenden Sie die R+/R- Refrigerant Type Selection Buttons (7) to scroll through the available refrigerant types.
- Bestätigen Sie Ihre Auswahl.
5.4 Druckmessung
The LM120 measures both high and low pressures simultaneously.
- Ensure hoses are correctly connected to the high and low-pressure ports of the system.
- The display will show the current high and low pressure readings.
5.5 Temperaturmessung
With optional clamp-on temperature probes, the device can measure dual temperatures.

Image 5.3: High/Low pressure temperature test display.
- Attach the temperature probes to the desired measurement points (e.g., suction line, liquid line).
- The display will show T1 and T2 temperature readings.
5.6 Evaporation Pressure & Temperature Test
This function measures the maximum pressure when the refrigerant changes from liquid to gas and the lowest temperature when the liquid becomes gaseous.
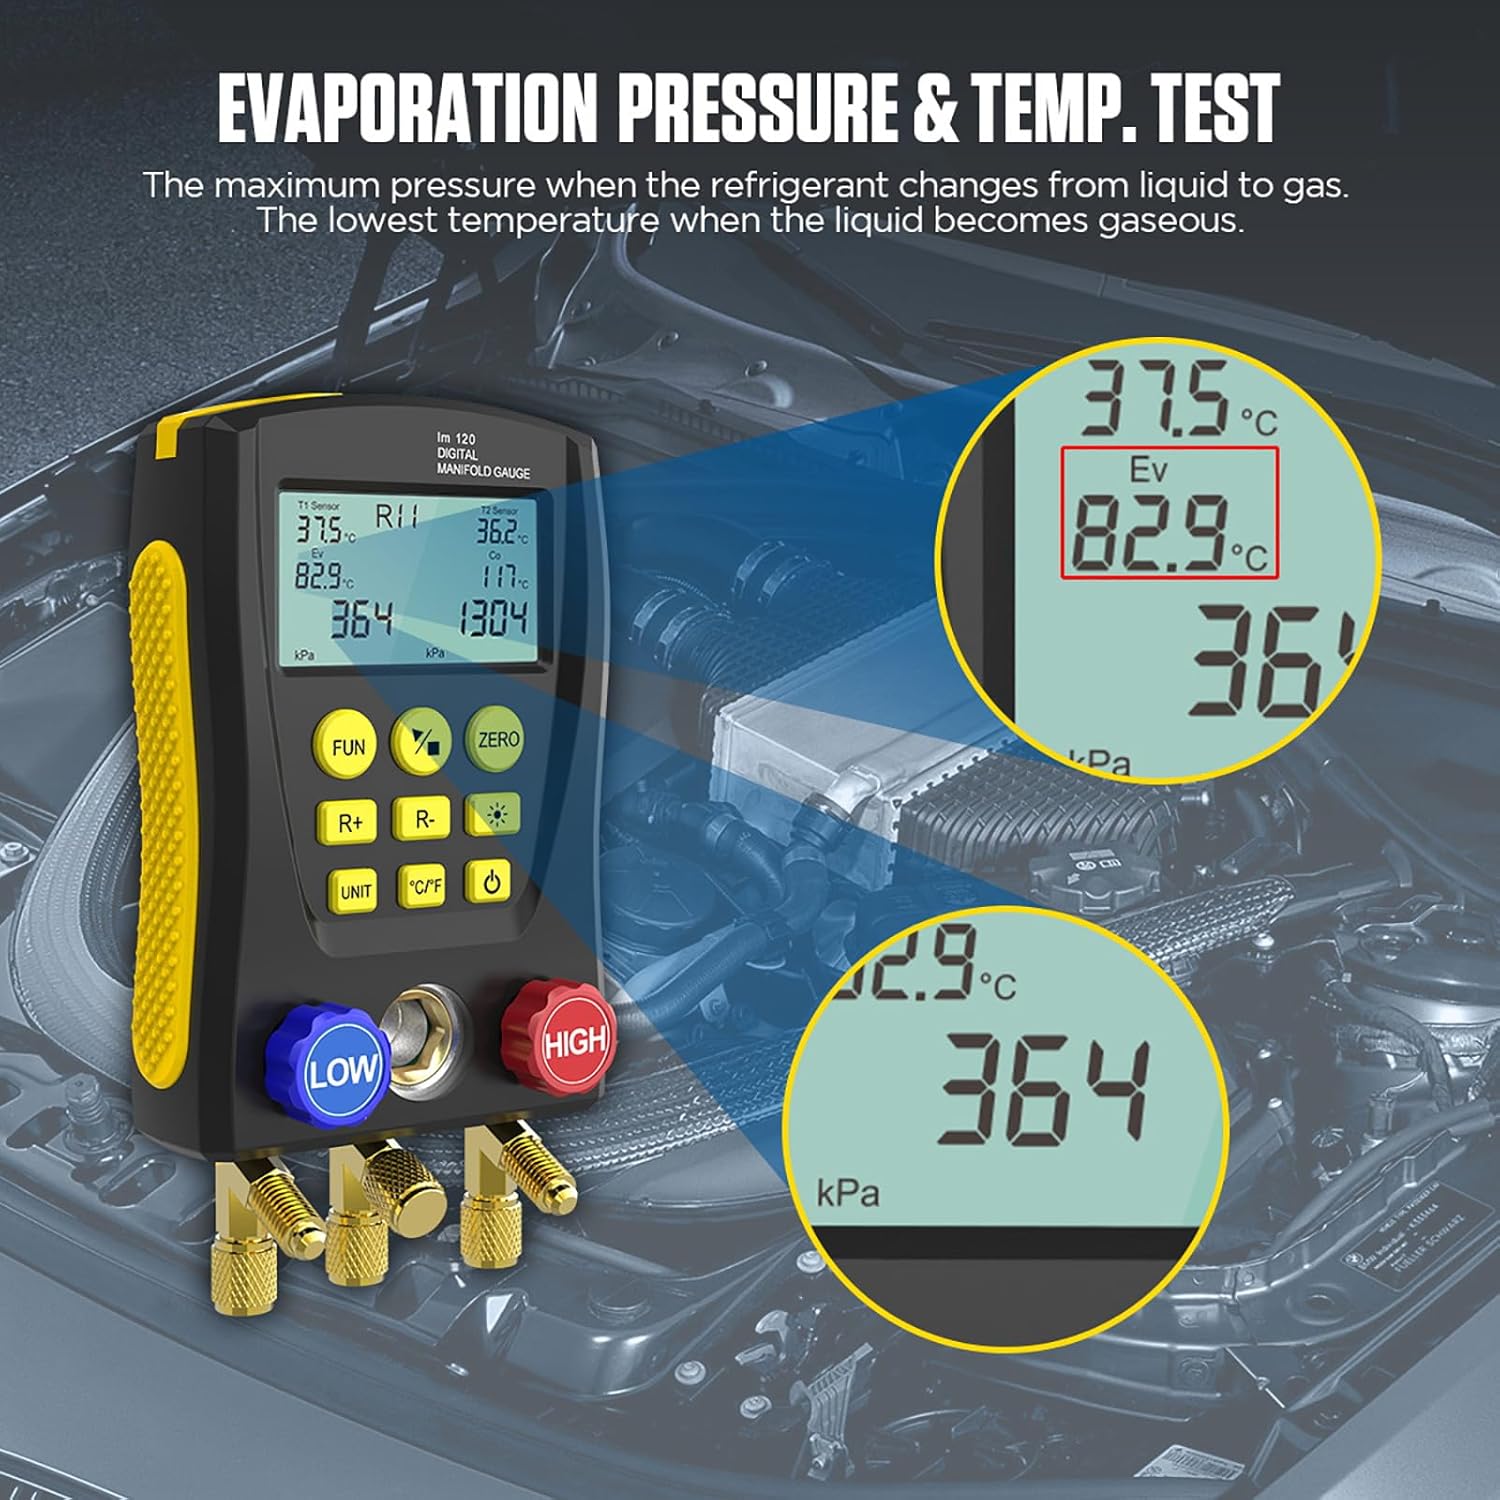
Image 5.4: Evaporation pressure and temperature test results on the display.
5.7 Condensing Pressure & Temperature Test
This function measures the minimum pressure when the refrigerant changes from gas to liquid and the maximum temperature when the gas changes to liquid.

Image 5.5: Condensing pressure and temperature test results on the display.
5.8 Druckleckprüfung
The device can perform a pressure leakage test, recording leak time and speed.
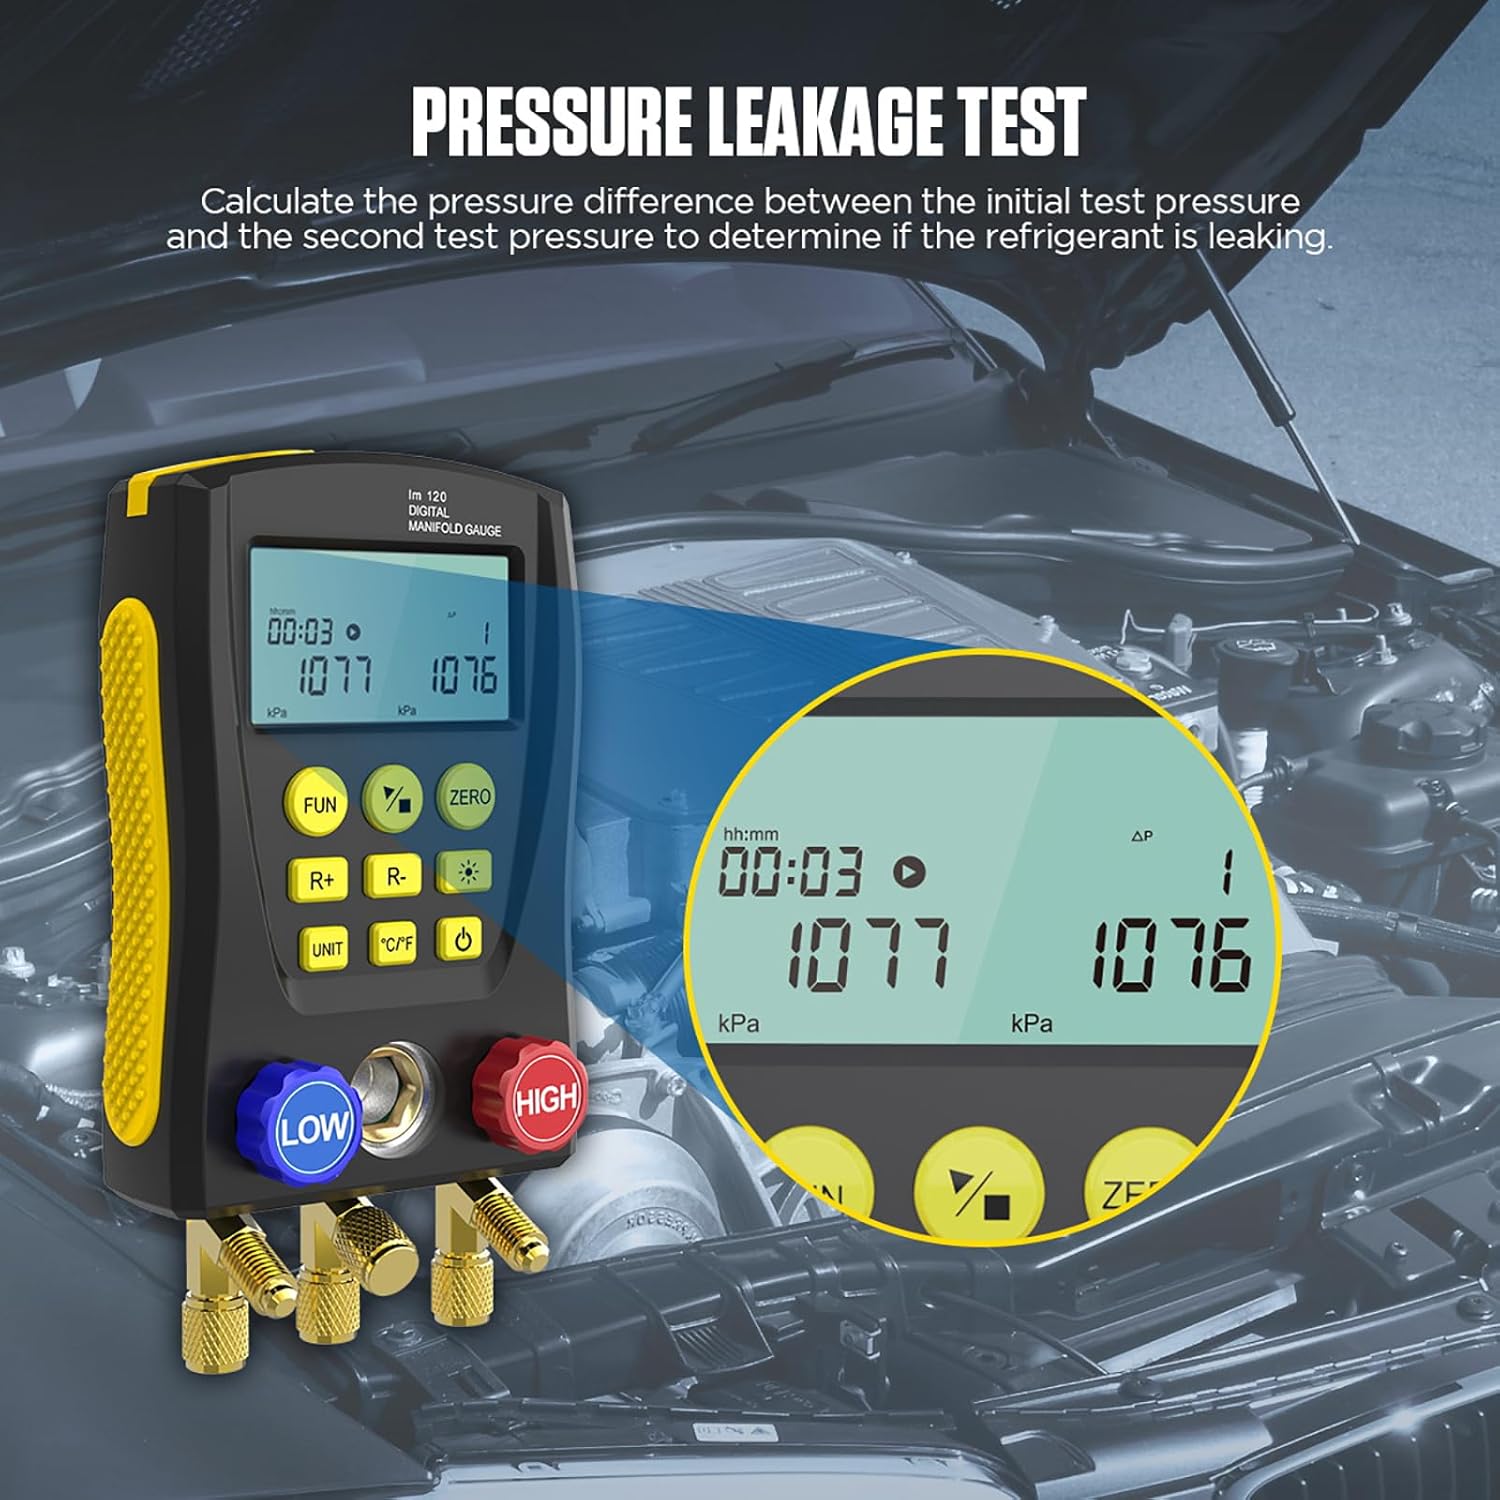
Image 5.6: Pressure leakage test in progress, showing initial and current pressure values over time.
- Schließen Sie das Messgerät an das zu testende System an.
- Drücken Sie die Funktionstaste (4) to navigate to the leakage test mode.
- Follow the on-screen prompts to start and monitor the test. The device calculates the pressure difference between the initial and second test pressures to determine if refrigerant is leaking.
5.9 Vakuummessung
The LM120 can measure the percentage of vacuum achieved in a system.
- Connect the vacuum pump to the Refrigerant Inlet / Vacuum Pump Inlet (18).
- Activate the vacuum pump and monitor the vacuum percentage auf dem Display.
5.10 Superheat and Subcooling Calculation
Leveraging its integrated 89-type refrigerant database, the LM120 can automatically calculate superheat and subcooling temperatures.

Image 5.7: Built-in database of 89 refrigerant types for accurate calculations.
- Ensure the correct refrigerant type is selected (refer to Section 5.3).
- With pressure and temperature probes connected, the device will display calculated superheat and subcooling values.
6. Wartung
Proper maintenance ensures the longevity and accuracy of your LM120 Digital Manifold Gauge.
- Reinigung: Reinigen Sie das Gerät mit einem weichen, trockenen Tuch. Verwenden Sie keine Scheuermittel oder Lösungsmittel.
- Lagerung: Store the gauge in its original case or a protective container in a cool, dry place away from direct sunlight and extreme temperatures.
- Schlauchinspektion: Regularly inspect refrigerant hoses for cracks, wear, or damage. Replace damaged hoses immediately.
- Verbindungsprüfung: Ensure all connections and valves are clean and free of debris.
7. Fehlerbehebung
If you encounter issues with your LM120, refer to the following common problems and solutions.
| Problem | Mögliche Ursache | Lösung |
|---|---|---|
| Gerät lässt sich nicht einschalten | Low or depleted internal battery; power button not pressed correctly. | Ensure the device is charged or has sufficient power. Press and hold the Power Button firmly. |
| Ungenaue Druck-/Temperaturmesswerte | Incorrect refrigerant selected; loose hose connections; faulty probes; sensor calibration needed. | Verify the correct refrigerant type. Check all hose connections for tightness. Ensure temperature probes are clean and properly connected. Perform a zero calibration if available (using Zero Button). |
| Das Display ist dunkel oder unlesbar | Hintergrundbeleuchtung aus; schwacher Akku. | Press the Dimming Button (8) to adjust backlight. Ensure the device is charged. |
| Leakage test shows false positive/negative | Improper connection; external temperature fluctuations; insufficient test duration. | Ensure all connections are absolutely leak-free. Conduct the test in a stable environment. Allow sufficient time for the test to complete. |
8. Spezifikationen
Detailed technical specifications for the AUTOOL LM120 Digital Manifold Gauge.
| Besonderheit | Spezifikation |
|---|---|
| Hersteller | AUTOOL |
| Modellnummer | LM120 |
| Material | High-strength Engineering Plastic |
| Druckprüfbereich | 0 kpa – 6000 kpa |
| Drucktestauflösung | 1 Kpa |
| Drucktestgenauigkeit | +/- 0.5 %(FS) + 5dgt |
| Drucküberlastungsgrenze | 10000 kPa (10 MPa; 100 bar) |
| Number of Refrigerants in Database | 89 Typen |
| Schnittstellenstandard | 1/4 Zoll |
| Abmessungen (L x B x H) | 20.32 x 7.62 x 12.7 cm (8 x 3 x 5 Zoll) |
| Gewicht | 59.53 g (2.1 Unzen) |
| Bestandteile umfaßten | 1 set of LM120 Digital Refrigeration Manifold Gauge |
| Batterien erforderlich | No (implies internal rechargeable or power source) |
| UPC | 733810026709, 733810026198 |
9. Garantie und Support
AUTOOL is committed to providing high-quality products and customer satisfaction.
- Drei Jahre Garantie: For damage caused by non-human factors, AUTOOL promises to resend parts free of charge within 3 years from the date of purchase.
- Permanent Maintenance: The product is covered by permanent maintenance support.
- Kundendienst: For any inquiries, technical assistance, or warranty claims, please contact AUTOOL customer support. You can expect a response within 24 hours.