
1. Einleitung
This manual provides detailed instructions for the safe and effective operation of your BSIDE ACM92 DC Current Clamp Meter. Please read this manual thoroughly before use and retain it for future reference.
The BSIDE ACM92 is a versatile digital multimeter designed for measuring DC and AC current, AC/DC voltage, frequency, resistance, and continuity. It also features V-alert non-contact voltage detection and live-wire checking capabilities.
2. Sicherheitshinweise
Wichtige Sicherheitsvorkehrungen:
- Halten Sie sich stets an die örtlichen und nationalen Sicherheitsvorschriften.
- Do not use the meter if it appears damaged or operates abnormally.
- Vor Gebrauch sicherstellen, dass die Messleitungen ordnungsgemäß angeschlossen und in gutem Zustand sind.
- Vermeiden Sie den Kontakt mit stromführenden Stromkreisen.
- The device conforms to IEC-61010-1, IEC-61010-2-030, IEC-61010-2-032, IEC-61010-2-033 standards.
- ÜberlautstärketagSchutzklasse: CAT III 300V, CAT II 600V, Verschmutzungsgrad II.
DC Current Measurement Specifics:
- The readings for DC current can be influenced by the Earth's magnetic field due to the Hall effect sensor.
- Nullstellen: Always zero out the readings multiple times before each DC current measurement.
- Orientierung: Once zeroed, hold the meter in the exact same orientation when taking readings. Do not tilt, twist, or rotate it, as changes in orientation can lead to false readings due to varying magnetic field strengths.
- Messdauer: For accurate results, measure DC current within 3 seconds after zeroing.
3. Packungsinhalt
Überprüfen Sie, ob alle Artikel im Paket vorhanden sind:
- 1 x BSIDE ACM92 Clamp Meter
- 1 x Messleitungen (rot und schwarz)
- 1 x Tragetasche
- 1 x Schraubendreher
- 1 x Benutzerhandbuch (Dieses Dokument)
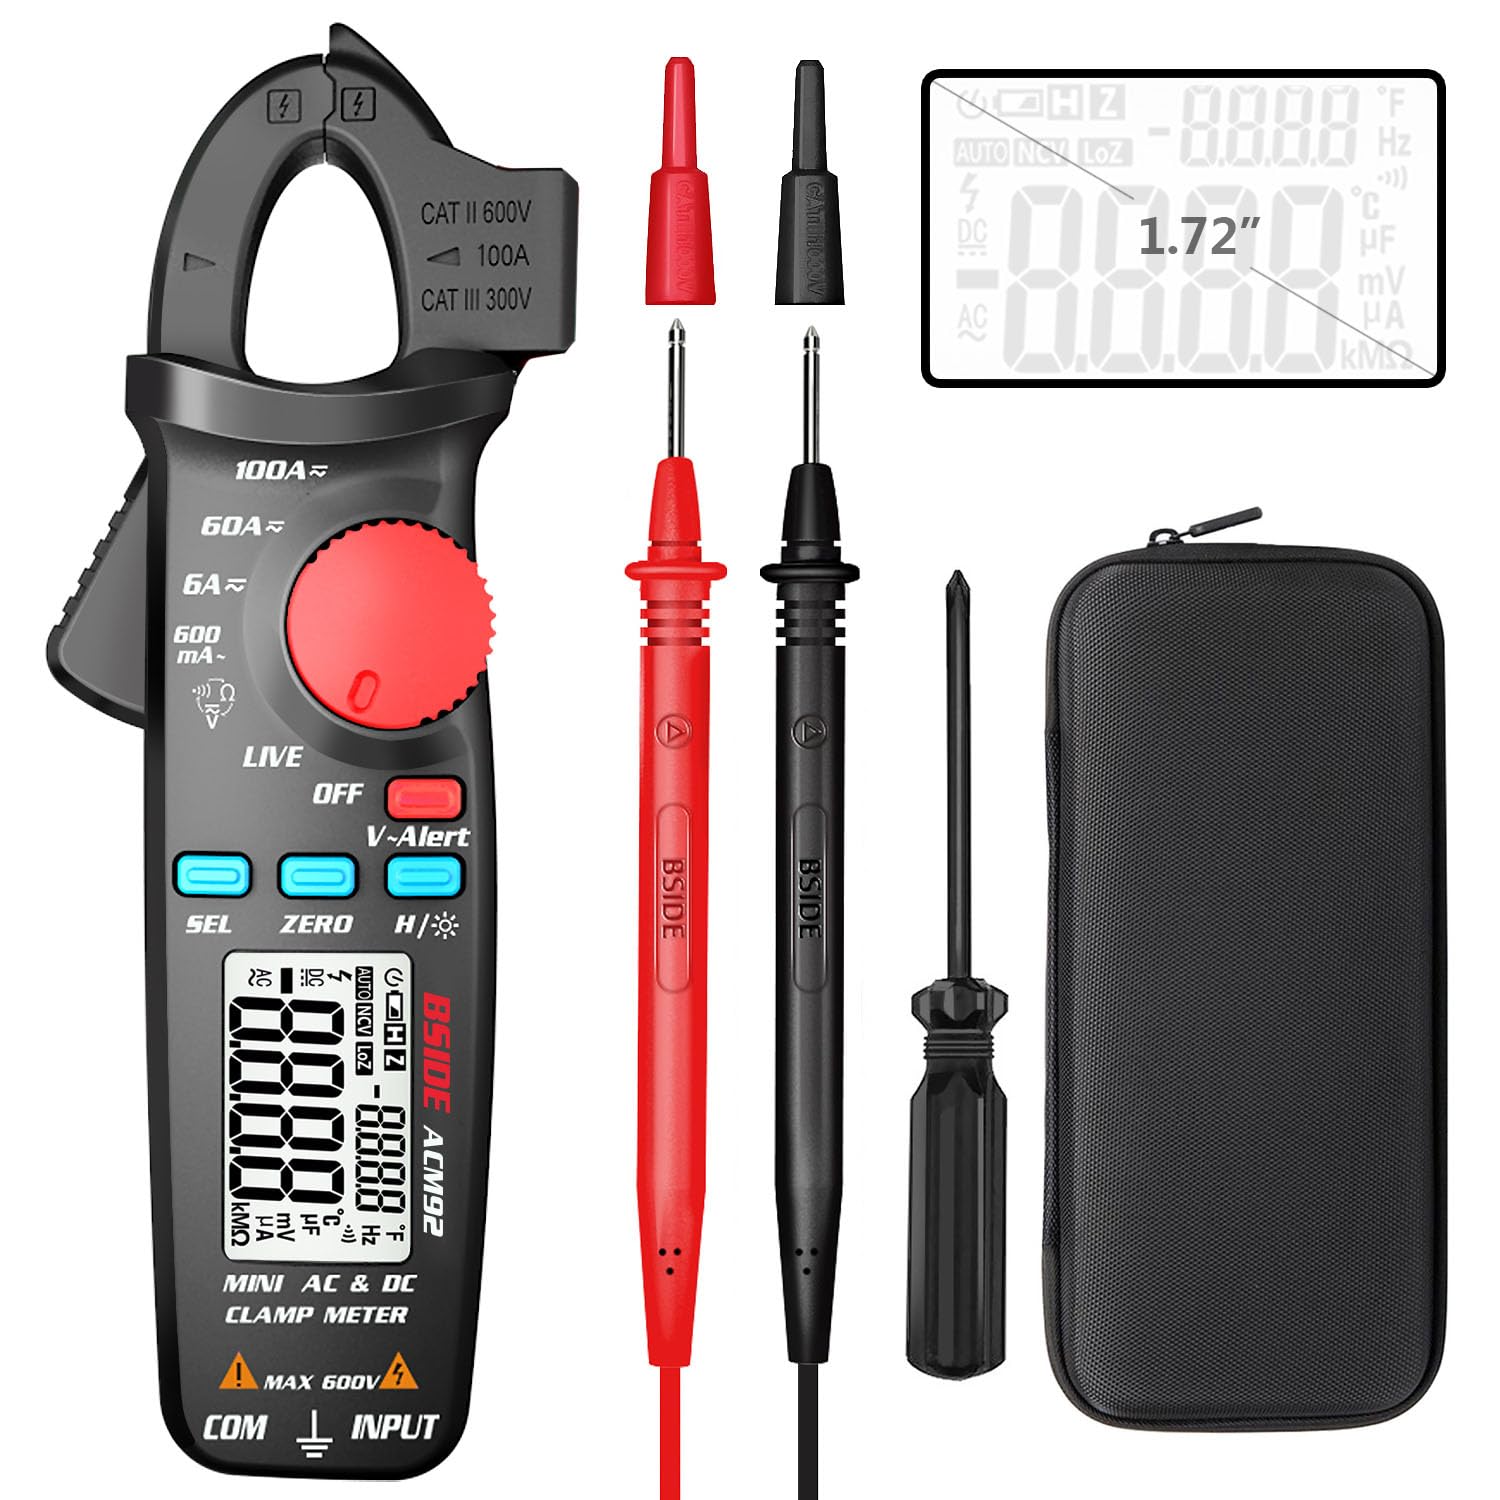
Image: The BSIDE ACM92 Clamp Meter, including the main unit, red and black test leads, a carrying case, and a small screwdriver.
4. Produktmerkmale
- Measures DC Current (minimum 1mA by jaws)
- Measures AC Current (minimum 0.1mA by jaws)
- Maßnahmen AC/DC Lautstärketage
- V-Alert (Non-Contact Voltage Erkennung)
- Live-Wire Check
- Measures Frequency, Resistance, and Continuity
- Clamp-on Frequency Function
- Automatische Abschaltung
- Datenhaltefunktion
- Low Battery Indication with Backlight
- Dual Line Display: Shows both AC voltage/current and frequency simultaneously.

Image: The BSIDE ACM92 Clamp Meter displaying both current and frequency on its dual-line screen while clamping a wire.
Sondenhalter
The integrated probe holder on the side of the meter allows for convenient storage of test leads and can assist in hands-free measurements, especially in narrow or tight environments.

Image: The BSIDE ACM92 Clamp Meter with a test probe secured in its side holder, demonstrating convenient portability and readiness for use.
5. Einrichtung
5.1 Einlegen der Batterie
- Stellen Sie sicher, dass das Messgerät ausgeschaltet ist.
- Suchen Sie das Batteriefach auf der Rückseite des Messgeräts.
- Verwenden Sie den mitgelieferten Schraubendreher, um die Abdeckung des Batteriefachs zu öffnen.
- Legen Sie zwei 1.5V AAA-Batterien ein und achten Sie dabei auf die richtige Polarität (+/-).
- Bringen Sie die Batteriefachabdeckung wieder an und sichern Sie sie mit der Schraube.
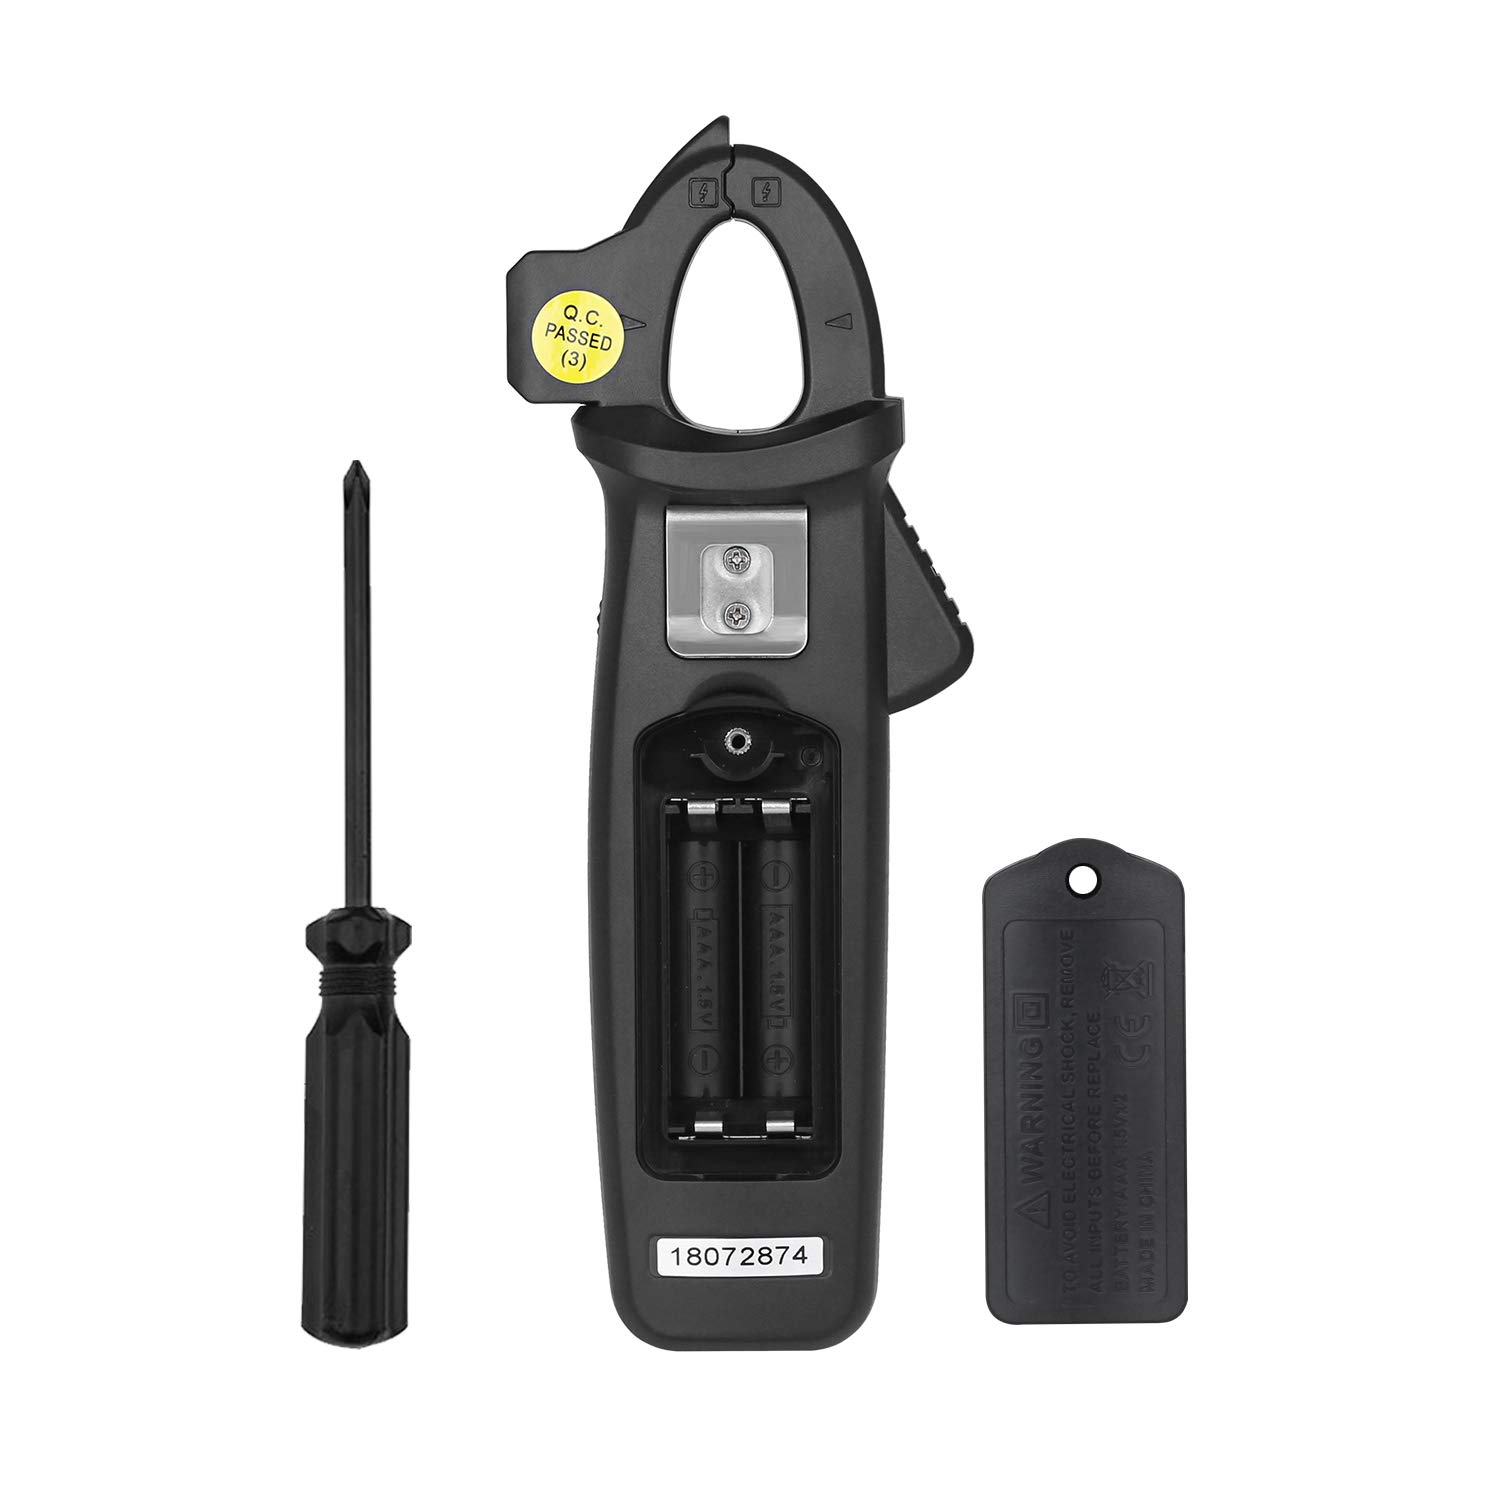
Image: The back of the BSIDE ACM92 Clamp Meter with the battery compartment open, showing the slots for two AAA batteries.
5.2 Anschließen der Testleitungen
Für voltage, resistance, frequency (via leads), and continuity measurements, insert the red test lead into the "INPUT" jack and the black test lead into the "COM" jack.
6. Bedienungsanleitung
Rotate the central dial to select the desired measurement function.
6.1 DC Current Measurement (by Jaws)
- Turn the dial to the DC current range (e.g., 6A, 60A, 100A).
- Press and hold the "ZERO" button for 2 seconds to zero the display. Repeat this several times.
- Öffne dieamp jaws and enclose only one conductor of the circuit.
- Hold the meter in the same orientation as when zeroed.
- Read the DC current value on the display within 3 seconds for optimal accuracy.
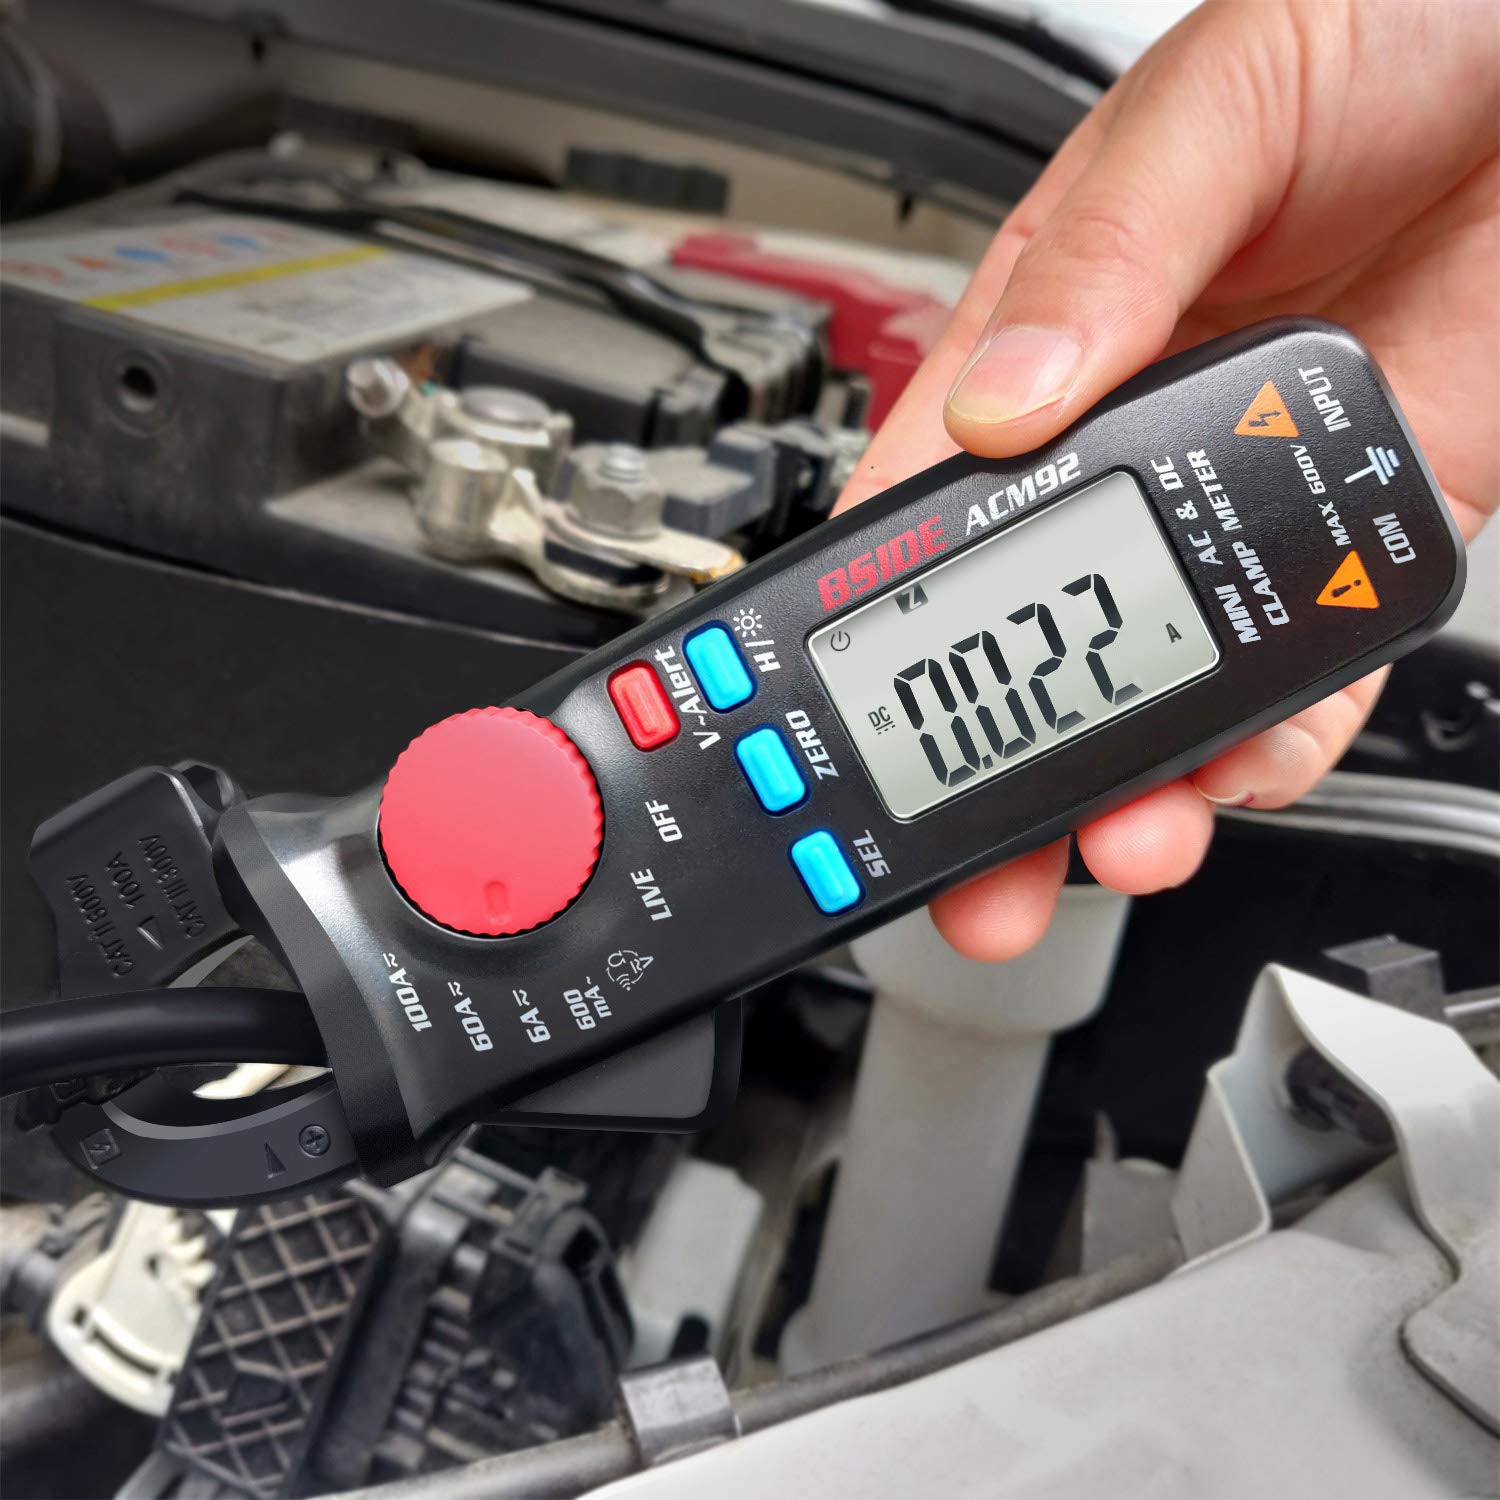
Image: The BSIDE ACM92 Clamp Meter measuring DC current on a car battery cable, showing a reading of 0.022A.
6.2 AC Current Measurement (by Jaws)
- Turn the dial to the AC current range (e.g., 600mA, 6A, 60A, 100A).
- Öffne dieamp jaws and enclose only one conductor of the AC circuit.
- Lesen Sie den Wechselstromwert auf dem Display ab.

Image: The BSIDE ACM92 Clamp Meter measuring AC current by clamping a single wire within an electrical panel.
6.3 AC/DC-Voltage Messung
- Connect the test leads to the "INPUT" and "COM" jacks.
- Turn the dial to the ACV or DCV range.
- Touch the test probes to the circuit points to be measured.
- Lesen Sie den Bandtage-Wert auf dem Display.
6.4 V-Alarm (kontaktloser Vol)tage Erkennung)
- Turn the dial to the "V-Alert" position.
- Bring the tip of the clamp Messgerät in der Nähe einer WechselstromquelletagDie Quelle.
- The LCD display will flash, and an alarm buzzer will sound if AC voltage wird erkannt.

Image: The BSIDE ACM92 Clamp Meter in V-Alert mode, indicating the detection of non-contact voltage with a flashing display and audible alert.
6.5 Live-Wire Check
- Connect the red test lead to the "INPUT" jack.
- Turn the dial to the "LIVE" position.
- Touch the red probe to the conductor to be tested.
- Das Messgerät zeigt an, ob der Draht unter Spannung steht.

Image: The BSIDE ACM92 Clamp Meter performing a live wire check using the red test probe on an electrical circuit.
6.6 Widerstands- und Durchgangsmessung
- Connect the test leads to the "INPUT" and "COM" jacks.
- Turn the dial to the Resistance/Continuity position.
- For resistance, touch the probes across the component.
- For continuity, touch the probes across the circuit. If resistance is less than 30Ω, the continuity beeper will sound.
6.7 Frequenzmessung
Frequency can be measured either by the clamp jaws (for current frequency) or by test leads (for voltage frequency).
- Select the appropriate frequency range using the dial.
- Verwenden Sie die clamp jaws for current frequency or test leads for voltage-Frequenz.
- Lesen Sie den Frequenzwert auf dem Display ab.
6.8 Datenhaltefunktion
Press the "H/*" button briefly to hold the current reading on the display. Press it again to release the hold.
6.9 Hintergrundbeleuchtung
Press and hold the "H/*" button for 2 seconds to turn the backlight on or off.
7. Wartung
7.1 Reinigung
Den Zähler mit Werbung abwischenamp Mit einem Tuch und mildem Reinigungsmittel reinigen. Keine Scheuermittel oder Lösungsmittel verwenden. Das Messgerät vor der Lagerung oder Verwendung vollständig trocknen.
7.2 Batteriewechsel
Wenn die Anzeige für niedrigen Batteriestand erscheint, tauschen Sie die Batterien wie im Abschnitt „Batterieeinbau“ (5.1) beschrieben aus.
7.3 Speicherung
If the meter is not used for an extended period, remove the batteries to prevent leakage and store it in the provided carrying case in a cool, dry place.
8. Fehlerbehebung
| Problem | Mögliche Ursache | Lösung |
|---|---|---|
| Das Messgerät lässt sich nicht einschalten. | Defekte oder falsch eingesetzte Batterien. | Überprüfen Sie die Batteriepolarität oder ersetzen Sie die Batterien. |
| Inaccurate DC current readings. | Not zeroed correctly; meter orientation changed; external magnetic fields. | Ensure proper zeroing before measurement. Maintain consistent meter orientation. Measure within 3 seconds. |
| AC current reading is zero when clamping a power cord. | Clamping both live and neutral wires simultaneously. | Ensure only a single conductor (live or neutral) is enclosed by the clamp Kiefer. |
| No reading with test leads. | Test leads not properly connected or damaged. | Verify test lead connection to "INPUT" and "COM" jacks. Check leads for damage. |
9. Spezifikationen
| Messung | Reichweite | Auflösung | Genauigkeit |
|---|---|---|---|
| Anzeige | 6000 Zählwerte | ||
| Gleichstrom | 6 A / 60 A / 100 A. | 0.001 A / 0.01 A / 0.1 A. | ±(2.5%+10 counts) |
| Wechselstrom | 600mA / 6A / 60A / 100A | 0.1mA / 0.001A / 0.01A / 0.1A | ±(3.0%+10 counts) for 600mA; ±(2.5%+10 counts) for others |
| DC-Voltage | 600 V | 0.1 V | ±(1.0%+5 counts) |
| AC-Lautstärketage | 600 V | 0.1 V | ±(1.0%+3 counts) |
| Widerstand | 6000 Ω | 1 Ω | ±(1.0%+3 counts) |
| Frequency (by leads) | 60Hz / 1000Hz | 0.1Hz / 1Hz | ±(1.5%+5 counts) |
| Frequency (by jaws) | 60Hz / 1000Hz | 0.1Hz / 1Hz | ±(1.0%+5 counts) |
| Kontinuität | Beeper sounds at < 30Ω | ||
| Backenkapazität | 20 mm | ||
| Leistung | 2 x 1.5 V AAA-Batterien | ||
| Maße | 179 x 67 x 36 mm (7.05 x 2.64 x 1.42 Zoll) | ||
| Gewicht | 137 g (4.83 Unzen) | ||
10. Garantie und Support
Informationen zur Produktgarantie und zum Kundendienst waren in den bereitgestellten Produktdaten nicht enthalten. Bitte beachten Sie die Produktverpackung oder die offizielle Website des Herstellers. webAuf der Webseite finden Sie Einzelheiten zur Garantieabdeckung und zum technischen Support.