
BESDER BES-MH03
BESDER Home Security IP Camera User Manual
Model: BES-MH03
1. Einleitung
Thank you for choosing the BESDER Home Security IP Camera. This wireless smart WiFi camera is designed to provide reliable surveillance, audio recording, and baby monitoring capabilities with high-definition video. This manual will guide you through the setup, operation, and maintenance of your new device to ensure optimal performance and security.
2. Sicherheitshinweise
- Ensure the camera is powered by the correct voltage (DC 5V) as specified.
- Do not expose the camera to water or moisture. It is designed for indoor use only.
- Vermeiden Sie es, die Kamera direkter Sonneneinstrahlung oder der Nähe von Wärmequellen auszusetzen.
- Versuchen Sie nicht, die Kamera selbst zu zerlegen oder zu reparieren. Wenden Sie sich zur Reparatur an qualifiziertes Fachpersonal.
- Bewahren Sie die Kamera und das Zubehör außerhalb der Reichweite von Kindern auf.
- Verwenden Sie ausschließlich das mitgelieferte Netzteil und Kabel, um Beschädigungen zu vermeiden.
3. Packungsinhalt
Bitte überprüfen Sie das Paket, um sicherzustellen, dass alle Artikel vorhanden und in einwandfreiem Zustand sind:
- BESDER Home Security IP Camera
- USB-Stromkabel
- Netzteil (DC 5 V)
- Befestigungsschrauben und Dübel
- Benutzerhandbuch (dieses Dokument)

Image showing the BESDER IP Camera along with its accessories: a USB power cable, a power adapter, and a packet of mounting screws.
4. Produktüberschreitungview
Familiarize yourself with the main components of your BESDER IP Camera:
- Kameraobjektiv: Nimmt Videoaufnahmen auftage.
- Infrarot-LEDs: Für Nachtsicht.
- Mikrofon: Für Audioeingang.
- Lautsprecher: Für die bidirektionale Audiokommunikation.
- SD-Kartensteckplatz: Für die lokale Videospeicherung (unterstützt bis zu 64 GB).
- Power Interface (DC 5V): Wird mit dem Netzteil verbunden.
- Reset-Taste: Dient zum Wiederherstellen der Werkseinstellungen.

Diagram illustrating the side view of the BESDER IP Camera, highlighting the SD Card slot, Power interface (DC 5V), and Reset button.
5. Einrichtung
5.1. Einschalten
- Connect the USB power cable to the camera's power interface.
- Stecken Sie das Netzteil in eine normale Steckdose.
- Die Kamera schaltet sich ein und ihre Kontrollleuchte beginnt zu blinken, was anzeigt, dass sie bereit zur Einrichtung ist.
5.2. App Installation (iCSee)
The BESDER IP Camera uses the iCSee application for remote monitoring and control.
- Download the iCSee app from your mobile device's app store (App Store for iOS or Google Play Store for Android).
Für iOS herunterladen | Für Android herunterladen - Registrieren Sie ein neues Konto oder melden Sie sich an, falls Sie bereits eines besitzen.
5.3. WiFi Verbindung
Follow these steps to connect your camera to your home Wi-Fi network:
- Open the iCSee app and tap the "+" icon to add a new device.
- Select "Add My Device" or "Add Camera".
- Choose the "Wi-Fi Camera" option.
- Follow the on-screen prompts to enter your Wi-Fi network name (SSID) and password. Ensure your phone is connected to a 2.4GHz Wi-Fi network, as the camera may not support 5GHz.
- The app will generate a QR code. Position your phone's screen in front of the camera lens (approx. 15-20 cm away) until you hear a confirmation sound from the camera.
- Once connected, the camera's indicator light will turn solid blue. You can now name your camera and start monitoring.
5.4. Montage
Die Kamera kann auf einer ebenen Fläche platziert oder an einer Wand oder Decke befestigt werden.
- Wählen Sie einen geeigneten Standort mit freiem Blick view und innerhalb der WLAN-Reichweite.
- If mounting, use the provided mounting screws and wall plugs to secure the camera base.
- Adjust the camera's angle as needed within the app after mounting.
6. Betrieb
6.1. Leben View
Access real-time video feed from your camera through the iCSee app.
- Öffnen Sie die iCSee-App und wählen Sie Ihre Kamera aus der Geräteliste aus.
- The live video feed will appear. You can pan and tilt the camera remotely using the controls in the app.

Screenshot of a multi-camera monitoring interface, likely from the iCSee application, displaying live feeds from multiple cameras and recording controls.
6.2. Aufzeichnung und Speicherung
The camera supports local storage via a MicroSD card.
- Insert a MicroSD card (up to 64GB, Class 10 recommended) into the SD card slot.
- In the iCSee app settings, navigate to "Storage Settings" to format the SD card and configure recording modes (e.g., continuous, motion-triggered).
- Aufgenommen footagWir können sein viewed und direkt aus der App heruntergeladen.
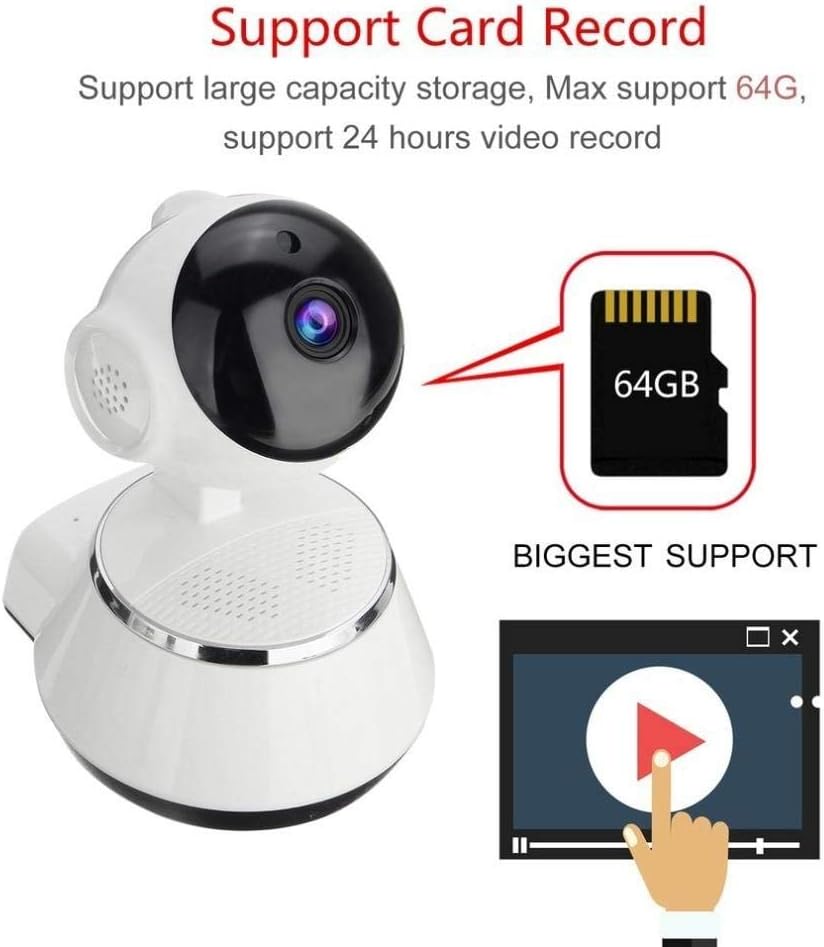
Image demonstrating the camera's support for large capacity storage, specifically showing a 64GB MicroSD card, indicating support for 24-hour video recording.
6.3. Bewegungserkennung
Receive alerts when motion is detected in the camera's field of view.
- Enable "Motion Detection" in the camera settings within the iCSee app.
- Adjust sensitivity levels and set up notification preferences (e.g., push notifications, email alerts).
6.4. Nachtsicht
Die Kamera schaltet bei schlechten Lichtverhältnissen automatisch in den Nachtsichtmodus.
- Infrared LEDs provide clear black-and-white video up to 10 meters in complete darkness.
- No manual intervention is required for night vision activation.

Comparison image displayed on a smartphone screen, showing the difference between daytime and nighttime monitoring views, highlighting the infrared night vision capability.
6.5. Zwei-Wege-Audio
Kommunizieren Sie über die Kamera mithilfe des eingebauten Mikrofons und Lautsprechers.
- Während im Leben view, tap the microphone icon in the iCSee app to speak through the camera.
- Tippen Sie auf das Lautsprechersymbol, um Audio aus der Umgebung der Kamera zu hören.
6.6. Fernzugriff
Monitor your property from anywhere with an internet connection.
- As long as your camera is connected to Wi-Fi and your phone has internet access, you can view live feeds and manage settings remotely via the iCSee app.
7. Wartung
- Reinigung: Reinigen Sie Objektiv und Gehäuse der Kamera mit einem weichen, trockenen Tuch. Verwenden Sie keine flüssigen Reiniger oder Sprays.
- Firmware-Updates: Regularly check for firmware updates through the iCSee app to ensure your camera has the latest features and security patches.
- SD-Kartenverwaltung: Periodically back up important recordings and format the SD card to maintain optimal performance.
- Lagerung: Bei längerer Nichtbenutzung sollte die Kamera an einem kühlen, trockenen Ort und vor direkter Sonneneinstrahlung geschützt aufbewahrt werden.
8. Fehlerbehebung
| Problem | Mögliche Ursache/Lösung |
|---|---|
| Kamera lässt sich nicht einschalten | Ensure the power adapter is securely connected to both the camera and the power outlet. Try a different outlet. |
| Keine Verbindung zum WLAN möglich | Check if your Wi-Fi network is 2.4GHz. Ensure the Wi-Fi password is correct. Move the camera closer to the router. Reset the camera and try again. |
| Live view ist verschwommen oder dunkel | Clean the camera lens. Check lighting conditions. Ensure night vision is functioning correctly in low light. |
| SD-Karte zeichnet nicht auf | Ensure the SD card is inserted correctly and formatted in the app. Check if the card is full or corrupted. Try a different SD card. |
| Kein Ton oder schlechte Tonqualität | Überprüfen Sie die Mikrofon- und Lautsprechereinstellungen in der App. Stellen Sie sicher, dass Mikrofon und Lautsprecher nicht durch Hindernisse blockiert werden. |
| Die Kamera trennt häufig die Verbindung | Weak Wi-Fi signal. Move the camera closer to the router or consider a Wi-Fi extender. Reduce network congestion. |
9. Spezifikationen
| Besonderheit | Detail |
|---|---|
| Modellnummer | BES-MH03 |
| Konnektivitätstechnologie | Kabellos (Wi-Fi) |
| Empfohlene Verwendung | Baby Monitoring, Home Security |
| Besondere Merkmale | Motion Sensor, Night Vision (Infrared distance 10m) |
| Formfaktor | Kuppel |
| Wastage | 3 Watt |
| Speicherunterstützung | MicroSD-Karte (max. 64 GB) |
| Audio | Two-way audio (Audio Record) |
10. Garantie und Support
BESDER products are manufactured to high-quality standards. For warranty information, please refer to the terms and conditions provided at the point of purchase or contact your retailer. For technical support or further assistance, please refer to the support section within the iCSee application or visit the official BESDER webWebsite (falls vorhanden).
Ask a question about this manual
Ask about setup, troubleshooting, compatibility, parts, safety, or missing instructions. Manuals+ will review the question and use this page’s manual context to help answer it.