
TRUE CDT845P2NS1
CAFE CDT845P2NS1 24" Matte Collection Einbaugeschirrspüler – Benutzerhandbuch
Model: CDT845P2NS1 | Brand: TRUE
1. Einleitung
This user manual provides comprehensive instructions for the installation, operation, maintenance, and troubleshooting of your CAFE CDT845P2NS1 24" Matte Collection Built-In Dishwasher. Designed for efficiency and performance, this appliance features advanced cleaning and drying technologies to ensure your dishes are spotless and ready for use. Please read this manual thoroughly before operating your dishwasher to ensure safe and optimal performance.

Abbildung 1: Vorderseite view of the CAFE CDT845P2NS1 Built-In Dishwasher, showcasing its sleek matte finish and handle design.
2. Wichtige Sicherheitshinweise
Beachten Sie bei der Verwendung dieses Geräts stets die grundlegenden Sicherheitsvorkehrungen, um das Risiko von Bränden, Stromschlägen oder Verletzungen zu verringern.
- Lesen Sie alle Anweisungen, bevor Sie den Geschirrspüler benutzen.
- Connect to a properly rated, protected, and sized power supply circuit.
- Use only detergents and rinse agents recommended for dishwashers.
- Betreiben Sie den Geschirrspüler nicht, wenn nicht alle Gehäuseteile ordnungsgemäß angebracht sind.
- Halten Sie Kinder von Spülmittel und Klarspüler fern.
- Kinder dürfen nicht in oder auf dem Gerät spielen.
- Scharfe Gegenstände sollten mit den Griffen nach oben eingelegt werden, um die Schnittgefahr zu verringern.
- Do not wash plastic items unless marked "dishwasher safe."
- In case of a malfunction, disconnect the appliance from the power supply before attempting any repairs.
3. Installation (Einrichtung)
Proper installation is crucial for the performance and longevity of your dishwasher. It is highly recommended that installation be performed by a qualified installer.
3.1 Auspacken und Aufstellen
Carefully remove all packaging materials. Ensure the dishwasher is placed on a level surface in its designated cabinet opening. The dimensions are 34"D x 24"W x 23"H.
3.2 Wasser- und Abwasseranschlüsse
Connect the water supply line to the dishwasher's inlet valve and the drain hose to the sink drain or garbage disposal. Ensure all connections are secure and leak-free.
3.3 Elektrischer Anschluss
Connect the dishwasher to a dedicated 120 Volts electrical circuit as per local electrical codes. Ensure the power is off at the circuit breaker before making connections.
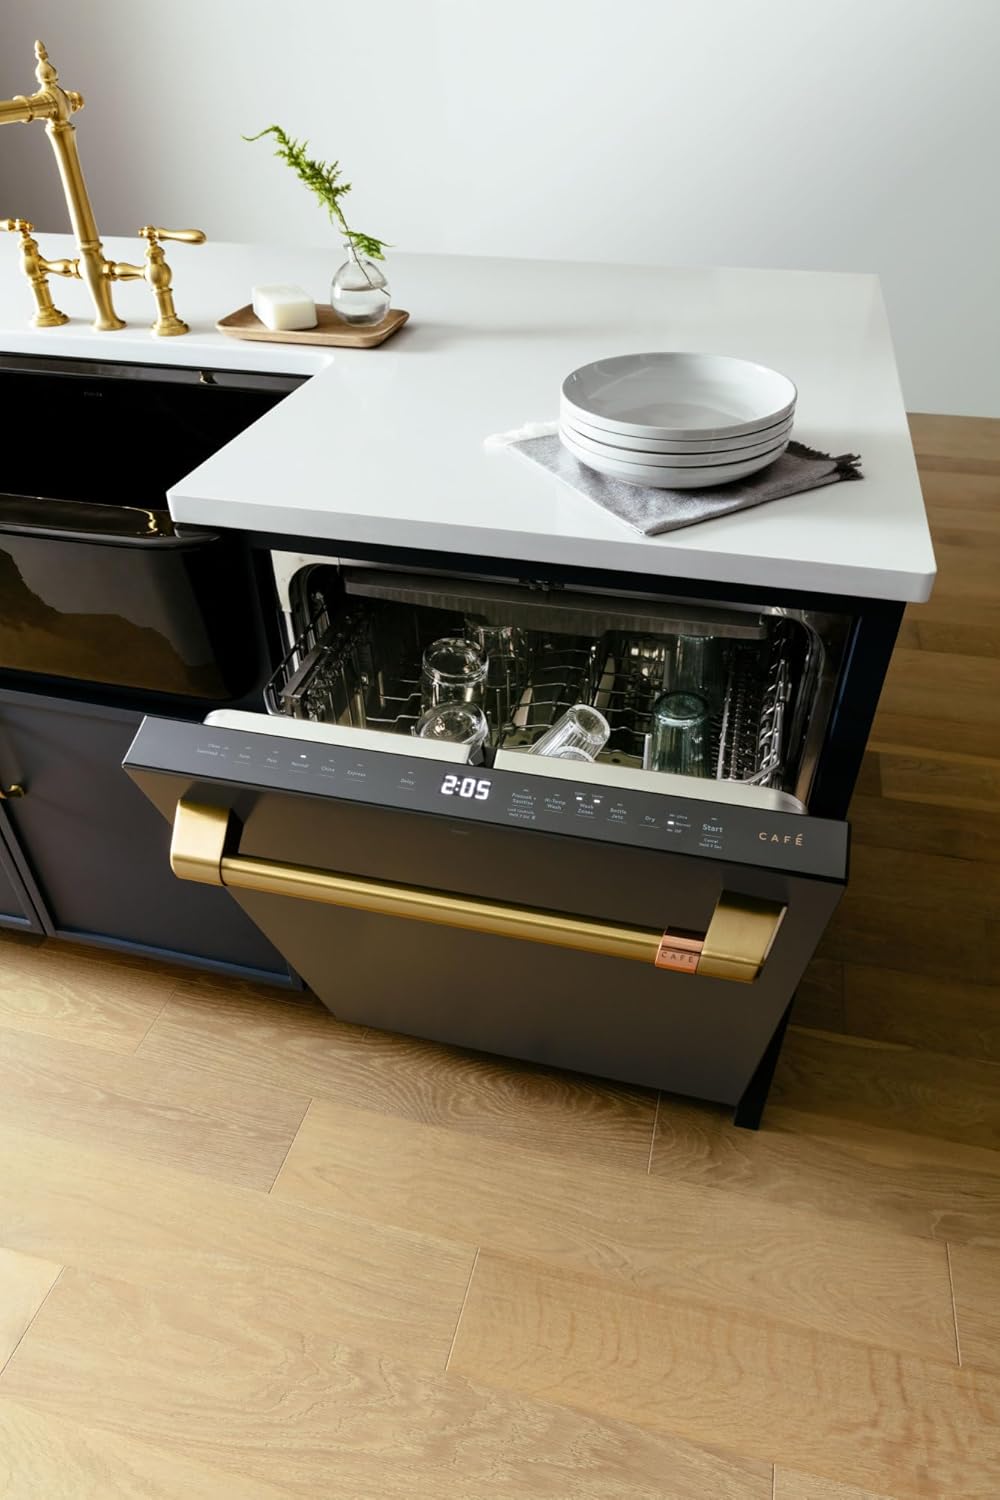
Figure 2: The dishwasher integrated into a kitchen setting, demonstrating its built-in form factor and how it complements kitchen cabinetry.
4. Bedienungsanleitung
Your CAFE dishwasher is designed for intuitive operation, offering various settings to achieve optimal cleaning results.
4.1 Einräumen des Geschirrspülers
Proper loading maximizes cleaning performance. Utilize the 16 place settings capacity effectively. The lower wash arm provides excellent coverage for larger loads. Fold-down tines accommodate wide or odd-shaped items, and the third rack offers extra space for silverware and cookware. Adjustable upper shelves can be moved two inches up or down for loading flexibility, accommodating fine stemware or tall bakeware.

Abbildung 3: Innenraum view showing the flexible loading options, including the third rack for cutlery and adjustable upper shelves.
4.2 Waschmittel und Klarspüler hinzufügen
Add the appropriate amount of dishwasher detergent to the dispenser. For enhanced drying and to prevent spots, fill the rinse aid dispenser with a suitable rinse aid product.
4.3 Auswahl eines Waschprogramms
The control panel is located on the top edge of the door. Select from various cycles and options:
- Ultra-Wash & Dry: Delivers excellent cleaning and drying results with 90+ cleaning jets.
- Steam + Sani: Loosens stubborn food residue and provides thorough sanitization, reducing 99.999% of bacteria.
- Wash Zones: Customize cycles to wash a half load on either the top or bottom rack, saving water and time.
- Schneller Zyklus: For quick washing needs.
- Additional options include Pots, Normal, China, Express, Delay, Pre-soak, Hi-Temp Wash, Bottle Jets, and Dry settings.

Figure 4: The discreetly located control panel on the top edge of the door, showing cycle and option selections.

Figure 5: Visual representation of the Steam + Sani feature's effectiveness in reducing bacteria and cleaning tough residues.
4.4 Starten eines Zyklus
Close the dishwasher door firmly. Press the "Start" button to begin the selected wash cycle. The dishwasher will automatically proceed through the wash, rinse, and dry phases.
5. Pflege und Wartung
Regelmäßige Wartung gewährleistet die effiziente Funktion Ihres Geschirrspülers und verlängert seine Lebensdauer.
5.1 Innenraum reinigen
Periodically clean the interior of the dishwasher, including the spray arms and the filter area. The Hard Food Disposer helps manage food particles, but occasional cleaning of the filter can prevent blockages and odors.
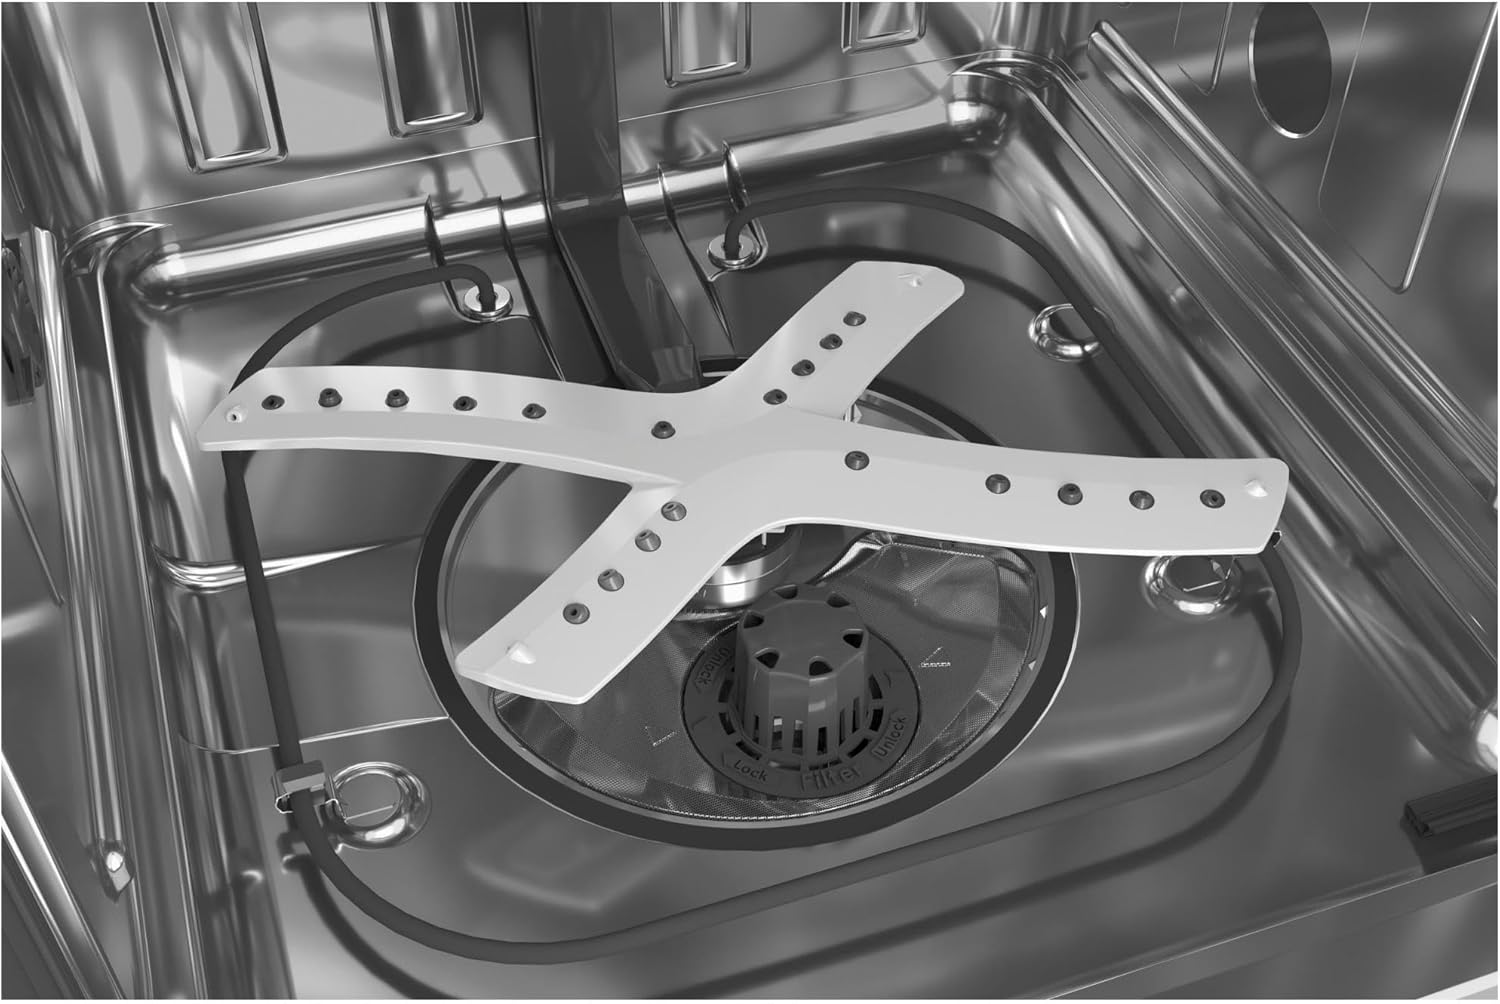
Abbildung 6: Ausführlich view of the lower spray arm and the removable filter system, important for regular cleaning.
5.2 Außenreinigung
Wischen Sie die Außenflächen mit einem weichen, damp cloth. For stainless steel finishes, use a specialized stainless steel cleaner. Avoid abrasive cleaners that can scratch the surface.
5.3 Winterfestmachung (falls zutreffend)
If your dishwasher is in a location subject to freezing temperatures, it is important to winterize it. Consult a qualified technician for proper winterization procedures to prevent damage from freezing water.
6. Fehlerbehebung
Bevor Sie den Kundendienst anrufen,view Die folgenden häufig auftretenden Probleme und ihre möglichen Lösungen:
| Problem | Mögliche Ursache/Lösung |
|---|---|
| Spülmaschine startet nicht | Ensure the door is fully latched. Check power supply and circuit breaker. Verify a cycle has been selected and the "Start" button pressed. |
| Geschirr ist nicht sauber | Check water temperature (should be hot). Ensure spray arms are not blocked. Use proper detergent and rinse aid. Avoid overloading. |
| Der Geschirrspüler ist laut | Check for foreign objects in the pump or spray arms. Ensure dishes are not rattling against each other. |
| Wasser läuft nicht ab | Check for clogs in the drain hose or air gap. Ensure the drain pump is clear. |
For more detailed troubleshooting or issues not listed here, please refer to the comprehensive troubleshooting guide available on the manufacturer's webWebsite oder wenden Sie sich an den Kundendienst.
7. Produktspezifikationen
| Besonderheit | Detail |
|---|---|
| Modellname | CDT845P2NS1 |
| Marke | WAHR |
| Installationstyp | Eingebaut |
| Technische Daten | 34"T x 24"B x 23"H |
| Kapazität | 16 Gedecke |
| Geräuschpegel | 45 dB |
| Material | Edelstahl |
| Ausführung | Stainless Steel, Matte |
| Bandtage | 120 Volt |
| Steuerelementtyp | Voll Integriert |
| Optionszyklen | 5 (including Rapid) |
| Besondere Merkmale | Hard Food Disposer, Quick Wash, Steam + Sani, Wash Zones |
| Zertifizierung | Energy Star, NSF |
| Im Lieferumfang enthaltene Komponenten | Dishwasher, Cutlery Basket |
8. Garantie und Kundendienst
For warranty information, product registration, or technical assistance, please refer to the warranty card included with your purchase or visit the official TRUE (CAFE) website. You can also contact customer support directly for service inquiries or to order replacement parts.
Für weitere Unterstützung besuchen Sie bitte: GE Store auf Amazon
Ask a question about this manual
Ask about setup, troubleshooting, compatibility, parts, safety, or missing instructions. Manuals+ will review the question and use this page’s manual context to help answer it.