Einführung
This manual provides detailed instructions for the installation, operation, and maintenance of your SR Suntour Raidon 27.5-inch suspension fork. This fork features 100mm of travel, an air spring system, remote lockout with rebound adjustment, and a 9mm quick-release axle design. Please read this manual thoroughly before installation and use to ensure proper function and safety.

Abbildung 1: Vorderseite view of the SR Suntour Raidon 27.5-inch suspension fork.
Setup und Installation
Proper installation is crucial for the safety and performance of your suspension fork. If you are unsure about any step, consult a professional bicycle mechanic.
1. Vorbereitung des Steuerrohrs
- The steerer tube diameter is 1-1/8 inch (threadless). Ensure your bicycle frame is compatible.
- Measure and cut the steerer tube to the appropriate length for your frame and stem setup. Use a proper cutting guide for a straight cut.
- Install a star-nut or compression plug into the steerer tube according to the manufacturer's instructions.
2. Gabelmontage
- Fetten Sie das Gabelschaftrohr und die Steuersatzlager ein.
- Führe das Gabelschaftrohr durch das Steuerrohr deines Fahrradrahmens.
- Install the headset components, stem, and spacers, ensuring proper stack height.
- Tighten the top cap bolt to preload the headset bearings, then align and tighten the stem bolts to the manufacturer's specified torque.
3. Rad- und Bremsenmontage
- This fork is designed for 27.5-inch wheels with a 9mm quick-release axle.
- Install your front wheel, ensuring the quick-release skewer is properly tightened.
- The fork features a Postmount 160mm brake mount. Install your disc brake caliper and rotor according to the brake manufacturer's instructions. Ensure proper alignment and torque.
4. Remote Lockout Installation
- Mount the remote lockout lever on your handlebar in a comfortable and accessible position.
- Route the lockout cable from the lever to the fork's right-side crown-mounted lockout mechanism. Ensure the cable routing does not interfere with steering or other controls.
- Secure the cable housing with appropriate cable ties or clips.
- Connect the cable to the lockout mechanism and adjust tension according to the instructions provided with the remote lever.

Figure 2: Remote lockout lever and cable for the SR Suntour Raidon fork.
Bedienungsanleitung
Understanding the fork's adjustments will optimize your riding experience.
1. Air Spring Adjustment (Left Side)
- The left stanchion contains the air spring. Remove the air cap to access the Schrader valve.
- Use a high-pressure shock pump to add or release air. Refer to the fork's pressure guide (often found on a sticker on the fork leg or in a separate manual) for recommended pressures based on rider weight.
- Adjusting air pressure changes the fork's sag and spring rate. Higher pressure results in a firmer ride, lower pressure in a softer ride.
- Always check air pressure before each ride.
2. Remote Lockout (Right Side)
- The right stanchion features the RL-R (Remote Speed-Lock with Rebound Adjust) cartridge.
- Sperrfunktion: Press the lever on your handlebar to engage the lockout, stiffening the fork for climbing or smooth terrain. Press again to disengage and allow the fork to absorb impacts.
- Rückpralleinstellung: The rebound dial is located on the top of the right stanchion, beneath the lockout mechanism. This dial controls the speed at which the fork extends after compression.
- Turn the dial clockwise for slower rebound (fork extends slower).
- Turn the dial counter-clockwise for faster rebound (fork extends quicker).
- Adjust rebound to prevent the fork from packing up on successive bumps or kicking back too quickly.
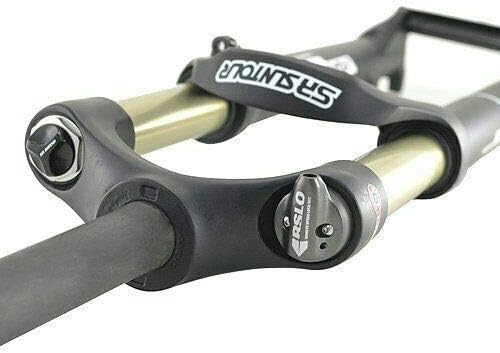
Abbildung 3: Oben view of the fork crown showing the remote lockout mechanism and rebound adjustment dial.
Wartung
Regular maintenance ensures the longevity and optimal performance of your SR Suntour Raidon fork.
1. After Each Ride
- Clean the stanchion tubes (32mm alloy) and seals with a soft cloth and mild soap and water. Avoid harsh chemicals.
- Inspect the stanchions for any scratches or damage. Deep scratches can compromise the seals and fork performance.
- Check for any oil leaks around the seals.
- Ensure the quick-release skewer is securely tightened.
2. Periodic Checks (Monthly/Quarterly)
- Check air pressure in the air spring and adjust as needed.
- Inspect all bolts (brake caliper, stem, crown bolts) for proper torque.
- Check for any play in the headset or fork bushings.
- Ensure the remote lockout cable operates smoothly and is free from corrosion or fraying.
3. Professional Service
- Internal service, including oil changes and seal replacement, should be performed by a qualified bicycle mechanic or an authorized SR Suntour service center.
- Refer to the SR Suntour website for recommended service intervals, which typically depend on riding conditions and frequency.

Abbildung 4: Unterseite view of the fork, highlighting lower leg construction and warning labels.
Fehlerbehebung
In diesem Abschnitt werden häufig auftretende Probleme behandelt, die bei Ihrer Federgabel auftreten können.
| Problem | Mögliche Ursache | Lösung |
|---|---|---|
| Die Gabel fühlt sich zu weich an oder schlägt leicht durch. | Unzureichender Luftdruck. | Add air to the air spring using a high-pressure shock pump. Refer to recommended pressure settings. |
| Die Gabel fühlt sich zu steif an oder nutzt den vollen Federweg nicht aus. | Übermäßiger Luftdruck. | Release air from the air spring using a high-pressure shock pump. Refer to recommended pressure settings. |
| Lockout not engaging or disengaging properly. | Cable tension incorrect, damaged cable/housing, or internal mechanism issue. | Check and adjust cable tension. Inspect cable and housing for damage. If issues persist, consult a professional mechanic. |
| Fork makes unusual noises (e.g., creaking, clunking). | Loose components (headset, stem, axle), dry bushings, or internal damage. | Check all bolts for proper torque. Inspect for play in headset or wheel. If noise persists, seek professional inspection. |
| Oil leaking from seals. | Abgenutzte oder beschädigte Dichtungen. | Requires seal replacement. Consult a professional bicycle mechanic. |
Technische Daten
| Besonderheit | Detail |
|---|---|
| Modell | SR Suntour Raidon |
| Reisen | 100 mm |
| Right Side Mechanism | RL-R (Remote Speed-Lock with Rebound Adjust) cartridge |
| Left Side Mechanism | Luftfeder |
| Stanchion Tube Diameter | 32 mm |
| Stanchion Tube Material | Legierung |
| Achsenkonstruktion | 9mm Quick Release (QR) |
| Lower Leg Material | Magnesium monocoque design |
| Gabelschaftdurchmesser | 1-1/8 inch Threadless |
| Kompatible Radgröße | 27.5 Zoll |
| Gabelschaftlänge | 255mm (Top tube) |
| Bremsmontagetyp | Postmount 160mm |
| Farbe | Mattschwarz |
| Ungefähres Gewicht | 2148g (Including Remote Lockout Lever) |
Garantieinformationen
The SR Suntour Raidon fork comes with a 1 Jahr Garantie from the date of purchase. This warranty covers manufacturing defects in materials and workmanship. It does not cover damage resulting from improper installation, misuse, neglect, accidents, modifications, or normal wear and tear. For warranty claims, please retain your proof of purchase and contact your retailer or an authorized SR Suntour service center.
Unterstützung
For further assistance, technical questions, or service inquiries regarding your SR Suntour Raidon fork, please refer to the official SR Suntour website or contact an authorized SR Suntour dealer or service center. Professional bicycle mechanics are equipped to handle complex installations, adjustments, and repairs.
SR Suntour Official WebWebsite: www.srsuntour.com


