Einführung
The Vector Optics Omega 1x27x39mm Tactical Red Dot Sight is a high-performance optical device designed for rapid target acquisition and precision aiming. Featuring 8 types of red and green illuminated reticles, this sight is engineered for diverse lighting conditions and tactical applications. Its robust construction from 6061 T6 aircraft aluminum alloy ensures durability, shock resistance, water resistance, and fog proofing. The free eye relief makes it ideal for tracking moving targets and quick shooting scenarios. This manual provides comprehensive instructions for the setup, operation, maintenance, and troubleshooting of your Omega Red Dot Sight.

Abbildung: Vorderseite view of the Vector Optics Omega Red Dot Sight, showcasing its compact and tactical design.
Technische Daten
| Besonderheit | Detail |
|---|---|
| Vergrößerung | 1x |
| Fenstergröße | 27 x 39 mm |
| Länge | 110 mm (4.1 Zoll) |
| Breite | 53 mm (2.1 Zoll) |
| Höhe | 63 mm (2.5 Zoll) |
| Gewicht (netto) | 260g (9.2 OZ) |
| Eye Relief | Frei |
| Fachgebiet View | 125 feet @ 100 yards |
| Austrittspupille | 39-27 mm |
| Parallaxe | 1 MOA at 80 yards |
| Fadenkreuz | 8 types of red & green illuminated reticles |
| Beleuchtung | 5 Stufen |
| Klicken Sie auf Wert | 1 MOA |
| Höhenanpassung | 60 MOA |
| Windage-Einstellung | 60 MOA |
| Optikbeschichtung | Voll mehrfach beschichtet |
| Material | 6061 T6 aircraft aluminum alloy |
| Batterie | CR2032 (NOT INCLUDED) |
| Beenden | Mattschwarz |
| Montagetyp | 21mm Quick Release Mount for Picatinny/Weaver rail |
Packungsinhalt
Bitte überprüfen Sie nach dem Öffnen des Pakets, ob alle folgenden Artikel enthalten sind:
- 1 x Omega Red Dot Sight
- 1 x Reinigungstuch
- 1 x Inbusschlüssel
Aufstellen
Montage des Visiers
The Omega Red Dot Sight is equipped with a 21mm Quick Release Mount, designed for easy attachment and detachment from Picatinny or Weaver rails.
- Ensure your firearm or airsoft replica has a compatible 21mm Picatinny or Weaver rail.
- Open the quick release lever on the side of the sight's mount.
- Align the sight's mount with the rail on your firearm.
- Press the sight firmly onto the rail, ensuring it is seated correctly.
- Close the quick release lever. It should snap securely into place, holding the sight firmly without wobble. If the fit is too loose or too tight, adjust the tension screw on the opposite side of the lever using the provided Allen wrench until a secure fit is achieved.

Abbildung: Seite view of the Omega Red Dot Sight, highlighting the quick release mount mechanism for easy attachment to rails.
Einlegen der Batterie
The sight requires one CR2032 battery (not included).
- Locate the battery compartment, typically on the bottom or side of the sight.
- Den Batteriedeckel gegen den Uhrzeigersinn abschrauben.
- Insert a fresh CR2032 battery with the positive (+) side facing upwards (towards the cap).
- Screw the battery cap back on clockwise until it is finger-tight. Do not overtighten.
Bedienungsanleitung
Powering On/Off and Illumination Adjustment
The Omega sight features 5 levels of red and green illumination.
- To power on the sight, rotate the illumination control knob (located on the side) from the 'OFF' position to any numbered setting (1-5).
- Rotate the knob further to increase or decrease the brightness level.
- To power off the sight, rotate the knob back to the 'OFF' position.
Fadenkreuzauswahl
This sight offers 8 distinct reticle patterns, switchable between red and green illumination.
- To change the reticle pattern, rotate the reticle selection dial (located on the top or side of the sight, often marked with symbols representing the reticles).
- Each click will cycle through a different reticle pattern.
- To switch between red and green illumination, use the dedicated color switch button or dial, if present. (Note: Specific mechanism may vary, refer to physical sight for exact control).

Image: Visual representation of the 8 distinct red and green illuminated reticle patterns available on the Omega Red Dot Sight.
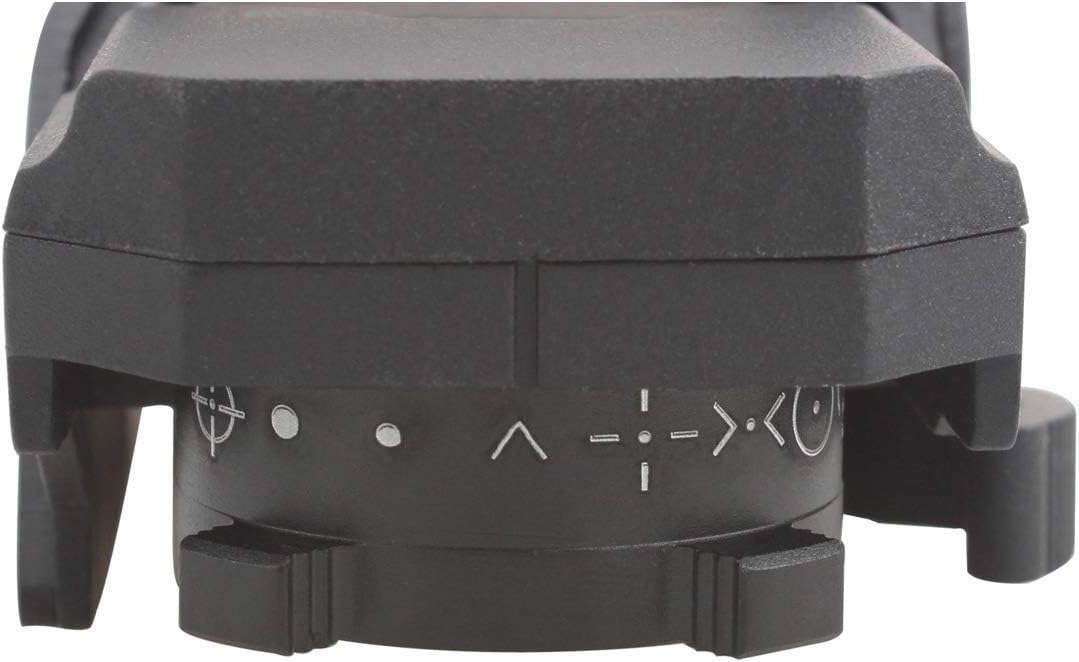
Bild: Oben view of the Omega Red Dot Sight, illustrating the location of the reticle selection dial and illumination control.
Zeroing the Sight (Windage and Elevation Adjustment)
Zeroing the sight aligns the point of aim with the point of impact. This process should be performed at a controlled range.
- Höhenverstellung: The elevation adjustment turret is typically located on the top of the sight. Rotate the turret to move the reticle up or down. Turning the turret clockwise usually moves the point of impact down, and counter-clockwise moves it up.
- Seitenverstellung: The windage adjustment turret is typically located on the right side of the sight. Rotate the turret to move the reticle left or right. Turning the turret clockwise usually moves the point of impact right, and counter-clockwise moves it left.
- Each click of the adjustment turrets corresponds to 1 MOA (Minute of Angle) at 100 yards.
- Make small adjustments and fire test shots to confirm the changes until the point of aim matches the point of impact at your desired zeroing distance.
Wartung
Reinigung
To ensure the longevity and optimal performance of your sight, regular cleaning is recommended.
- Use the provided cleaning cloth or a soft, lint-free cloth to gently wipe the exterior surfaces of the sight.
- For the lenses, use a lens brush to remove any loose dust or debris. Then, use a clean, optical-grade microfiber cloth with a small amount of lens cleaning solution (if necessary) to gently wipe the lens surfaces. Avoid using harsh chemicals or abrasive materials.
- Ensure no moisture enters the battery compartment or other sensitive areas.
Batteriewechsel
Replace the CR2032 battery when the reticle illumination becomes dim or fails to light up. Refer to the 'Battery Installation' section under 'Setup' for detailed steps.

Abbildung: Unten view of the Omega Red Dot Sight, clearly showing the battery compartment for CR2032 battery replacement.
Fehlerbehebung
If you encounter issues with your Omega Red Dot Sight, please refer to the following common problems and solutions:
- Reticle is dim or not illuminating:
- Check battery: Ensure the CR2032 battery is correctly installed with the positive (+) side up and is not depleted. Replace with a fresh battery if necessary.
- Illumination setting: Verify the illumination control knob is turned to a numbered setting (1-5) and not 'OFF'.
- Reticle appears blurry or distorted:
- Check for smudges: Clean the lenses with the provided cleaning cloth.
- Parallax: While this sight has minimal parallax, ensure you are looking directly through the center of the window.
- Eye relief: Ensure your eye is positioned at a comfortable distance from the sight.
- Sight is loose on the rail:
- Quick release lever: Ensure the quick release lever is fully closed and locked.
- Tension adjustment: Adjust the tension screw on the quick release mount using the Allen wrench until a secure fit is achieved.
- Adjustments (windage/elevation) are not working:
- Ensure the adjustment turrets are not stripped or damaged.
- Confirm you are turning the correct turret for the desired adjustment.
If the issue persists after attempting these solutions, please contact Vector Optics customer support for further assistance.
Garantie und Support
Vector Optics bietet ein 5 Jahr Garantie for the Omega Red Dot Sight, covering manufacturing defects and material flaws under normal use. This warranty ensures your investment is protected and reflects our commitment to quality.
For any inquiries, technical support, or warranty claims, please do not hesitate to contact Vector Optics customer service. We are available 24x7 online to assist you with any interests or product issues you may have.
Bitte bewahren Sie Ihren Kaufbeleg zur Überprüfung der Garantie auf.