
Einführung
This manual provides detailed instructions for the installation, operation, and maintenance of your Lanzar VIBE432.5 4-Channel Car AmpVerstärker. Bitte lesen Sie diese Bedienungsanleitung sorgfältig durch, bevor Sie das Gerät installieren oder in Betrieb nehmen, um eine ordnungsgemäße Verwendung zu gewährleisten und Schäden am Gerät oder am Audiosystem Ihres Fahrzeugs zu vermeiden.
The Lanzar VIBE Series MOSFET amplifiers are designed to deliver high-quality audio performance. These amplifiers provide the necessary power and clarity for an enhanced car audio experience, focusing on rich bass production and overall sound quality.
Produkteigenschaften
- Fortschrittliche Technologie: Incorporates DC to DC switching power supplies for dynamic range and peak performance.
- Intelligentes Design: Features Power and Protection LED indicators, soft turn-on/off circuitry, and advanced protection mechanisms.
- Sound Specialization: Equipped with silver RCA connectors and speaker screw-down terminals for secure, distortion-free audio connections.
- RCA Line-Out Jacks: Allows for building multi-amplifier systems by distributing the signal without external splitter cords.
- Audio Evolution: Regulated MOSFET Pulse Width Modulated (PWM) power supply maintains rated power across varying battery voltages, ensuring excellent frequency response.
- Material: Constructed with durable Aluminum.
Lieferumfang
Bitte überprüfen Sie beim Auspacken, ob alle unten aufgeführten Artikel vorhanden und in gutem Zustand sind.

Image: Contents of the Lanzar VIBE432.5 package, including the amplifier, remote subwoofer level control, and connection cable.
- Lanzar VIBE432.5 4-Channel Car Ampschwerer
- Fernsteuerung des Subwoofer-Pegels
- Connection Cable for Remote Control
- Befestigungsmaterial (Schrauben usw.)
Setup und Installation
Proper installation is critical for optimal performance and safety. If you are unsure about any part of the installation process, it is recommended to seek professional assistance.
1. Montageort
Wählen Sie einen Montageort, der trocken, gut belüftet und vor direkter Sonneneinstrahlung sowie Wärmequellen geschützt ist. Achten Sie auf ausreichend Platz um das Gerät herum. amplifier for proper air circulation. Avoid mounting on carpet or other materials that could obstruct airflow.
2. Stromanschlüsse
Before making any connections, disconnect the vehicle's negative battery terminal to prevent electrical shorts.
- +12V (Stromversorgung): Connect a heavy-gauge wire (e.g., 8-gauge or larger, depending on power requirements) directly from the positive terminal of the car battery to the +12V terminal on the amplifier. Install an in-line fuse holder with an appropriate fuse (e.g., 30A x 2, as indicated by the amplifier's fuses) within 18 inches of the battery.
- GND (Masse): Connect a heavy-gauge wire from the GND terminal on the ampSchließen Sie den Verstärker an eine saubere, unlackierte Metalloberfläche des Fahrzeugchassis an. Achten Sie auf eine feste, niederohmige Verbindung.
- REM (Ferneinschalten): Connect a smaller gauge wire from the REM terminal on the amplifier to the remote turn-on output of your car stereo or head unit. This wire signals the amplifier to turn on when the stereo is activated.
3. Audioeingangsanschlüsse
Connect the RCA output cables from your car stereo system to the "Line Input" RCA jacks on the amplifier. The VIBE432.5 is a 4-channel amplifier, allowing for front and rear speaker inputs.

Image: Diagram showing RCA Line Input and Line Out connections, Level controls, Bass Boost, Mode switches, and Remote Subwoofer Control port on the ampFrontplatte des Verstärkers.
4. Lautsprecherausgangsanschlüsse
Verbinden Sie Ihre Lautsprecher mit dem amplifier's speaker terminals. Observe correct polarity (+ to + and - to -) for each speaker. The VIBE432.5 supports 4-channel operation or can be bridged for 2-channel operation (e.g., for subwoofers).

Image: Diagram illustrating the speaker output terminals (CH1, CH2, CH3, CH4), bridged mode connections, and power/ground/remote terminals on the ampRückseite des Verstärkers.
- 4-Kanal-Modus: Connect one speaker to each channel (CH1, CH2, CH3, CH4).
- Überbrückter Modus: For higher power output to fewer speakers (e.g., subwoofers), connect speakers across designated bridged terminals (e.g., CH1+CH2 for one speaker, CH3+CH4 for another). Refer to the diagram for specific bridged connections.
5. Remote Subwoofer Bass Control
Connect the provided remote subwoofer level control to the "Remote" port on the amplifier using the supplied cable. Mount the control in an accessible location for easy adjustment of subwoofer bass levels.

Bild: Nahaufnahme view of the remote subwoofer level control unit, showing the level knob and the RJ-style connector port.
6. Schlusskontrollen
Once all connections are made, double-check all wiring for correct polarity, secure connections, and proper insulation to prevent shorts. Reconnect the vehicle's negative battery terminal.
Bedienungsanleitung
After successful installation, follow these steps to operate your ampReiniger:
- Einschalten: Turn on your car stereo. The amplifier's "PWR" (Power) LED indicator should illuminate, indicating it is receiving power and is operational. If the "PROT" (Protection) LED illuminates, refer to the Troubleshooting section.
- Pegelregelung (Verstärkung): Adjust the "Level" (gain) control for each channel (CH1/CH2 and CH3/CH4) to match the output voltage of your car stereo. Start with the level at minimum and slowly increase it until you achieve a clear, undistorted sound at your desired maximum volume from the stereo. Avoid setting the gain too high, as this can introduce distortion.
- Mode Switch (Crossover):
- Voll: Voller Audioausgangsbereich.
- Hochpass: Allows frequencies above the set crossover point (40Hz-3kHz) to pass, typically used for full-range speakers or tweeters.
- Tiefpass: Allows frequencies below the set crossover point (40Hz-3kHz) to pass, typically used for subwoofers.
- Bassverstärkung: Use the "Bass Boost" switch to apply a low-frequency boost if desired. Use this feature sparingly to avoid distortion or damage to speakers.
- Remote Subwoofer Bass Control: If connected, use the remote control knob to adjust the subwoofer's bass level conveniently from the driver's seat.
Wartung
To ensure the longevity and optimal performance of your Lanzar VIBE432.5 ampBefolgen Sie bei der Wartung Ihres Verstärkers diese einfachen Richtlinien:
- Reinigung: Wischen Sie regelmäßig ab ampReinigen Sie die Außenseite des Verstärkers mit einem weichen, trockenen Tuch. Verwenden Sie keine scharfen Chemikalien oder Scheuermittel.
- Belüftung: Stellen Sie sicher, dass die ampDie Kühlrippen des Verstärkers sind frei von Staub und Schmutz. Eine gute Luftzirkulation ist unerlässlich, um eine Überhitzung zu vermeiden.
- Verbindungen: Occasionally check all power, ground, remote, RCA, and speaker connections to ensure they are secure and free from corrosion. Loose connections can lead to poor performance or damage.
- Sicherungen: Der amplifier is equipped with replaceable fuses (30A x 2). If a fuse blows, replace it only with a fuse of the same type and rating. Never use a higher-rated fuse, as this can cause severe damage to the ampVerstärker oder elektrische Anlage des Fahrzeugs.
Fehlerbehebung
Wenn Sie Probleme mit Ihrem amplifier, consult the following troubleshooting guide before contacting support.
Kein Strom / Betriebsanzeige aus
- Check the +12V power wire connection at the battery and ampschwerer.
- Verify the in-line fuse near the battery and the fuses on the ampVerstärker. Bei Durchbrennen ersetzen.
- Ensure the ground wire connection is secure and making good contact with the chassis.
- Check the remote turn-on (REM) wire connection at both the stereo and amplifier. Ensure the stereo is turned on.
Protection LED On (PROT)
- Überhitzung: Der amplifier may be overheating. Ensure adequate ventilation around the amplifier. Allow it to cool down.
- Speaker Short Circuit: Check speaker wiring for any shorts (e.g., bare wires touching each other or the vehicle chassis). Ensure speaker impedance matches the ampSpezifikationen des Herstellers.
- Niedrige Lautstärketage: Überprüfen Sie die Batteriespannung des Fahrzeugs.tage.
Keine Tonausgabe
- Bestätigen Sie die amplifier is powered on (Power LED illuminated).
- Check RCA input cables from the stereo to the ampschwerer.
- Überprüfen Sie die Lautsprecherkabelanschlüsse an beiden Seiten. ampVerstärker und Lautsprecher.
- Stellen Sie sicher, dass die Lautstärke der Stereoanlage aufgedreht und nicht stummgeschaltet ist.
- Passen Sie die amplifier's "Level" (gain) controls.
Verzerrter Klang
- Reduzieren Sie die amplifier's "Level" (gain) control.
- Check for proper crossover settings (High Pass/Low Pass).
- Ensure speaker impedance is compatible.
- Check for damaged speakers or wiring.
Technische Daten
The following are the technical specifications for the Lanzar VIBE432.5 4-Channel Car AmpReiniger:
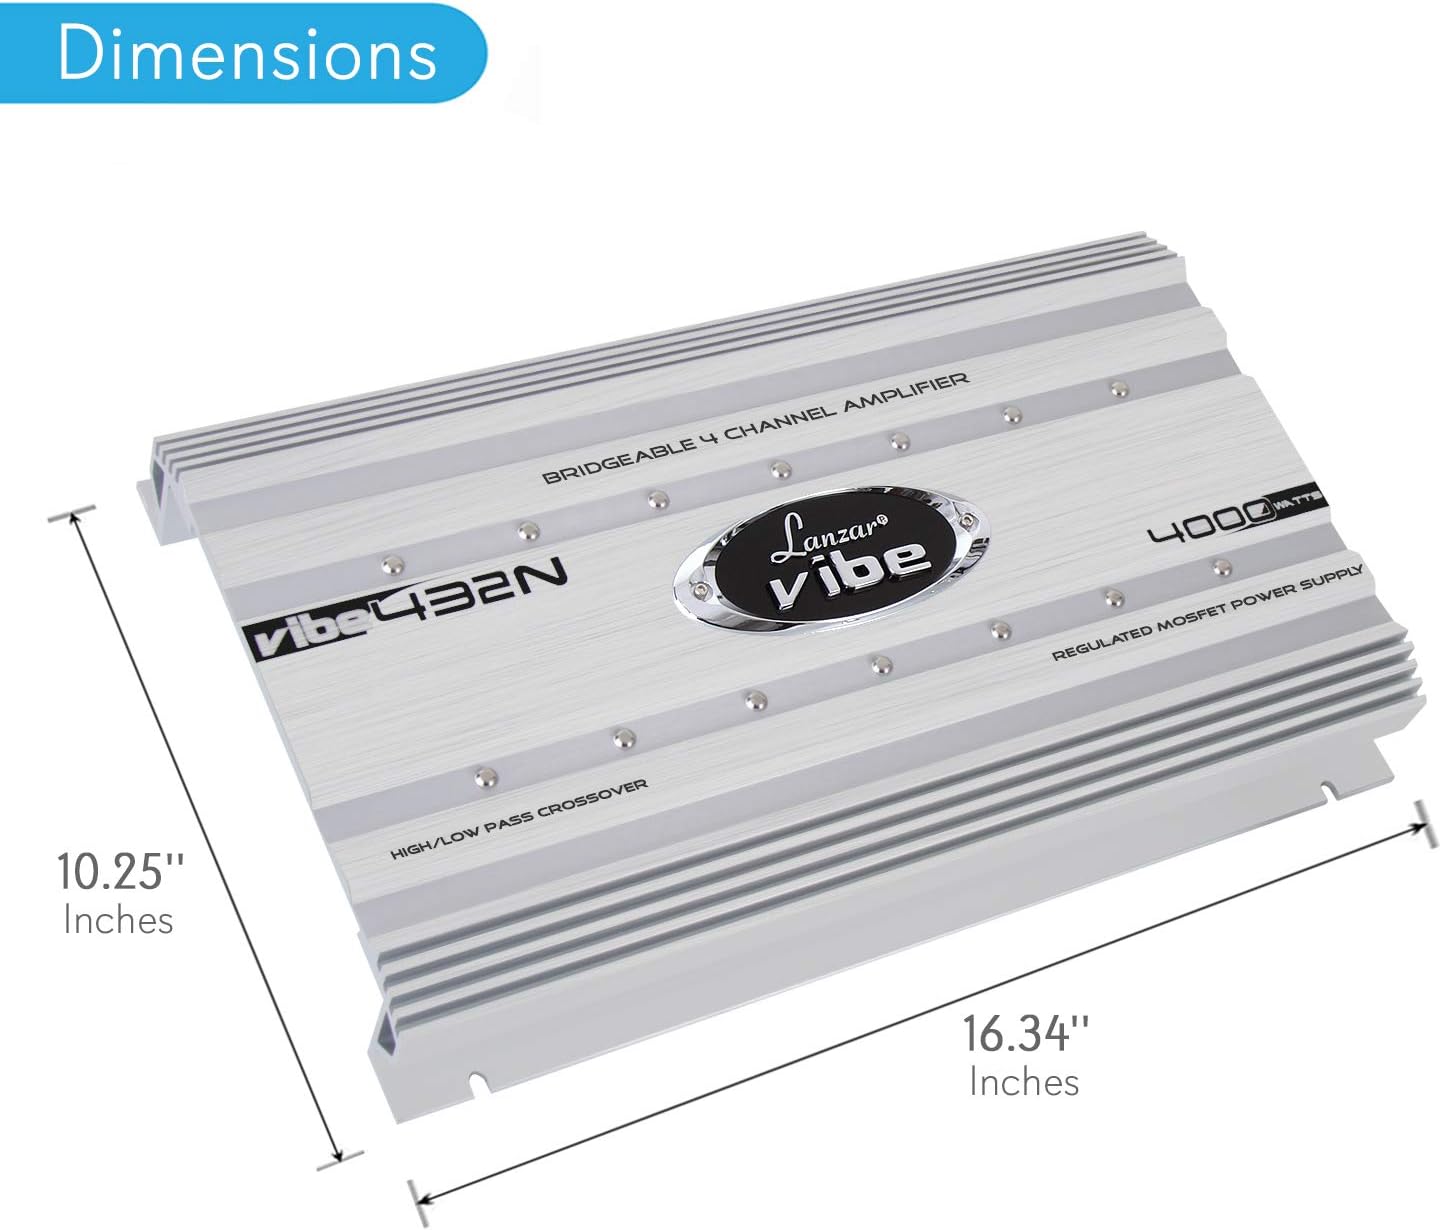
Image: Dimensions of the Lanzar VIBE432.5 amplifier, showing a length of 16.34 inches and a width of 10.25 inches.
| Besonderheit | Spezifikation |
|---|---|
| Modell | VIBE432.5 |
| Anzahl der Kanäle | 4 |
| Ausgangsleistung | 500 Watt (Note: Product title mentions 4000-Watt, but specifications list 500 Watts. Refer to product packaging for exact RMS/Peak power ratings.) |
| Bandtage | 16 Volt (Betriebsspannung)tage-Bereich) |
| Materialtyp | Aluminium |
| Montagetyp | Oberflächenmontage |
| Spezifikation erfüllt | Less Than 1% THD, 95 dB S/N Ratio, >75 dB Crosstalk |
| Frequency Response (Remote Bass Control) | 10 Hz - 40 kHz |
| Abmessungen (ungefähr) | 16.34 Zoll (Länge) x 10.25 Zoll (Breite) |
Hinweis: Technische Daten können sich ohne vorherige Ankündigung ändern. Die aktuellsten und genauesten Informationen finden Sie auf der Produktverpackung.
Garantie und Support
Lanzar products are designed for reliability and performance. For warranty information, technical support, or service inquiries, please refer to the warranty card included with your product or visit the official Lanzar webBewahren Sie Ihren Kaufbeleg als Kaufnachweis für Garantieansprüche auf.
For further assistance, please contact Lanzar customer support.