
Lidl PBHA 12 A1
Parkside 12V Akku-Schlagbohrmaschine PBHA 12 A1 Benutzerhandbuch
Model: PBHA 12 A1
Einführung
This user manual provides essential information for the safe and efficient operation, maintenance, and troubleshooting of your Parkside 12V Cordless Hammer Drill PBHA 12 A1. Please read this manual thoroughly before first use and keep it for future reference.
The Parkside 12V Cordless Hammer Drill PBHA 12 A1 is designed for powerful drilling and chiseling in concrete, stone, metal, or wood. It features two adjustable functions: hammer drilling (with impact mechanism) and screw or drilling (without impact mechanism).
Sicherheitshinweise
Beachten Sie beim Umgang mit Elektrowerkzeugen stets grundlegende Sicherheitsvorkehrungen, um das Risiko von Bränden, Stromschlägen und Verletzungen zu verringern.
- Tragen Sie geeignete persönliche Schutzausrüstung (PSA) wie Schutzbrille, Gehörschutz und Handschuhe.
- Stellen Sie sicher, dass der Arbeitsbereich gut beleuchtet und frei von Hindernissen ist.
- Halten Sie Kinder und Unbeteiligte fern, während Sie das Werkzeug bedienen.
- Betreiben Sie Elektrowerkzeuge nicht in explosionsgefährdeten Bereichen, in denen sich beispielsweise brennbare Flüssigkeiten, Gase oder Staub befinden.
- Vor jeglichen Einstellungen, dem Wechseln von Zubehörteilen oder dem Verstauen des Werkzeugs muss immer der Akku abgeklemmt werden.
- Verwenden Sie ausschließlich vom Hersteller empfohlene Akkus und Ladegeräte.
- Maintain the tool with care. Check for misalignment or binding of moving parts, breakage of parts, and any other condition that may affect the tool's operation.
Packungsinhalt
Carefully unpack all items and check for any damage. Ensure all components are present before discarding packaging materials.
- Parkside 12V Cordless Hammer Drill PBHA 12 A1
- 12V Li-ion Battery (2.0 Ah) PAPK 12 A2
- 60-minute Quick Charger PLGK 12 A1
- Keyless round axis drill chuck
- 2 SDS concrete drill bits (6mm / 8mm)
- 2 round drill bits (3mm / 5mm)
- 4 screw bits 50mm (S2 / PH2 / PH1 / TX25)
- Aufbewahrungskoffer
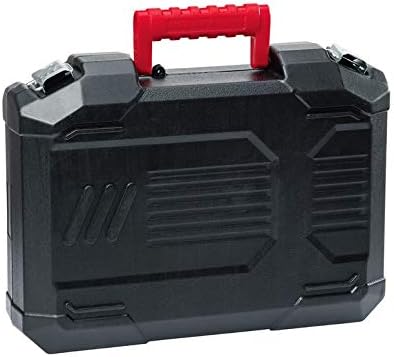
Image: The included storage case for the drill and accessories.
Produkt überview
Familiarize yourself with the components of your Parkside Cordless Hammer Drill.

Bild: Vorderseite view of the Parkside 12V Cordless Hammer Drill PBHA 12 A1 with a drill bit attached, showing the main body, handle, and chuck.

Bild: Abgewinkelt view of the Parkside 12V Cordless Hammer Drill PBHA 12 A1, highlighting the ergonomic handle and control switches.

Image: A collection of accessories for the Parkside 12V Cordless Hammer Drill, including the charger, keyless chuck, SDS concrete drill bits, round drill bits, and screw bits.
Aufstellen
Laden des Akkus
- Insert the 12V Li-ion Battery (PAPK 12 A2) into the 60-minute Quick Charger (PLGK 12 A1).
- Stecken Sie das Ladegerät in eine geeignete Steckdose.
- The charger has an automatic charging power-off feature. The 3-stage battery status indicator on the battery will show charging progress.
- Sobald das Gerät vollständig aufgeladen ist, trennen Sie das Ladegerät von der Steckdose und entnehmen Sie den Akku.
Anbringen von Zubehör
- SDS-plus Drill Bits: Insert SDS-plus drill bits directly into the SDS-plus chuck until they click into place. Pull on the bit to ensure it is securely locked.
- Round Shank Drill Bits/Screw Bits: Attach the keyless chuck for round drill holes to the SDS-plus chuck. Then, insert round shank drill bits or screw bits into the keyless chuck and tighten securely.
Bedienungsanleitung
Betriebsart auswählen
The tool features two adjustable functions:
- Hammerbohren: For drilling in concrete and stone. This mode engages the impact mechanism.
- Screw or Drilling: For drilling in wood, metal, or for screwdriving. This mode operates without the impact mechanism.
Use the mode selector switch on the side of the tool to choose the desired function.
Adjusting Rotation Speed
The tool features an adjustable rotation speed. Press the trigger switch to start the tool. The speed can be varied by the amount of pressure applied to the trigger. For precise control, start with a lower speed and increase as needed.
Right/Left Rotation
A switch near the trigger allows you to select between right (forward) and left (reverse) rotation. Use right rotation for drilling and screwdriving, and left rotation for removing screws or freeing jammed drill bits.
Integriertes LED-Arbeitslicht
The integrated LED work light illuminates the work area for improved visibility, especially in dimly lit conditions. It activates automatically when the trigger is pressed.
Wartung
Regelmäßige Wartung gewährleistet die Langlebigkeit und optimale Leistung Ihres Werkzeugs.
- Reinigung: After each use, clean the tool's ventilation slots and housing with a soft, damp Tuch. Verwenden Sie keine Lösungsmittel oder Scheuermittel.
- Wartung des Spannfutters: Keep the chuck clean and free of dust and debris to ensure proper bit insertion and removal.
- Batteriepflege: Store the battery in a cool, dry place away from direct sunlight. Do not store fully discharged batteries for extended periods. Charge the battery periodically if not in use.
- Inspektion: Periodically inspect the tool for any signs of damage, loose screws, or worn parts. If damage is found, have the tool repaired by a qualified service technician.
Fehlerbehebung
| Problem | Mögliche Ursache | Lösung |
|---|---|---|
| Werkzeug startet nicht | Batterie nicht geladen oder nicht richtig eingesetzt. | Charge the battery. Ensure the battery is fully inserted and locked into place. |
| Reduzierte Leistung | Battery charge is low. Incorrect mode selected for material. | Recharge the battery. Select the appropriate operating mode (e.g., Hammer Drilling for concrete). |
| Drill bit not holding securely | Chuck is dirty or damaged. Bit not inserted correctly. | Clean the chuck. Ensure the bit is fully inserted and locked. If using the keyless chuck, ensure it is tightened properly. |
| Überhitzung | Kontinuierliche intensive Nutzung. Verstopfte Lüftungsschlitze. | Allow the tool to cool down. Clear any obstructions from the ventilation slots. Avoid prolonged heavy use. |
Technische Daten
- Modell: PBHA12A1
- Batterie: 12 V Li-Ion (2.0 Ah)
- Leerlaufdrehzahl: 0-900 U/min
- Aufprallenergie: 1 Joule
- Chuck KlampBereich: bis 10 mm
- Max. Bore diameter:
- 10 mm in concrete, stone, and wood
- 8 mm in steel
- Ladegerät: 60 minute quick charger with automatic charging power off
- Produktabmessungen: 37.5 x 29.6 x 10 cm
- Gewicht: 2.98 kg (einschließlich Batterie)
- Material: Metall
- Farbe: Schwarz, Grün
Garantie und Support
For warranty information and customer support, please refer to the documentation provided with your purchase or contact Lidl customer service. Keep your proof of purchase for any warranty claims.
Hersteller: Lidl
Ask a question about this manual
Ask about setup, troubleshooting, compatibility, parts, safety, or missing instructions. Manuals+ will review the question and use this page’s manual context to help answer it.