
MTX Audio JH15001
MTX Audio JH15001 Jackhammer Series 1500W Monoblock Class-D Car Audio Ampschwerer
Offizielle Bedienungsanleitung
Einführung
This manual provides detailed instructions for the installation, operation, and maintenance of your MTX Audio JH15001 Jackhammer Series 1500W Monoblock Class-D Car Audio Amplifier. The JH15001 is a high-performance monoblock amplifier designed to deliver powerful and clear audio to your car's subwoofer system. It features a Class-D design for efficiency, robust power output, and a range of adjustable controls to fine-tune your sound.
Zu den Hauptmerkmalen gehören:
- 1500W Monoblock Class-D Ampschwerer
- Flexible power output: 650 watts x 1 ch. at 4 Ohm, 1100 watts x 1 ch. at 2 Ohm, 1650 watts x 1 ch. at 1 Ohm
- Wide frequency response: 20Hz - 250Hz
- Variable Low Pass Filter (40Hz - 250Hz, 12dB/Oct)
- Variable Subsonic Filter (20Hz - 50Hz, 12dB/Oct)
- Adjustable Bass Boost (0 - 12dB) at 45Hz
- Includes Remote Bass Knob for convenient control
Sicherheitshinweise
Bitte lesen Sie alle Anweisungen sorgfältig durch, bevor Sie Ihr Gerät installieren und in Betrieb nehmen. ampVerstärker. Die Nichtbeachtung dieser Richtlinien kann zu Schäden am Verstärker führen. amplifier, your vehicle, or personal injury. Keep this manual for future reference.
- Energiequelle: Always disconnect the vehicle's battery negative terminal before making any power connections to prevent electrical shorts.
- Verdrahtung: Use appropriate gauge wiring for power, ground, and speaker connections as recommended in the installation section. Improper wiring can lead to overheating and fire.
- Montage: Montieren Sie die amplifier securely in a dry, well-ventilated area away from direct sunlight, heat sources, and moisture. Ensure adequate airflow around the ampVerstärker für ordnungsgemäße Kühlung.
- Lautstärkepegel: Längerer Kontakt mit hohen Lautstärken kann zu Gehörschäden führen. Passen Sie die Lautstärke verantwortungsvoll an.
- Professionelle Installation: If you are unsure about any aspect of the installation, seek assistance from a qualified car audio professional.
Produkt überview
The MTX Audio JH15001 amplifier is designed for robust performance and ease of use. Below are images illustrating the amplifier's design and control panel.

Abbildung 1: Vorderseite view of the MTX Audio JH15001 amplifier, showing the MTX Audio logo and Jackhammer JH15001 model name, along with the control knobs for Gain, LPF, Subsonic, and Bass Boost.
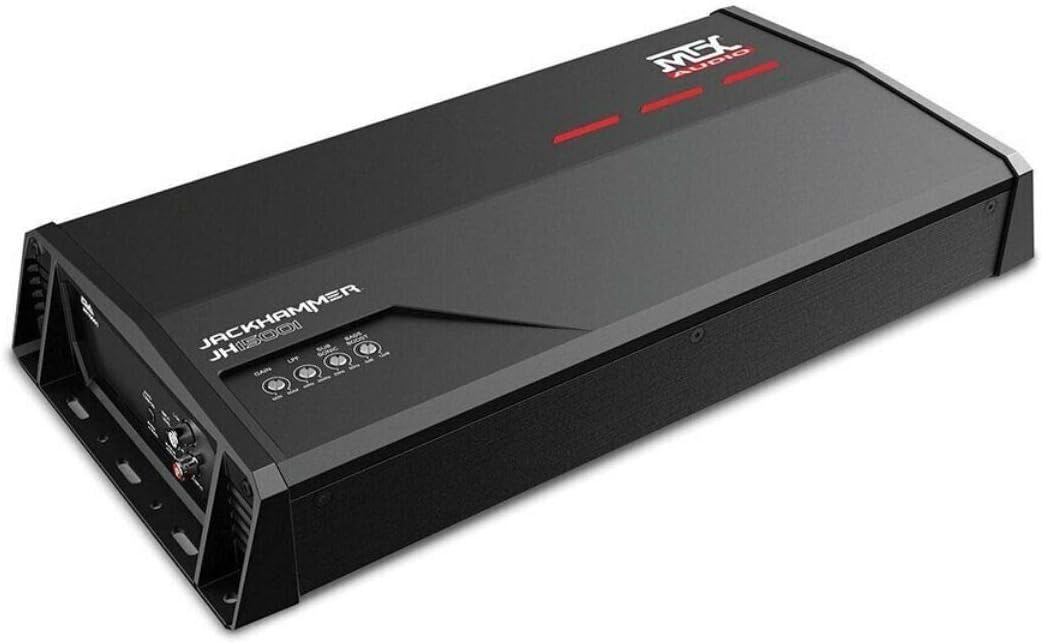
Abbildung 2: Schräg view of the MTX Audio JH15001 amplifier, providing a perspective of its compact design and heat sink fins.
Setup und Installation
Eine fachgerechte Installation ist für optimale Leistung und Sicherheit unerlässlich. Befolgen Sie diese Schritte sorgfältig.
Überlegungen zur Verdrahtung
- Always use high-quality power and ground cables. For the JH15001, a minimum of 4-gauge power and ground wire is recommended.
- Install an in-line fuse holder within 18 inches of the vehicle's battery. The fuse rating should match the amplifier's requirements (typically 80-100A for this power level).
- Stellen Sie sicher, dass alle Verbindungen sauber, fest und frei von Korrosion sind.
Stromanschlüsse

Abbildung 3: Rückseite view of the MTX Audio JH15001 amplifier, detailing the Power Input (GND, REM, +12V) and Speaker Output terminals.
- Masse (GND): Connect the ground terminal to a clean, unpainted metal surface of the vehicle's chassis. The ground wire should be as short as possible, ideally less than 3 feet (1 meter).
- Fernbedienung (REM): Verbinden Sie den Remote-Anschluss mit dem Remote-Einschaltausgang Ihres Autoradios. Dieses Kabel signalisiert dem ampVerstärker, der sich einschaltet, wenn das Hauptgerät aktiv ist.
- +12 V: Connect the +12V terminal to the positive terminal of your vehicle's battery, via the in-line fuse holder.
Lautsprecheranschlüsse
The JH15001 is a monoblock amplifier, designed for a single subwoofer or multiple subwoofers wired to a single channel. Refer to Figure 3 for the speaker output terminals.
- Schließen Sie Ihren/Ihre Subwoofer an die Anschlüsse „SPEAKER OUTPUT“ an. Achten Sie auf die richtige Polarität (+ an + und - an -).
- Der amplifier is stable down to 1 Ohm. Ensure your subwoofer's impedance (or combined impedance of multiple subwoofers) matches the amplifier's capabilities for optimal performance and to prevent damage.
Eingangsanschlüsse

Abbildung 4: Rückseite view of the MTX Audio JH15001 amplifier, showing the Line Input (RCA) and Auto Turn On switch.
- Line-Eingang (Cinch): Connect the RCA output from your head unit or signal processor to the "LINE INPUT" (L CH and R CH) on the ampschwerer.
- Automatisches Einschalten: Dieser Schalter ermöglicht die amplifier to turn on automatically by sensing a DC offset or audio signal on the input. Set to "REM" if using a dedicated remote wire, or "AUDIO" if using signal sensing.
- Eingangspegel: This switch adjusts the input sensitivity for either "PRE IN" (low-level RCA input) or "SPK IN" (high-level speaker input, if using a line output converter).
Bassregler mit Fernbedienung
Connect the included remote bass knob to the "EBC" port on the amplifier (refer to Figure 4). This allows for convenient adjustment of the bass level from the driver's seat.
Bedienungsanleitung
Nach der Installation können Sie die Einstellungen feinabstimmen. amplifier's settings for optimal audio performance.
Verstärkungseinstellung
The "GAIN" knob (refer to Figure 1) matches the ampEingangsempfindlichkeit des Verstärkers in Bezug auf die Ausgangslautstärketage of your head unit. This is not a volume control. To set the gain:
- Den Gain-Regler ganz nach unten drehen (gegen den Uhrzeigersinn).
- Set your head unit's volume to about 75-80% of its maximum.
- Drehen Sie langsam die amplifier's gain knob clockwise until you hear slight distortion, then back it off slightly until the sound is clean.
Tiefpassfilter (LPF)
The "LPF" knob (refer to Figure 1) controls the low-pass crossover frequency. This filter allows only frequencies below the set point to pass through to the subwoofer. Adjust this between 40Hz and 250Hz to blend the subwoofer's output with your main speakers.
Unterschallfilter
The "SUBSONIC" knob (refer to Figure 1) controls a high-pass filter specifically for the subwoofer channel, preventing extremely low, inaudible frequencies from being played. These frequencies can waste amplifier power and potentially damage the subwoofer. Adjust this between 20Hz and 50Hz, typically set slightly below your LPF or subwoofer's resonant frequency.
Bass Boost
The "BASS BOOST" knob (refer to Figure 1) provides an adjustable boost (0-12dB) at 45Hz. Use this sparingly to enhance bass impact. Excessive bass boost can lead to distortion and potential damage to your subwoofer.
Automatisch einschalten
As mentioned in the input connections, the "AUTO TURN ON" switch (Figure 4) allows the amplifier to power on without a dedicated remote wire. If your head unit does not have a remote output, set this to "AUDIO" to detect an audio signal, or "DC" (if available, though not explicitly labeled as DC on this model, it's implied by "AUDIO" vs "REM") to detect a DC offset on the speaker lines. For best results and reliability, using the "REM" setting with a remote wire from the head unit is recommended.
Wartung
Your MTX Audio ampDer Verstärker benötigt nur minimalen Wartungsaufwand, um eine dauerhafte Leistung zu gewährleisten.
- Reinigung: Wischen Sie regelmäßig ab ampReinigen Sie die Außenseite des Verstärkers mit einem weichen, trockenen Tuch. Verwenden Sie keine scharfen Chemikalien oder Scheuermittel.
- Belüftung: Stellen Sie sicher, dass die ampDie Kühlrippen des Verstärkers sind frei von Staub und Schmutz. Eine gute Luftzirkulation ist unerlässlich, um eine Überhitzung zu vermeiden.
- Verbindungen: Occasionally check all power, ground, and speaker connections to ensure they remain tight and secure. Loose connections can cause performance issues or damage.
Fehlerbehebung
Wenn Sie Probleme mit Ihrem ampBei häufig auftretenden Problemen und deren Lösungen konsultieren Sie bitte die untenstehende Tabelle.
| Problem | Mögliche Ursache | Lösung |
|---|---|---|
| Kein Strom / AmpVerstärker schaltet sich nicht ein | Blown fuse, loose power/ground/remote wire, incorrect Auto Turn On setting. | Check in-line fuse, verify all power connections are secure, ensure remote wire has +12V, or adjust Auto Turn On switch. |
| Keine Tonausgabe | Loose RCA cables, incorrect input level setting, speaker wires disconnected, ampVerstärker im Schutzmodus. | Check RCA connections, ensure Input Level switch is correct (PRE IN/SPK IN), verify speaker wiring, check for protect light (usually red). |
| Verzerrter Klang | Gain set too high, LPF/Subsonic settings incorrect, poor ground connection, damaged speaker. | Reduce gain, adjust LPF/Subsonic filters, check ground connection, inspect speaker for damage. |
| AmpVerstärkerüberhitzung | Insufficient ventilation, impedance too low, gain set too high. | Sorgen Sie für eine ausreichende Luftzirkulation um amplifier, verify speaker impedance is not below 1 Ohm, reduce gain. |
Technische Daten
Detailed technical specifications for the MTX Audio JH15001 ampschwerer.
| Besonderheit | Spezifikation |
|---|---|
| Modell | JH15001 |
| Typ | Monoblock Class-D Car Audio Ampschwerer |
| Anzahl der Kanäle | 1 |
| RMS-Ausgangsleistung (4 Ohm) | 650 Watt x 1 Kanal |
| RMS-Ausgangsleistung (2 Ohm) | 1100 Watt x 1 Kanal |
| RMS-Ausgangsleistung (1 Ohm) | 1650 Watt x 1 Kanal |
| Frequenzgang | 20Hz - 250Hz |
| Low Pass Filter (Variable) | 40Hz - 250Hz, 12dB/Octave |
| Subsonic Filter (Variable) | 20Hz - 50Hz, 12dB/Octave |
| Bass Boost | 0 - 12dB at 45Hz |
| Bandtage | 12 Volt (DC) |
| Betriebstemperatur | 40 Grad Celsius |
| Artikelabmessungen (L x B x H) | 18 x 12 x 6 Zoll |
| Artikelgewicht | 10.18 Pfund |
| Montagetyp | Oberflächenmontage |
| Hersteller | MTX-Audio |
| Spezifikation erfüllt | FCC |
| UPC | 715442242115 |
Garantie und Support
MTX Audio products are designed for reliability and performance. For information regarding warranty coverage, please refer to the warranty card included with your product or visit the official MTX Audio website. For technical support, troubleshooting assistance beyond this manual, or service inquiries, please contact MTX Audio customer service through their official channels.
Always ensure you have your product model number (JH15001) and purchase details available when contacting support.
Ask a question about this manual
Ask about setup, troubleshooting, compatibility, parts, safety, or missing instructions. Manuals+ will review the question and use this page’s manual context to help answer it.