
1. Einleitung
The iFlight SucceX-D F7 TwinG is an advanced F7 flight controller designed for high-performance FPV drones. It features a dual ICM20689 gyroscope system for enhanced stability and precision, a built-in OSD (On-Screen Display), BEC (Battery Eliminator Circuit), and current sensor. This flight controller is optimized for seamless integration with the DJI FPV Air Unit (HD Version), offering a plug-and-play solution for digital FPV systems.

Figure 1: iFlight SucceX-D F7 TwinG V2.1 Flight Controller highlighting F722 Gyro Fusion, Type-C USB, Plug & Play for DJI, 5V 9V BEC, and 30.5x30.5mm mounting.
2. Spezifikationen
Below are the technical specifications for the iFlight SucceX-D F7 TwinG Flight Controller:
- Prozessor: STM32F722
- Gyroscopes: Dual ICM20689
- OSD: Built-in BetaFlight OSD
- BEC: 5V and 9V outputs
- Stromsensor: Ja
- Blackbox: Ja
- USB-Anschluss: Typ C
- Montagemuster: 30.5 x 30.5 mm
- Konnektivität: O3 (OcuSync 3.0) compatible for DJI FPV Air Unit
- Gewicht: Ungefähr 1.58 Unzen (45 g)

Figure 2: Physical dimensions of the SucceX-D F7 TwinG Flight Controller, showing a 36mm x 36mm board size with 4mm mounting holes.
3. Packungsinhalt
The standard package for the iFlight SucceX-D F7 TwinG Flight Controller typically includes:
- iFlight SucceX-D F7 TwinG Flight Controller unit
- Connection cables (e.g., for DJI Air Unit, ESC, receiver)
- Mounting hardware (e.g., standoffs, grommets)

Figure 3: The SucceX-D F7 TwinG Flight Controller shown with typical included accessories such as various connection cables and rubber grommets for mounting.
4. Einrichtung und Installation
Proper installation and wiring are crucial for the safe and correct operation of your flight controller. Always ensure power is disconnected before making any connections.
4.1. Schaltplan
Refer to the detailed wiring diagram for connecting your flight controller to other components such as the ESC, receiver, VTX, GPS, and LED/Buzzer. Pay close attention to voltage requirements and pin assignments.

Figure 4: Comprehensive wiring diagram illustrating connections for DJI FPV Air Unit, various receivers (FrSky, TBS, DSMX), VTX, GPS, ESC, LED, and Buzzer.
4.2. Connecting to DJI FPV Air Unit
The SucceX-D F7 TwinG is designed for direct compatibility with the DJI FPV Air Unit. Use the provided cable to connect the Air Unit to the designated port on the flight controller. Ensure the correct pin orientation.

Figure 5: The flight controller connected to a DJI FPV Air Unit and camera, demonstrating the plug-and-play integration.
4.3. Mounting the Flight Controller
Mount the flight controller securely onto your drone frame using the provided standoffs and grommets. Ensure the board is oriented correctly according to your BetaFlight configuration. The 30.5x30.5mm mounting pattern is standard for many frames.
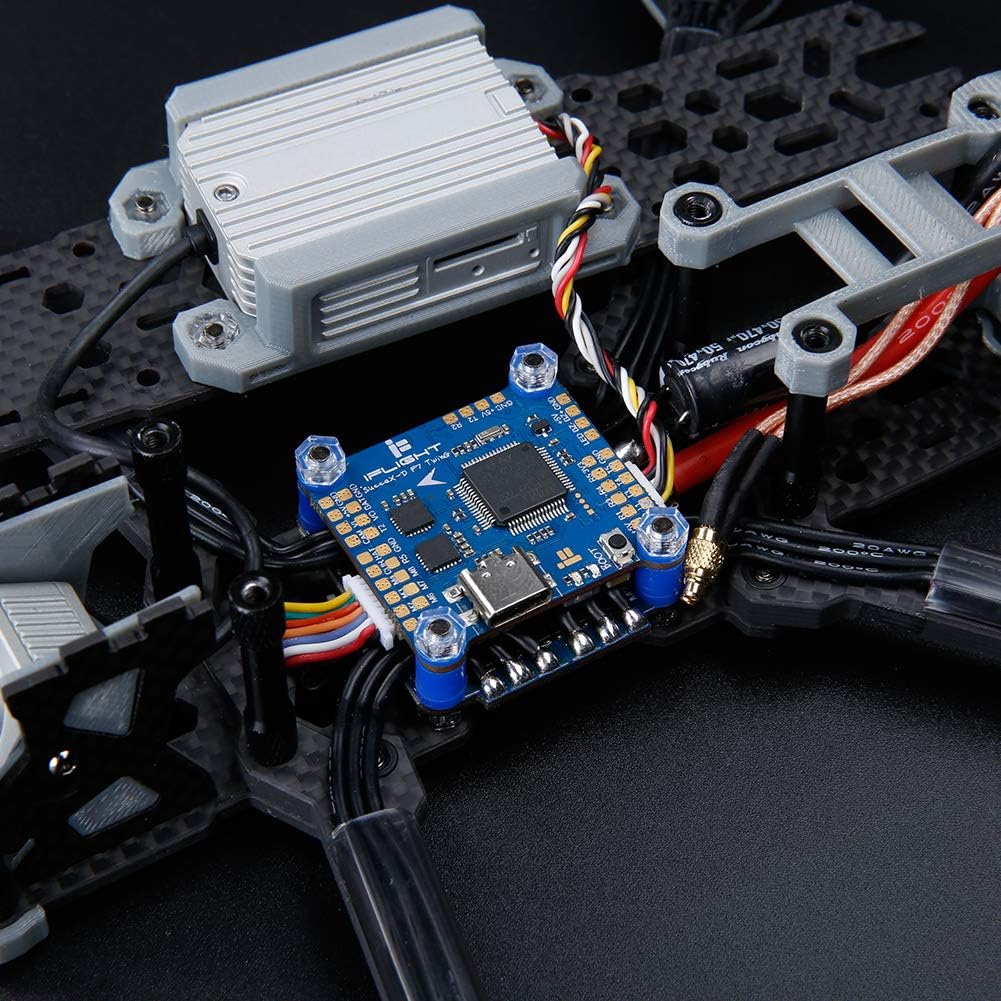
Figure 6: The flight controller mounted within a drone frame, showing connections to other components.
4.4. BetaFlight-Konfiguration
After physical installation, connect the flight controller to your computer via the USB Type-C port. Use the BetaFlight Configurator software to:
- Flash the latest firmware (if necessary).
- Konfigurieren Sie die UARTs für Ihren Empfänger, VTX, GPS usw.
- Kalibrieren Sie Beschleunigungsmesser und Gyroskope.
- Set up flight modes and OSD elements.
- Perform motor testing and ESC calibration.
Refer to the official BetaFlight documentation for detailed instructions on software configuration.
5. Operating the Flight Controller
Once installed and configured, the flight controller manages the drone's flight dynamics. Its dual gyroscopes provide precise data for stable flight. The integrated OSD displays critical flight information directly in your FPV feed.
- Einschalten: Schließen Sie den Drohnenakku an. Der Flugcontroller wird initialisiert.
- Bewaffnung: Arm the drone using your configured switch on the remote controller. Ensure propellers are clear before arming.
- Flugmodi: Select desired flight modes (e.g., Acro, Angle, Horizon) via your remote controller.
- OSD-Informationen: Batterievol überwachentage, current draw, flight time, RSSI, and other data displayed on your FPV goggles or monitor.
6. Wartung
To ensure the longevity and reliable performance of your iFlight SucceX-D F7 TwinG Flight Controller, follow these maintenance guidelines:
- Sauber halten: Regularly inspect the board for dust, dirt, or debris. Use compressed air or a soft brush to gently clean the components.
- Feuchtigkeit vermeiden: Protect the flight controller from water and excessive humidity. If exposed to moisture, ensure it is completely dry before powering on.
- Verbindungen prüfen: Periodically check all soldered joints and connectors for looseness or damage. Re-solder or replace as necessary.
- Firmware-Updates: Keep the BetaFlight firmware updated to benefit from performance improvements and bug fixes.
- Physischer Schutz: Consider using a protective enclosure or conformal coating for added durability, especially in harsh environments.
7. Fehlerbehebung
If you encounter issues with your flight controller, consider the following troubleshooting steps:
- Kein Strom/LEDs aus:
- Überprüfen Sie den Batterieanschluss und die Lautstärketage.
- Inspect power cables for damage or incorrect polarity.
- Verify BEC output if powering other components.
- No Connection to BetaFlight Configurator:
- Ensure USB Type-C cable is fully inserted and functional.
- Installieren Sie die erforderlichen VCP-Treiber (Virtual COM Port).
- Probieren Sie einen anderen USB-Anschluss oder Computer aus.
- Instabiler Flug:
- Recalibrate accelerometers in BetaFlight.
- Check for loose mounting or vibrations affecting the gyros.
- Verify PID settings are appropriate for your drone setup.
- OSD wird nicht angezeigt:
- Ensure OSD is enabled in BetaFlight and configured correctly.
- Check VTX and camera connections.
- Empfänger antwortet nicht:
- Verify receiver wiring to the correct UART.
- Ensure the correct serial receiver protocol (e.g., SBUS, Crossfire, Spektrum) is selected in BetaFlight.
- Check receiver binding status.
For more in-depth troubleshooting, consult the iFlight support resources or the BetaFlight documentation online.
8. Garantie und Support
Informationen zur Garantie finden Sie auf der offiziellen iFlight-Website. webBesuchen Sie unsere Website oder kontaktieren Sie Ihren Händler. Bewahren Sie Ihren Kaufbeleg für eventuelle Garantieansprüche auf.
For technical support, firmware updates, and additional resources, please visit the official iFlight website or their dedicated support channels. Online communities and forums can also be valuable resources for assistance.
iFlight Official WebWebsite: www.iflight-rc.com