Einführung
The Fractal Design Meshify 2 Compact is a high-performing computer case designed for optimal airflow and efficient space utilization. It features a bold, stealth-inspired aesthetic with a distinctive angular mesh front, bolt-free tempered glass side panel, and a fully removable top panel for excellent interior access. This manual provides essential information for setting up, operating, and maintaining your Meshify 2 Compact case.
Hauptmerkmale
- Iconic angular mesh front provides filtered airflow with a bold, stealth-inspired aesthetic.
- Room for GPUs up to 360 mm with a 240 mm radiator in the top, or up to 360/280 mm front radiators with GPUs under 305 mm.
- Install up to 7x 120 mm or 4x 140 mm fans (1x 120 mm and 2x 140 mm Dynamic X2 fans included).
- Versatile and space-efficient ATX form-factor design offers the performance and capacity of much larger cases.
- Open interior layout creates a smooth airflow path from front intake to rear exhaust.
- Bolt-free, flush tempered glass side panel for easy access and clean aesthetics.
- Fully removable top panel for excellent interior access during installation and maintenance.
- Front USB 3.1 Type-C port for modern connectivity.
Technische Daten
| Besonderheit | Detail |
|---|---|
| Technische Daten | 16.22 x 8.27 x 17.91 Zoll |
| Artikelmodellnummer | 7340172702337 |
| Datum der ersten Verfügbarkeit | 12. Mai 2020 |
| Hersteller | Fraktales Design |
| Marke | Fraktales Design |
| Motherboard-Kompatibilität | Micro ATX |
| Gehäusetyp | Mittlerer Turm |
| Empfohlene Verwendung für das Produkt | Spiele |
| Farbe | Black TG Dark Tint |
| Material | Gehärtetes Glas |
| Montageart des Netzteils | Top Mount |
| Kühlmethode | Luft |
| Modellname | FD-C-MES2C-02 |
| Artikelgewicht | 21.16 Pfund (9600 Gramm) |
Installationshandbuch
Follow these steps to assemble your computer components within the Meshify 2 Compact case.
- Auspacken und erste Inspektion: Carefully remove the case from its packaging. Inspect for any damage during transit.
- Entfernen der Seitenwand: The tempered glass side panel is bolt-free. Gently pull the panel from the rear to detach it. The solid steel side panel can also be removed by pulling it from the rear.
- Top Panel Removal: The top panel is fully removable. This provides excellent access to the interior for easier component installation.
- Motherboard-Installation: Install your Micro ATX motherboard onto the pre-installed standoffs. Secure it with the provided screws.
- Installation des Netzteils: The case supports a top-mount power supply. Install your PSU into its designated bay and secure it. Ensure proper cable routing.
- Installation des Speicherlaufwerks: Utilize the modular drive cages and SSD trays for your 2.5-inch SSDs and 3.5-inch HDDs. The case offers flexible storage options.
- Grafikkarteninstallation: Install your graphics card into the appropriate PCIe slot on your motherboard. Ensure it is securely seated and fastened. The case supports large GPUs; refer to specifications for maximum length.
- Lüfter- und Kühlerinstallation: The case comes with pre-installed fans. Additional fans or radiators can be installed in the front, top, and bottom positions as per the specifications.
- Kabelmanagement: Nutzen Sie die ample cable routing channels and Velcro straps behind the motherboard tray to organize cables for optimal airflow and a clean aesthetic.
- Neuinstallation der Bedienfelder: Once all components are installed and cables are managed, carefully reattach the top panel, then the side panels.
Bedienungsanleitung
The Meshify 2 Compact is designed for straightforward operation. Ensure all components are correctly installed and connected before powering on your system.
- Ein-/Ausschalten: Use the power button located on the top I/O panel to turn your system on or off.
- E/A-Anschlüsse vorne: Utilize the front USB 3.1 Type-C, USB 3.0 Type-A, and audio jacks for convenient peripheral connectivity.
- Luftstrom: The mesh front panel and included fans provide excellent airflow. Ensure no obstructions block the intake or exhaust vents for optimal cooling performance.
Wartung
Regular maintenance helps ensure the longevity and optimal performance of your Meshify 2 Compact case.
- Reinigung des Staubfilters: The front mesh panel acts as a dust filter and can be easily removed for cleaning. Gently clean the mesh with compressed air or a soft brush to remove accumulated dust.
- Innenreinigung: Periodically remove the side panels and use compressed air to clear dust from internal components, especially fans and heatsinks.
- Kabelmanagement-Check: Ensure cables remain neatly routed and do not obstruct airflow or fan operation.
Fehlerbehebung
If you encounter issues with your Meshify 2 Compact case, consider the following common solutions:
- Kein Strom: Ensure the power supply is correctly installed and connected, and the power button on the case is functioning. Check all internal power connections.
- Schlechte Luftzirkulation/Hohe Temperaturen: Verify that all fans are spinning correctly and are not obstructed. Clean any dust filters. Ensure proper intake and exhaust fan orientation.
- Lose Paneele: Ensure all side and top panels are securely latched into place.
- Front-I/O funktioniert nicht: Check that the front I/O cables are correctly connected to the motherboard headers.
Produktbilder

Gesamt view of the Fractal Design Meshify 2 Compact case in black with dark tinted tempered glass.

Front view showcasing the angular mesh design for optimal airflow.

Hinteren view of the case, showing the exhaust fan mount and PCIe slots.

Innere view of the case with the tempered glass panel removed, showing the spacious layout.

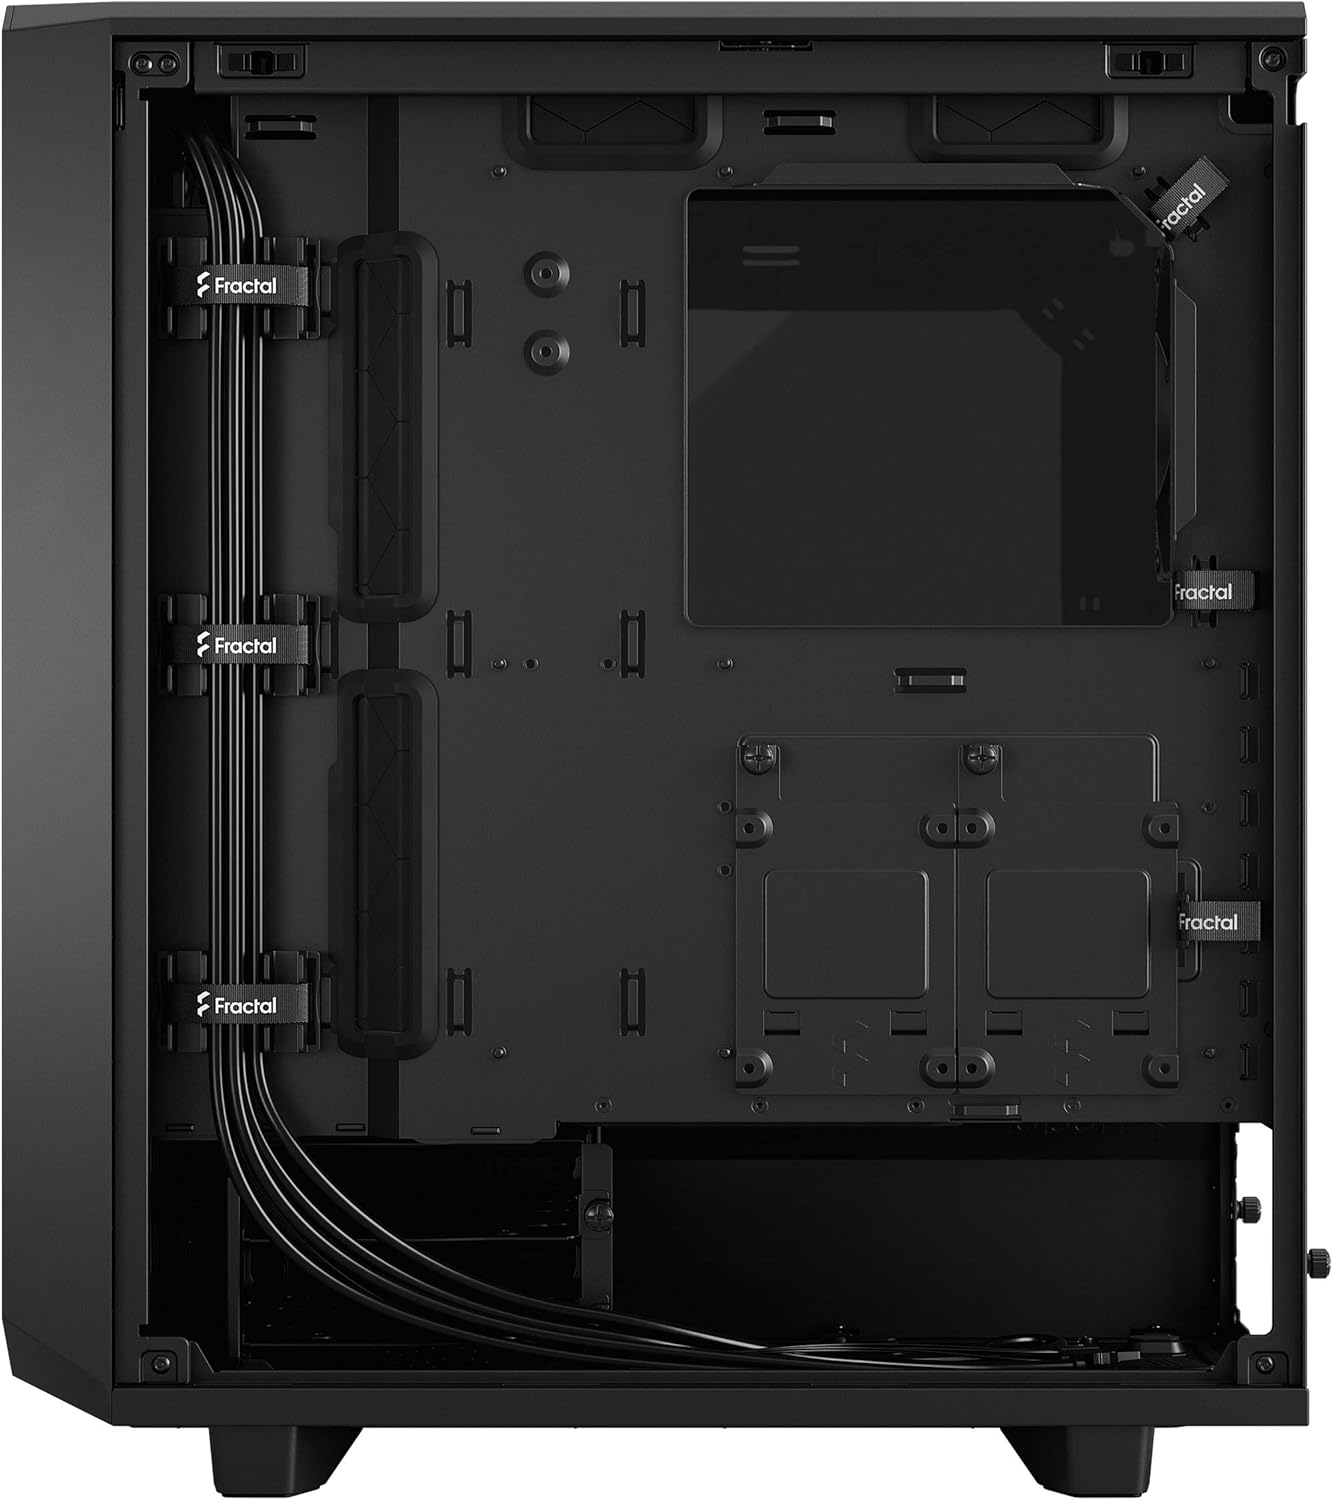
View behind the motherboard tray, highlighting cable management features and drive mounts.
Explodierte view illustrating the modularity and removable panels of the case.
Offizielle Produktvideos
No official product videos from the seller are available for this specific product.
Garantie und Support
For warranty information, technical support, or further assistance, please refer to the official Fractal Design webBesuchen Sie die Website oder kontaktieren Sie direkt den Kundenservice. Bewahren Sie Ihren Kaufbeleg für Garantieansprüche auf.