
Walfront TS-TP40-B
Walfront Digital Meat Thermometer TS-TP40 User Manual
Model: TS-TP40-B
Einführung
Vielen Dank für Ihren Einkauf.asing the Walfront Digital Meat Thermometer TS-TP40. This advanced cooking thermometer is designed to help you achieve perfect cooking results every time, whether you're grilling, baking, or roasting. Featuring a large LCD display, four color-coded probes, and a wireless range of up to 100m, it provides precise temperature monitoring for multiple food items simultaneously. This manual provides detailed instructions for setup, operation, maintenance, and troubleshooting to ensure optimal performance and longevity of your device.
Packungsinhalt
Bitte überprüfen Sie nach dem Auspacken den Packungsinhalt, um sicherzustellen, dass alle Komponenten vorhanden sind:
- 1 x Main Machine (Receiver)
- 1 x Auxiliary Machine (Transmitter)
- 4 x Temperature Probes (color-coded)
- 2 x Sondenklemmen
- 1 x Benutzerhandbuch

Image: All components of the Walfront Digital Meat Thermometer TS-TP40, including the main receiver unit, the auxiliary transmitter unit, four distinct color-coded temperature probes, and two metal probe clips.
Technische Daten
| Marke | Walfront |
| Modellname | TS-TP40 |
| Artikelmodellnummer | TS-TP40-B |
| Temperaturerfassungsbereich | -20 300 bis 4 ℃ (-572 ℉ bis XNUMX ℉) |
| Drahtlose Distanz | Bis zu 100 m |
| Anzeigetyp | LCD |
| Power Supply (Main Machine) | 2 x AAA-Batterie (nicht im Lieferumfang enthalten) |
| Power Supply (Auxiliary Machine) | 2 x AAA-Batterie (nicht im Lieferumfang enthalten) |
| Hauptmaschinengröße | Ca. 124 x 71 x 25 mm / 4.9 x 2.8 x 1 Zoll |
| Auxiliary Machine Size | Ca. 90 x 72 x 25 mm / 3.5 x 2.8 x 1 Zoll |
| Sondenlänge | Ca. 62 mm / 2.4 Zoll |
| Total Line Length (with Probe) | Ca. 1170 mm / 46.1 Zoll |
| Gewicht | Ca. 382 g |
| Material | ABS + Edelstahl |

Image: Detailed dimensions of both the main receiver unit and the auxiliary transmitter unit of the thermometer, showing height, width, and thickness.
Aufstellen
1. Einlegen der Batterie
Both the Main Machine (receiver) and Auxiliary Machine (transmitter) require 2 x AAA batteries each. Batteries are not included.
- Locate the battery compartment on the back of both units.
- Öffnen Sie die Batterieabdeckung.
- Insert 2 x AAA batteries into each unit, ensuring correct polarity (+/-).
- Schließen Sie die Batterieabdeckung fest.

Abbildung: Die Rückseite view of both the main and auxiliary thermometer units, highlighting the battery compartments and integrated kickstands for tabletop use.
2. Sondenanschluss
Connect the temperature probes to the Auxiliary Machine (transmitter).
- The Auxiliary Machine has four ports for the probes.
- Insert each probe's jack firmly into an available port. The probes are color-coded for easy identification.
3. Erstes Einschalten
Drücken Sie die LIGHT/O button on the Auxiliary Machine to power it on. The Main Machine will automatically connect to the Auxiliary Machine.
Bedienungsanleitung
1. Temperature Unit Switching (℃/℉)
To switch between Celsius (℃) and Fahrenheit (℉) temperature units:
- On the Main Machine, press the ℃ / ℉ Taste.
- The display will toggle between the two units.

Image: The main display unit showing the temperature readings, demonstrating the ability to switch between Celsius and Fahrenheit units.
2. Setting Target Temperature and Food Type
The thermometer allows you to set specific target temperatures and select pre-programmed food types for each probe.
- Drücken Sie die FLEISCH button to cycle through different meat types (e.g., Beef, Poultry, Fish).
- Drücken Sie die TASTE/O button to select the desired doneness level (e.g., Well, Medium, Rare).
- Alternatively, you can manually set a target temperature using the MODUS button to select a probe, then use the SEC/▼ Und MIN/▲ Tasten zur Einstellung der Zieltemperatur.
3. Using the Timer/Countdown Function
The device includes a timer function for convenience.
- Drücken Sie die MODUS button until the timer icon appears on the display.
- Verwenden Sie die SEC/▼ Und MIN/▲ Tasten zum Einstellen der gewünschten Countdown-Zeit.
- Drücken START/STOP to begin or pause the countdown.
- Drücken KLAR um den Timer zurückzusetzen.

Image: The main display unit illustrating the timing and countdown features, showing how to set and monitor cooking durations.
4. Hintergrundbeleuchtungsbetrieb
The LCD display features a backlight for improved visibility in low-light conditions.
- Drücken Sie die LIGHT/O button on the Main Machine to activate the blue backlight.
- The backlight will turn orange when the target temperature is reached or an alarm condition is met.

Image: The main display unit demonstrating the two backlight colors: a normal blue backlight for general viewing and an orange backlight that illuminates when an alarm condition (e.g., target temperature reached) is triggered.
5. Platzierungsoptionen
Both units are designed for versatile placement.
- Magnetische Rückseite: The units have magnets on the back, allowing them to be attached to metallic surfaces like refrigerators or oven doors.
- Integrierter Ständer: A foldable bracket on the back allows the units to stand upright on a countertop or table.
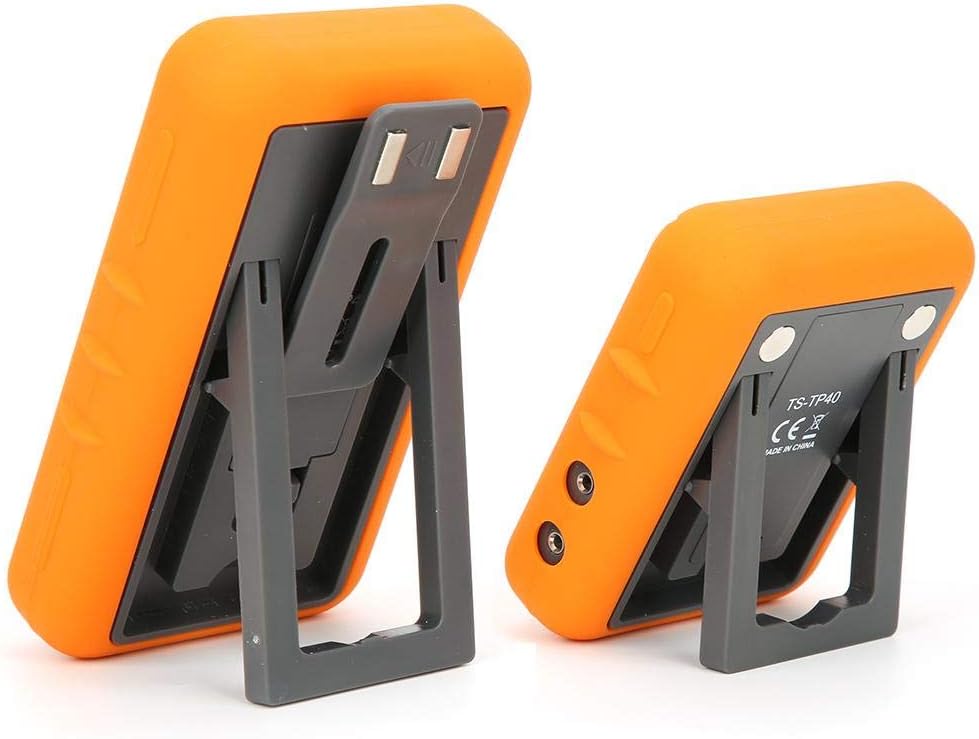
Image: The main and auxiliary thermometer units shown with their integrated kickstands extended, demonstrating their ability to stand independently on a flat surface.
Wartung
Reinigung
- Wipe the thermometer units with a damp cloth. Do not immerse the units in water.
- The probes can be cleaned with warm soapy water. Ensure the probe connectors are dry before re-inserting them into the unit.
- Do not use abrasive cleaners or scouring pads, as this may damage the surface.
Lagerung
- Bewahren Sie Thermometer und Sonden bei Nichtgebrauch an einem sauberen, trockenen Ort auf.
- Wenn das Gerät längere Zeit nicht verwendet wird, entfernen Sie die Batterien, um ein Auslaufen zu verhindern.
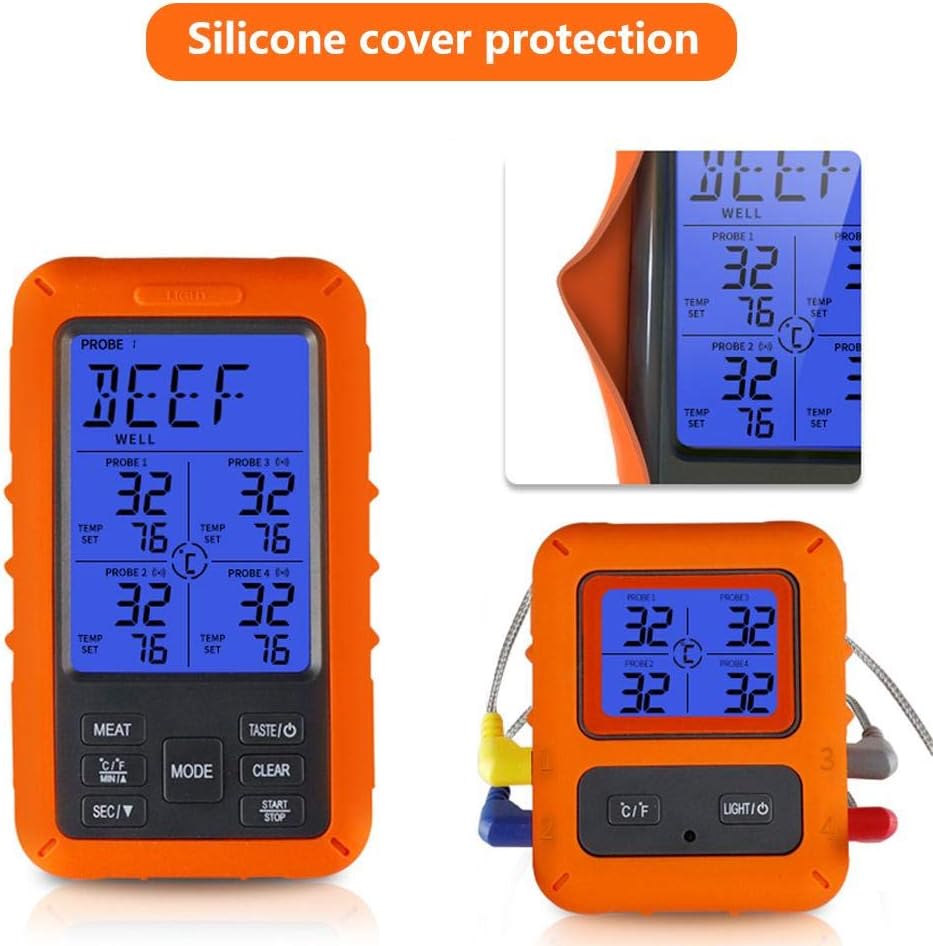
Image: The main display unit encased in its protective silicone cover, highlighting the durable design that aids in maintenance and longevity.
Fehlerbehebung
| Problem | Mögliche Ursache | Lösung |
|---|---|---|
| Kein Display/Gerät lässt sich nicht einschalten. | Die Batterien sind leer oder falsch eingelegt. | Ersetzen Sie die Batterien durch neue und achten Sie dabei auf die richtige Polarität. |
| Ungenaue Temperaturmessungen. | Probe not fully inserted; probe damaged; probe tip not in the center of the thickest part of the meat. | Ensure probe is fully inserted. Check probe for visible damage. Re-insert probe into the correct part of the food. |
| No connection between Main and Auxiliary Unit. | Units are out of range; interference; low batteries. | Move units closer together. Avoid placing near strong electromagnetic sources. Replace batteries in both units. |
| Alarm ertönt nicht. | Volume too low or muted; target temperature not set. | Check device settings for alarm volume. Ensure a target temperature is set for the active probe. |
Garantie und Support
Walfront products are manufactured to high-quality standards. For warranty information or technical support, please refer to the contact details provided with your purchase or visit the official Walfront webBitte bewahren Sie Ihren Kaufbeleg für Garantieansprüche auf.
For further assistance, you may contact Walfront customer service through their official channels.
Ask a question about this manual
Ask about setup, troubleshooting, compatibility, parts, safety, or missing instructions. Manuals+ will review the question and use this page’s manual context to help answer it.