
1. Einleitung
Vielen Dank für Ihren Einkauf.asing the Vonyx VSA15 Active Bi-Amplified Speaker. This manual provides important information regarding the safe operation, installation, and maintenance of your speaker. Please read it thoroughly before use and keep it for future reference.
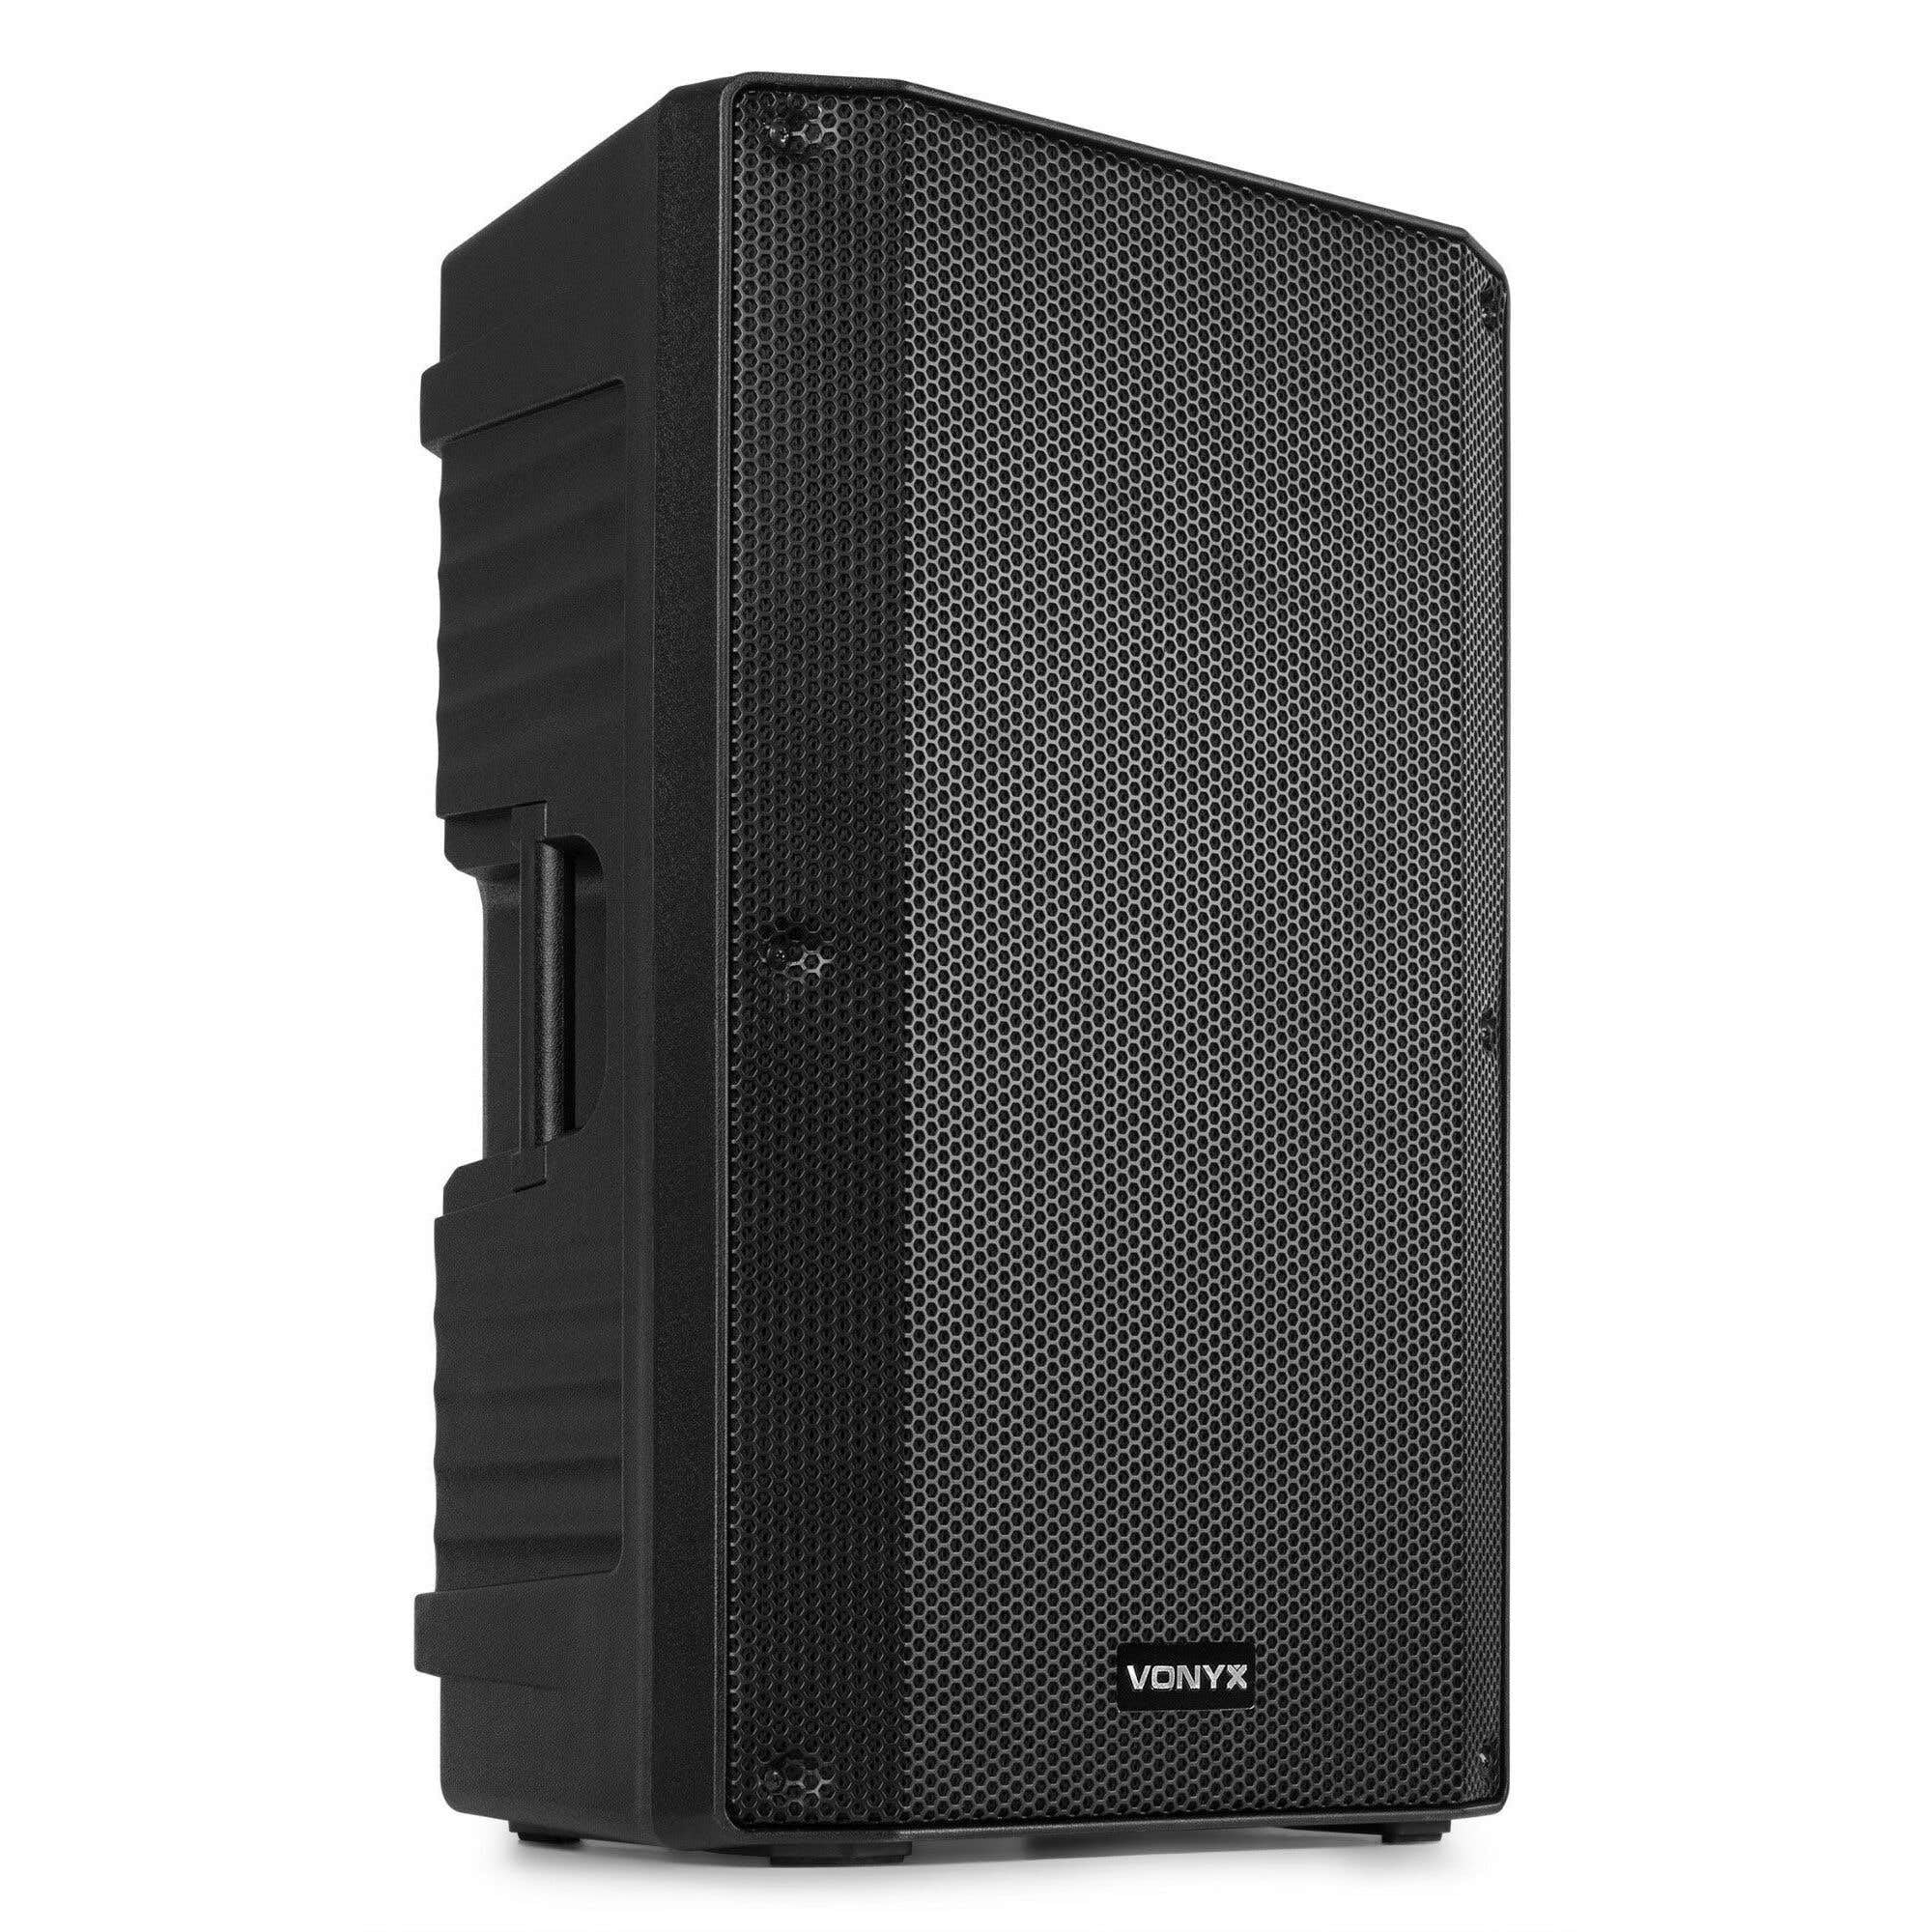
Abbildung 1.1: Schräge Frontansicht view of the Vonyx VSA15 active speaker.
2. Sicherheitshinweise
Entfernen Sie nicht die Abdeckung, um das Risiko eines Stromschlags zu verringern. Keine vom Benutzer zu wartenden Teile im Inneren. Überlassen Sie die Wartung qualifiziertem Servicepersonal.
- Stromversorgung: Stellen Sie sicher, dass die Stromversorgungslautstärketage matches the rating on the speaker.
- Belüftung: Do not block ventilation openings. Install according to manufacturer's instructions.
- Wasser & Feuchtigkeit: Setzen Sie das Gerät weder Regen noch Feuchtigkeit aus. Stellen Sie keine mit Flüssigkeiten gefüllten Gegenstände auf das Gerät.
- Hitze: Nicht in der Nähe von Wärmequellen wie Heizkörpern, Heizregistern, Öfen oder anderen Wärme erzeugenden Geräten installieren.
- Kabel: Schützen Sie das Netzkabel vor Beschädigungen durch Treten oder Einklemmen.
- Reinigung: Nur mit trockenem Tuch reinigen.
- Montage: Nur mit Ständer, Stativ, Halterung oder Tisch verwenden, die vom Hersteller angegeben oder mit dem Gerät verkauft werden.
3. Produktüberschreitungview
3.1 Hauptmerkmale
- Powerful 15-inch woofer with 1000 watts maximum output.
- Integrated 2-way active crossover for optimized sound.
- Bi-amplified design with integrated ampschwerer.
- Multiple inputs: Microphone (XLR/Jack), Guitar (Jack), Line (RCA/XLR/Jack).
- Line output for connecting additional speakers.
- Durable ABS plastic housing with metal grille.
- Equipped with wheels and large handles for easy transport.
- 35mm pole mount for stand installation.
3.2 Bedienfeld und Anschlüsse
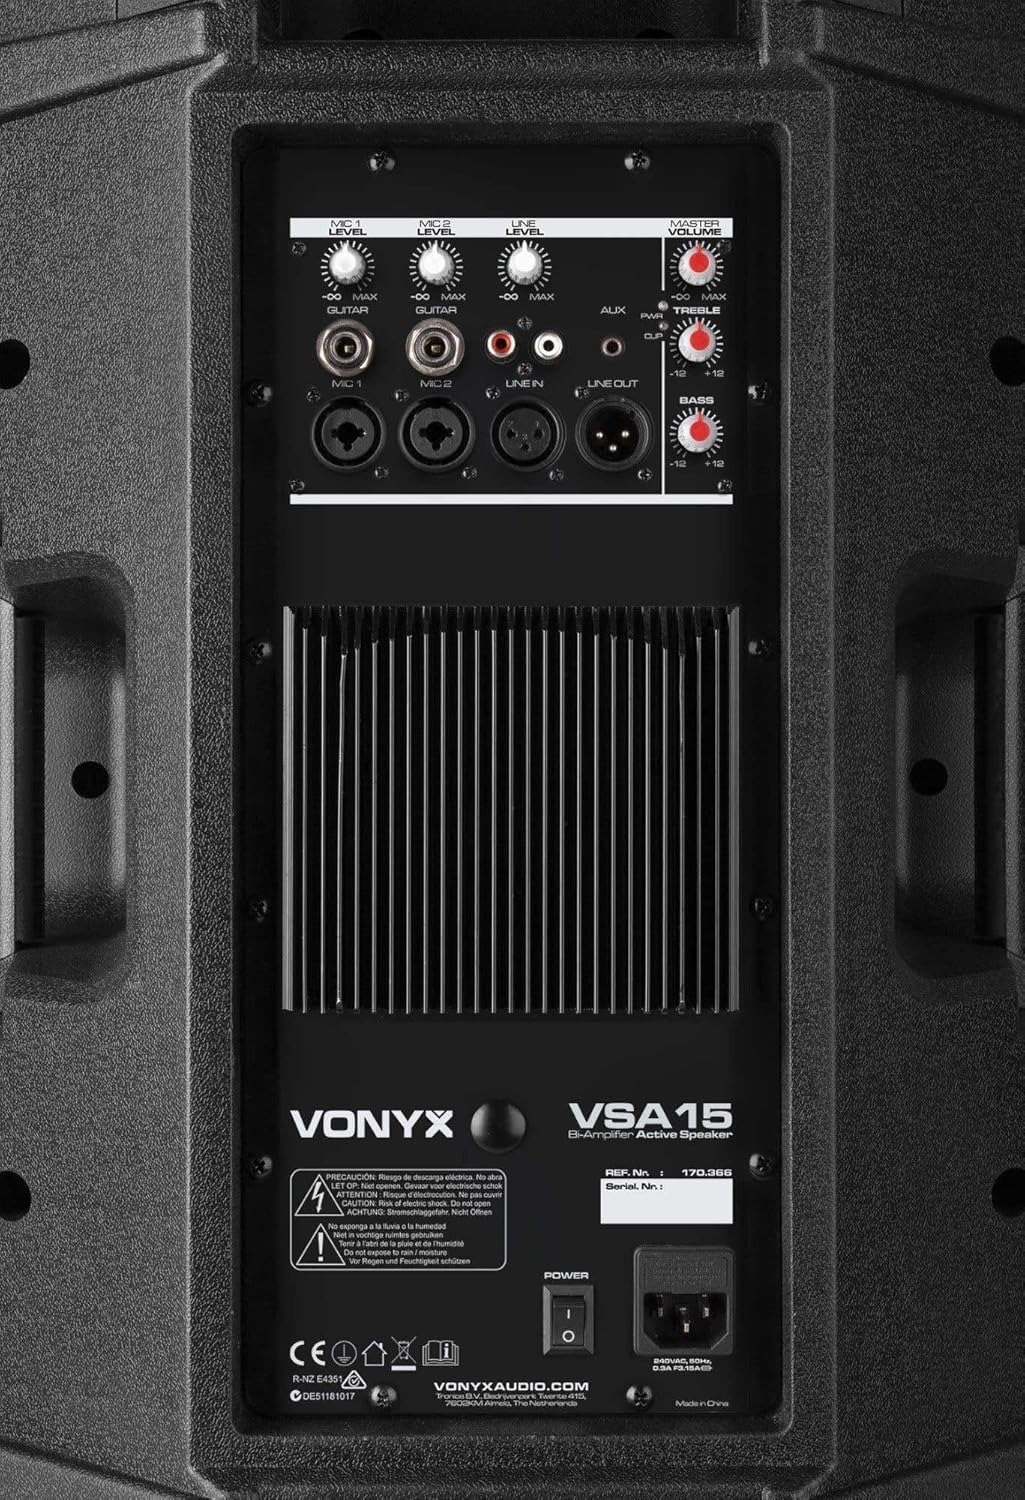
Image 3.2.1: Rear control panel showing inputs, outputs, and volume controls.
- MIC 1-Eingang: XLR/Jack combo input for microphone.
- MIC 2-Eingang: XLR/Jack combo input for microphone.
- Gitarreneingang: 1/4" Jack input for guitar.
- LINE-Eingang: RCA/XLR/Jack inputs for line-level audio sources (e.g., mixer, CD player).
- AUX-Eingang: Auxiliary input for portable devices.
- LINE-Ausgang: XLR output for connecting to another active speaker or mixer.
- Lautstärkeregler: Individual volume controls for MIC 1, MIC 2, GUITAR, LINE, and MASTER.
- EQ-Regler: Treble and Bass adjustment knobs.
- Stromschalter: Ein-/Ausschalter für das Gerät.
- Leistungsaufnahme: IEC-Netzstecker für das Hauptnetzkabel.
4. Einrichtung
4.1 Auspacken
Carefully remove the speaker from its packaging. Inspect the unit for any signs of damage during transit. Retain the original packaging for future transport or storage.
4.2 Platzierung
The VSA15 speaker can be placed on a flat, stable surface or mounted on a standard 35mm speaker pole stand. Ensure the speaker is stable and secure to prevent tipping.

Abbildung 4.2.1: Unterseite view with integrated wheels and 35mm pole mount socket.

Image 4.2.2: Top handle for easy lifting and transport.
4.3 Stromanschluss
- Stellen Sie sicher, dass sich der Netzschalter des Lautsprechers in der Position AUS befindet.
- Connect the supplied power cable to the IEC power input on the rear panel of the speaker.
- Stecken Sie das andere Ende des Netzkabels in eine geeignete 230-V-Wechselstromsteckdose.
4.4 Audioverbindungen
Schließen Sie Ihre Audioquellen an die entsprechenden Eingänge auf der Rückseite an:
- Mikrofone: Use XLR or 1/4" Jack cables to connect microphones to the MIC 1 or MIC 2 inputs.
- Gitarre: Use a 1/4" Jack cable to connect a guitar to the GUITAR input.
- Leitungspegelgeräte: Use RCA, XLR, or 1/4" Jack cables to connect mixers, CD players, or other line-level audio sources to the LINE inputs.
- Weitere Sprecher: To connect another active speaker, use an XLR cable from the LINE OUT of the VSA15 to the input of the second speaker.
5. Bedienungsanleitung
- Einschalten: After all connections are made, turn on the speaker using the power switch on the rear panel.
- Lautstärkeregelung: Start with all individual input volume controls and the MASTER volume control set to their minimum positions.
- Input Level Setting: Gradually increase the volume control for the specific input you are using (MIC 1, MIC 2, GUITAR, LINE) until the desired level is achieved.
- Master-Lautstärke: Adjust the MASTER volume control to set the overall output level of the speaker.
- Tonsteuerung: Use the TREBLE and BASS knobs to adjust the high and low frequencies to your preference.
- Ausschalten: Before disconnecting power or cables, turn the MASTER volume down and then switch off the speaker.
Notiz: Avoid operating the speaker at excessively high volumes for extended periods to prevent damage to the components and hearing loss.
6. Wartung
- Reinigung: Regularly clean the speaker cabinet with a soft, dry cloth. Do not use abrasive cleaners or solvents.
- Gitter: Keep the metal grille free from dust and debris to ensure proper sound dispersion and cooling.
- Lagerung: When not in use for extended periods, store the speaker in a dry, dust-free environment, preferably in its original packaging.
- Inspektion: Periodically check all cables and connections for wear or damage. Replace any faulty cables immediately.
7. Fehlerbehebung
| Problem | Mögliche Ursache | Lösung |
|---|---|---|
| Keine Tonausgabe. |
|
|
| Verzerrter Ton. |
|
|
| Summen oder Brummen. |
|
|
8. Spezifikationen
| Modellnummer | VSA15 |
| Marke | VONYX |
| Max. Ausgangsleistung | 1000 Watt |
| Woofer-Durchmesser | 15 Zoll |
| Hochtönerdurchmesser | 1.35 Zoll |
| Frequenzgang | 35 Hz (Untergrenze, vollständiger Bereich nicht spezifiziert) |
| Konnektivitätstechnologie | Wired (Jack, XLR, RCA) |
| Audioausgabemodus | Stereo (Implied by 2.1 channels, but typically mono for a single PA speaker) |
| Eingangslautstärketage | 230 Volt |
| Gehäusematerial | ABS-Kunststoff |
| Lautsprechertyp | Monitor / Active PA Speaker |
| Empfohlene Verwendung | Public speeches, musical performances, DJ events, home parties, karaoke, indoor and outdoor events. |
| Artikelgewicht | 16.4 Kilogramm |
| Abmessungen (H x B x T) | 68cm x 42cm x 36cm (approximate, based on image) |

Image 8.1: Approximate dimensions of the VSA15 speaker.
9. Garantie und Support
Information regarding warranty coverage and customer support is typically provided with your purchase documentation or can be found on the official Vonyx website. Please refer to these resources for details on warranty periods, service procedures, and contact information for technical assistance.
For further assistance, please visit the official VONYX webWebsite: www.vonyxaudio.com