1. Einleitung
This manual provides detailed instructions for the setup, operation, and maintenance of your BMW Multi-Function Clock, Alarm, and Weather Station. This device combines a digital clock, an alarm with a snooze function, and a weather station that displays temperature. Please read this manual carefully before use to ensure proper functionality and to maximize your experience with the product.
2. Packungsinhalt
Bitte überprüfen Sie den Packungsinhalt nach dem Auspacken. Sollten Artikel fehlen oder beschädigt sein, wenden Sie sich bitte an Ihren Händler.
- BMW Multi-Function Clock, Alarm, and Weather Station Unit
- Benutzerhandbuch (dieses Dokument)
3. Einrichtung
3.1. Einlegen der Batterie
Das Gerät benötigt 2 AAA-Batterien (nicht im Lieferumfang enthalten) für den Betrieb. Gehen Sie zum Einlegen der Batterien wie folgt vor:
- Suchen Sie die Abdeckung des Batteriefachs auf der Rückseite des Geräts.
- Schieben oder heben Sie den Deckel vorsichtig an, um das Fach zu öffnen.
- Legen Sie zwei AAA-Batterien ein und achten Sie dabei auf die richtige Polarität (+ und -), wie im Batteriefach angegeben.
- Bringen Sie den Batteriefachdeckel wieder fest an.
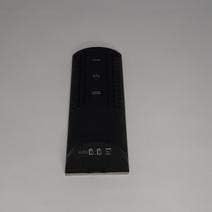
Abbildung 3.1: Zurück view of the device, illustrating the battery compartment and control buttons for setup.
3.2. Erstes Einschalten
After battery installation, the device display will illuminate, and it will typically show a default time or begin searching for a signal (if applicable for weather functions). Proceed to the operating instructions to set the time and other functions.
4. Bedienungsanleitung
4.1. Uhrzeit und Datum einstellen
So stellen Sie die aktuelle Uhrzeit und das Datum ein:
- Halten Sie die MODUS button (usually located on the back or side) for a few seconds until the time display starts flashing.
- Verwenden Sie die UP or RUNTER buttons (often labeled '+' or '-') to adjust the hour.
- Drücken MODUS again to confirm the hour and move to the minutes.
- Adjust the minutes using the UP or RUNTER Schaltflächen.
- Drücken Sie weiter MODUS and adjusting with AUF/AB for year, month, and day settings.
- Drücken MODUS Ein letztes Mal, um den Einstellungsmodus zu verlassen.
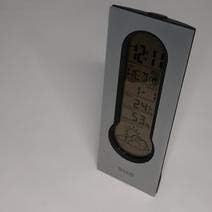
Abbildung 4.1: Front display of the device, showing the digital clock, temperature, and weather forecast icons.
4.2. Alarm einstellen
So stellen Sie die Weckzeit ein:
- Drücken Sie im normalen Zeitanzeigemodus die Taste ALARM Taste (oder MODUS repeatedly until 'AL' or an alarm icon appears).
- Halten Sie die ALARM Drücken Sie die Taste, bis die Alarmzeitanzeige zu blinken beginnt.
- Verwenden Sie die UP or RUNTER Tasten zum Einstellen der gewünschten Weckzeit.
- Drücken ALARM again to confirm the hour and move to the minutes.
- Adjust the minutes using the UP or RUNTER Schaltflächen.
- Drücken ALARM one last time to save the alarm setting. An alarm icon will typically appear on the display to indicate the alarm is active.
4.3. Using Snooze Function
Wenn der Alarm ertönt, drücken Sie die SCHLAFEN button (usually a large button on the top of the unit) to temporarily silence the alarm. The alarm will sound again after a few minutes (typically 5-10 minutes, depending on the model). To turn off the alarm completely, press any other button or let it ring until it automatically stops.

Abbildung 4.2: Spitze view of the device, highlighting the prominent SNOOZE button.
4.4. Temperaturanzeige
The device continuously displays the ambient temperature. The temperature unit (Celsius or Fahrenheit) can usually be switched by pressing a dedicated button (e.g., 'C/F' or 'TEMP') or by holding down one of the adjustment buttons during time setting.
4.5. Weather Station Function
The integrated weather station provides a basic weather forecast using graphical icons (e.g., sun, clouds, rain). This forecast is based on internal barometric pressure changes and is an estimation for the local area. It is not connected to external weather services.
5. Wartung
5.1. Reinigung
To clean the device, use a soft, dry cloth. Do not use abrasive cleaners, solvents, or chemical sprays, as these can damage the surface and electronic components. Avoid getting moisture into the device.
5.2. Batteriewechsel
When the display dims or functions become erratic, it is time to replace the batteries. Follow the battery installation steps in Section 3.1. Always replace both batteries at the same time with new AAA batteries.
6. Fehlerbehebung
Sollten Sie Probleme mit Ihrem Gerät haben, beachten Sie bitte die folgenden häufig auftretenden Probleme und Lösungen:
- Bildschirm ist leer oder dunkel:
Check if batteries are installed correctly. Replace with fresh AAA batteries. - Uhrzeit oder Datum ist falsch:
Refer to Section 4.1 to reset the time and date. Ensure you confirm each setting step. - Der Alarm ertönt nicht:
Verify that the alarm is set and activated (look for an alarm icon on the display). Ensure the volume is not set to zero if adjustable. - Die Temperaturanzeige scheint ungenau zu sein:
Ensure the device is not placed in direct sunlight, near heat sources, or in drafts, which can affect readings. Allow some time for the sensor to stabilize after placement. - Weather forecast icons are not changing:
The weather forecast is based on local barometric pressure changes and may take time to update. It provides a general trend, not a precise forecast.
7. Spezifikationen
| Besonderheit | Detail |
|---|---|
| Marke | BMW |
| Modellnummer | 06017443015007 |
| Besondere Merkmale | Alarm, Snooze, Temperature Display |
| Stromquelle | Batterie |
| Akku-Typ | 2 x AAA-Batterien (nicht im Lieferumfang enthalten) |
| ASIN | B089QGJ9VR |
8. Garantie und Support
This product is covered by a standard manufacturer's warranty. For specific warranty terms and conditions, please refer to the documentation provided at the time of purchase or contact your retailer. For technical support or service inquiries, please reach out to the point of purchase or the manufacturer's customer service department.