
1. Produktüberschreitungview
This HOMCOM shoe cabinet is designed to provide an organized storage solution for your footwear. Its slim design makes it suitable for various spaces, including hallways and entryways, helping to keep your home tidy and shoes out of sight. The cabinet features three compartments, each with adjustable internal dividers, offering storage for up to 18 pairs of shoes.

Image 1.1: The HOMCOM shoe cabinet in a typical home environment, showcasing its slim profile and modern design.
2. Sicherheitshinweise
Bitte lesen Sie vor der Montage und Benutzung alle Sicherheitshinweise. Die Nichtbeachtung dieser Hinweise kann zu Verletzungen oder Schäden am Produkt führen.
- Kippgefahr: To prevent unintended tipping, it is strongly recommended to fix the furniture to the wall using the provided anti-tip hardware.
- Gewichtsbeschränkung: Do not exceed the maximum load capacity of 15 kg (33 lbs) for the entire unit. Overloading can compromise stability and safety.
- Montage: Montieren Sie das Gerät auf einer weichen, sauberen Oberfläche, um Kratzer zu vermeiden. Stellen Sie vor der Inbetriebnahme sicher, dass alle Schrauben und Befestigungselemente fest angezogen sind.
- Kinder: Keep children away from the assembly area. Small parts can be a choking hazard. Do not allow children to climb on or play with the cabinet.
3. Packungsinhalt
Bitte prüfen Sie vor Beginn der Montage, ob alle Komponenten vorhanden sind. Sollten Teile fehlen oder beschädigt sein, wenden Sie sich bitte an den Kundendienst.
- Schrankfronten (Oberseite, Unterseite, Seiten, Rückseite)
- Drawer fronts and internal mechanisms
- Adjustable dividers
- Hardware pack (screws, dowels, cam locks, handles, protective pads, anti-tip kit)
- Montageanleitung
4. Aufbau und Montage
Follow these steps carefully for proper assembly. Two people are recommended for assembly.
- Teile auspacken und identifizieren: Lay out all components on a clean, soft surface. Refer to the parts list in the included assembly guide to identify each piece.
- Montieren Sie den Hauptrahmen: Connect the side panels to the top and bottom panels using the provided hardware (e.g., cam locks and dowels). Ensure the back panel groove is correctly aligned.
- Schubladenmechanismen einbauen: Attach the drawer runners and pivot mechanisms to the inside of the cabinet frame according to the instructions.
- Schubladen zusammenbauen: Attach the internal dividers to the drawer fronts. The dividers have 3 adjustable positions to accommodate different shoe sizes.
- Schutzpolster anbringen: Apply the protective pads to the bottom of the cabinet feet to prevent floor scratches.
- An der Wand befestigen (empfohlen): Position the cabinet in its desired location. Use the anti-tip kit to secure the cabinet to a wall stud. This is crucial for stability and safety.
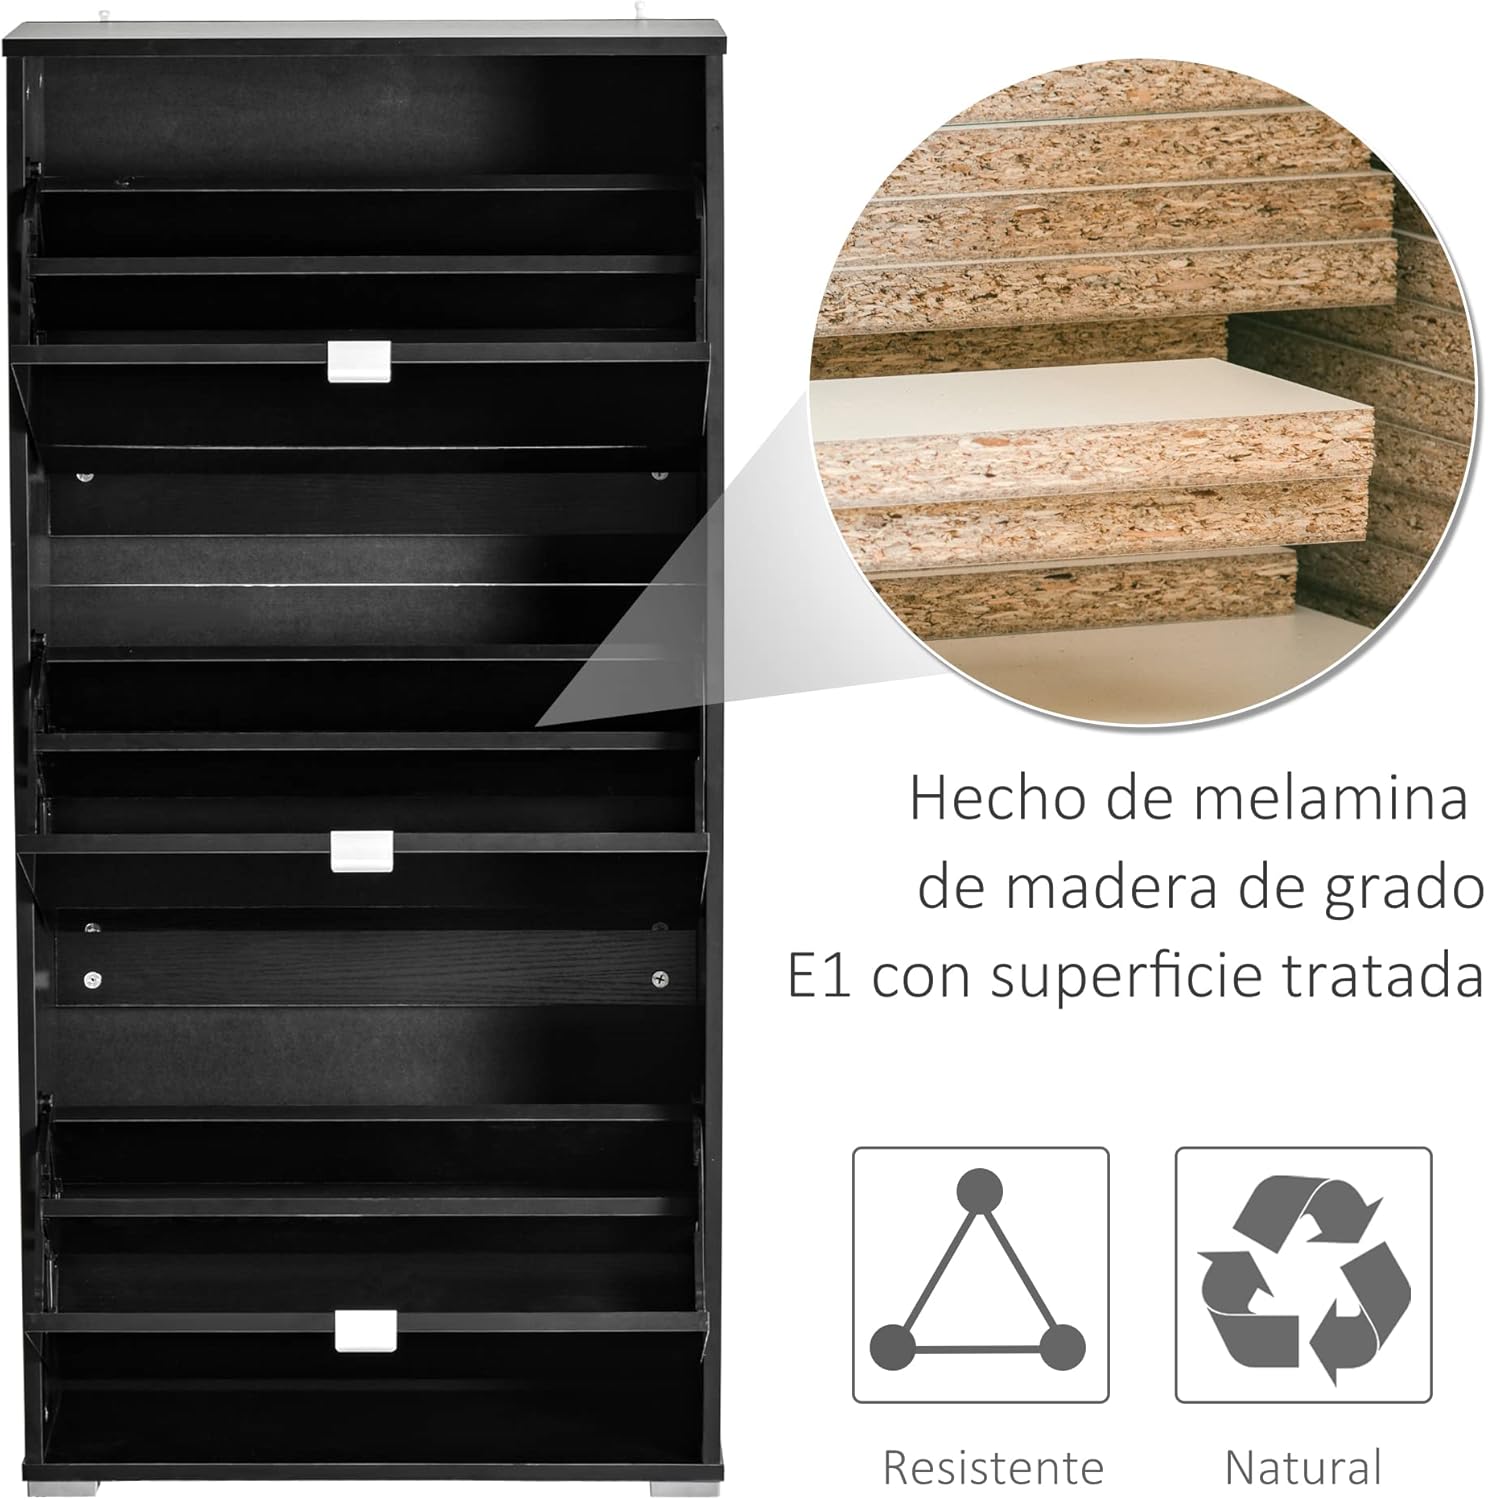
Abbildung 4.1: Innenraum view of the cabinet, highlighting the E1 grade melamine wood material and adjustable shelf positions.
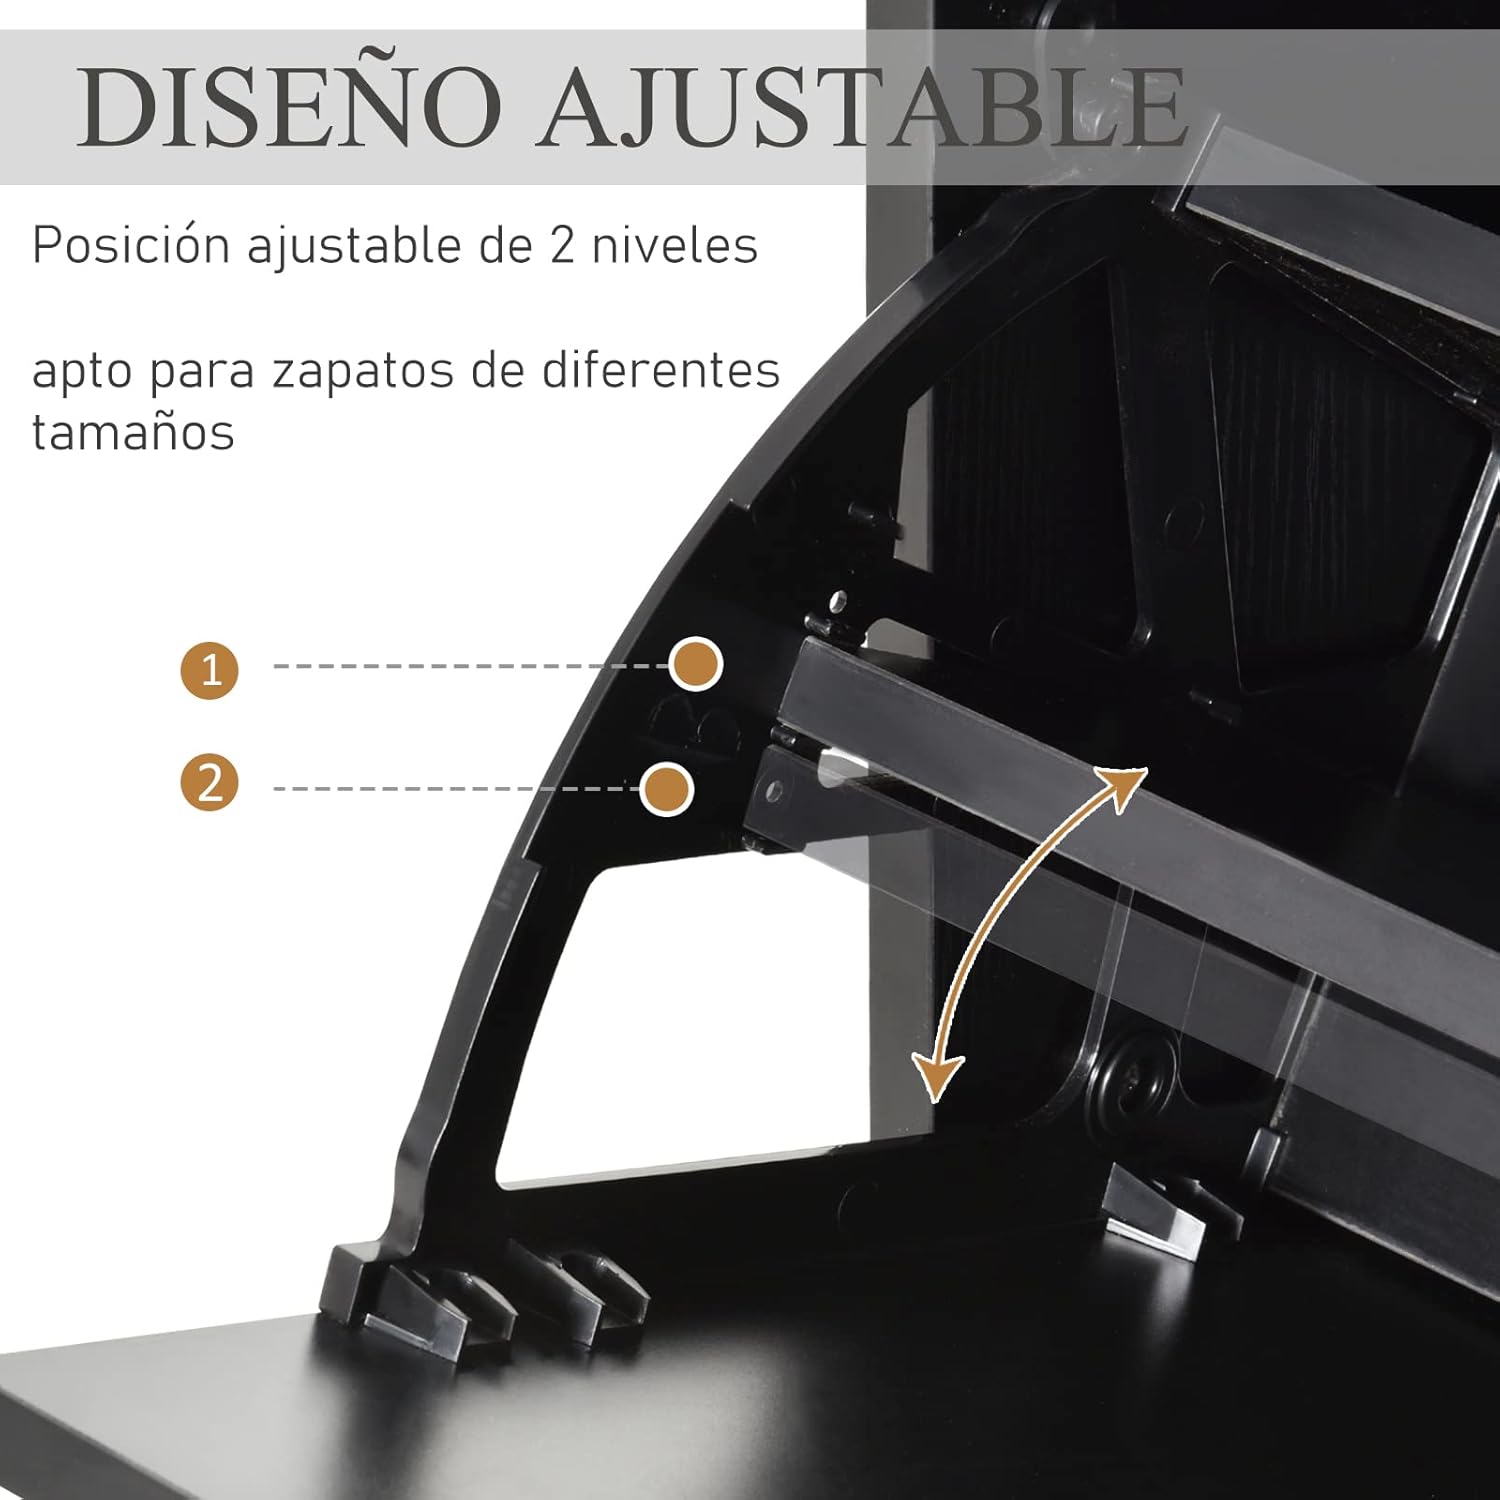
Image 4.2: Detail of the adjustable divider design, allowing customization for various shoe types and sizes.
5. Bedienungsanleitung
The HOMCOM shoe cabinet is designed for simple and efficient use.
- Öffnen der Schubladen: Gently pull the handle on each drawer front to open the compartment. The drawers pivot outwards.
- Aufbewahrung von Schuhen: Place shoes on the internal dividers. Each compartment can hold multiple pairs depending on shoe size and the divider's position. The double-level design maximizes storage.
- Einstellen der Teiler: To adjust the height of the internal dividers, carefully remove them and reinsert them into one of the 3 available slots to best fit your footwear.
- Schubladen schließen: Push the drawer front back into the cabinet until it is flush with the main frame.

Image 5.1: The shoe cabinet with a drawer open, demonstrating how shoes are stored on the internal divider.
6. Wartung
Regelmäßige Pflege trägt dazu bei, die Lebensdauer und das Aussehen Ihres Schuhschranks zu verlängern.
- Reinigung: Wischen Sie die Schrankoberflächen mit einem weichen, fusselfreien Tuch ab.amp Mit einem Tuch abwischen. Vermeiden Sie die Verwendung von scharfen Chemikalien oder Scheuermitteln, da diese die Oberfläche beschädigen können.
- Abstauben: Regelmäßig mit einem trockenen, weichen Tuch abstauben.
- Hardwareprüfung: Überprüfen Sie regelmäßig alle Schrauben und Befestigungselemente, um sicherzustellen, dass sie fest sitzen. Ziehen Sie sie gegebenenfalls nach.
- Feuchtigkeit vermeiden: Setzen Sie den Schrank keiner übermäßigen Feuchtigkeit oder direkter Sonneneinstrahlung aus, da dies zu Verformungen oder Ausbleichen führen kann.
7. Fehlerbehebung
Sollten Sie Probleme mit Ihrem Schuhschrank haben, beachten Sie bitte die folgenden gängigen Lösungsansätze:
- Schubladen schließen nicht richtig:
- Check for obstructions inside the drawer or along the closing mechanism.
- Ensure shoes are not overhanging the dividers, preventing the drawer from closing flush.
- Verify that the drawer mechanisms are correctly installed and not damaged.
- Der Schrank fühlt sich wackelig an:
- Stellen Sie sicher, dass alle Montageschrauben fest angezogen sind.
- Vergewissern Sie sich, dass der Schrank auf einer ebenen Fläche steht.
- Verify that the anti-tip kit is properly installed and secured to the wall.
- Kratzer auf dem Boden:
- Ensure the protective pads are correctly attached to all feet of the cabinet.
8. Spezifikationen
| Besonderheit | Detail |
|---|---|
| Marke | HOMCOM |
| Modellnummer | 837-060BK |
| Farbe | Schwarz |
| Material | Engineered Wood (E1 grade melamine) |
| Gesamtabmessungen (LxBxH) | 60 x 26 x 124 cm (23.6 x 10.2 x 48.8 Zoll) |
| Gewichtskapazität | 15 kg |
| Anzahl der Schubladen | 3 |
| Schuhkapazität | Up to 18 pairs (depending on shoe size) |
| Besondere Merkmale | Adjustable Dividers, Slim Design, Anti-tip Mechanism |
| Montagetyp | Floor Mount (Wall-mountable for safety) |
| Empfohlene Verwendung | Shoe storage in entryways, hallways, living rooms |

Image 8.1: Dimensional drawing of the shoe cabinet.
9. Garantie und Support
For warranty information or customer support, please refer to the documentation included with your purchase or contact the retailer where the product was acquired. Please have your model number (837-060BK) and purchase date available when contacting support.