
1. Einleitung
The PNI House IP516 is a 16-channel Network Video Recorder (NVR) designed for advanced surveillance systems, supporting up to 5MP IP cameras and H.265 video compression. This NVR allows for local and remote monitoring, recording, and management of your security cameras. It is compatible with ONVIF protocol cameras, offering flexibility in camera selection. This manual provides essential information for the proper installation, operation, and maintenance of your PNI House IP516 NVR.
2. Packungsinhalt
Bitte überprüfen Sie, ob alle unten aufgeführten Artikel in Ihrem Paket enthalten sind. Sollten Artikel fehlen oder beschädigt sein, wenden Sie sich bitte an Ihren Händler.
- PNI House IP516 NVR Unit
- USB-Maus
- Netzteil
- Benutzerhandbuch (dieses Dokument)
- CD with Software
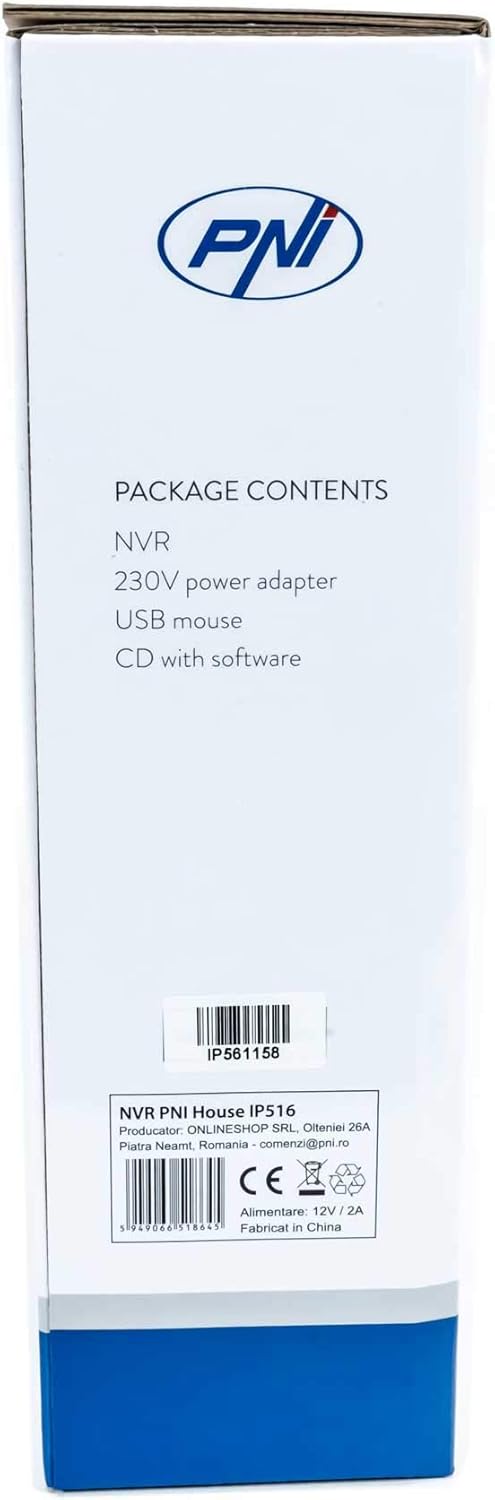
Image: Side of the NVR box detailing the package contents.

Image: The PNI House IP516 NVR unit, power adapter, and USB mouse included in the package.
3. Produktüberschreitungview
3.1 Frontplatte
The front panel of the NVR features indicator lights for system status.
- PWR (Leistung): Indicates the NVR is powered on.
- REC (Aufnahme): Flashes when recording is active.
- NET (Netzwerk): Zeigt Netzwerkaktivität an.

Bild: Vorderseite view of the PNI House IP516 NVR, showing the power, record, and network indicator lights.
3.2 Rückseite
The rear panel provides all necessary connection ports for the NVR.
- VGA-Anschluss: Anschluss an einen VGA-Monitor.
- HDMI-Anschluss: Anschlussmöglichkeit an einen HDMI-Monitor oder Fernseher für hochauflösende Videoausgabe.
- LAN Port (RJ45 10/100 Mbps): Connects to your network router or switch.
- USB-Anschlüsse (x2): For connecting the USB mouse, external storage, or for system upgrades.
- DC 12V Stromeingang: Wird an das mitgelieferte Netzteil angeschlossen.

Bild: Rückseite view of the PNI House IP516 NVR, displaying VGA, HDMI, LAN, USB, and DC 12V power input ports.
4. Einrichtung
4.1 Festplatteninstallation (optional)
The NVR supports a hard drive up to 8 TB for video storage. It is recommended to use dedicated CCTV hard drives for optimal reliability and endurance.
- Schrauben Sie die obere Abdeckung des NVR ab und entfernen Sie.
- Verbinden Sie die SATA-Daten- und Stromkabel vom NVR mit der Festplatte.
- Befestigen Sie die Festplatte mit den mitgelieferten Schrauben am NVR-Gehäuse.
- Bringen Sie die obere Abdeckung wieder an und befestigen Sie sie mit Schrauben.
4.2 Erste Verbindungen
- Connect a monitor to the NVR's VGA or HDMI port.
- Schließen Sie die USB-Maus an einen der USB-Anschlüsse des NVR an.
- Verbinden Sie den LAN-Anschluss des NVR mit einem Ethernet-Kabel mit Ihrem Netzwerkrouter oder -switch.
- Connect the power adapter to the NVR's DC 12V input and then plug it into a power outlet. The NVR will power on automatically.
4.3 First Boot and Basic Configuration
Upon the first boot, the NVR will guide you through an initial setup wizard. Follow the on-screen prompts to:
- Richten Sie ein sicheres Passwort für das Administratorkonto ein.
- Konfigurieren Sie Datums- und Uhrzeiteinstellungen.
- Formatieren Sie die installierte Festplatte (falls zutreffend).
- Perform network settings (DHCP is usually enabled by default).
- Suchen nach and add IP cameras to the NVR. The NVR supports up to 16 cameras at 2560x1920px (5MP) and is compatible with ONVIF protocol cameras.
5. Betrieb des NVR
5.1 Lokaler Betrieb
Use the connected mouse to navigate the NVR's graphical user interface (GUI) on the monitor. Right-click to access the main menu, which includes options for live view, playback, recording settings, system configuration, and more.
5.2 Fernzugriff
The PNI House IP516 NVR can be accessed remotely for live viewing, playback, and configuration.
- Mobile Application (XMEye): Download the XMEye app from the Android Play Store or Apple App Store. Register an account, add your NVR by scanning its QR code or entering its serial number, and then you can view your cameras from anywhere with an internet connection.
- PC Software (General CMS): Install the General CMS software from the included CD or download it from the PNI support website. This software allows for comprehensive management of your NVR and cameras from a Windows PC.
5.3 Aufzeichnungsverwaltung
Der NVR unterstützt verschiedene Aufnahmemodi:
- Kontinuierliche Aufnahme: Aufzeichnungen rund um die Uhr.
- Geplante Aufnahme: Aufzeichnungen während bestimmter Zeiträume.
- Aufnahme mit Bewegungserkennung: Die Kameras zeichnen nur dann auf, wenn eine Bewegung erkannt wird.
Configure these settings in the NVR's menu under 'Record' or 'Storage' settings.
5.4 Bewegungserkennung und Benachrichtigungen
When motion is detected, the system can trigger various alerts:
- Mobile Benachrichtigungen: Text notifications sent via the XMEye mobile application.
- E-Mail-Benachrichtigungen: An email sent to a predefined address.
- FTP-Upload: The recording saved to an FTP server.
These alert settings can be configured in the NVR's 'Alarm' or 'Event' menu.
6. Wartung
6.1 Festplattenverwaltung
Regularly check the status of your hard drive in the NVR's storage settings. If the hard drive becomes full, the NVR will typically overwrite the oldest recordings (loop recording). You may need to format the hard drive periodically if you encounter issues or wish to clear all data.
6.2 Systemaktualisierungen
Periodically check the PNI support website for firmware updates. Firmware updates can improve performance, add new features, or fix bugs. Follow the instructions provided with the firmware update carefully to avoid damaging the device.
6.3 Reinigung
Ensure the NVR unit is kept clean and free from dust. Use a soft, dry cloth to wipe the exterior. Do not use liquid cleaners or aerosols directly on the unit.
7. Fehlerbehebung
| Problem | Mögliche Ursache | Lösung |
|---|---|---|
| NVR does not power on | No power supply; faulty power adapter | Check power connection; test power adapter; try a different outlet. |
| Kein Videoausgang am Monitor | Loose cable; incorrect input selected on monitor | Ensure VGA/HDMI cable is securely connected; select correct input on monitor. |
| Fernzugriff auf NVR nicht möglich | Network issue; incorrect app settings; NVR not connected to internet | Verify NVR network connection; check router settings; ensure correct NVR ID/serial in app. |
| Kameras zeigen keine Anzeige an | Camera not powered; network issue; incorrect camera IP/protocol | Check camera power and network cables; ensure cameras are ONVIF compatible; verify camera IP addresses. |
| Kein Aufnehmen | Hard drive not installed/formatted; recording schedule not set; motion detection not configured | Install and format HDD; configure recording schedule; set up motion detection zones and sensitivity. |
8. Spezifikationen
| Besonderheit | Detail |
|---|---|
| Modellnummer | IP516 |
| Kanäle | 16 |
| Max Auflösung | 5MP (2560 x 1920px) |
| Videokomprimierung | H.265 |
| Kompatible Geräte | IP Cameras, Smartphone |
| Konnektivitätstechnologie | HDMI, USB, VGA, RJ45 Ethernet |
| Kommunikationsschnittstelle | RJ45 10/100 Mbit/s |
| Maximale Speicherkapazität | 8 TB (HDD) |
| USB-Anschlüsse | 2 |
| Energieaufnahme | 10 Watt |
| Herstellerteilenummer | PNI-1920P |
9. Gewährleistung
The PNI House IP516 NVR comes with a standard manufacturer's warranty. Please refer to the warranty card included in your package or visit the official PNI webAuf der Website finden Sie die detaillierten Garantiebedingungen hinsichtlich Umfang, Dauer und Serviceabwicklung. Bewahren Sie Ihren Kaufbeleg für Garantieansprüche auf.
10. Unterstützung
For technical support, troubleshooting assistance, or further inquiries regarding your PNI House IP516 NVR, please visit the official PNI website or contact their customer service department. You can find contact information and additional resources on the PNI brand store page: PNI Brand Store.