
1. Produktüberschreitungview
Thank you for choosing the Lepro 10W LED Outdoor Floodlight. This manual provides essential information for the safe installation, operation, and maintenance of your new floodlight. Please read it thoroughly before use and retain it for future reference.
This product is a high-efficiency, IP65 waterproof LED floodlight designed for outdoor and indoor lighting applications such as gardens, yards, garages, and security lighting.
2. Sicherheitshinweise
- Trennen Sie vor der Installation oder Wartung immer die Stromversorgung.
- Die Installation sollte im Zweifelsfall von einem qualifizierten Elektriker durchgeführt werden.
- Stellen Sie sicher, dass die Stromversorgungslautstärketage entspricht den Produktanforderungen (220 Volt).
- Schauen Sie nicht direkt in die eingeschaltete LED-Lichtquelle.
- Halten Sie das Produkt von brennbaren Materialien fern.
- Nehmen Sie keinerlei Änderungen am Produkt vor.
- Ensure all connections are secure and properly insulated to maintain IP65 rating.
3. Packungsinhalt
Das Paket beinhaltet typischerweise:
- 2 x Lepro 10W LED Outdoor Floodlights
- Befestigungsmaterial (Schrauben, Dübel)
- Bedienungsanleitung
4. Produktmerkmale
- Hohe Helligkeit: 10W LED chip provides 850 lumens of 5000K cool white light, equivalent to a 70W incandescent bulb.
- Langlebiges Design: Constructed from die-cast aluminum and ultra-thin tempered glass, offering rust-proof and high-quality electrostatic adsorption surface treatment.
- Einfache Installation: Features a bracket that can be easily mounted to ceilings, walls, or floors using two self-locking screws. Includes a 1-meter cable for connection.
- Effiziente Wärmeableitung: Ultra-thin body design with an integrated heat sink ensures optimal thermal performance and extends product lifespan.
- IP65 Wasserdicht & Breites Anwendungsspektrum: Rated IP65 for protection against dust and water jets, suitable for various indoor and outdoor lighting projects including gardens, squares, billboards, factories, docks, stadiums, patios, warehouses, courtyards, garages, driveways, and entrances.
5. Spezifikationen
| Spezifikation | Wert |
|---|---|
| Modellnummer | PR340010-DW-EU-2 |
| Energieaufnahme | 10 Watt |
| Lichtstrom | 850 Lumen |
| Farbtemperatur | 5000K (Cool White) |
| Bandtage | 220 Volt AC |
| IP-Schutzart | IP65 (wasserdicht) |
| Material | Aluminium, gehärtetes Glas |
| Produktabmessungen (L x B x H) | 9 x 2.4 x 7.8 cm |
| Gewicht | 200 Gramm |
| Abstrahlwinkel | 110 Grad |
| Kabellänge | 1 Meter |
| Montagetyp | Wall-mounted, Ceiling-mounted, Ground-mounted |
Detaillierte Informationen zur Energieeffizienz finden Sie in der EPREL-Datenbank:
6. Einrichtung und Installation
Befolgen Sie diese Schritte für eine sichere und ordnungsgemäße Installation:
- Vorbereitung für die Installation:
- Vor Beginn jeglicher Elektroarbeiten die Hauptstromversorgung am Sicherungsautomaten abschalten.
- Gather necessary tools: drill, screwdriver, wire strippers, electrical tape, and a pencil.
- Montageort wählen:
Select a suitable location on a wall, ceiling, or ground that provides the desired illumination area. The floodlight can be adjusted to direct light as needed.
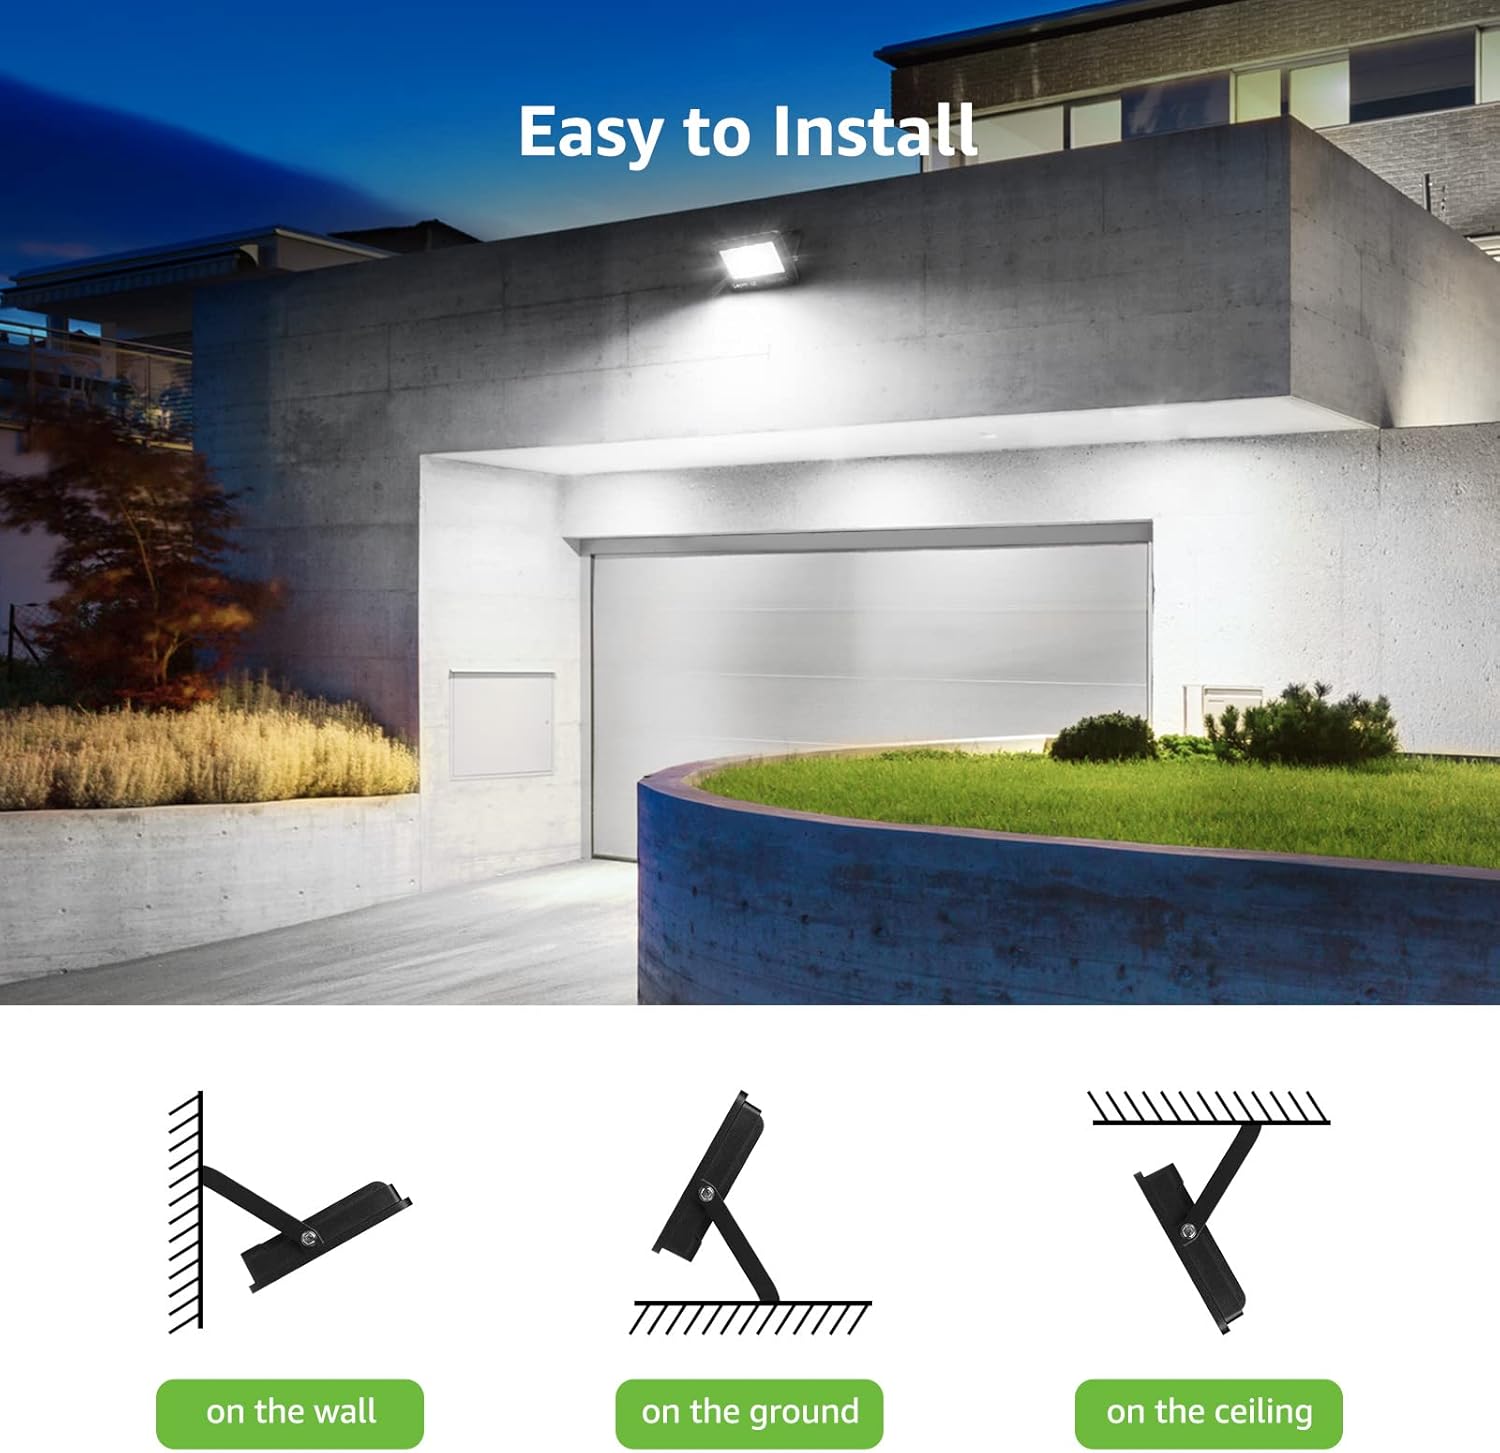
Image: Illustration of various mounting positions for the floodlight (wall, ground, ceiling).
- Löcher markieren und bohren:
Use the floodlight's mounting bracket as a template to mark the drilling points on the chosen surface. Drill appropriate holes for the included mounting hardware.
- Sichern Sie die Halterung:
Attach the mounting bracket securely to the surface using the provided screws and anchors. Ensure it is firm and stable.
- Verdrahtungsanschluss:
Connect the floodlight's cable to your main power supply. Observe the standard wiring color codes:
- Braunes Kabel: Live Wire
- Yellow & Green Wire: Grundlinie
- Blauer Draht: Neutralleiter

Bild: Detailliert view of the floodlight's heat sink and wiring color codes for electrical connection.
Ensure all connections are tight and insulated with appropriate waterproof connectors or electrical tape to maintain the IP65 rating, especially for outdoor installations.
- Attach the Floodlight:
Mount the floodlight unit onto the secured bracket using the self-locking screws. Adjust the angle of the floodlight to your desired position.
- Strom wiederherstellen:
Sobald die Installation abgeschlossen und alle Verbindungen sicher hergestellt sind, schalten Sie die Stromversorgung am Leistungsschalter wieder ein.

Image: The floodlight installed above a garage, demonstrating its wide beam angle and bright illumination.

Image: An outdoor floodlight illuminating a garden area from a height, showing its coverage.
7. Bedienungsanleitung
The Lepro 10W LED Outdoor Floodlight operates by direct electrical connection. Once properly installed and connected to a power source, it can be controlled via a standard wall switch or an external timer/sensor system (not included).
- Zum Einschalten: Activate the connected wall switch or power source.
- Ausschalten: Deactivate the connected wall switch or power source.
The floodlight provides instant full brightness upon activation.
8. Wartung
Regelmäßige Wartung gewährleistet optimale Leistung und Langlebigkeit Ihres Flutlichts:
- Reinigung: Reinigen Sie die Glasoberfläche regelmäßig mit einem weichen, fusselfreien Tuch.amp cloth to remove dust and debris. Do not use abrasive cleaners or solvents. Ensure power is off before cleaning.
- Inspektion: Regularly check the mounting bracket and wiring for any signs of damage, corrosion, or loose connections. Tighten screws if necessary.
- Umweltverträglichkeit: The IP65 rating ensures resistance to water and dust. The floodlight is designed to withstand various weather conditions, including heat and frost.

Image: Visual representation of the floodlight's IP65 waterproof, heat resistance, and frost resistance features.
9. Fehlerbehebung
Sollten Sie Probleme mit Ihrem Flutlicht haben, beachten Sie bitte die folgenden häufigen Probleme und Lösungen:
| Problem | Mögliche Ursache | Lösung |
|---|---|---|
| Licht geht nicht an. | Keine Stromversorgung. Wackelkontakt. Fehlerhafter Schalter. | Prüfen Sie, ob der Strom am Sicherungsautomaten eingeschaltet ist. Prüfen Sie, ob alle Kabelverbindungen fest sitzen. Testen Sie den Schalter mit einem anderen Gerät oder tauschen Sie ihn aus. |
| Licht flackert. | Instabile Stromversorgung. Wackelkontakt. | Ensure stable power. Check for loose wiring and tighten connections. |
| Reduzierte Helligkeit. | Schmutzige Linse. Alternde LED-Komponenten. | Clean the glass surface of the floodlight. If the product is old, reduced brightness may indicate end of lifespan. |
If the problem persists after trying these solutions, please contact Lepro customer support.
10. Garantie und Support
Lepro products are designed for quality and durability. This product is covered by a standard return policy of 30 days from the date of purchase. For specific warranty terms and conditions, please refer to your purchase documentation or contact Lepro customer support.
For technical assistance, troubleshooting, or warranty claims, please visit the official Lepro website or contact their customer service department. You can often find support information on the product packaging or the retailer's webWebsite.
Online-Ressourcen: