
1. Einleitung
Thank you for choosing the BSIDE ACM92 Mini Clamp Meter. This device is a compact, auto-ranging digital multimeter designed for accurate measurement of AC/DC current, AC/DC voltage, resistance, and frequency. It also features non-contact voltage detection and continuity testing. Please read this manual thoroughly before operation to ensure safe and correct usage.
Sicherheitshinweise: Always adhere to safety precautions when working with electrical circuits. Incorrect use can lead to electric shock or damage to the meter. This device conforms to IEC-61010-1, IEC-61010-2-030, IEC-61010-2-032, IEC-61010-2-033 standards and has over-voltage protection class CAT III 300V, CAT II 600V, pollution degree II.
2. Produktüberschreitungview
2.1 Komponenten
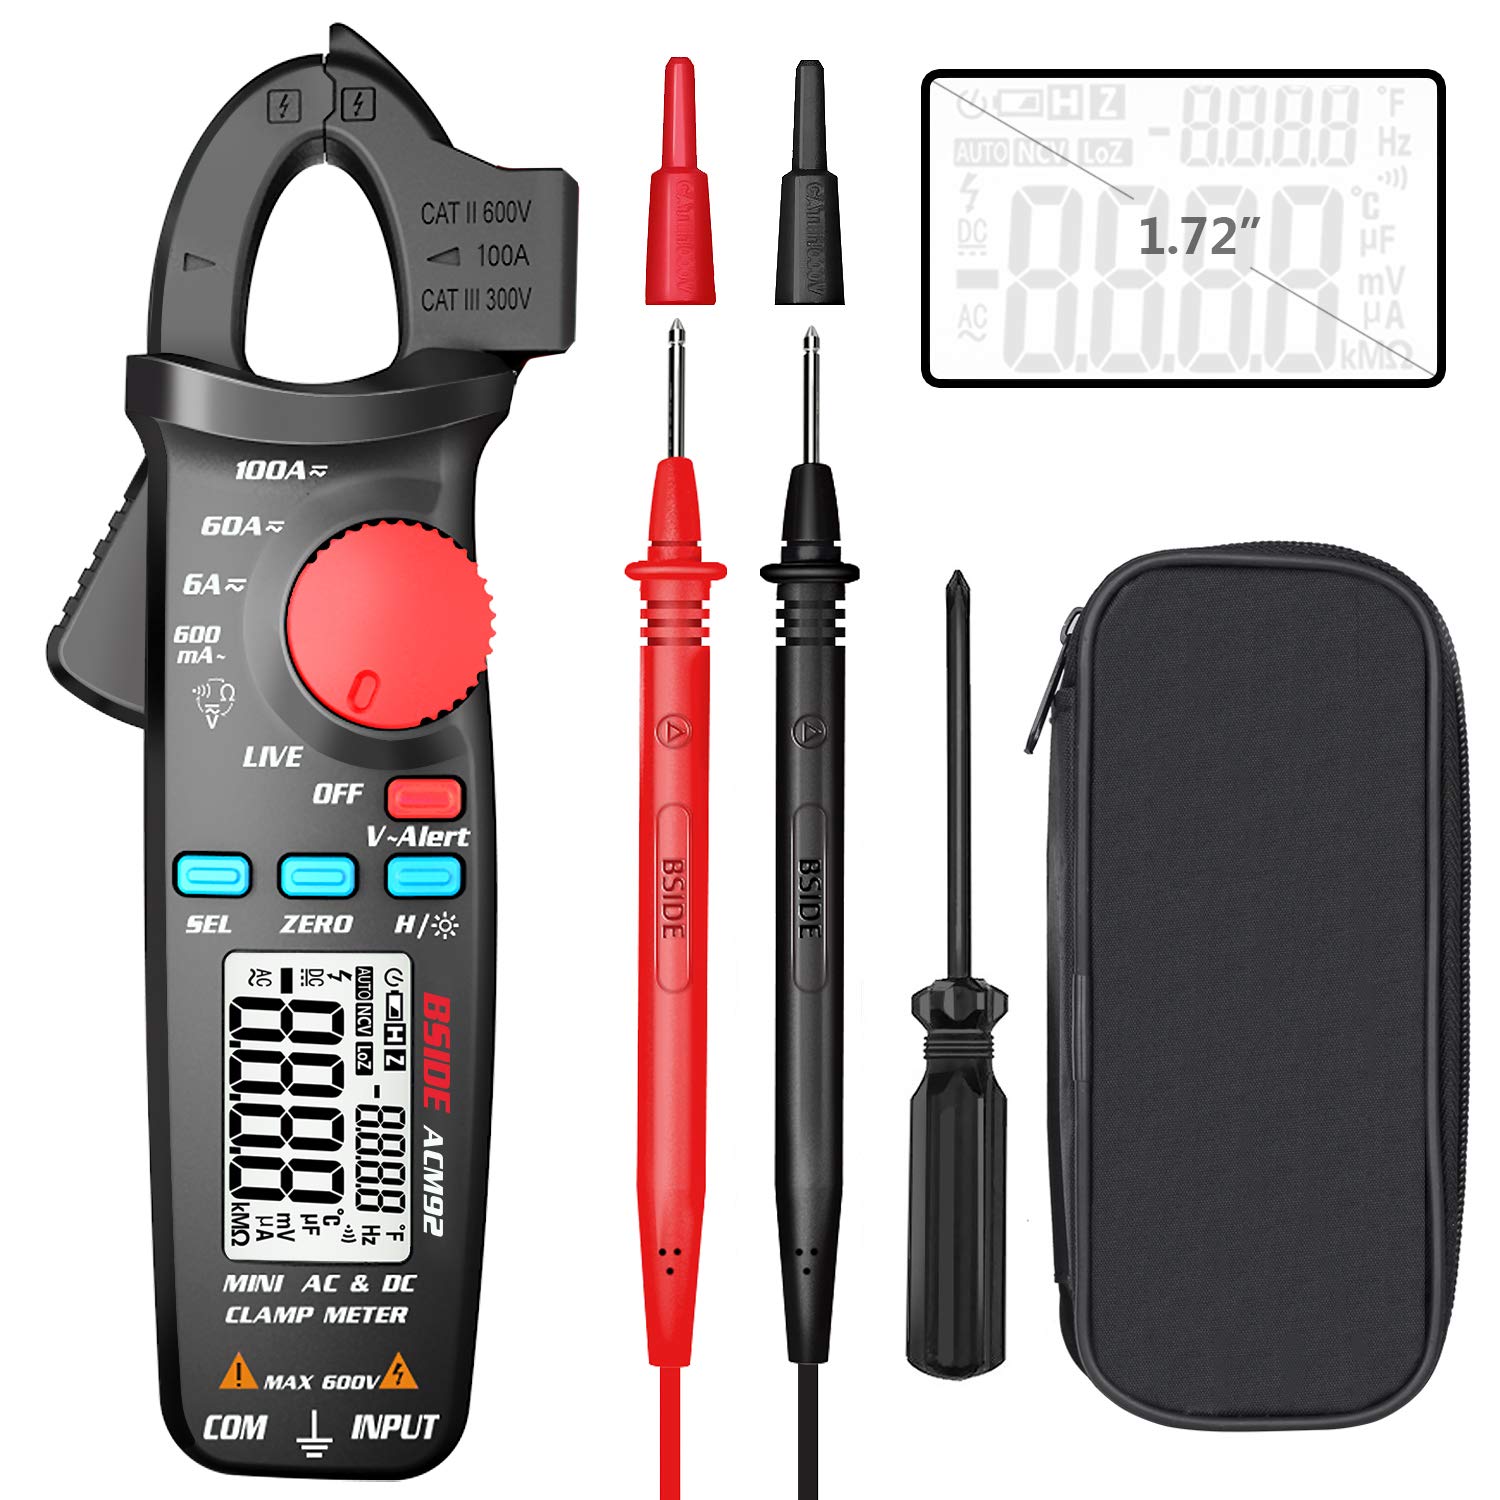
This image displays the BSIDE ACM92 Mini Clamp Meter along with its standard accessories. Included are the clamp meter unit, a pair of test probes (red and black), a carrying bag for protection and portability, and a small screwdriver for battery compartment access.
2.2 Hauptmerkmale
- Measures AC Current (minimum 0.1mA by jaws)
- Measures DC Current (minimum 1mA by jaws)
- Maßnahmen AC/DC Lautstärketage
- V-Alert (Non-Contact Voltage Detection) and Live-Wire Check
- Measures Frequency, Resistance, and Continuity
- Clamp-on Frequency Function
- Auto Power Off for battery conservation
- Data Hold-Funktion
- Anzeige für niedrigen Batteriestand
- Backlight for improved visibility in dark environments
- 20mm jaw capacity with side probe holder
3. Einrichtung
3.1 Einlegen der Batterie
- Stellen Sie sicher, dass das Messgerät ausgeschaltet ist.
- Suchen Sie den Batteriefachdeckel auf der Rückseite des Messgeräts.
- Verwenden Sie den mitgelieferten Schraubendreher, um die Schraube zu lösen, mit der die Batterieabdeckung befestigt ist.
- Nehmen Sie die Abdeckung ab.
- Legen Sie zwei 1.5V AAA-Batterien ein und achten Sie dabei auf die richtige Polarität (+/-).
- Bringen Sie die Batterieabdeckung wieder an und ziehen Sie die Schraube fest.
4. Bedienungsanleitung
4.1 Ein-/Ausschalten
Rotate the rotary switch from 'OFF' to any desired measurement function to power on the meter. To power off, rotate the switch back to 'OFF'. The meter will automatically power off after 20 minutes of inactivity.
4.2 Messen von Gleichstrom

This image illustrates the BSIDE ACM92 Mini Clamp Meter being used to measure DC current. The clamp jaws are placed around a single conductor connected to a car battery, and the display shows a current reading.
- Rotate the rotary switch to the '6A/60A/100A' DC current range.
- Press the 'ZERO' button to zero out any residual magnetic field before measurement.
- Öffne dieamp jaws and enclose only one conductor (not a bundle of wires).
- Lesen Sie den Gleichstromwert auf dem Display ab.
4.3 Messung von Wechselstrom
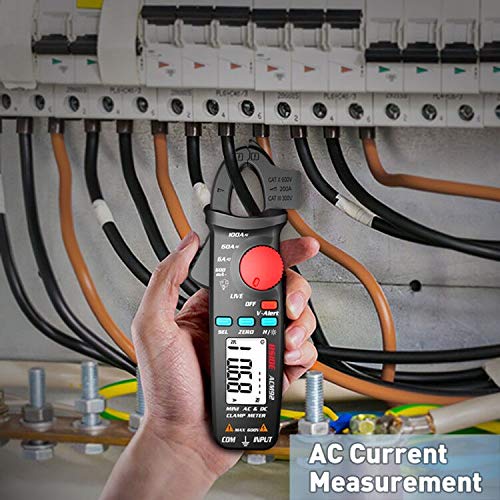
This image shows the BSIDE ACM92 Mini Clamp Meter measuring AC current. The clamp jaws are positioned around a single live wire within an electrical distribution panel, with the measurement displayed on the screen.
- Rotate the rotary switch to the '600mA' or '6A/60A/100A' AC current range.
- Öffne dieamp jaws and enclose only one conductor.
- Lesen Sie den Wechselstromwert auf dem Display ab.
4.4 Messen von AC/DC-Voltage
- Insert the red test probe into the 'INPUT' jack and the black test probe into the 'COM' jack.
- Rotate the rotary switch to the 'V' (Voltage) function. The meter will automatically detect AC or DC voltage.
- Schließen Sie die Messspitzen parallel an den zu messenden Stromkreis oder das zu messende Bauteil an.
- Lesen Sie den Bandtage-Wert auf dem Display.
4.5 V-Alarm (kontaktloser Vol)tage Erkennung)

This image demonstrates the V-Alert function of the BSIDE ACM92 Mini Clamp Meter. The meter is held near an electrical circuit breaker, and its display shows 'V-Alert' with a flashing indicator, signifying the detection of AC voltage ohne direkten Kontakt.
- Rotate the rotary switch to the 'V-Alert' position.
- Bring the top end of the meter near the conductor or outlet.
- Wenn AC-Voltage is detected, the LCD display will flash, and an alarm buzzer will sound.
4.6 Widerstandsmessung
- Insert the red test probe into the 'INPUT' jack and the black test probe into the 'COM' jack.
- Rotate the rotary switch to the 'Ω' (Resistance) function.
- Stellen Sie sicher, dass der Stromkreis oder das Bauteil spannungsfrei ist, bevor Sie die Messspitzen anschließen.
- Schließen Sie die Messspitzen an das Bauteil an, um dessen Widerstand zu messen.
- Lesen Sie den Widerstandswert auf dem Display ab.
4.7 Durchgangstest
- Insert the red test probe into the 'INPUT' jack and the black test probe into the 'COM' jack.
- Rotate the rotary switch to the 'Ω' (Resistance) function and press 'SEL' to cycle to continuity mode (indicated by a buzzer symbol).
- Schließen Sie die Prüfspitzen an die Schaltung oder das Bauteil an.
- If the resistance is less than 30Ω, the continuity beeper will sound, indicating a continuous path.
4.8 Frequenz messen
- Verwendung von Testsonden: Insert probes, rotate switch to 'Hz' function, connect probes to the circuit.
- Verwendung von Clamp Kiefer: Rotate switch to 'Hz' function, open jaws and enclose a single conductor carrying AC current.
- Lesen Sie den Frequenzwert auf dem Display ab.
4.9 Datenhaltung
Press the 'H/☀' button briefly to hold the current reading on the display. Press it again to release the hold function.
4.10 Hintergrundbeleuchtung
Press and hold the 'H/☀' button for approximately 2 seconds to turn the backlight on or off.
5. Wartung
5.1 Reinigung
Wischen Sie die Oberfläche des Zählers ab.asing mit Adamp Mit einem Tuch und mildem Reinigungsmittel reinigen. Keine Scheuermittel oder Lösungsmittel verwenden. Vor Gebrauch sicherstellen, dass das Messgerät vollständig trocken ist.
5.2 Batteriewechsel
Wenn die Anzeige für niedrigen Batteriestand erscheint, tauschen Sie die Batterien wie in Abschnitt 3.1 beschrieben aus. Entfernen Sie die Batterien, wenn das Messgerät längere Zeit nicht benutzt wird.
6. Fehlerbehebung
6.1 Häufige Probleme
| Problem | Mögliche Ursache | Lösung |
|---|---|---|
| Das Messgerät schaltet sich nicht ein | Leere oder falsch eingelegte Batterien | Batterien austauschen und dabei auf die richtige Polarität achten. |
| Inaccurate current reading | Multiple conductors in jaws; residual magnetism (DC) | Ensure only one conductor is in jaws. Press 'ZERO' for DC current. |
| Kein Durchgangssignal | Resistance too high; meter not in continuity mode | Check circuit for breaks. Press 'SEL' to select continuity mode. |
| Im Display wird „OL“ angezeigt. | Überlastung oder außerhalb des Messbereichs | Select a higher range if available, or the measured value exceeds meter's maximum. |
7. Spezifikationen
7.1 Technische Daten
| Messung | Reichweite | Genauigkeit |
|---|---|---|
| Anzeige | 6000 Zählwerte | |
| Gleichstrom | 6A/60A/100A | ±(2.5%+10 counts) |
| Wechselstrom | 600mA/6A/60A/100A | ±(3.0%+10 counts) for 600mA; ±(2.5%+10 counts) for others |
| DC-Voltage | 600 V | ±(1.0%+5 counts) |
| AC-Lautstärketage | 600 V | ±(1.0%+3 counts) |
| Widerstand | 6000 Ω | ±(1.0%+3 counts) |
| Frequency (Probes) | 60 Hz/1000 Hz | ±(1.5%+5 counts) |
| Frequency (Jaws) | 60 Hz/1000 Hz | ±(1.0%+5 counts) |
| Backenkapazität | 20 mm | |
| Leistung | 1.5 V (AAA) x 2 | |
| Größe | 179 x 67 x 36 mm | |
| Gewicht | 137g | |
8. Wichtige Sicherheitsvorkehrungen
- Die für jede Funktion angegebenen maximalen Eingabewerte dürfen nicht überschritten werden.
- Verwenden Sie das Messgerät niemals, wenn es oder die Messleitungen beschädigt erscheinen.
- Das Messgerät darf nicht in explosionsgefährdeten Bereichen (Gase, Dämpfe, Staub) betrieben werden.
- Seien Sie vorsichtig beim Arbeiten mit VolumentagEs liegt über 30 V AC RMS, 42 V Spitze oder 60 V DC. Diese SpannungentagEs besteht die Gefahr eines Stromschlags.
- Trennen Sie den Stromkreis immer vom Stromnetz und entladen Sie alle Hochspannungskondensatoren.tage capacitors before measuring resistance or continuity.
- Ensure the rotary switch is set to the correct function before making a measurement.
- Halten Sie Ihre Finger während der Benutzung der Testsonden hinter den Fingerschutzvorrichtungen.
- Tauschen Sie die Batterien sofort aus, sobald die Anzeige für niedrigen Batteriestand erscheint, um genaue Messwerte zu gewährleisten.
9. Packungsinhalt
- 1 x BSIDE ACM92 Clamp Meter
- 1 x Pair of Test Probes
- 1 x Tragetasche
- 1 x Schraubendreher
- 1 x Benutzerhandbuch (dieses Dokument)
10. Garantie und Kundendienst
Informationen zur Garantie und technische Unterstützung finden Sie auf der Produktverpackung oder wenden Sie sich an Ihren Händler. Bewahren Sie Ihren Kaufbeleg als Kaufnachweis auf.