Einführung
This manual provides detailed instructions for the setup, operation, and maintenance of your groov e Atlas Radio Alarm Clock with Wireless Charger. Please read this manual thoroughly before using the device to ensure proper function and to maximize your user experience. Keep this manual for future reference.
Packungsinhalt
Überprüfen Sie, ob alle Artikel im Paket vorhanden sind:
- groov e Atlas Radio Alarm Clock
- Netzteil
- Bedienungsanleitung
Produkteigenschaften
- Kabelloses Laden (5W): Conveniently charge compatible smartphones by placing them on the top surface.
- FM Radio: Tune into your favorite FM stations.
- LED-Anzeige: Clear digital time display.
- Netzbetrieben: Reliable power supply for continuous operation.
- USB-Ladestation: Additional USB port for charging other devices.
- Doppelalarm: Stelle zwei unabhängige Wecker für unterschiedliche Weckzeiten ein.
- Display-Dimmer: Passen Sie die Helligkeit des LED-Displays an.
Aufstellen
- Strom anschließen: Insert the power adapter into the 'DC IN' port on the back of the alarm clock, then plug the adapter into a wall outlet. The display will light up.
- Zeit einstellen:
- Press and hold the 'TIME SET' button located on the back of the unit.
- Use the 'TUN-' or 'TUN+' buttons on the top panel to adjust the hour.
- Drücken Sie erneut auf „ZEIT EINSTELLEN“, um die Stunde zu bestätigen und zu den Minuten zu wechseln.
- Use 'TUN-' or 'TUN+' to adjust the minutes.
- Press 'TIME SET' once more to confirm and exit time setting.
- To switch between 12-hour and 24-hour format, press the '12/24H' button on the back.

Bild: Rückseite view of the groov e Atlas alarm clock, highlighting the DC IN power input and the USB charging port. The '12/24H TIME SET' and 'SLEEP' buttons are also visible.
Bedienungsanleitung
Setting Alarms (ALM1 / ALM2)
- Press the 'ALM1' or 'ALM2' button to select the alarm you wish to set. The alarm icon will flash on the display.
- Use the 'TUN-' or 'TUN+' buttons to adjust the alarm hour.
- Press the 'ALM1' or 'ALM2' button again to confirm the hour and move to minutes.
- Use 'TUN-' or 'TUN+' to adjust the alarm minutes.
- Press the 'ALM1' or 'ALM2' button a third time to confirm the alarm time. The alarm icon will remain lit, indicating the alarm is active.
- To deactivate an alarm, press the corresponding 'ALM1' or 'ALM2' button until the alarm icon disappears from the display.
FM-Radiobetrieb
- Ein-/Ausschalten: Press the 'ON/OFF' button to turn the radio on or off.
- Automatischer Scan: Drücken Sie die Taste „SCAN“, um automatisch verfügbare FM-Sender zu scannen und zu speichern.
- Manuelle Abstimmung: Use the 'TUN-' or 'TUN+' buttons to manually adjust the frequency. Press and hold for faster tuning.
- Voreingestellte Sender: Use 'MEM-' or 'MEM+' to cycle through saved preset stations.
- Lautstärke anpassen: Use the 'VOL-' or 'VOL+' buttons to control the radio volume.
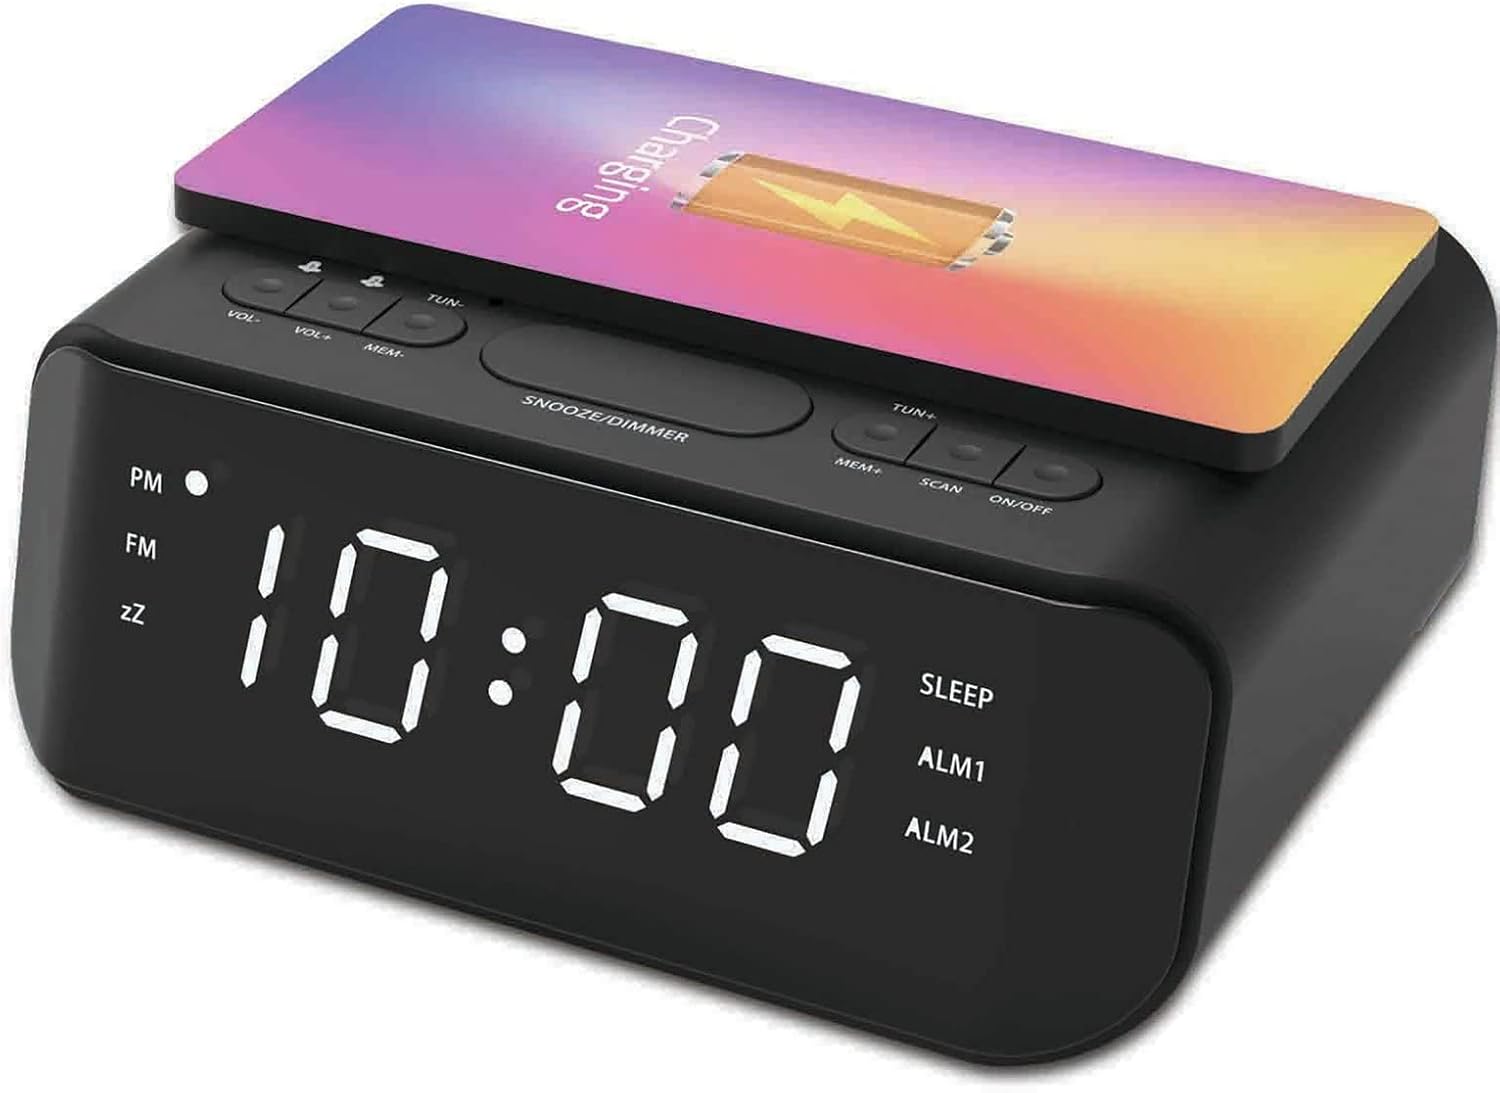
Bild: Oben view of the groov e Atlas alarm clock, illustrating the layout of the control buttons for volume, tuning, memory, scan, and power.
Kabelloses Laden
- Ensure your smartphone is compatible with 5W Qi wireless charging.
- Place your compatible smartphone centrally on the wireless charging pad located on the top surface of the alarm clock.
- The phone's display should indicate that charging has begun. If not, adjust the phone's position.

Image: A smartphone placed on the groov e Atlas alarm clock's top surface, showing the charging indicator on the phone's screen, confirming wireless charging is active.
Aufladen über USB
- Connect a USB charging cable (not included) to the USB port on the back of the alarm clock.
- Verbinden Sie das andere Ende des Kabels mit Ihrem Gerät.
- Ihr Gerät beginnt mit dem Aufladen.
Display-Dimmer
Press the 'SNOOZE/DIMMER' button to cycle through different brightness levels for the LED display. This allows you to adjust the display to your preferred visibility, especially in dark environments.
Wartung
- Reinigung: Reinigen Sie die Oberfläche des Weckers mit einem weichen, trockenen Tuch. Verwenden Sie keine flüssigen Reinigungsmittel oder Scheuermittel.
- Lagerung: Wenn Sie das Gerät längere Zeit nicht verwenden, ziehen Sie den Stecker und bewahren Sie es an einem kühlen, trockenen Ort auf.
- Sicherheit: Do not expose the device to water, high humidity, or extreme temperatures. Avoid dropping or subjecting the device to strong impacts.
Fehlerbehebung
| Problem | Mögliche Ursache | Lösung |
|---|---|---|
| Gerät lässt sich nicht einschalten. | Netzteil nicht angeschlossen oder Steckdose defekt. | Vergewissern Sie sich, dass das Netzteil fest mit dem Gerät und einer funktionierenden Steckdose verbunden ist. Versuchen Sie es mit einer anderen Steckdose. |
| Kabelloses Laden funktioniert nicht. | Phone not Qi-compatible or not positioned correctly. | Verify your phone supports Qi wireless charging. Reposition the phone centrally on the charging pad. Remove any thick phone cases. |
| Der Alarm ertönt nicht. | Alarm nicht aktiviert oder Lautstärke zu niedrig. | Check if the alarm icon is lit on the display. Increase the alarm volume using the 'VOL+' button. |
| Der Radioempfang ist schlecht. | Schwaches Signal oder ungünstige Antennenposition. | Extend and adjust the position of the FM antenna wire on the back of the unit for better reception. |
Technische Daten
- Modellnummer: GVWC06BK
- Marke: groov e
- Farbe: Schwarz
- Anzeigetyp: Digitale LED
- Energiequelle: Mains Powered (AC Adapter included)
- Drahtloser Ladeausgang: 5W
- USB-Ladeausgang: 5 V/1 A
- Alarmfunktionen: Doppelalarm, Schlummerfunktion
- Radio: FM
- Material: Acrylnitril-Butadien-Styrol (ABS)
- Form: Rechteckig
- Montageart: Tischmontage
- Bewegungsart: Quarz
- Batterien: Not included (requires 1 battery for backup, type not specified in data)
Garantie und Support
Your groov e Atlas Radio Alarm Clock GVWC06BK comes with a standard manufacturer's warranty. Please refer to the warranty card included in your package for specific terms and conditions, including the warranty period and coverage details.
For technical support, troubleshooting assistance, or warranty claims, please contact groov e customer service through their official webWebsite oder die Kontaktinformationen auf Ihrer Garantiekarte.
Bitte bewahren Sie Ihren Kaufbeleg für eventuelle Garantieanfragen auf.