1. Einleitung
This manual provides instructions for the installation, setup, and operation of the Layfuz Tuya WiFi M515EGWT Intelligent Pull Bead Curtain Motor. This device is designed to automate bead-chain roller blinds, allowing control via a mobile application or voice commands through compatible smart home assistants.
2. Produktüberschreitungview
The Layfuz M515EGWT motor offers convenient automation for your curtains. It integrates with the Tuya Smart App for remote control and supports voice commands via Amazon Alexa and Google Home. Key features include:
- Steuerung per mobiler App: Manage your curtains from anywhere using the Tuya Smart App.
- Sprachsteuerung: Kompatibel mit Amazon Alexa und Google Home für freihändige Bedienung.
- Timing-Funktion: Schedule curtain opening and closing times to suit your daily routine.
- Einstellbare Hubbegrenzungen: Set custom upper, lower, and intermediate stop positions.
- Direct Current Power Supply: Gewährleistet einen sicheren und zuverlässigen Betrieb.

Abbildung 2.1: Layfuz M515EGWT motor with compatible bead chain types. The motor is designed to work with various bead chain sizes and materials, including 2mm, 4mm, 6mm, 4.5*6mm, 4.5*12mm, metal chain, beaded, and 3.2mm chains.
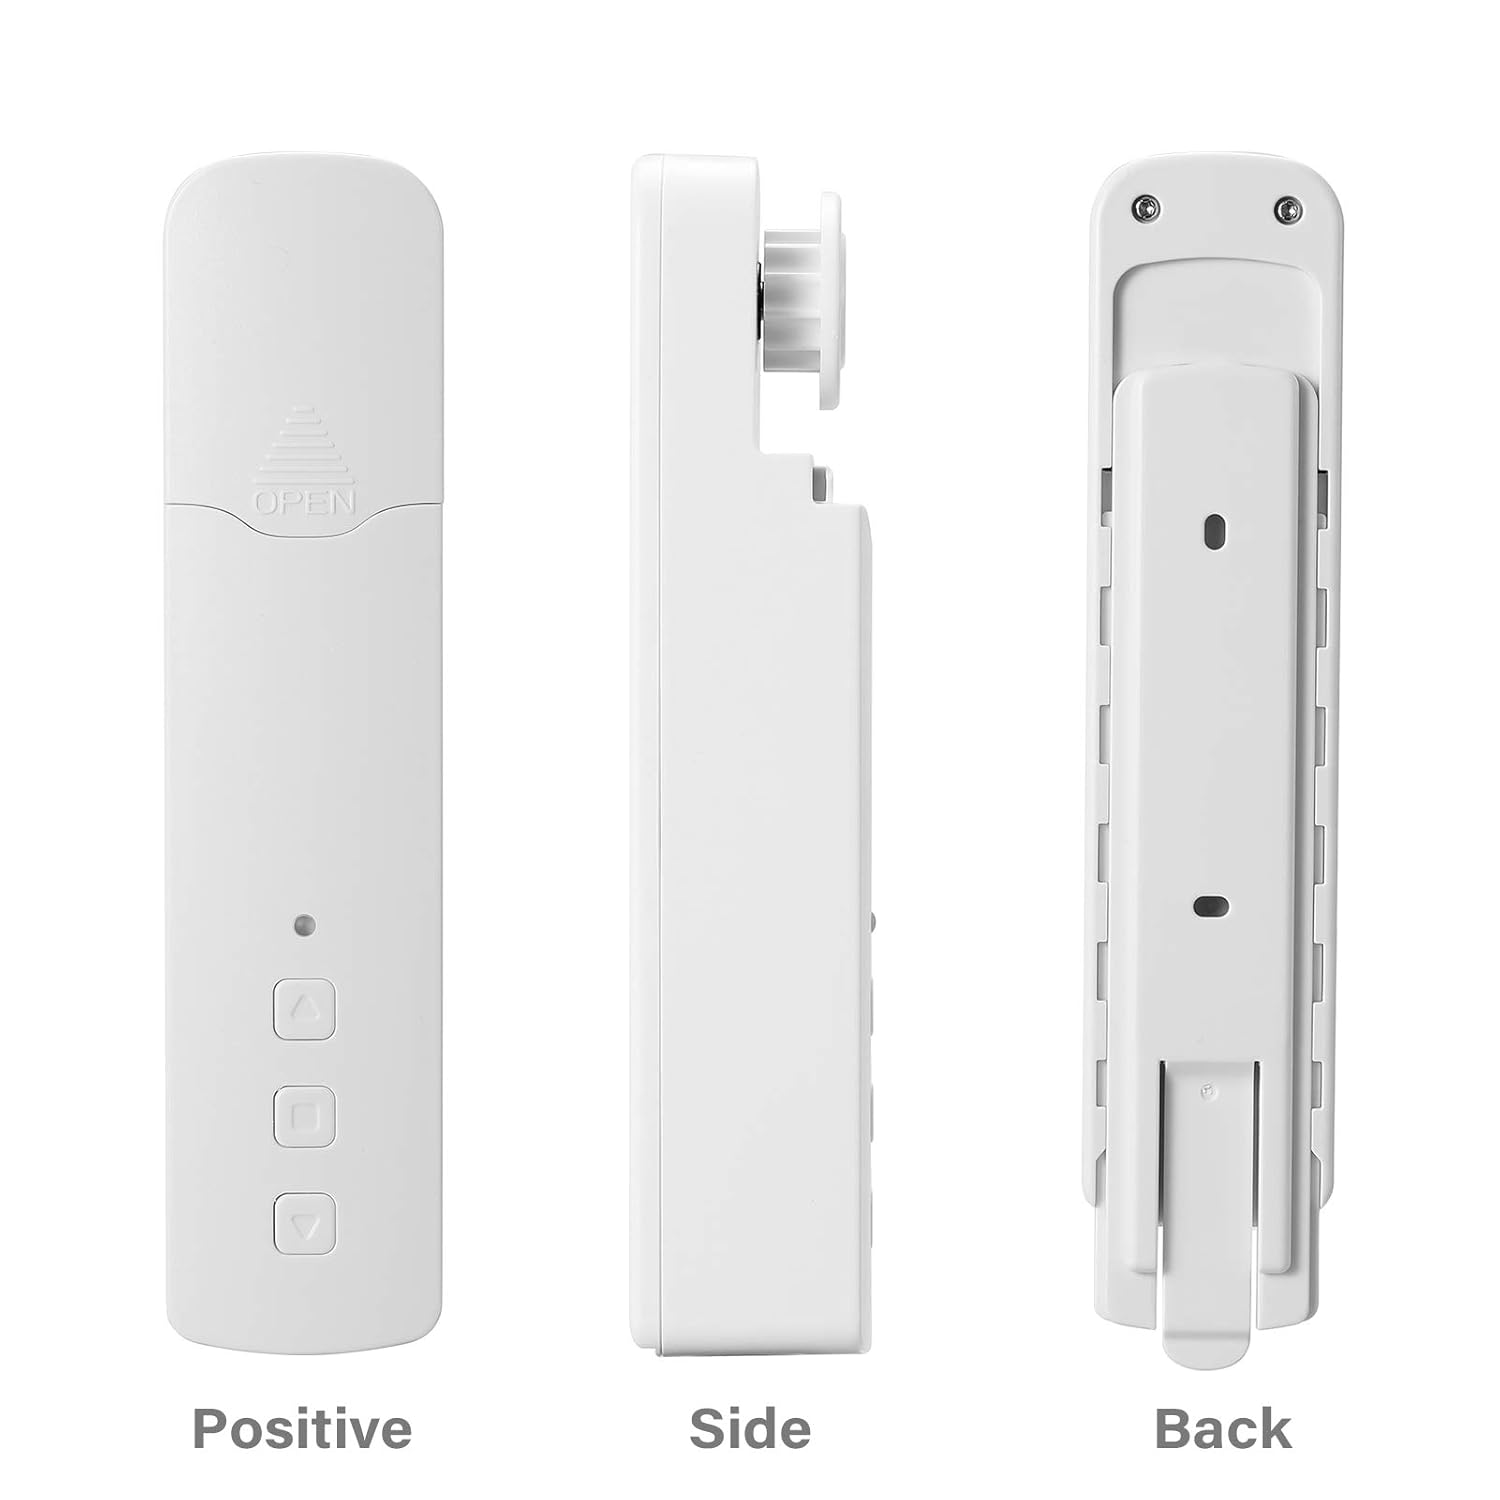
Abbildung 2.2: Anders views of the Layfuz M515EGWT motor, showing its positive (front), side, and back profiles. The front includes an indicator light and control buttons, while the back features mounting points.

Abbildung 2.3: The motor is suitable for various curtain types, including Venetian blinds, vertical blinds, honeycomb shades, triple shades, roller shades, and zebra shades, provided they use a compatible bead chain mechanism.

Abbildung 2.4: This image highlights the motor's control buttons: Up, Stop, and Down. It also shows the Set button and the charging port. Compatibility logos for Amazon Alexa, Google Home, and Tuya Smart are visible, indicating smart home integration.
3. Packungsinhalt
Bitte überprüfen Sie, ob alle Artikel im Paket vorhanden sind:
- 1 x Curtain Motor (M515EGWT)
- 1 x Power Adapter (EU, UK, USA, or AU type, optional based on region)
- 1 x Benutzerhandbuch
4. Spezifikationen
| Besonderheit | Spezifikation |
|---|---|
| Marke | Layfuz |
| Modellnummer | M515EGWT |
| Material | ABS |
| Farbe | Weiß |
| Nennvolumentage | 5 V Gleichstrom |
| Nennleistung | 6.0 W |
| Nenndrehmoment | 0.45Nm |
| Rotationsgeschwindigkeit | 30 U/min |
| Betriebstemperatur | -20℃ ~ +65℃ |
| Eingebaute Empfangsfrequenz | 915 MHz, 2.4 GHz |
| Technische Daten | 22 x 18.5 x 4 cm |
| Artikelgewicht | 640 g |
| Ursprungsland | China |
5. Installation
Follow these steps to install the curtain motor. Refer to Figure 5.1 for visual guidance.

Abbildung 5.1: Comprehensive guide for the Layfuz M515EGWT motor, detailing its appearance, step-by-step installation, Tuya Smart App connection process, and instructions for setting and deleting travel limits.
5.1 Product Installation Steps (Refer to '2 Product install' in Figure 5.1)
- Fix the Wall Panel: Secure the mounting panel to the wall at the desired location for the motor.
- Installieren Sie den Motor: Slide the motor onto the fixed wall panel until it clicks into place.
- Insert the Bead Chain: Carefully place the curtain's bead chain into the motor's drive wheel. Ensure it is seated correctly.
- Close Wheel Cover: Close the wheel cover and tighten the curtain bead chain to prevent slippage.

Abbildung 5.2: The motor features fast switching capability for different drive gears, making it applicable to multiple models of bead chains. Ensure the correct gear is installed for your curtain's bead chain type.
6. Einrichtung
After physical installation, proceed with the smart app setup and limit settings. Refer to '3 Instructions for use' and '3.2 Limit Setting' in Figure 5.1.
6.1 Add Tuya Smart App (Refer to '3.1 Add Tuya Smart App' in Figure 5.1)
- Lade App herunter: Download the Tuya Smart App from your mobile phone's app store (Google Play or Apple App Store).
- Registrieren/Anmelden: Öffne die App und registriere ein neues Konto oder melde dich mit einem bestehenden Konto an.
- Gerät hinzufügen: Click '+' or 'Add Device' in the app. The indicator light on the motor should be flashing red. If not, press and hold the 'Set' key for 3-5 seconds until it flashes rapidly.
- Gerätetyp auswählen: Choose 'Manual Add' or 'Auto Scan'. For manual, select 'Curtain Motor'.
- Mit WLAN verbinden: Geben Sie den Namen und das Passwort Ihres 2.4-GHz-WLAN-Netzwerks ein. Stellen Sie sicher, dass Ihr Telefon mit demselben 2.4-GHz-WLAN-Netzwerk verbunden ist.
- Paarung: Die App sucht das Gerät und stellt eine Verbindung her. Nach erfolgreicher Verbindung können Sie das Gerät umbenennen.
6.2 Limit Setting (Refer to '3.2 Limit Setting' in Figure 5.1)
Setting the upper and lower travel limits is crucial for proper operation. You must set these limits before setting any middle limits.
- Obergrenze einstellen: Press the 'Set' key once. The indicator light will flash red. Use the 'Up' key to move the curtain to the desired upper limit. Press the 'Set' key again to confirm. The indicator light will flash red three times, indicating the upper limit is set.
- Untergrenze einstellen: Press the 'Set' key once. The indicator light will flash red. Use the 'Down' key to move the curtain to the desired lower limit. Press the 'Set' key again to confirm. The indicator light will flash red three times, indicating the lower limit is set.
6.3 Middle Limit Setting (Refer to '3.3 Middle Limit Setting' in Figure 5.1)
You can set an intermediate stop point for your curtain.
- Initiate Middle Limit Setting: Press the 'Set' key once. The indicator light will flash red.
- Move to Desired Position: Use the 'Up' or 'Down' keys to move the curtain to the desired middle stop position.
- Confirm Middle Limit: Press the 'Set' key again. The indicator light will flash red three times, confirming the middle limit is set.
6.4 Delete Middle Limit (Refer to '3.4 Delete Middle Limit' in Figure 5.1)
To remove a previously set middle limit:
- Initiate Deletion: Press the 'Set' key once. The indicator light will flash red.
- Confirm Deletion: Press and hold the 'Set' key for 5 seconds. The indicator light will flash red, release, and then flash red three times, indicating the middle limit has been deleted.
7. Bedienung
The Layfuz M515EGWT motor can be operated via its physical buttons, the Tuya Smart App, or voice commands.
7.1 Manual Control (Device Buttons)
- Aufwärts-Taste: Schiebt den Vorhang nach oben.
- Abwärtstaste: Schiebt den Vorhang nach unten.
- Stopptaste: Stoppt den Vorhang in seiner aktuellen Position.
- Set-Taste: Used for pairing and setting travel limits (as described in Section 6).
7.2 Tuya Smart App-Steuerung
Once the motor is successfully paired with the Tuya Smart App (Section 6.1), you can:
- Open/Close Curtains: Verwenden Sie die virtuellen Tasten in der App, um die Vorhänge vollständig zu öffnen oder zu schließen.
- Position anpassen: Precisely control the curtain's position by sliding a bar or setting a percentage.
- Zeitpläne festlegen: Utilize the timing function to create automated schedules for opening and closing curtains at specific times.
- Fernbedienung: Operate your curtains from any location with internet access.
7.3 Sprachsteuerung
The motor is compatible with Amazon Alexa and Google Home. After linking your Tuya Smart account to your voice assistant, you can use commands such as:
- "Alexa, öffne den Vorhang."
- „Hey Google, Vorhang zu.“
- "Alexa, stelle den Vorhang auf 50%."
8. Wartung
To ensure the longevity and optimal performance of your Layfuz M515EGWT motor, follow these maintenance guidelines:
- Reinigung: Reinigen Sie die Außenseite des Motors mit einem weichen, trockenen Tuch. Verwenden Sie keine Scheuermittel und tauchen Sie das Gerät nicht in Wasser.
- Stromanschluss: Ensure the power adapter and cable are securely connected and free from damage. Disconnect power before cleaning or performing any maintenance.
- Prüfung von Kugelketten: Periodically check the curtain's bead chain for wear, damage, or obstructions that could hinder motor operation. Ensure the chain is properly seated in the motor's drive wheel.
- Umgebungsbedingungen: Operate the motor within the specified temperature range (-20℃ to +65℃) and avoid excessive humidity.
9. Fehlerbehebung
If you encounter issues with your Layfuz M515EGWT motor, refer to the following common problems and solutions:
- Motor reagiert nicht:
- Prüfen Sie, ob das Netzteil fest angeschlossen ist und der Motor Strom erhält.
- Stellen Sie sicher, dass die Steckdose funktionsfähig ist.
- Verify that the bead chain is correctly installed and not jammed.
- Difficulty Connecting to Tuya App:
- Ensure your mobile phone is connected to a 2.4GHz Wi-Fi network. The motor does not support 5GHz Wi-Fi.
- Confirm that the motor's indicator light is flashing rapidly during pairing mode. If not, press and hold the 'Set' button for 3-5 seconds.
- Überprüfen Sie Ihr WLAN-Passwort auf Richtigkeit.
- Move the motor closer to your Wi-Fi router to improve signal strength.
- Starten Sie Ihren WLAN-Router neu und versuchen Sie den Kopplungsvorgang erneut.
- Curtain Not Moving to Correct Limits:
- Re-calibrate the upper and lower travel limits as described in Section 6.2.
- Ensure the bead chain is not slipping or obstructed.
- Sprachsteuerung funktioniert nicht:
- Verify that your Tuya Smart account is correctly linked to your Amazon Alexa or Google Home app.
- Überprüfen Sie Ihre Internetverbindung.
- Ensure the device name in the Tuya app is recognized by your voice assistant.
10. Sicherheitshinweise
Bitte lesen und beachten Sie die folgenden Sicherheitsvorkehrungen:
- Dieses Gerät ist nur für den Innenbereich bestimmt.
- Do not expose the motor to water, moisture, or extreme temperatures.
- Ensure the power adapter and cable are not damaged. Do not use if damaged.
- Bewahren Sie das Gerät außerhalb der Reichweite von Kindern und Haustieren auf.
- Versuchen Sie nicht, den Motor selbst zu zerlegen oder zu reparieren. Wenden Sie sich zur Reparatur an qualifiziertes Fachpersonal.
- Ensure the curtain's bead chain is installed correctly and securely to prevent accidents.
11. Garantie und Support
Informationen zu Garantie und technischem Support finden Sie in der Ihnen beim Kauf ausgehändigten Dokumentation oder wenden Sie sich an Ihren Händler. Bewahren Sie Ihren Kaufbeleg als Kaufnachweis auf.