
1. Einleitung
This manual provides comprehensive instructions for the installation, operation, and maintenance of your PANOEAGLE DS-7608NI-I2/8P 8-Channel 4K Network Video Recorder (NVR). Please read this manual thoroughly before using the product to ensure proper setup and functionality. Retain this manual for future reference.
The PANOEAGLE DS-7608NI-I2/8P is an embedded Plug and Play 4K NVR designed for robust 24/7 surveillance recording. It supports up to 8 cameras simultaneously, offering high-resolution recording up to 12MP and utilizing H.264+/H.264/H.265 video compression for efficient storage. Its Power over Ethernet (PoE) capability simplifies camera installation by providing both power and data through a single cable.
2. Produktüberschreitungview
Familiarize yourself with the components and interfaces of your NVR.
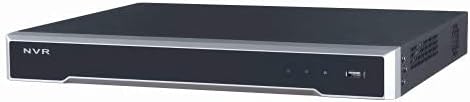
Abbildung 2.1: Frontplatte View
This image displays the front panel of the NVR, featuring the 'NVR' branding, status indicators, and a USB port for peripheral connections.

Abbildung 2.2: Rückseite View
This image shows the rear panel of the NVR, highlighting the power input, cooling fan, 8 PoE ports, network port, USB ports, audio input/output, VGA, and HDMI video outputs, and alarm/control terminals.

Abbildung 2.3: Abgewinkeltes Heck View
An angled perspective of the NVR's rear panel, providing a clearer view of the various connectivity options and ventilation.
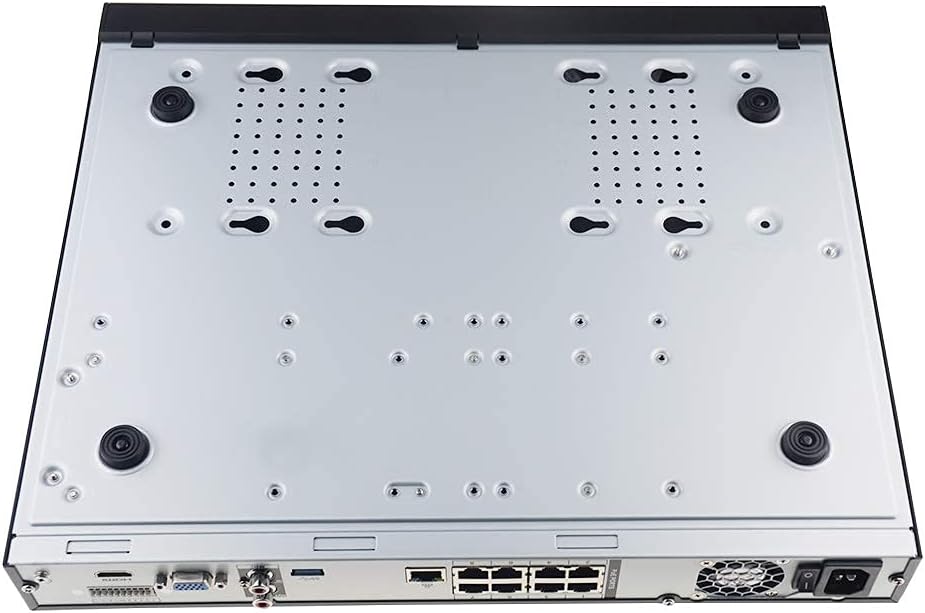
Abbildung 2.4: Untere Reihe View
This image displays the bottom of the NVR, showing mounting points and ventilation holes, along with rubber feet for stable placement.
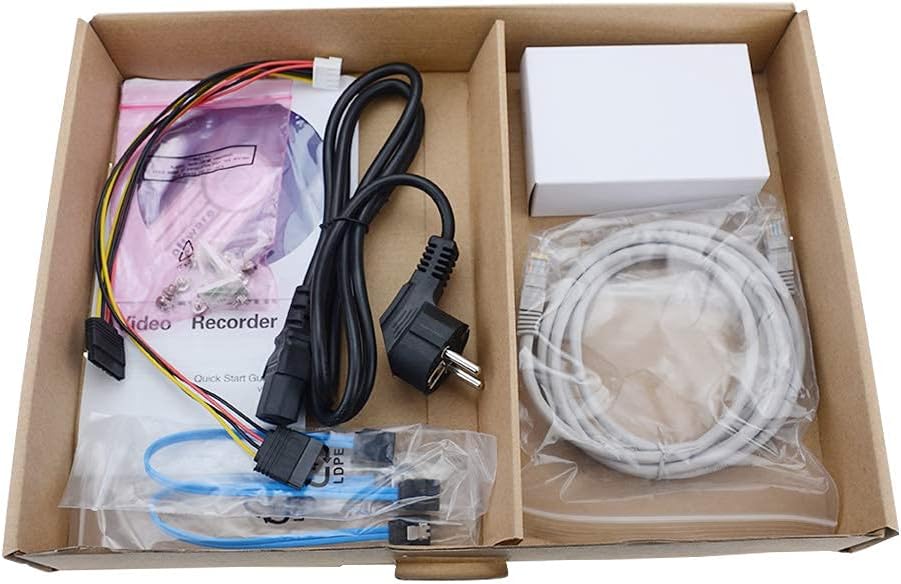
Abbildung 2.5: Packungsinhalt
A view of the accessories included with the NVR, typically comprising a power cable, network cable, USB mouse, SATA cables for hard drive installation, and a quick start guide.
3. Hauptmerkmale
- 8-Kanal-Aufnahme: Supports simultaneous recording from up to 8 IP cameras.
- 4K-Auflösungsunterstützung: Capable of recording and displaying video resolutions up to 12MP.
- PoE Easy Setup: Integrated Power over Ethernet (PoE) ports for direct connection and power supply to IP cameras via a single Ethernet cable.
- Erweiterte Videokomprimierung: Utilizes H.264+/H.264/H.265 codecs for efficient storage and bandwidth usage.
- 24/7-Aufzeichnung: Designed for continuous, reliable surveillance monitoring.
- HDMI-Ausgang: High-definition video output for connecting to monitors or TVs.
- SATA-Unterstützung: Features 2 SATA interfaces for internal hard drive installation (HDDs not included).
4. Installationsanleitung
4.1. Festplatteninstallation (optional)
If your NVR did not come with a pre-installed hard drive, follow these steps:
- Schalten Sie den NVR aus und trennen Sie alle Kabel.
- Unscrew and remove the top cover of the NVR chassis.
- Connect the SATA data cable and power cable from the NVR to the hard drive.
- Befestigen Sie die Festplatte mit den mitgelieferten Schrauben am NVR-Gehäuse.
- Bringen Sie die obere Abdeckung wieder an und befestigen Sie sie mit Schrauben.
4.2. Erste Verbindungen
- Schließen Sie einen Monitor an: Schließen Sie einen Monitor an den HDMI- oder VGA-Ausgang des NVR an.
- Schließen Sie eine Maus an: Schließen Sie die USB-Maus an einen der USB-Anschlüsse des NVR an.
- Mit Netzwerk verbinden: Verbinden Sie den LAN-Anschluss des NVR mithilfe eines Ethernet-Kabels mit Ihrem Router oder Netzwerk-Switch.
- IP-Kameras anschließen: Connect your PoE IP cameras to the NVR's PoE ports using Ethernet cables. The NVR will provide power and data to the cameras.
- Einschalten: Schließen Sie das Netzteil an den NVR an und stecken Sie es anschließend in eine Steckdose. Der NVR schaltet sich automatisch ein.
4.3. Erstkonfiguration
Beim ersten Start führt Sie der NVR durch einen Einrichtungsassistenten. Dieser umfasst typischerweise Folgendes:
- Ein Administratorpasswort einrichten.
- Configuring network settings (DHCP is usually default).
- Initializing the hard drive (if newly installed).
- Suche und Hinzufügen von verbundenen IP-Kameras.
- Einstellen von Datum und Uhrzeit.
Befolgen Sie die Anweisungen auf dem Bildschirm, um die Einrichtung abzuschließen.
5. Bedienungsanleitung
5.1. Leben View
After logging in, the NVR will typically display the live view von allen angeschlossenen Kameras. Sie können zwischen Einzelkamera-Ansicht und Einzelkamera-Ansicht umschalten. view, Mehrkamera-Raster viewund die Anzeigelayouts anpassen.
5.2. Aufzeichnung
- Kontinuierliche Aufnahme: Records 24/7. Configure schedules in the NVR's menu.
- Aufnahme mit Bewegungserkennung: Records only when motion is detected. Sensitivity and detection zones can be adjusted.
- Geplante Aufnahme: Legen Sie feste Aufnahmezeiten fest.
Access recording settings via the NVR's main menu, usually under "Record" or "Storage" settings.
5.3. Wiedergabe
Um zu review aufgenommenes footage:
- Wählen Sie im Hauptmenü „Wiedergabe“.
- Wählen Sie die Kamera(s) und den Datums-/Zeitraum aus, den Sie erneut überprüfen möchten.view.
- Use the timeline to navigate through recorded events. Options for fast-forward, rewind, and pause are available.
5.4. Fernzugriff
Der NVR unterstützt Fernzugriff viewing via a mobile app or web browser. Refer to the NVR's network settings for details on enabling P2P (peer-to-peer) or port forwarding for remote access. Download the official PANOEAGLE mobile application from your device's app store.
6. Wartung
- Regelmäßige Reinigung: Keep the NVR free from dust. Use a soft, dry cloth for exterior cleaning. Ensure ventilation openings are clear.
- Firmware-Updates: Periodically check the PANOEAGLE official website for firmware updates. Updates can improve performance, add features, and enhance security. Follow update instructions carefully.
- Festplattenzustand: Monitor the health of your hard drive(s) through the NVR's system information. Replace failing drives promptly to avoid data loss.
- Passwortsicherheit: Regularly change your administrator password and use strong, unique passwords.
7. Fehlerbehebung
| Problem | Mögliche Ursache | Lösung |
|---|---|---|
| Kein Videosignal am Monitor. | Lose Kabelverbindung, falsche Eingangsquelle am Monitor, NVR nicht eingeschaltet. | Check HDMI/VGA cable connections. Ensure monitor is set to correct input. Verify NVR power. |
| Kameras zeigen kein Livebild an view. | Camera not powered, network issue, camera not added to NVR, incorrect IP address. | Check camera power and Ethernet cables. Ensure cameras are connected to PoE ports. Use NVR's camera management to search and add cameras. Verify camera IP addresses. |
| Keine Aufnahme oder fehlendes Essentage. | Hard drive not installed/initialized, recording schedule not configured, hard drive full, hard drive failure. | Install and initialize HDD. Configure recording schedules. Check HDD status and capacity. Replace faulty HDD. |
| Fernzugriff auf den NVR nicht möglich. | Network configuration issues, P2P disabled, incorrect app settings, firewall blocking. | Ensure NVR has internet access. Enable P2P service. Verify app settings and NVR's network configuration. Check router firewall settings. |
8. Spezifikationen
| Besonderheit | Detail |
|---|---|
| Modell | DS-7608NI-I2/8P |
| Marke | PANOEAGLE (Compatible with Hi-k USA systems) |
| Anzahl der Kanäle | 8 |
| Max Auflösung | Bis zu 12MP |
| Videokomprimierung | H.264+/H.264/H.265 |
| Videoausgang | HDMI, VGA |
| Audioeingang | Cinch |
| SATA-Schnittstellen | 2 (for HDD) |
| Konnektivitätstechnologie | HDMI, Ethernet (PoE) |
| Datum der ersten Verfügbarkeit | 28. Juli 2021 |
9. Garantie und Support
For warranty information, please refer to the warranty card included with your product or visit the official PANOEAGLE webTechnischer Support ist möglicherweise über die Website des Herstellers erhältlich. webüber die Website oder durch Kontaktaufnahme mit deren Kundendienstabteilung.
Always ensure you are using official channels for support and firmware downloads to maintain product integrity and security.