
Saooer BLUE 20A
Saooer 20A Solar Charge Controller User Manual
Model: BLUE 20A
Einführung
This manual provides essential information for the safe and efficient operation of your Saooer 20A Solar Charge Controller. This intelligent regulator is designed to manage the working of solar panels and batteries in a solar system, featuring dual USB ports for mobile device charging. It is compatible with 12V and 24V systems and includes multiple protection functions to ensure system efficiency and prolong battery lifespan.

Abbildung 1: Vorderseite view of the Saooer 20A Solar Charge Controller.
Sicherheitshinweise
- Ensure all connections are correct before powering on the controller. Incorrect wiring can damage the device or connected components.
- The controller is designed for indoor use or in a protected environment. Avoid exposure to direct sunlight, high temperatures, or moisture.
- Versuchen Sie nicht, den Controller selbst zu zerlegen oder zu reparieren. Wenden Sie sich für Reparaturen an qualifiziertes Fachpersonal.
- Außerhalb der Reichweite von Kindern aufbewahren.
- This controller is only suitable for lead-acid batteries: OPEN, AGM, GEL. Do not use with other battery types like Lithium-ion or LiFePO4, as this may cause damage or safety hazards.
- Always connect the battery first, then the solar panel, and finally the load. When disconnecting, reverse the order: disconnect the load, then the solar panel, and finally the battery.
Produkteigenschaften
- Automatisches System Voltage Identifizierung: Automatically detects 12V/24V system voltage.
- PWM-Ladung: Efficient Pulse Width Modulation charging mode.
- Dual USB Ports: Provides 5V/2A output for charging mobile devices.
- LCD Anzeige: Clear display of status and data, allowing for convenient mode switching and parameter configuration.
- Mehrere Schutzfunktionen: Includes short-circuit protection, open-circuit protection, reverse protection, and over-load protection.
- Einstellbare Parameter: User-adjustable charge and discharge parameters.
- Temperaturkompensation: Automatische Temperaturkompensation für optimales Laden.
Setup und Installation
Follow these steps carefully to install your solar charge controller. Incorrect installation can lead to damage or malfunction.
- Verkabelung vorbereiten: Ensure all wires are properly stripped and have appropriate connectors if necessary. Use wires of sufficient gauge for your system's current.
- Schließen Sie die Batterie an: Connect the battery to the charge regulator first. Observe correct polarity (+ to + and - to -). The controller will automatically recognize the battery voltage (12 V oder 24 V).
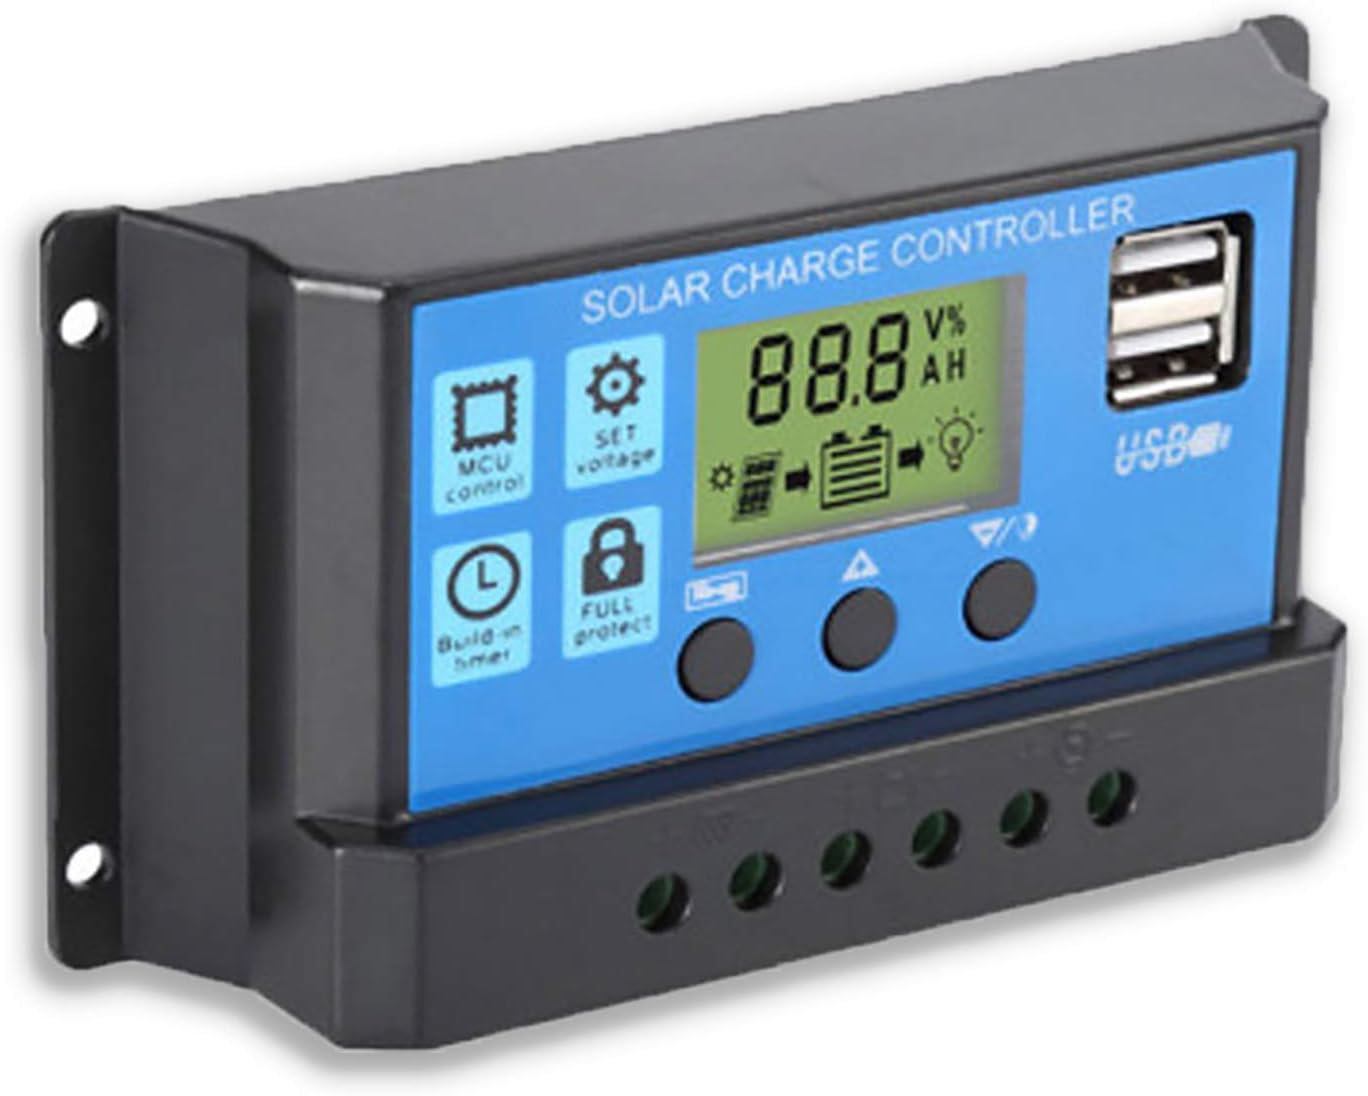
Abbildung 2: Seite view showing the connection terminals for battery, solar panel, and load.
- Schließen Sie das Solarpanel an: Connect the solar panel to the solar charge controller. Ensure correct polarity.
- Schließen Sie die Last an: Connect the consumer or load to the charge controller regulator. Ensure correct polarity.
Wichtiger Hinweis: Always connect the battery first, then the solar panel, and finally the load. When disconnecting the controller, please remove the solar panel, then the load, and finally the battery. This sequence helps the controller recognize the battery voltage correctly and prevents damage.
Bedienungsanleitung
LCD-Display und Tasten

Abbildung 3: Schräg view showing the LCD display and control buttons.
The controller features an LCD display and three buttons for operation:
- Menü-Schaltfläche: Used to cycle through display modes and enter parameter setting mode.
- Aufwärts-Taste: Wird verwendet, um Werte zu erhöhen oder in Menüs nach oben zu navigieren.
- Abwärtstaste: Wird verwendet, um Werte zu verringern oder in Menüs nach unten zu navigieren.
Anzeigemodi
Press the Menu button to cycle through the following display modes:
- Batterie Voltage (V)
- Solarpanel Voltage (V)
- Laststrom (A)
- Battery Temperature (°C)
- Ladestrom (A)
- Entladestrom (A)
- Load Working Mode (24H, 0-23H, 0H)
Parametereinstellungen
To enter parameter setting mode, press and hold the Menu button for 5 seconds. Use the Up and Down buttons to adjust values, and the Menu button to confirm and move to the next parameter. Press and hold Menu again to exit setting mode.
| Parameter | Beschreibung | Default (12V) | Range (12V) |
|---|---|---|---|
| B01/B02/B03 | Battery Type Selection (B01=Lead-acid, B02=Lithium Ion, B03=LiFePO4) | B01 | N / A |
| Charge Off Voltage | Bandtage at which charging stops | 14.4 V | 13.0 V - 15.0 V |
| Entladung Wiederverbindung Voltage | Bandtage at which load reconnects after low voltagich trenne | 12.6 V | 11.0 V - 13.5 V |
| Entladungsstopp-Volumetage | Bandtage at which load disconnects to protect battery | 10.7 V | 9.0 V - 11.5 V |
| Load Working Time | Timer for load output (24H, 0-23H, 0H) | 24H | N / A |
Note: For 24V systems, multiply the 12V values by two.
Wartung
- Regelmäßige Inspektion: Überprüfen Sie regelmäßig alle Kabelverbindungen auf festen Sitz und Korrosion.
- Sauberkeit: Keep the controller clean and free from dust. Use a dry cloth for cleaning.
- Belüftung: Sorgen Sie für ausreichende Belüftung rund um den Controller, um eine Überhitzung zu vermeiden.
- Batteriezustand: Batterievol überwachentage and health regularly. Replace batteries as needed.
Fehlerbehebung
| Problem | Mögliche Ursache | Lösung |
|---|---|---|
| Controller lässt sich nicht einschalten / LCD-Bildschirm bleibt schwarz | Batterie nicht angeschlossen oder verpolt; Batteriespannungtage zu niedrig. | Check battery connections and polarity. Ensure battery has sufficient charge. |
| Solarpanel lädt Batterie nicht | Solar panel not connected or reverse polarity; Insufficient sunlight; Damaged solar panel. | Check solar panel connections and polarity. Ensure panel is in direct sunlight. Test solar panel output. |
| Laden funktioniert nicht | Load not connected or reverse polarity; Battery voltage zu niedrig (niedrige Volatilität)tage disconnect); Overload protection activated. | Check load connections and polarity. Charge battery. Reduce load or check for short circuit. |
| USB-Anschlüsse laden nicht | Akku voltage too low; Device not compatible; Faulty USB cable. | Ensure battery is charged. Try a different device or cable. |
| Controller gets hot | Overload; Poor ventilation. | Reduce load. Ensure controller has adequate airflow and is not in an enclosed space. |
Technische Daten
| Besonderheit | Detail |
|---|---|
| Modell | BLAU 20A |
| Systemlautstärketage | 12V / 24V Auto |
| Max. Lade-/Entladestrom | 20 A |
| USB-Ausgang | Dual USB, 5V/2A (Max) |
| Kompatibilität des Batterietyps | Lead-acid (OPEN, AGM, GEL) |
| Technische Daten | 5.12 x 2.76 x 1.5 Zoll (ca. 133 mm x 70 mm x 38 mm) |
| Artikelgewicht | 5 Unzen |
| Anzeige | LCD |
| Betriebstemperatur | -35°C bis +60°C |

Figure 4: Product dimensions of the solar charge controller.
Garantie und Support
For warranty information or technical support, please contact the manufacturer, Saooer, through their official channels. Refer to your purchase documentation for specific warranty terms and contact details.
Hersteller: Saooer
ASIN: B095764VB7
UPC: 605832982977
Besuchen Sie die Saooer Store on Amazon Für weitere Informationen oder zur Kontaktaufnahme mit dem Support.
Ask a question about this manual
Ask about setup, troubleshooting, compatibility, parts, safety, or missing instructions. Manuals+ will review the question and use this page’s manual context to help answer it.