
1. Einleitung
Vielen Dank für Ihren Einkauf.asing the Technics SL-1200MK7 Direct Drive Turntable. This manual provides essential information for the proper setup, operation, and maintenance of your new turntable. Please read this manual thoroughly before using the product to ensure optimal performance and longevity.
The Technics SL-1200MK7 is engineered for precision and durability, offering a high-quality audio experience for both professional DJs and audiophiles. Its robust construction and advanced features make it a reliable choice for vinyl playback.
2. Sicherheitshinweise
Um Stromschläge, Brände oder Schäden am Gerät zu vermeiden, beachten Sie bitte die folgenden Sicherheitsvorkehrungen:
- Setzen Sie dieses Gerät nicht Regen oder Feuchtigkeit aus.
- Die Abdeckung darf nicht entfernt werden. Wartungsarbeiten dürfen nur von qualifiziertem Fachpersonal durchgeführt werden.
- Stellen Sie keine mit Flüssigkeit gefüllten Gegenstände, wie zum Beispiel Vasen, auf das Gerät.
- Sorgen Sie für ausreichende Belüftung. Blockieren Sie keine Belüftungsöffnungen.
- Verwenden Sie ausschließlich das für dieses Gerät angegebene Netzteil.
- Disconnect the power plug from the wall outlet if the unit will not be used for a long period.
- Vermeiden Sie es, das Gerät direkter Sonneneinstrahlung oder der Nähe von Wärmequellen auszusetzen.
3. Installationsanleitung
3.1 Auspacken und enthaltene Komponenten
Nehmen Sie alle Komponenten vorsichtig aus der Verpackung. Stellen Sie sicher, dass folgende Teile vorhanden sind:
- Technics SL-1200MK7 Turntable Unit
- Lid (Dust Cover)
- Stromkabel
- RCA Signal Cable
- Teller
- Slipmat
- Gegengewicht
- Headshell with Cartridge (may be sold separately)
- 45 U / min Adapter
3.2 Platzierung
Place the turntable on a stable, level surface, away from direct sunlight, heat sources, and strong magnetic fields. Ensure there is adequate space around the unit for ventilation and cable connections. Avoid placing it near speakers to minimize vibrations that could affect playback quality.

Abbildung 3.2.1: Haupt view of the Technics SL-1200MK7 Turntable, showcasing its sleek grey finish and classic design. This image provides an overview of the unit's primary components.
3.3 Montage
- Plattentellerinstallation: Carefully place the platter onto the spindle. Ensure it sits flush and rotates freely.
- Slipmat Placement: Legen Sie die mitgelieferte Slipmat auf den Plattenteller.
- Staubschutzhülle: Attach the dust cover to the hinges at the rear of the unit.
- Cartridge and Headshell: If not pre-installed, attach your preferred cartridge to the headshell. Ensure the stylus is protected during installation.
- Tonearm Balance: Mount the headshell onto the tonearm. Adjust the counterweight until the tonearm is balanced and floats horizontally.
- Tracking-Kraft: Set the tracking force according to your cartridge manufacturer's specifications using the tonearm's tracking force dial.
- Antiskating: Adjust the anti-skate dial to match the tracking force setting.
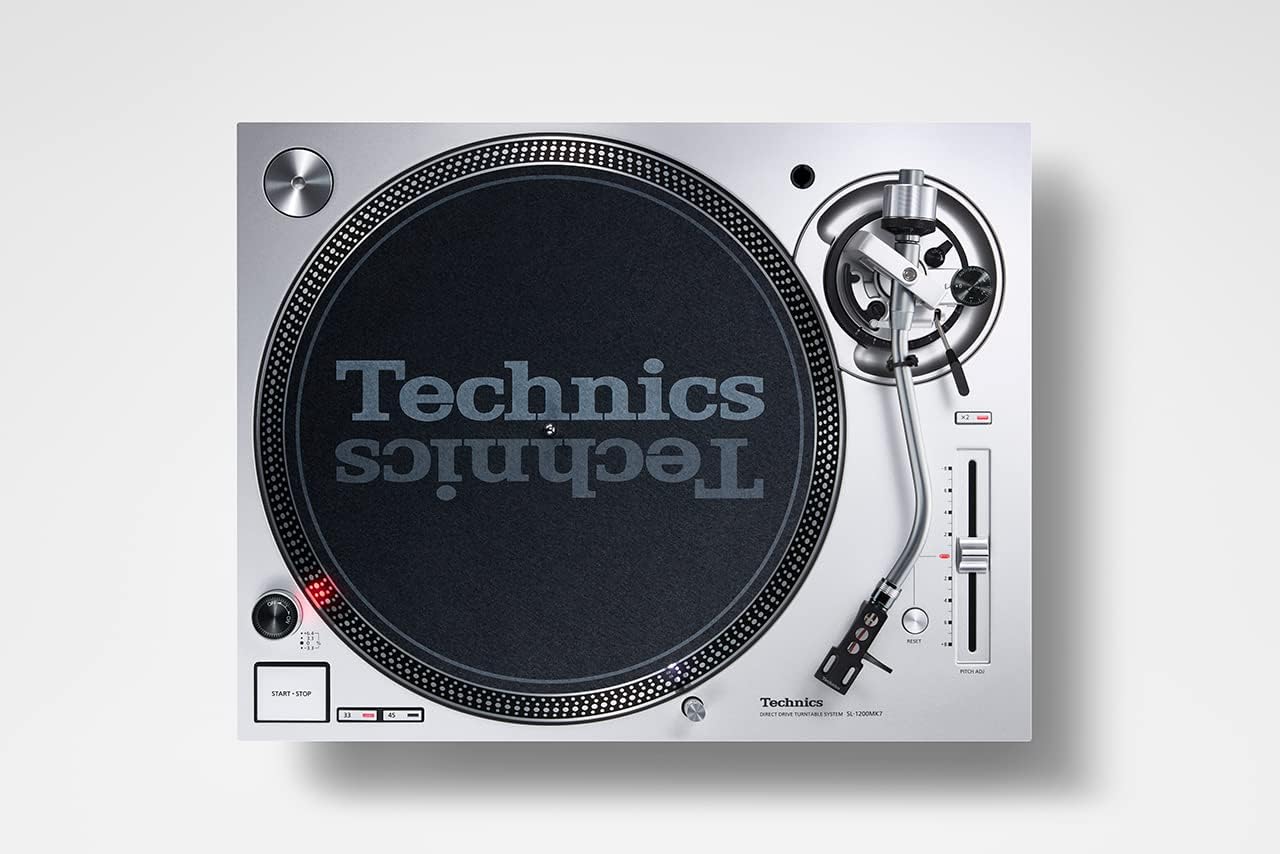
Abbildung 3.3.1: Draufsicht view of the Technics SL-1200MK7, highlighting the platter, tonearm, and control layout. This perspective is useful for understanding component placement during assembly.
3.4 Anschlüsse
- Cinch-Ausgang: Connect the supplied RCA signal cable from the turntable's RCA output jacks to the PHONO input of your ampVerstärker oder Phono-Vorverstärkeramplifier. Ensure correct left (white) and right (red) channel connections.
- Erdungskabel: Verbinden Sie das Erdungskabel des Plattenspielers mit der Erdungsklemme Ihres Geräts. ampVerstärker oder Phono-VorverstärkerampVerstärker zur Minimierung von Brummgeräuschen.
- Leistung: Connect the power cable to the turntable and then to a suitable wall outlet.
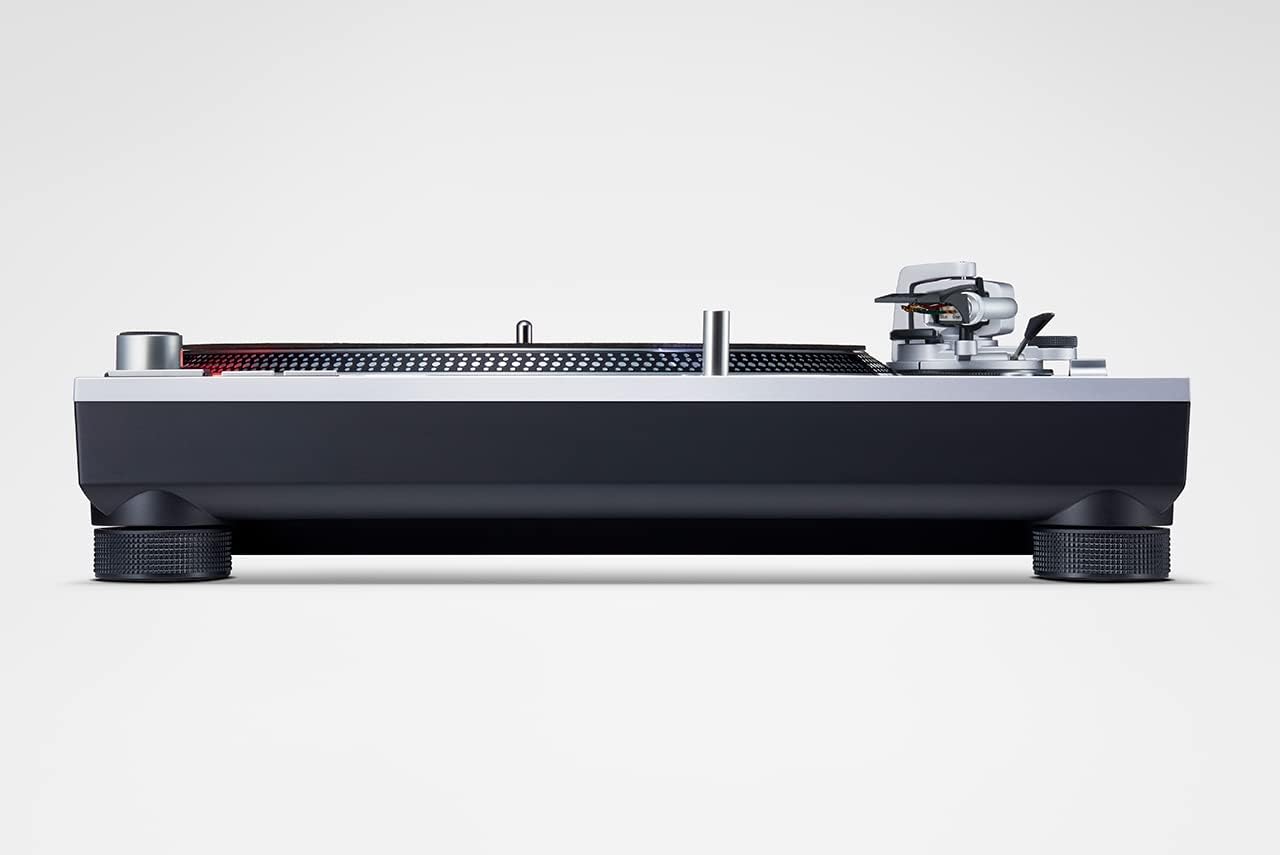
Abbildung 3.4.1: Seite view of the Technics SL-1200MK7, illustrating its sturdy base and adjustable feet. This view helps in understanding the unit's profile and stability features.
4. Bedienungsanleitung
4.1 Ein-/Ausschalten
To power on the turntable, rotate the power switch/strobe illuminator knob clockwise. The strobe light will illuminate. To power off, rotate the knob counter-clockwise until it clicks off.
4.2 Abspielen einer Schallplatte
- Legen Sie eine Schallplatte auf den Plattenteller.
- Select the appropriate speed (33 ⅓, 45, or 78 RPM) using the speed selector buttons. For 78 RPM, refer to the advanced settings in the full manual.
- Drücken Sie die START/STOP-Taste, um die Drehung des Plattentellers zu starten.
- Heben Sie den Tonarm vorsichtig mit dem Cueing-Hebel an.
- Position the tonearm over the desired groove of the record.
- Senken Sie den Cueing-Hebel langsam ab, damit die Nadel auf die Schallplatte absinken kann.
- To stop playback, lift the tonearm using the cueing lever and return it to the tonearm rest. Press the START/STOP button to stop the platter.
4.3 Tonhöhensteuerung
The SL-1200MK7 features a pitch control slider to adjust the playback speed. Move the slider up or down to increase or decrease the speed. The RESET button instantly returns the pitch to 0%.
5. Wartung
5.1 Reinigung
- Staubschutzhülle: Mit einem weichen, trockenen Tuch abwischen. Bei hartnäckigen Flecken ein leicht feuchtes Tuch verwenden.amp Tuch und mildem Reinigungsmittel, dann gründlich trocknen.
- Platter and Chassis: Use a soft, lint-free cloth. Avoid abrasive cleaners.
- Stift: Use a dedicated stylus brush or cleaner. Always brush from back to front.
5.2 Nadelwechsel
The stylus is a delicate component and wears over time. Replace it according to your cartridge manufacturer's recommendations (typically every 500-1000 hours of playback). Refer to your cartridge manual for specific replacement instructions.
6. Fehlerbehebung
| Problem | Mögliche Ursache | Lösung |
|---|---|---|
| Kein Ton oder geringe Lautstärke | Incorrect connections; Amplifier input not set to PHONO; Cartridge/stylus issue. | Check RCA and ground connections. Ensure amplifier is set to PHONO input. Verify cartridge is properly installed and stylus is not damaged. |
| Verzerrter Ton | Incorrect tracking force/anti-skate; Worn or dirty stylus; Damaged record. | Adjust tracking force and anti-skate. Clean or replace stylus. Inspect record for damage. |
| Teller dreht sich nicht | Power not connected; START/STOP button not pressed. | Check power cable connection. Press the START/STOP button. |
| Seilspringen oder Springen | Dust on stylus/record; Incorrect tracking force/anti-skate; Turntable not level; Vibrations. | Clean stylus and record. Re-adjust tracking force and anti-skate. Ensure turntable is level and on a stable surface. |
7. Spezifikationen
| Besonderheit | Detail |
|---|---|
| Modellname | Sl 1200 |
| Artikelmodellnummer | SL-1200MK7EG |
| Marke | Technik |
| Farbe | Grau |
| Material | Aluminium |
| Konnektivitätstechnologie | Hilfs |
| Maximale Drehzahl | 78 RPM (supports 33 ⅓, 45, and 78 RPM) |
| Artikelgewicht | 22 Pfund (ca. 10 kg) |
| Verpackungsabmessungen | 21.34 x 17.17 x 9.53 Zoll |
| Im Lieferumfang enthaltene Komponenten | Lid, power cable, RCA signal cable |
8. Garantie und Support
For warranty information and technical support, please refer to the warranty card included with your product or visit the official Technics webBewahren Sie Ihren Kaufbeleg für eventuelle Garantieansprüche auf.
For further assistance, you may contact Technics customer service through their official channels. Please have your model number (SL-1200MK7EG) and serial number ready when contacting support.