
Einführung
This user manual provides detailed instructions for the installation, operation, maintenance, and troubleshooting of your Xprinter XP-K200L 80mm Thermal Receipt Printer. Please read this manual thoroughly before using the printer to ensure proper function and to extend the product's lifespan. Keep this manual for future reference.
Sicherheitshinweise
- Always use the power adapter supplied with the printer.
- Der Drucker darf weder Wasser noch Feuchtigkeit ausgesetzt werden.
- Vermeiden Sie es, den Drucker direkter Sonneneinstrahlung oder der Nähe von Wärmequellen auszusetzen.
- Sorgen Sie für ausreichende Belüftung rund um den Drucker.
- Versuchen Sie nicht, den Drucker selbst zu zerlegen oder zu reparieren. Wenden Sie sich an qualifiziertes Servicepersonal.
- Außerhalb der Reichweite von Kindern aufbewahren.
Packungsinhalt
Please check the package contents upon unpacking. If any items are missing or damaged, contact your vendor.
- Xprinter XP-K200L Thermal Receipt Printer
- Netzteil
- Netzkabel
- USB-Kabel
- Thermopapierrolle (Starterrolle)
- Kabel für die Kassenlade
- Benutzerhandbuch (dieses Dokument)
Produkt überview
Familiarize yourself with the main components of your Xprinter XP-K200L thermal receipt printer.

Abbildung 1: Seite view of the Xprinter XP-K200L thermal receipt printer. On the right, the power switch is visible, and on the left, a button to open the paper cover is present.
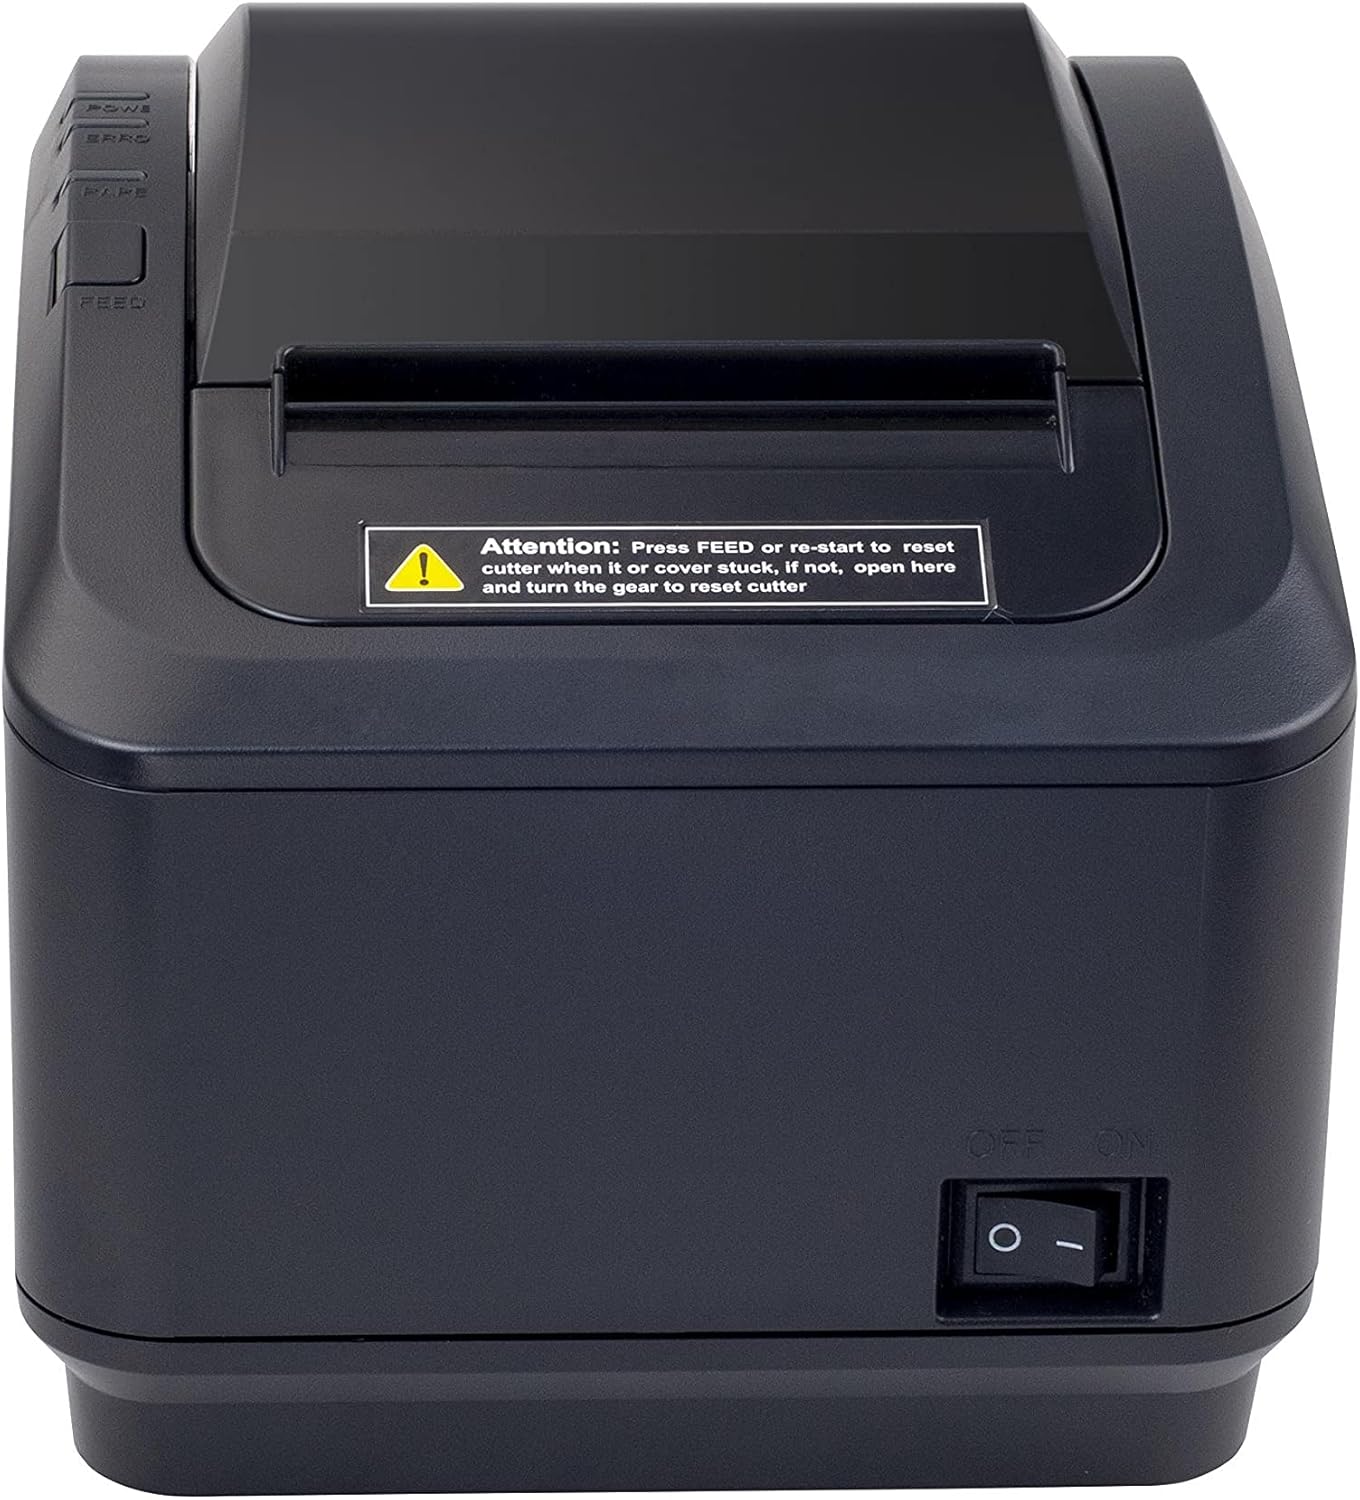
Abbildung 2: Eine Front view of the Xprinter XP-K200L thermal receipt printer. The paper output slot is at the top, and below it are control buttons for functions like feed and error reset. A warning label is also visible.

Figure 3: This image displays the Xprinter XP-K200L thermal receipt printer with its top cover open, showing the internal compartment where the thermal paper roll is loaded. The print head mechanism is also visible.
Aufstellen
1. Anschließen der Stromversorgung
- Ensure the printer's power switch is in the AUS Position.
- Schließen Sie das Netzteil an den Stromanschluss des Druckers an.
- Stecken Sie das Netzkabel in eine geeignete Steckdose.
2. Einlegen von Thermopapier
- Press the cover open button (refer to Figure 1) to open the top cover of the printer.
- Insert a new 80mm thermal paper roll into the compartment, ensuring the paper feeds from the bottom and the leading edge extends slightly out of the printer.
- Close the top cover firmly until it clicks into place. Ensure there is no slack in the paper roll.
3. Connecting to a Computer/Network
The XP-K200L printer supports both USB and LAN (Ethernet) connectivity.
USB-Verbindung:
- Verbinden Sie ein Ende des USB-Kabels mit dem USB-Anschluss des Druckers.
- Verbinden Sie das andere Ende des USB-Kabels mit einem freien USB-Anschluss Ihres Computers.
- Install the printer drivers. Drivers are typically provided on a CD or can be downloaded from the manufacturer's webFolgen Sie den Anweisungen auf dem Bildschirm zur Installation.
LAN-Anschluss (Ethernet):
- Connect one end of an Ethernet cable to the printer's LAN port.
- Verbinden Sie das andere Ende des Ethernet-Kabels mit Ihrem Netzwerk-Router oder Switch.
- Configure the printer's network settings (e.g., IP address) if necessary. This usually involves printing a self-test page to get the current IP address and then accessing the printer's web interface or using a utility tool provided by the manufacturer.
- Install the printer drivers on your computer, selecting the network connection option during setup.
4. Connecting a Cash Drawer
- Connect the cash drawer cable to the dedicated cash drawer port on the printer.
- Ensure your POS software is configured to send commands to open the cash drawer via the printer.
Bedienungsanleitung
Ein-/Ausschalten
- To power on the printer, flip the power switch (refer to Figure 1) to the ON Position.
- To power off the printer, flip the power switch to the AUS Position.
Grundlegendes Drucken
Once the printer is connected and drivers are installed, you can print receipts from your POS software or any application that supports printing.
- Stellen Sie sicher, dass der Drucker eingeschaltet ist und Papier eingelegt ist.
- From your application, select the print option.
- Choose the "Xprinter XP-K200L" from the list of available printers.
- Confirm print settings and click "Print".
Self-Test Page
To print a self-test page, which provides information about the printer's settings and status:
- Ensure the printer is powered off and the paper roll is loaded.
- Halten Sie die FÜTTERN Taste.
- Halten Sie die FÜTTERN button, turn the power switch to ON.
- Lassen Sie den FÜTTERN button after the printer starts printing.
Wartung
Reinigen des Druckers
- Druckkopf: Mit einem Wattestäbchen leicht dampened with isopropyl alcohol to gently wipe the thermal print head. Allow it to dry completely before use. Clean regularly to ensure print quality.
- Cutter: If the cutter becomes jammed or dirty, carefully clean it with a soft brush or cloth.
- Exterieur: Wischen Sie die Außenseite des Druckers mit einem weichen, trockenen Tuch ab. Verwenden Sie keine Scheuermittel oder Lösungsmittel.
Replacing Thermal Paper
When the paper roll is depleted or near its end, replace it following the steps in the "Loading Thermal Paper" section under Setup.
Fehlerbehebung
| Problem | Mögliche Ursache | Lösung |
|---|---|---|
| Der Drucker lässt sich nicht einschalten. | Power cord or adapter not connected properly; power outlet issue. | Überprüfen Sie alle Stromanschlüsse. Versuchen Sie eine andere Steckdose. |
| Kein Ausdruck. | No paper; paper loaded incorrectly; printer offline; driver issue; incorrect connection. | Load paper correctly. Check printer status. Reinstall drivers. Verify USB/LAN connection. |
| Schlechte Druckqualität. | Dirty print head; low quality thermal paper. | Clean the print head (see Maintenance). Use recommended thermal paper. |
| Paper jam or cutter error. | Paper loaded incorrectly; debris in cutter mechanism. | As per printer label: Drücken FÜTTERN or re-start to reset cutter. If the issue persists, open the top cover and carefully turn the gear to reset the cutter mechanism. Ensure paper is loaded correctly and remove any obstructions. |
| Die Kassenschublade lässt sich nicht öffnen. | Cable not connected; POS software not configured. | Check cash drawer cable connection. Verify POS software settings for cash drawer trigger. |
Technische Daten
| Besonderheit | Detail |
|---|---|
| Marke | Xprinter |
| Modellname | XP-K200L |
| Druckertechnologie | Thermal |
| Konnektivitätstechnologie | USB, LAN (Ethernet) |
| Besondere Merkmale | Netzwerkbereit |
| Farbe | Schwarz |
| Druckerausgabe | Einfarbig |
| Artikelgewicht | 1.5 kg |
| Produktabmessungen (TxBxH) | 19.5 cm x 14 cm x 13.8 cm |
| Compatible OS/Controller Type | Android (and typically Windows/Linux via drivers) |
| Printmedien | Plain Thermal Paper |
| Druckfarbe | Schwarz |
| Auflösung | 576 x 512 dots per inch (or dots per line) |
| Max Print Resolution B/W | 576 dpi |
| Zusätzliche Druckerfunktionen | Nur Drucken |
| Kontrollmethode | Fernbedienung |
| Maximale Mediengröße | 80 mm |
| Papierformat | 79.5 mm |
| Leistung | 60 Watt |
| Im Lieferumfang enthaltene Komponenten | Power adapter, Cash drawer cable |
| Serie | XP-K |
| Spezifische Verwendungen | Restaurants, bars, cinemas, garages, transportation, hospitals, clinics |
| Anzahl USB-Anschlüsse | 1 |
Garantie und Support
For warranty information and technical support, please refer to the documentation provided with your purchase or contact your vendor directly. Keep your proof of purchase for warranty claims.
For driver downloads and further support resources, visit the official Xprinter webWebsite.