1. Einleitung
Thank you for choosing the LiebeWH MH-020G Dual-Frequency Ultrasonic Cleaner. This device is designed for efficient and thorough cleaning of various items using ultrasonic waves, combined with heating and degassing functions. It is suitable for a wide range of applications, from delicate jewelry to industrial parts. Please read this manual carefully before operating the unit to ensure safe and optimal performance.
2. Sicherheitshinweise
WARNUNG!
- Always unplug the power source before filling or emptying the tank.
- Do not operate the heating function without water in the tank.
- Never leave the unit unattended while heating or in operation.
- Ensure the unit is powered off and the water has cooled to a normal temperature before draining the tank.
- Bewahren Sie das Gerät außerhalb der Reichweite von Kindern auf.
- Das Hauptgehäuse des Reinigers darf nicht in Wasser oder andere Flüssigkeiten eingetaucht werden.
- Verwenden Sie ausschließlich geeignete Reinigungsmittel. Vermeiden Sie brennbare oder ätzende Flüssigkeiten.
- Wenn das Netzkabel beschädigt ist, muss es vom Hersteller, seinem Kundendienst oder einer ähnlich qualifizierten Person ersetzt werden, um Gefahren zu vermeiden.
3. Produktüberschreitungview
The LiebeWH MH-020G Ultrasonic Cleaner features a durable SUS304 stainless steel tank, dual-frequency ultrasonic transducers, and an intuitive control panel for setting time, temperature, and special functions like degassing and turbo mode.

Figure 3.1: Main components of the LiebeWH MH-020G Ultrasonic Cleaner, including the unit, power cord, and cleaning basket.

Figure 3.2: The ultrasonic cleaner with its lid open, revealing the SUS304 stainless steel cleaning tank.

Figure 3.3: The included stainless steel cleaning basket, designed to hold items during the ultrasonic cleaning process.

Figure 3.4: The control panel with digital displays for temperature and time, and buttons for heating, degassing, sweep, turbo, and power.
Anwendungen
This ultrasonic cleaner is suitable for various applications, including:
- Hardwareteile
- Elektronische Komponenten
- Auto parts
- Dental instruments
- Laboratory equipment
- Jewelry, watches, glasses
- Hospital cleaning rooms

Abbildung 3.5: Bspamples of items that can be effectively cleaned using the ultrasonic cleaner.
4. Einrichtung
- Auspacken: Nehmen Sie das Ultraschallreinigungsgerät und sämtliches Zubehör vorsichtig aus der Verpackung. Prüfen Sie es auf Beschädigungen.
- Platzierung: Stellen Sie das Gerät auf eine stabile, ebene und trockene Oberfläche. Sorgen Sie für ausreichende Belüftung um das Gerät herum.
- Stromanschluss: Ensure the power switch on the back of the unit is in the OFF position. Connect the power cord to the unit and then to a grounded electrical outlet (EU Stekker).
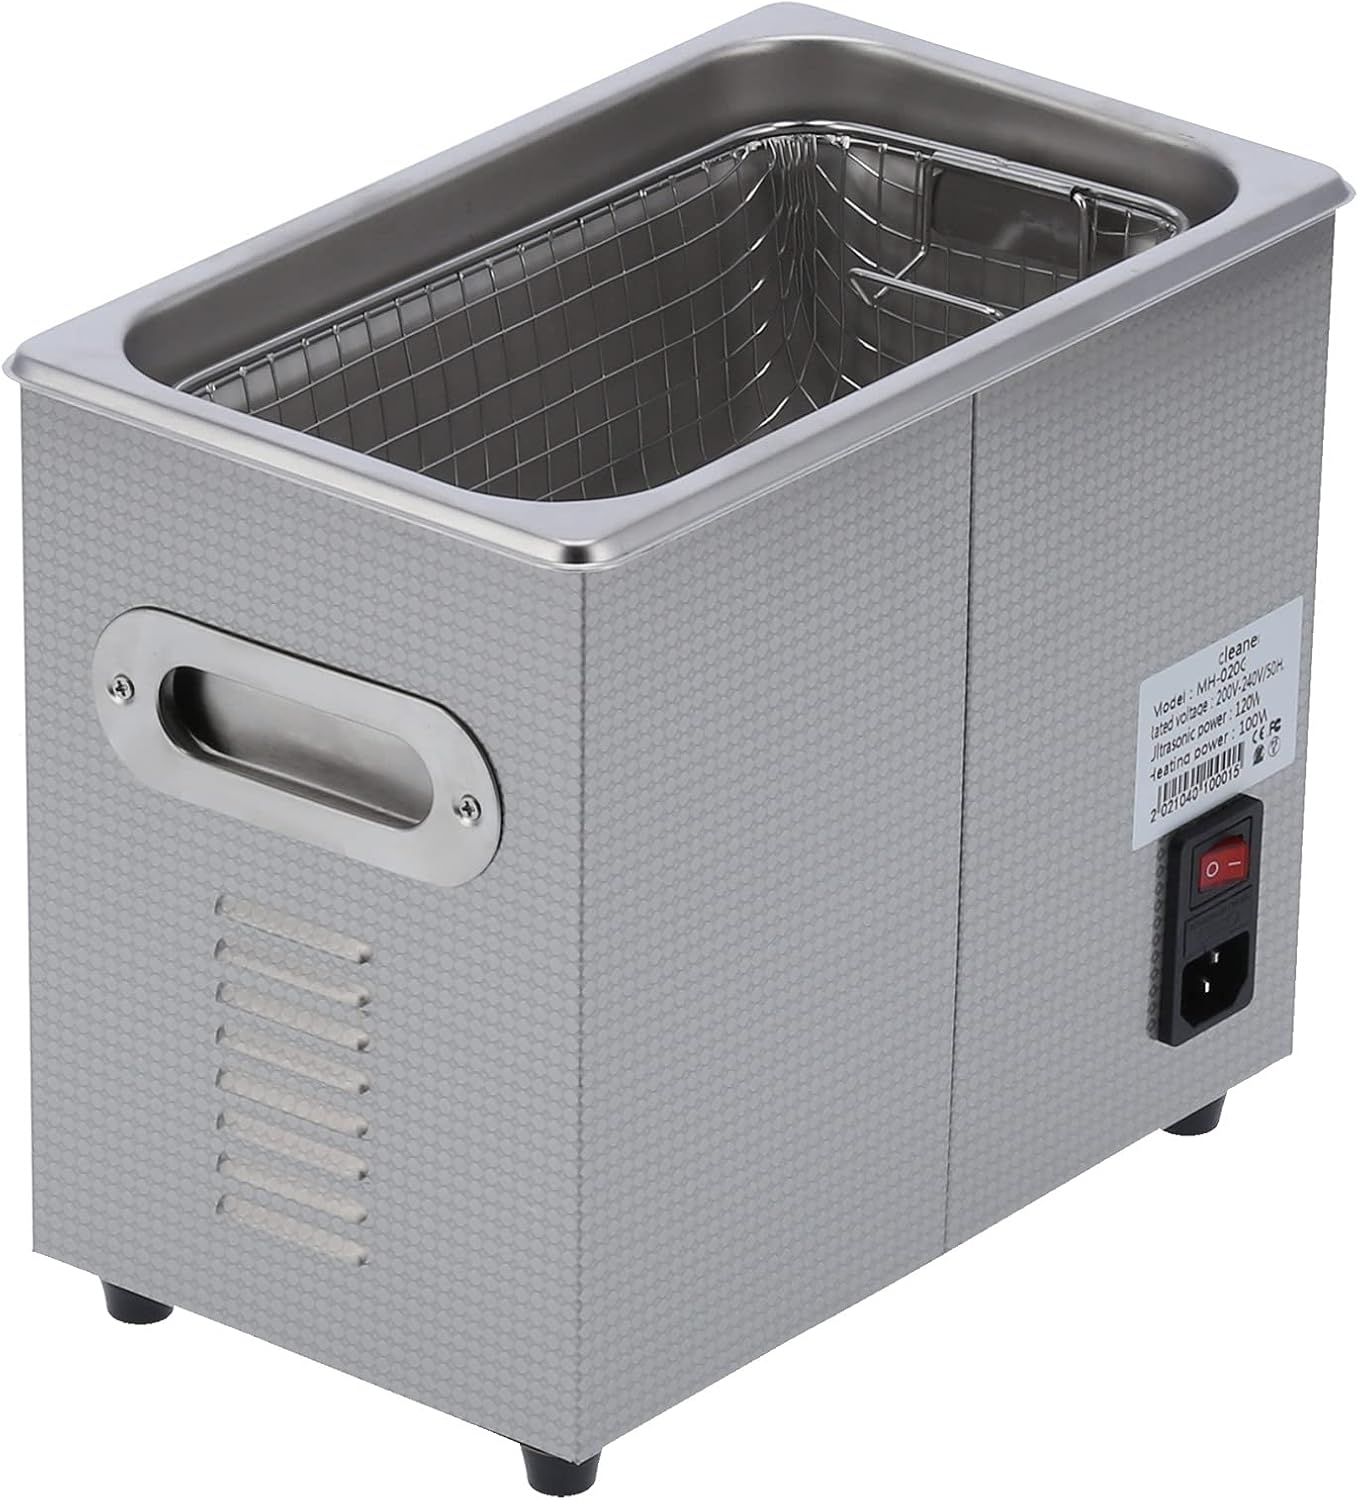
Abbildung 4.1: Rückseite view of the unit, highlighting the power input and main power switch.
5. Bedienungsanleitung
Befolgen Sie diese Schritte für eine effektive Reinigung:
- Tank füllen: Open the lid and fill the stainless steel tank with water. For optimal performance, fill the tank approximately 2/3 full.
- Reinigungslösung hinzufügen (optional): If required for your items, add an appropriate amount of cleaning detergent to the water. Stir the cleaning agent evenly to mix.
- Gegenstände platzieren: Carefully place the items to be cleaned into the cleaning basket, then lower the basket into the tank. Ensure items are fully submerged but not touching the bottom of the tank directly. For heavily soiled items, pre-soaking may improve results.
- Zeit und Temperatur einstellen:
- Schalten Sie den Hauptnetzschalter ein.
- Use the control panel to set the desired cleaning time (0-30 minutes) and heating temperature (0-80 ℃). If your model does not have a heating function, only set the time.
- Press the 'Heating' button to activate the heating function.
- Press the 'Degas' button to remove dissolved gases from the solution, which can improve cleaning efficiency.
- Press the 'Sweep' or 'Turbo' buttons for specialized cleaning modes if desired.
- Fang an zu putzen: Press the 'ON/OFF' button to start the ultrasonic cleaning process. The unit will operate for the set duration.
- Nach dem Saubermachen: Once the cleaning cycle is complete, turn off the unit. Wait for the water to cool down to a safe temperature if heating was used. Carefully remove the cleaning basket with the cleaned items.

Figure 5.1: The ultrasonic cleaner effectively cleaning delicate items such as glasses and a ring.
6. Wartung
Proper maintenance ensures the longevity and efficiency of your ultrasonic cleaner:
- Drain Wastewater: After each use, especially if using cleaning solutions, drain the wastewater from the tank.
- Reinigen Sie den Tank: Wipe the inside of the tank with a dry, soft cloth. Do not use abrasive cleaners or steel wool.
- Außenreinigung: Reinigen Sie das Äußere des Geräts mit adamp Tuch. Sprühen Sie kein Wasser direkt auf das Gerät.
- Lagerung: Store the unit in a cool, dry place when not in use. Ensure the tank is completely dry before storage.
- Regelmäßige Inspektion: Überprüfen Sie das Netzkabel regelmäßig auf Anzeichen von Beschädigungen.
7. Fehlerbehebung
If you encounter issues with your ultrasonic cleaner, refer to the following common problems and solutions:
- Das Gerät lässt sich nicht einschalten:
- Prüfen Sie, ob das Netzkabel sowohl am Gerät als auch an der Steckdose fest eingesteckt ist.
- Ensure the main power switch on the back of the unit is in the 'ON' position.
- Verify the electrical outlet is functioning correctly by plugging in another appliance.
- Ultrasonic function not working:
- Ensure the tank is filled with water to the recommended level.
- Check if the cleaning time has been set and the 'ON/OFF' button has been pressed.
- Listen for a faint buzzing sound; ultrasonic waves are often not visible.
- Heizfunktion funktioniert nicht:
- Ensure the tank is filled with water. The heating element requires water to operate safely.
- Verify the temperature setting is above 0 ℃ and the 'Heating' button is activated.
- Schlechte Reinigungsergebnisse:
- Ensure items are properly submerged and not overcrowded.
- Consider using a suitable cleaning solution for the type of dirt and material.
- Increase cleaning time or temperature (if applicable).
- Try using the 'Degas' function before cleaning to improve cavitation.
Sollten die Probleme weiterhin bestehen, wenden Sie sich bitte an den Kundendienst.
8. Spezifikationen
Technical specifications for the LiebeWH MH-020G Ultrasonic Cleaner:
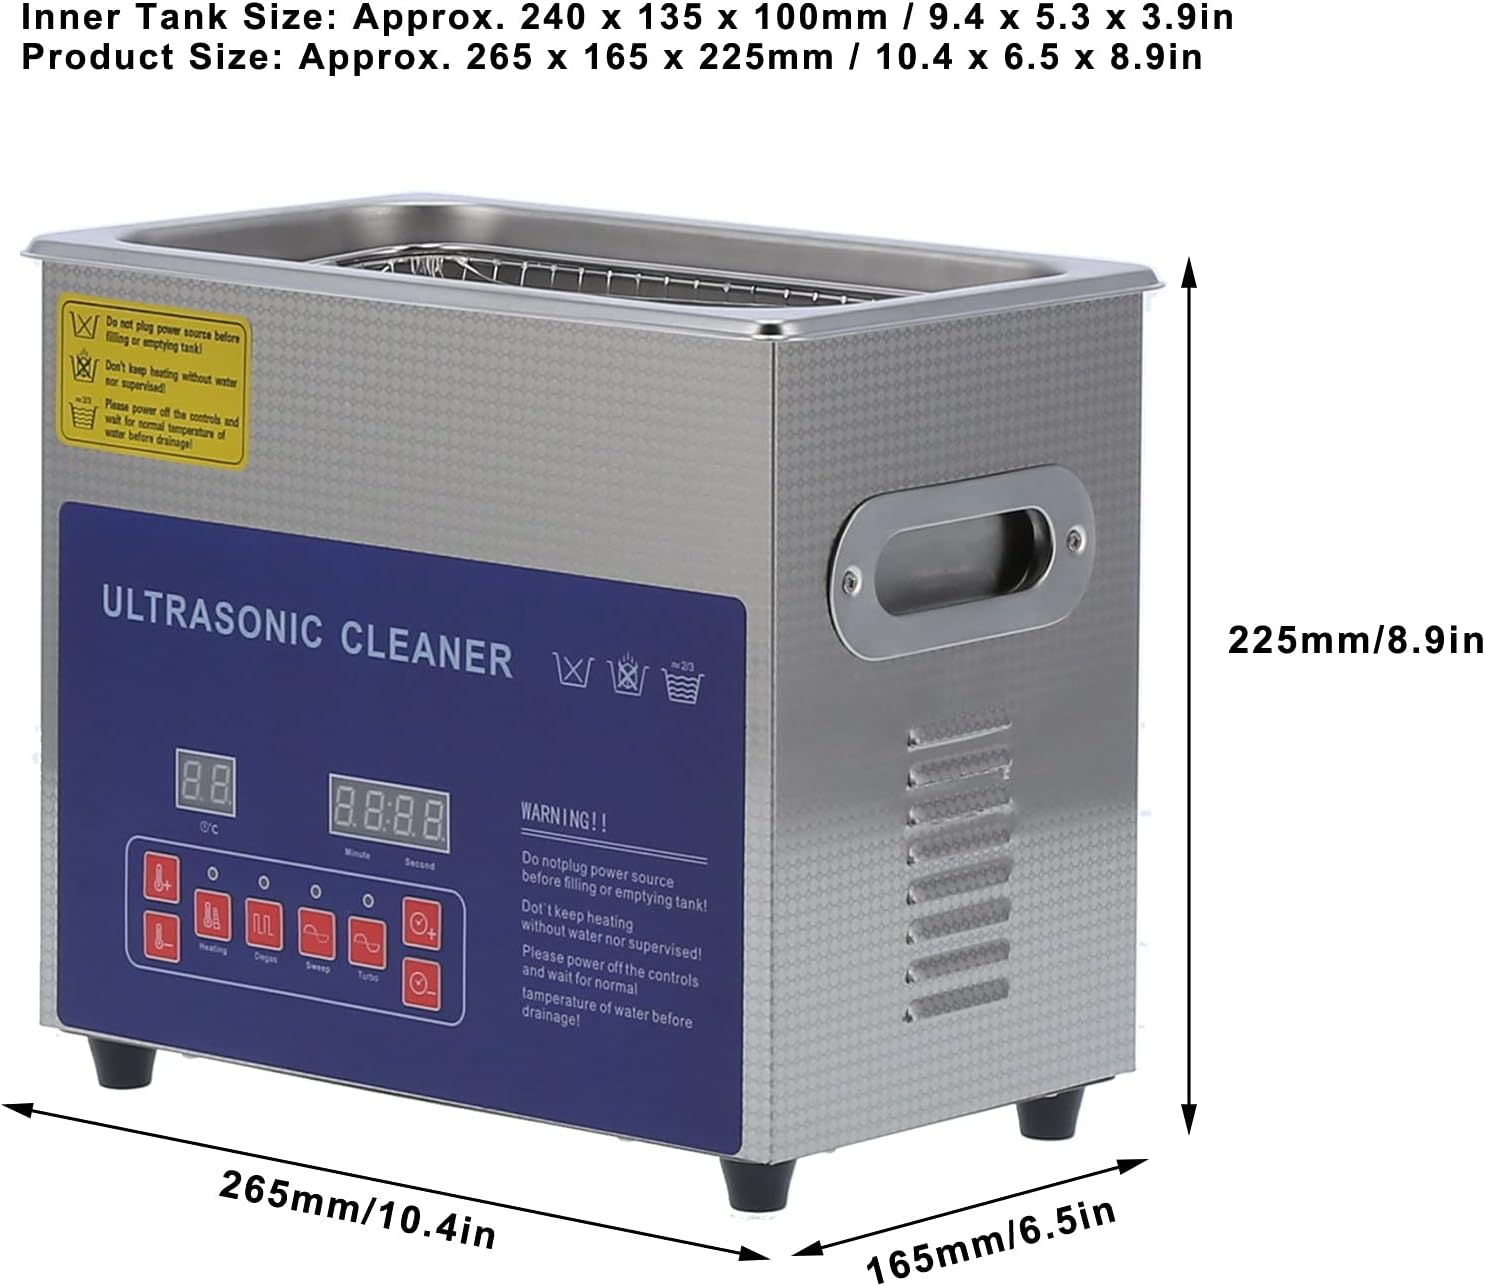
Figure 8.1: Product dimensions for the LiebeWH MH-020G Ultrasonic Cleaner.
| Besonderheit | Spezifikation |
|---|---|
| Modell | MH-020G |
| Material | SUS304 Edelstahl |
| Kapazität | 3 Liters (Actual capacity: 3L) |
| Ultraschallleistung | 120 W |
| Heizleistung | 100 W |
| Frequenz | Dual Frequency: 40 kHz / 33 kHz |
| Vibrating Heads | 2 |
| Heiztemperaturbereich | 0-80 ℃ |
| Cleaning Time Range | 0-30 Minuten |
| Inner Tank Dimensions (L x W x H) | Ca. 240 x 135 x 100 mm (9.4 x 5.3 x 3.9 Zoll) |
| Produktgröße (L x B x H) | Ca. 265 x 165 x 225 mm (10.4 x 6.5 x 8.9 Zoll) |
| Hersteller | LiebeWH |
| Verpackungsabmessungen | 34 x 30 x 25 cm |
| Paketgewicht | 3.68 kg |
9. Garantie und Support
LiebeWH products are covered by a quality guarantee. For specific warranty details, please refer to the documentation provided with your purchase or contact your retailer. For technical support, troubleshooting assistance, or spare parts, please contact LiebeWH customer service through their official channels or your point of purchase.